How to make a flying turtle
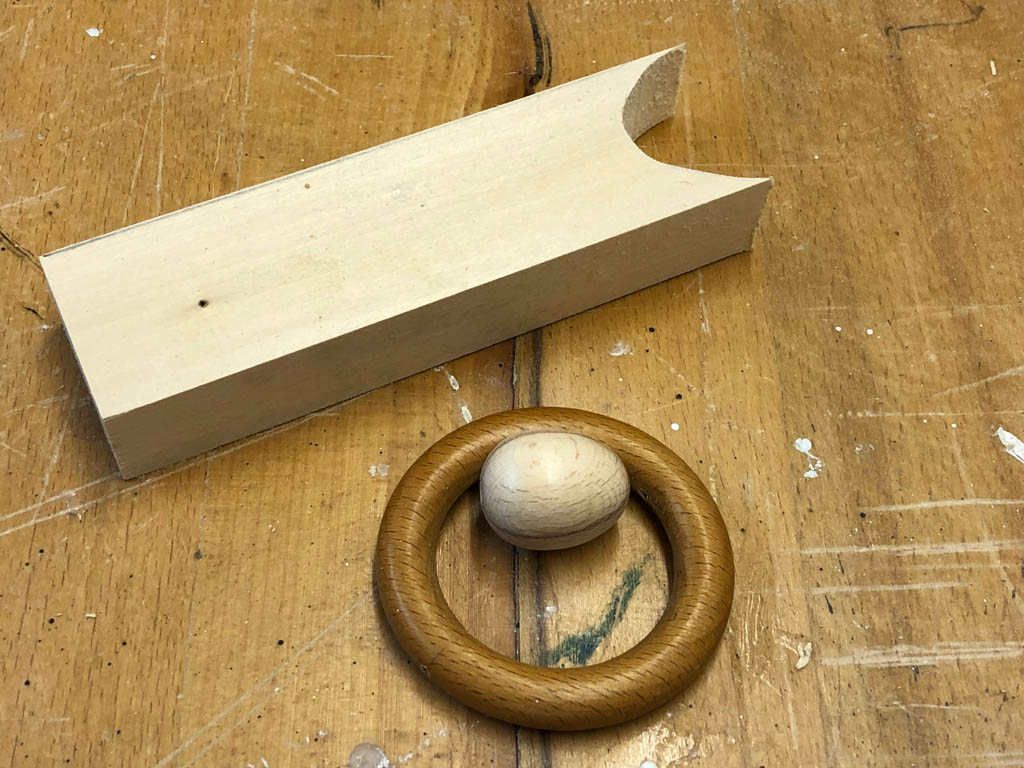
You need a piece of lime wood for the body and the fins, a beechwood egg for the head, and wooden ring as a controller to attach the strings. I had a few old wooden curtain rings lying about which was handy, otherwise craft shops often stock them. 2 small wooden hemispheres serve for the eyes and a piece of welding rod hinges the mouth.
First draw a turtle template on a piece of card
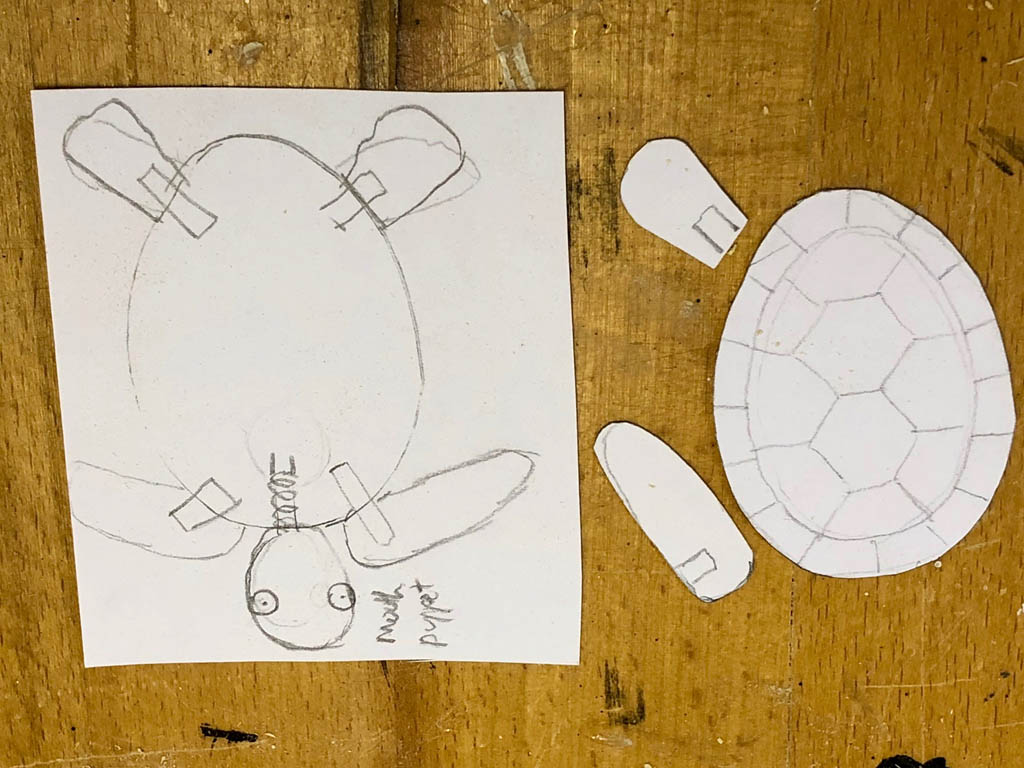
Use the templates to cut out the basic shapes and then curve them.
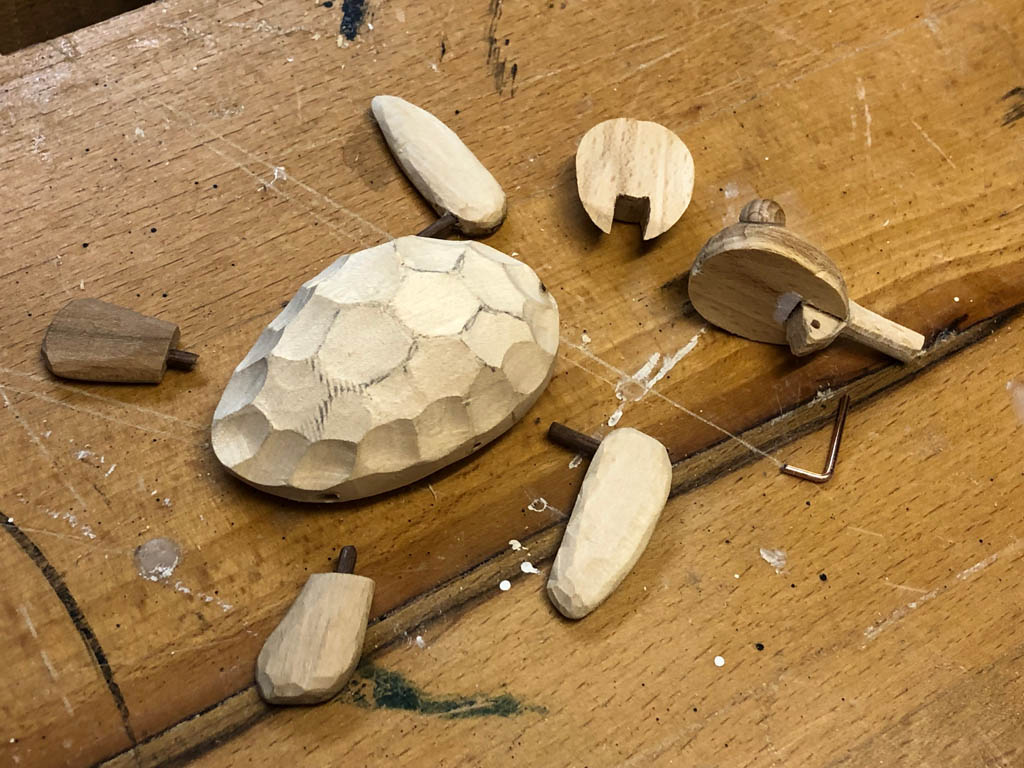
The head is made from the wooden egg, which you first have to cut into two pieces. You then need a notch in each piece to attach to the neck.
I made the neck from plywood. Glue it to the top of the head and sand the protruding stem to make it round.

The lower half of the head is hinged onto the neck piece.
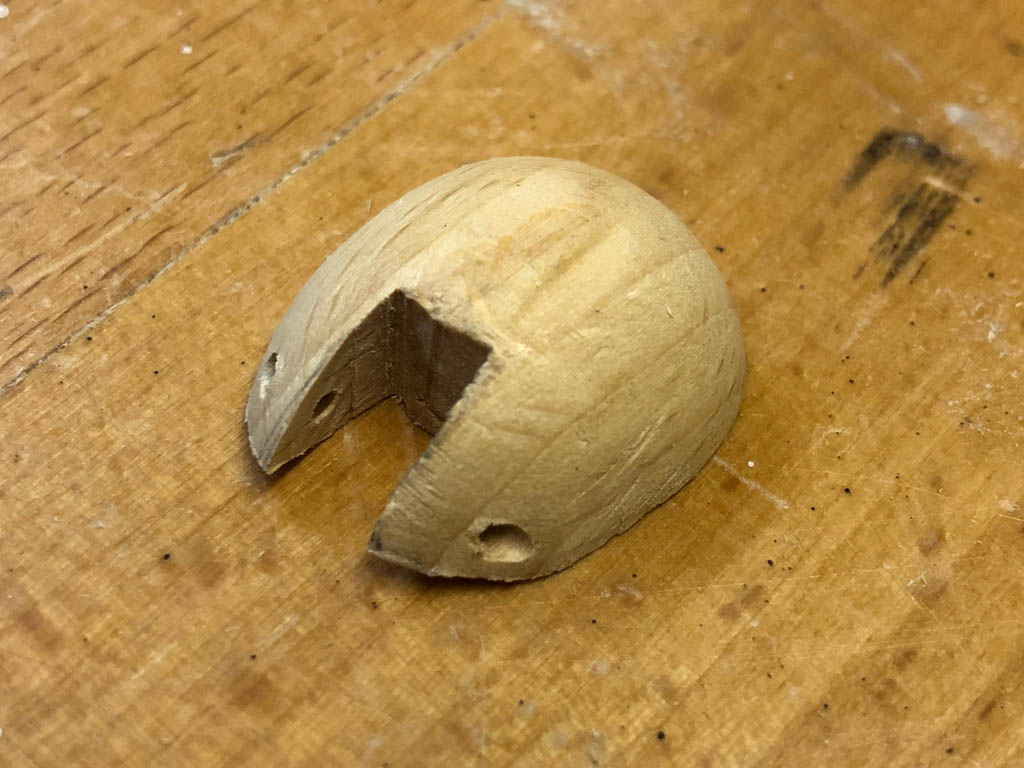
The plywood neckpiece makes the centre piece of the hinge and a piece of 1.6 mm welding rod is pushed through to make a nice loose hinge.
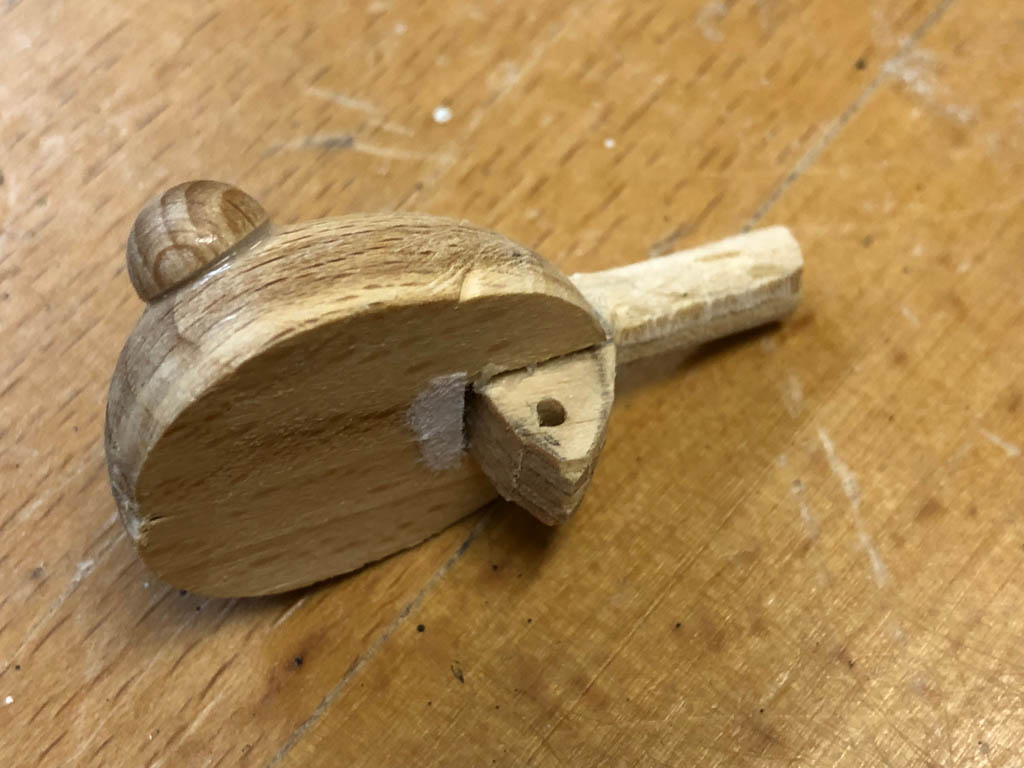
Drill holes to take the strings. The hole in the top of the head is larger so that the string moves easily without jamming. The hole through the jaw is smaller so that a simple knot will keep the string in place and not pull through the hole.
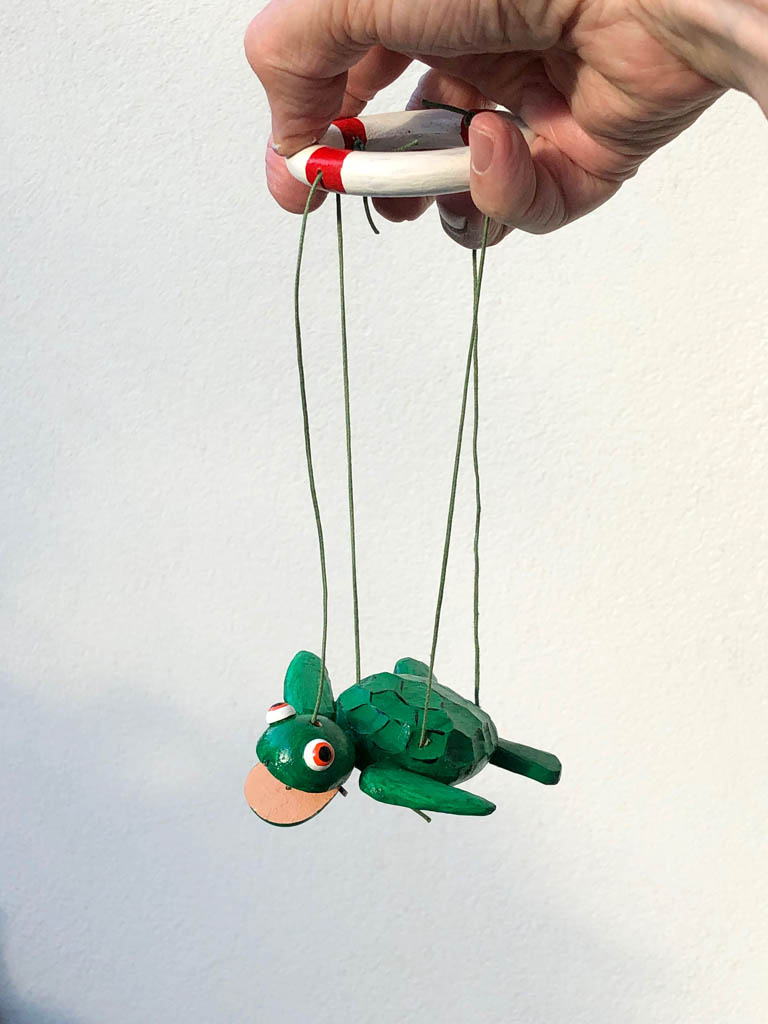
To add to the feeling of a stiff salty breeze I painted the ring like a ship’s life-saving ring. This makes the controller a visible part of the show, not something to be hidden high up in the darkness. Only four strings and the very simple controller reduce the risk of the terrifying tangle that sometimes ties up more complicated puppets.
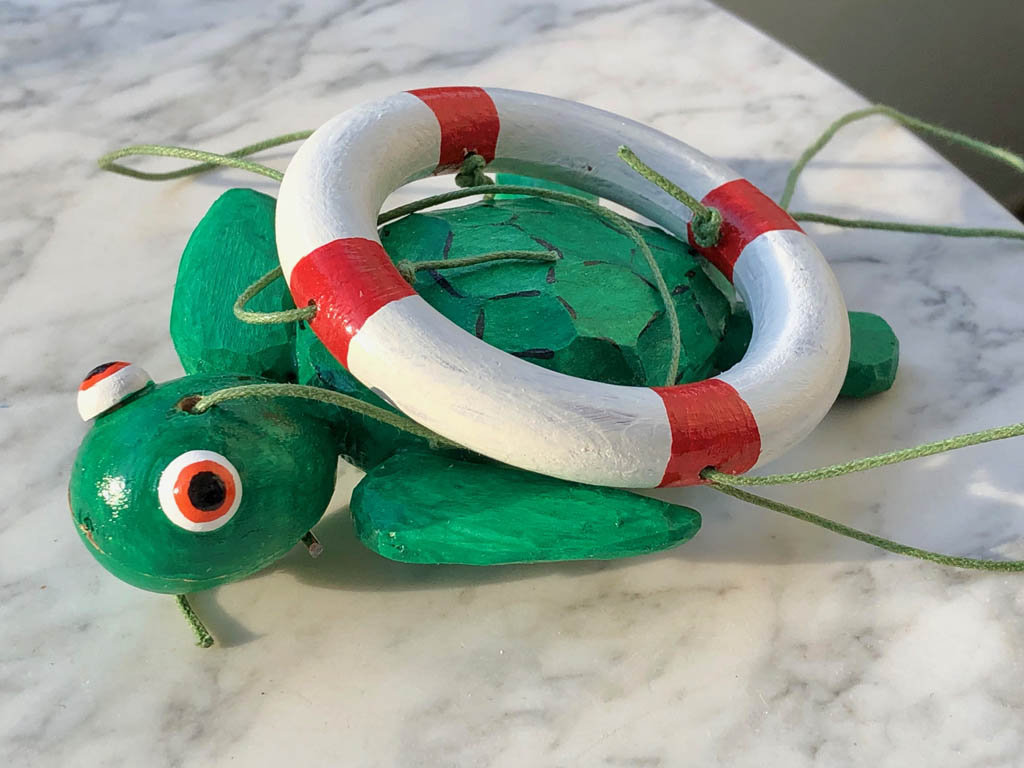
I left the jaw string slack so that the turtle’s mouth is usually open. If you then press the front string the mouth will then close, so that the turtle can talk.