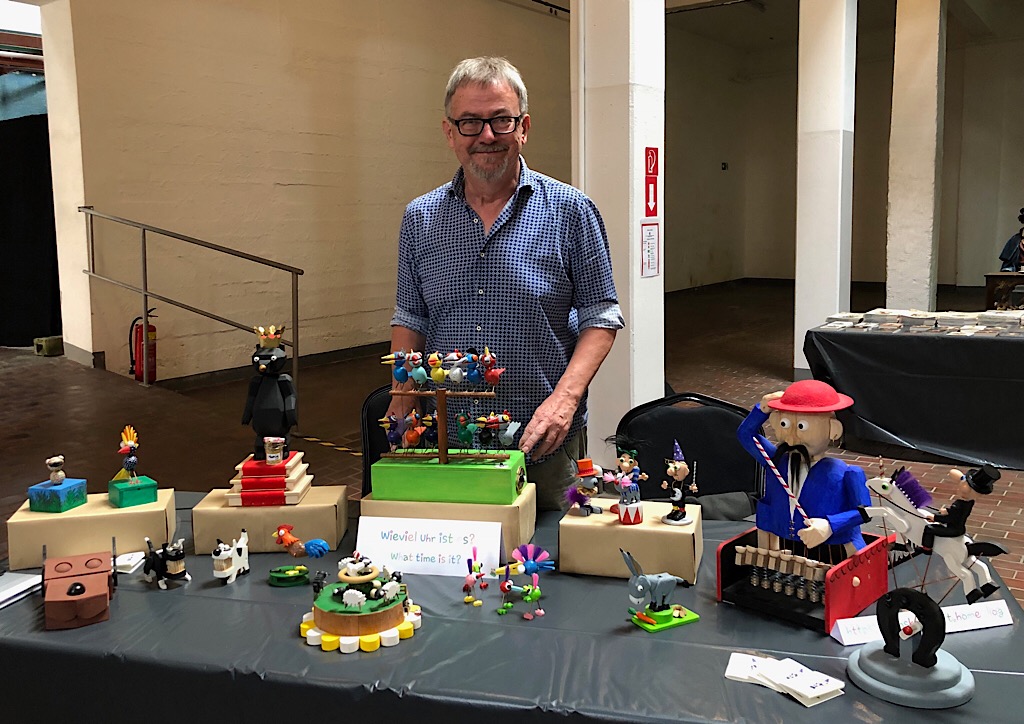
 Wikipedia tells us that the unicorn is a legendary creature that has been described since antiquity as a beast with a single large, pointed, spiralling horn projecting from its forehead. So of course I had to make one.
There are already plenty of horsey automata around. Rob Ives designed a brilliant paper Pegasus, a flying horse, using a clothes peg to hold the mechanism (https://www.robives.com/product/pegasus/). Keith Newstead has designed some fantastic winged horses (https://www.keithnewsteadautomata.com/slide/pegasus/) and there are a number of laser-cut wood/MDF kits available for both Pegasus and flying unicorns. It’s great to be able to see how other folk approach similar problems to see how they coped with the various challenges of making something quite mythical.
Some examples in YouTube
Some time ago I bought and assembled a laser-cut MDF Pegasus kit. The movement is good, but my 3 year old friend managed to break off the thin MDF handle at first go, and it is so light that it skates around the table while you turn the crank, meaning you need a second hand to hold the base still. So my first requirement is that it must be sturdy and heavy enough to be worked with just one hand, especially if it’s only 3 years old. A rubber mat under the base should prevent it from slipping about.
The force applied to the handle as you turn it varies. The handle must be positioned so that you are pushing down when the most force is applied and pushing up when the least force is required. Again this will make one-handed operation easier.
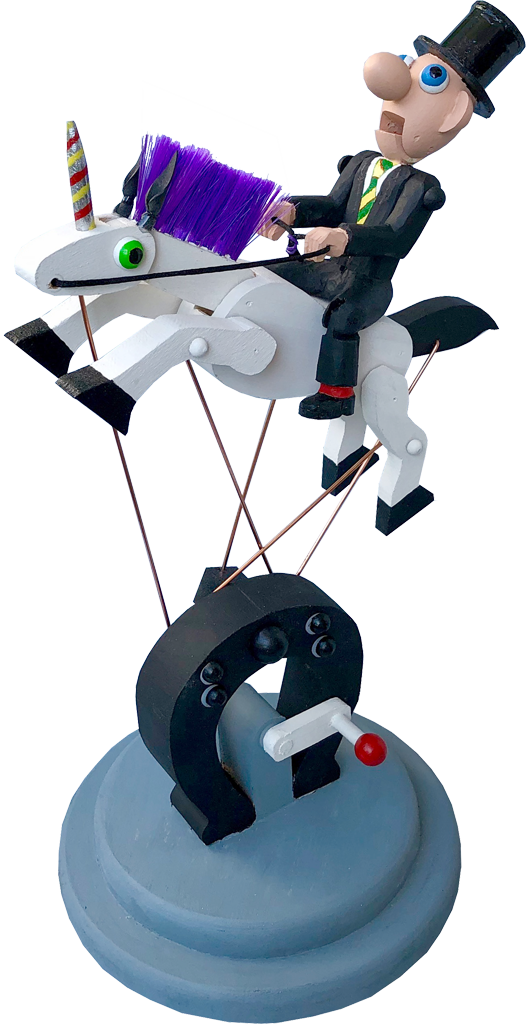
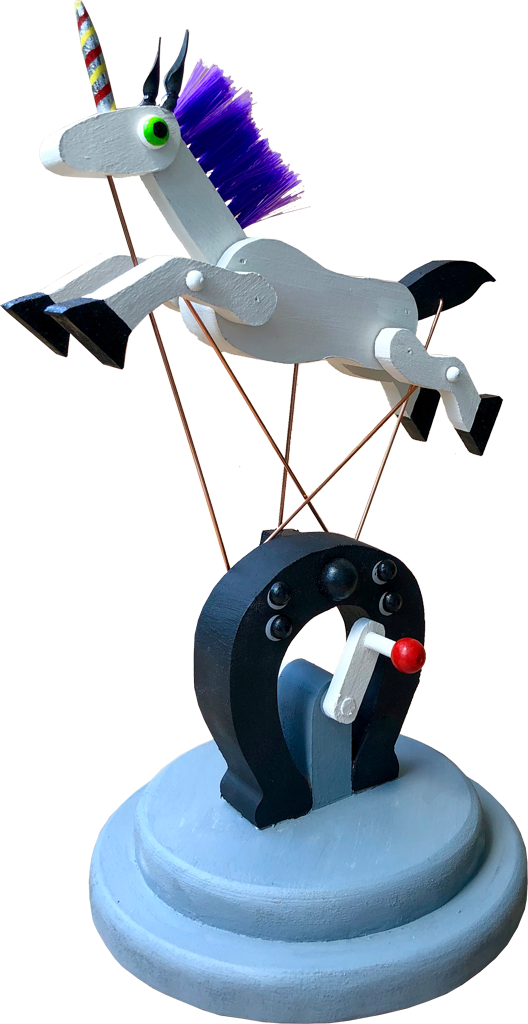
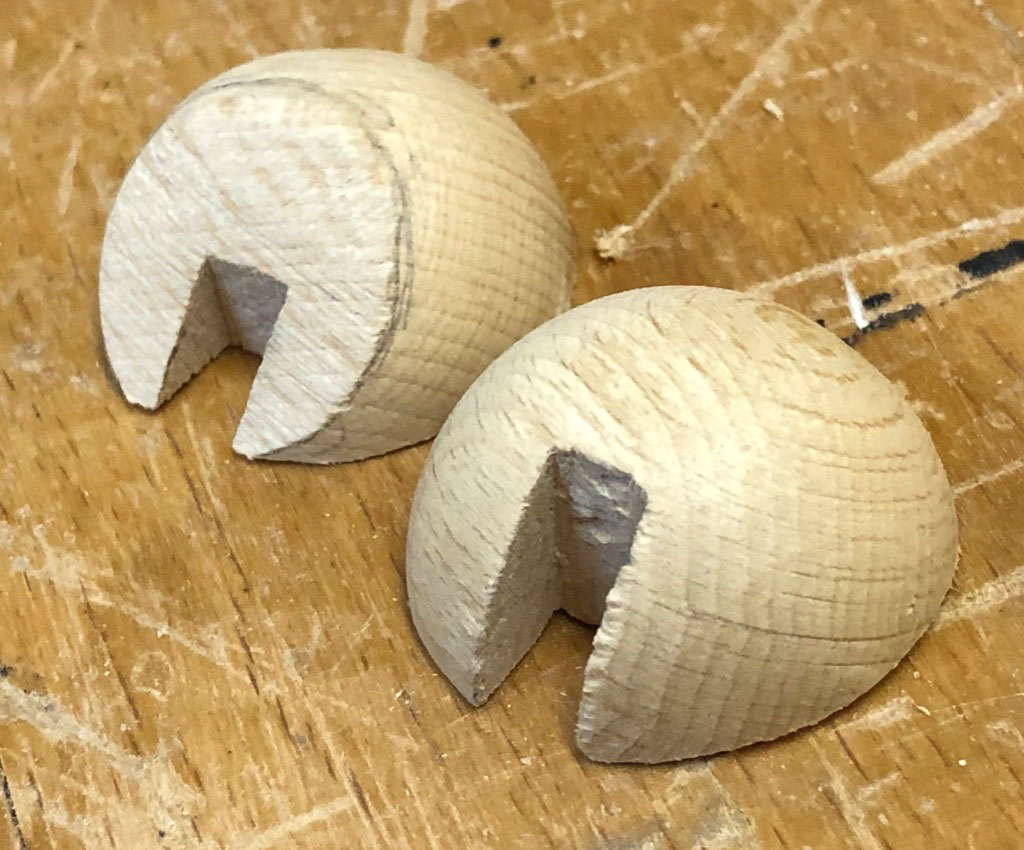
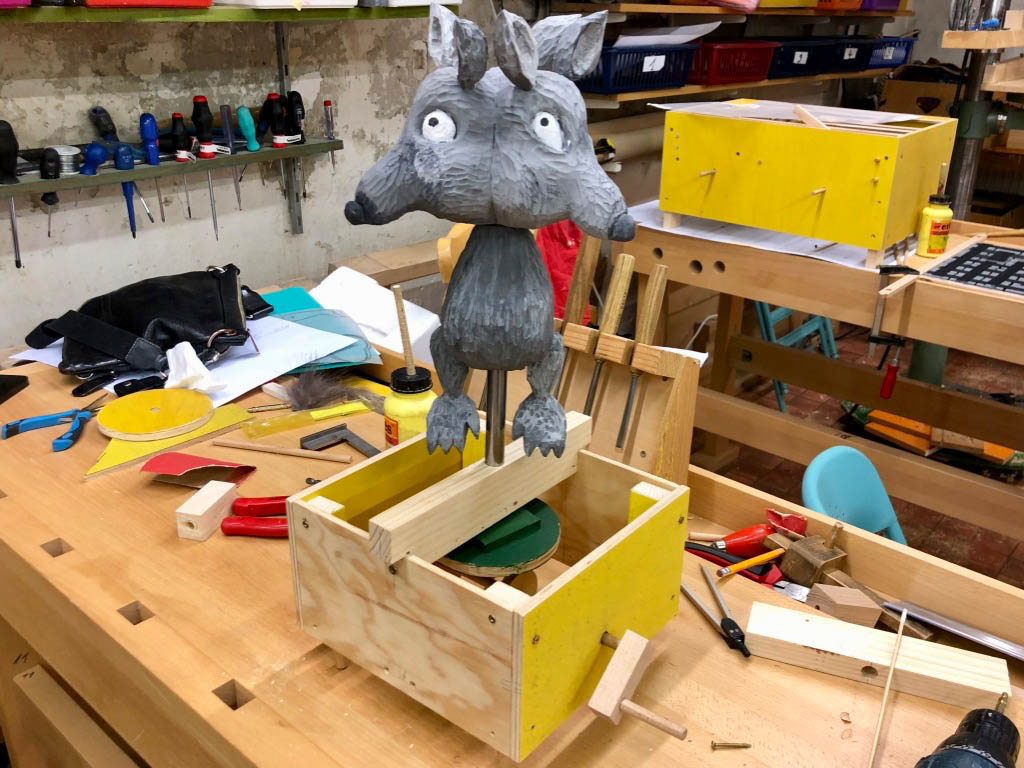
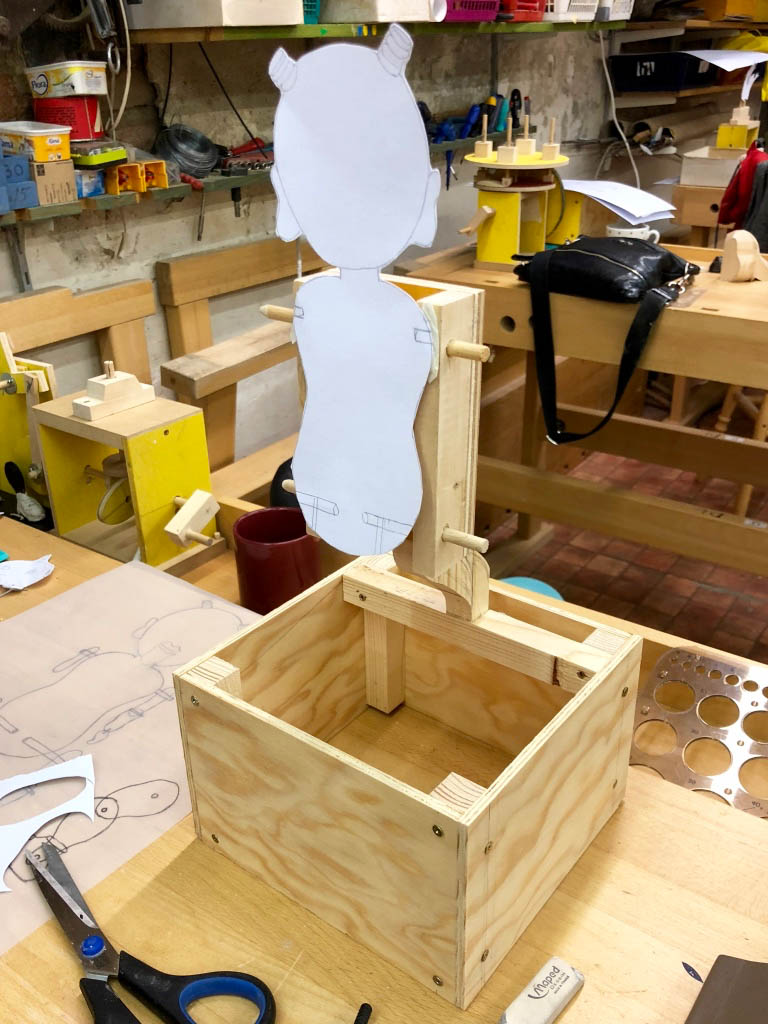
As a genuine unicorn, it has to have a spiral horn, horsey ears, a splendid mane, a bushy tail and friendly eyes. The base is part of the show, so it shouldn’t be boring.
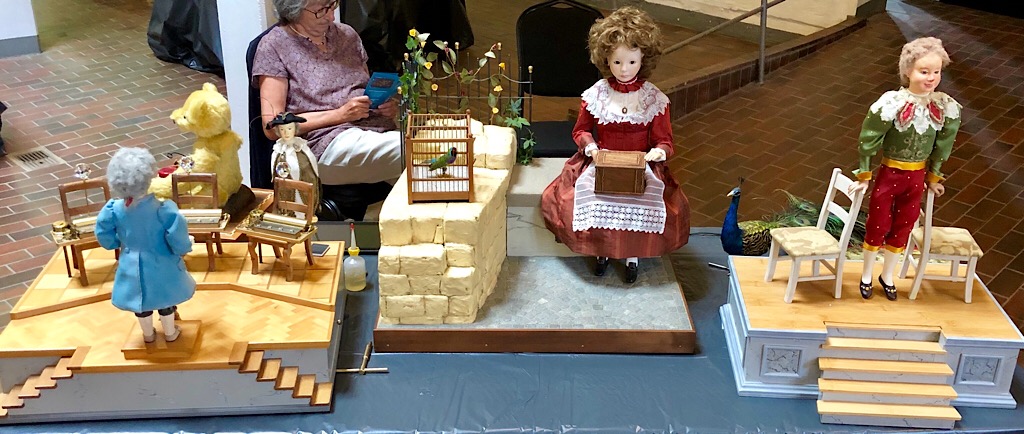
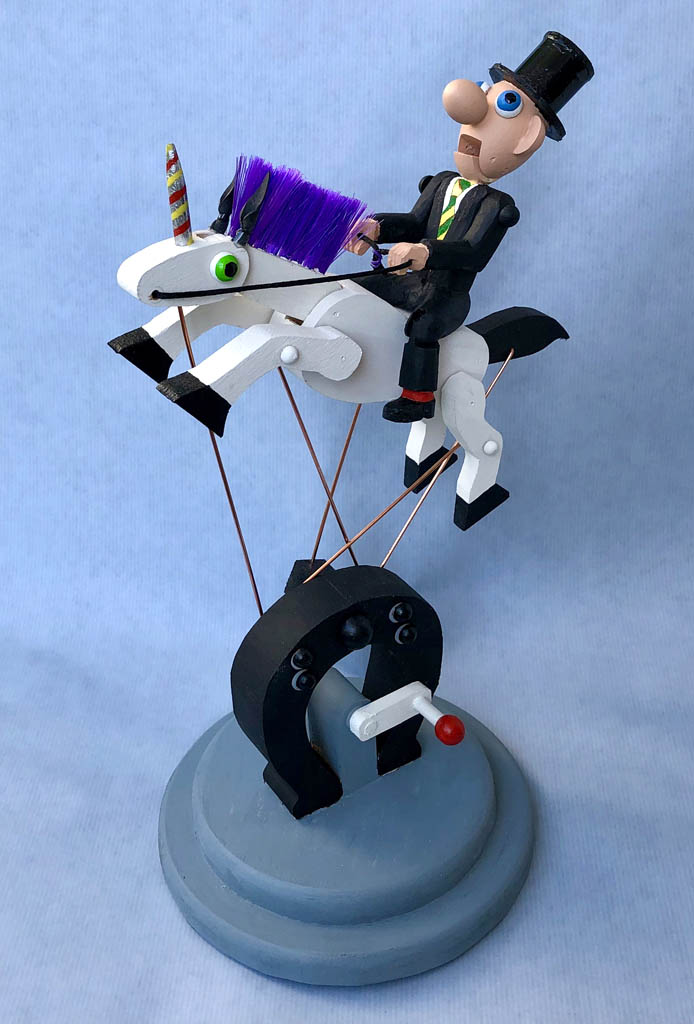
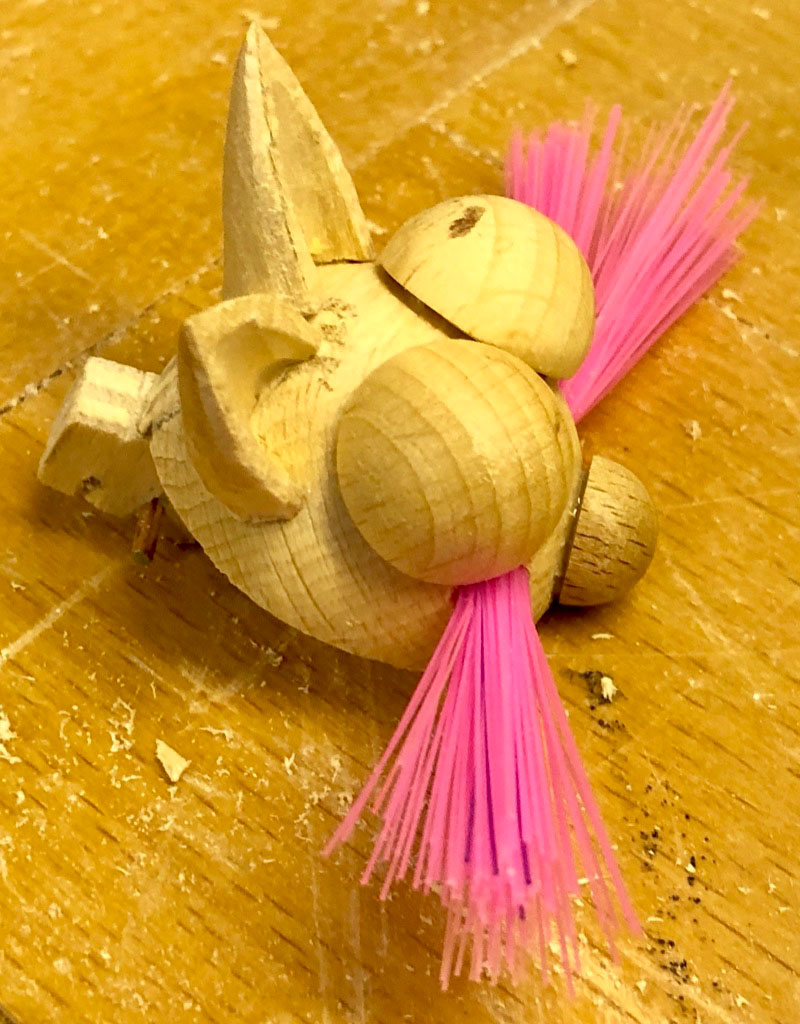
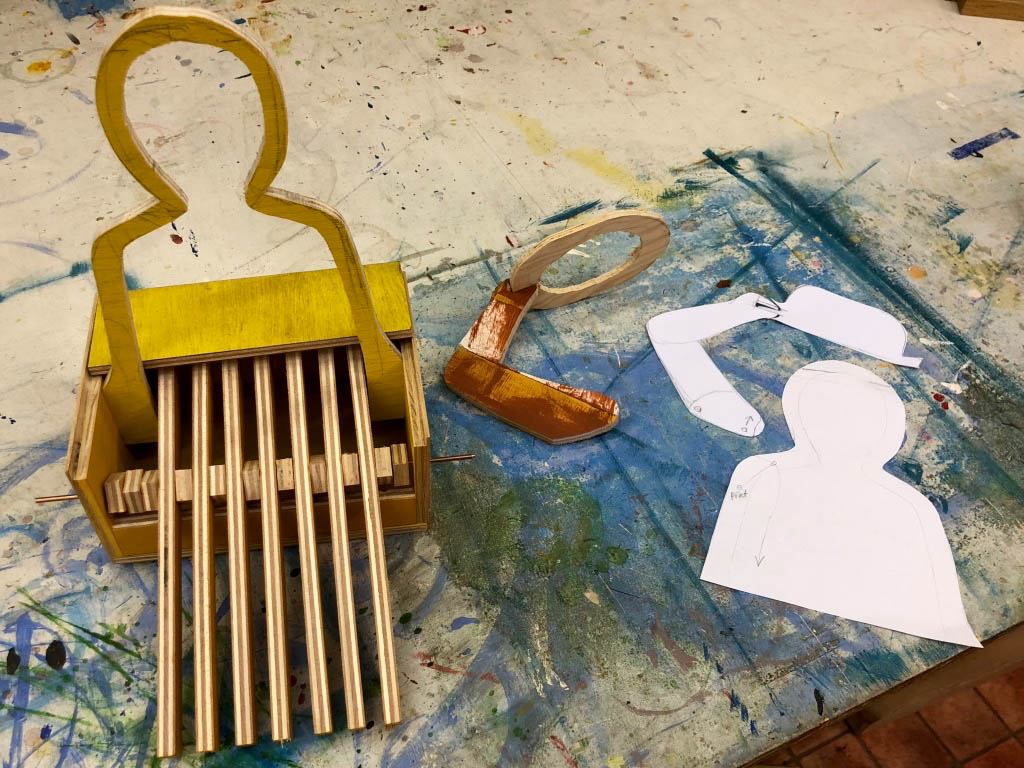
The unicorn would be interesting just by itself (see the inset image), but I thought a hapless rider would add to the fun, stylishly dressed but fearful of the unicorn’s movement, opening his mouth to protest each time that he might fall off backwards, rescued only by holding tight to the reins.

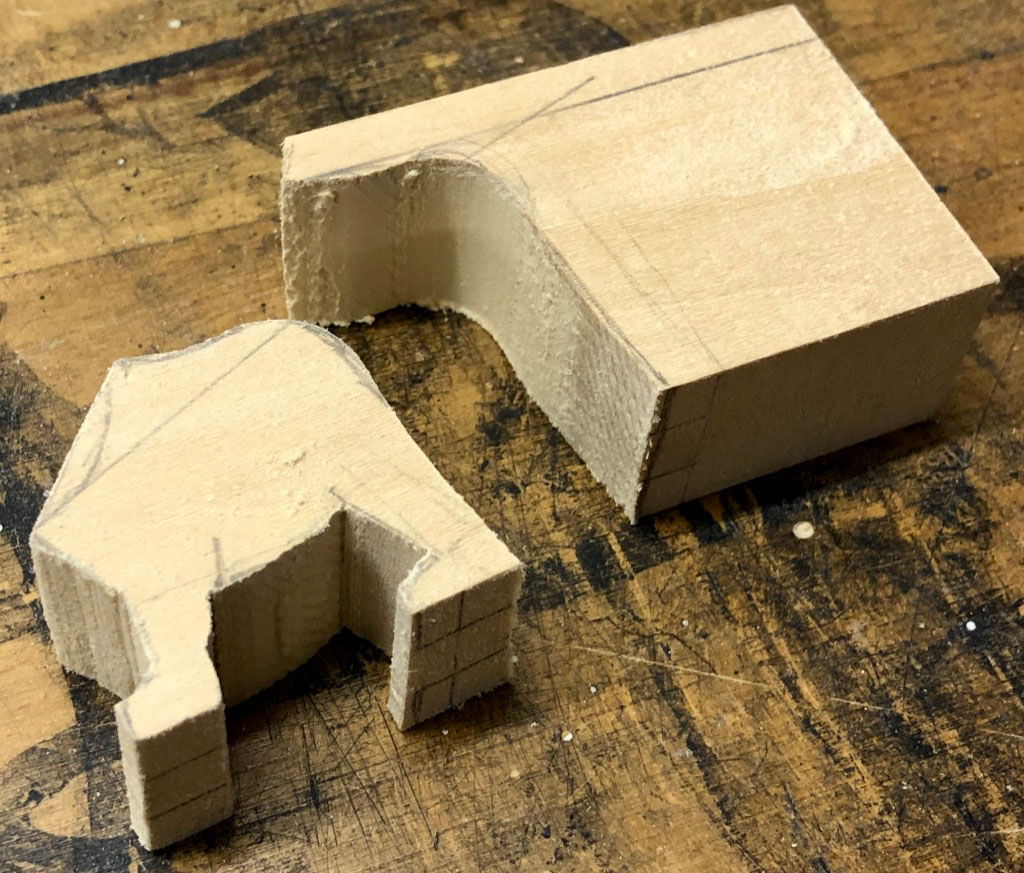
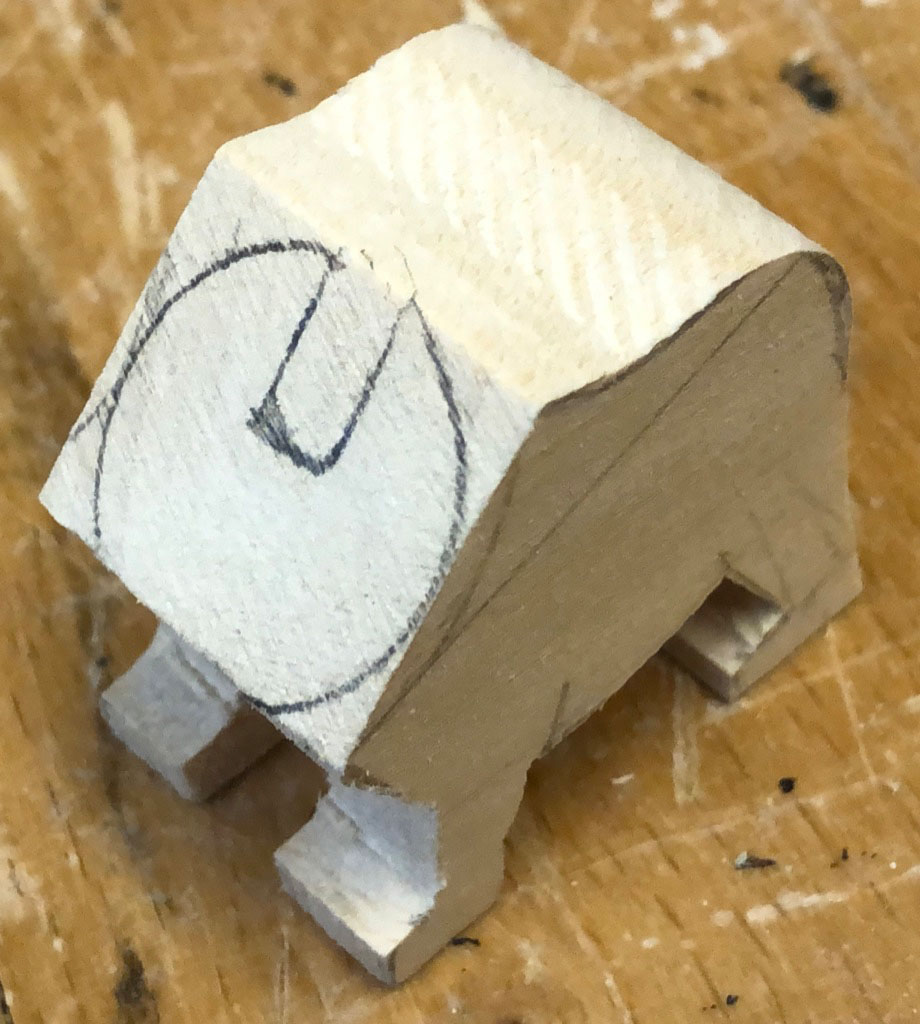
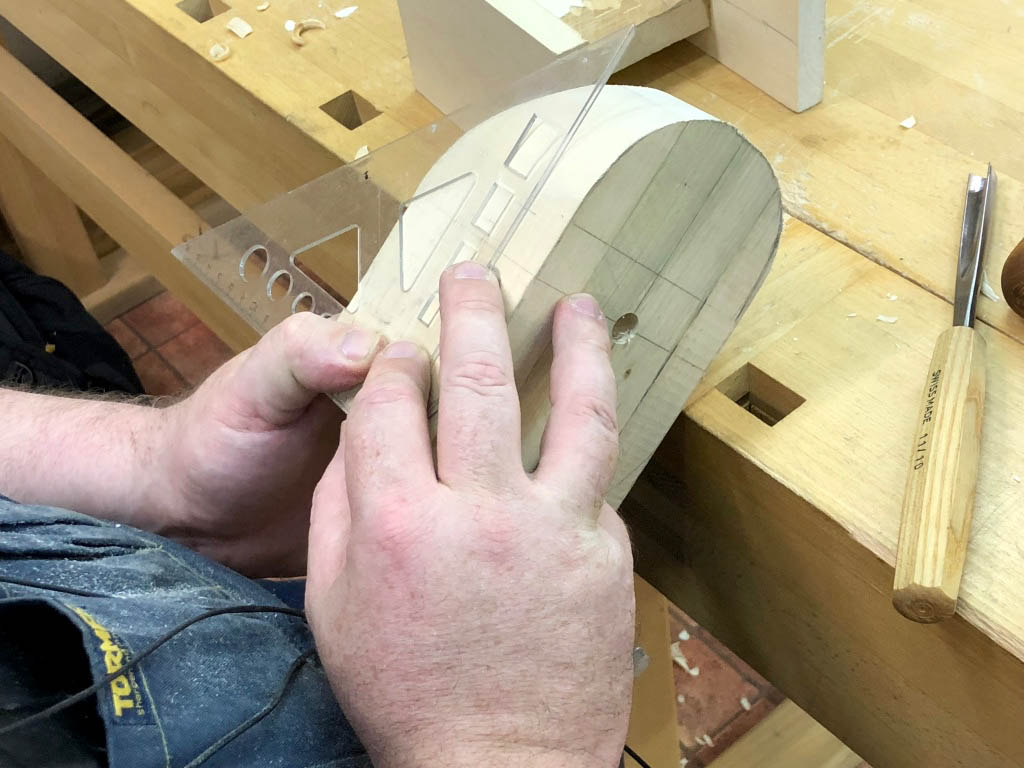
From the pencil sketch it’s not too hard to make some card templates which makes it easy to mark the wood for cutting with a bow saw.

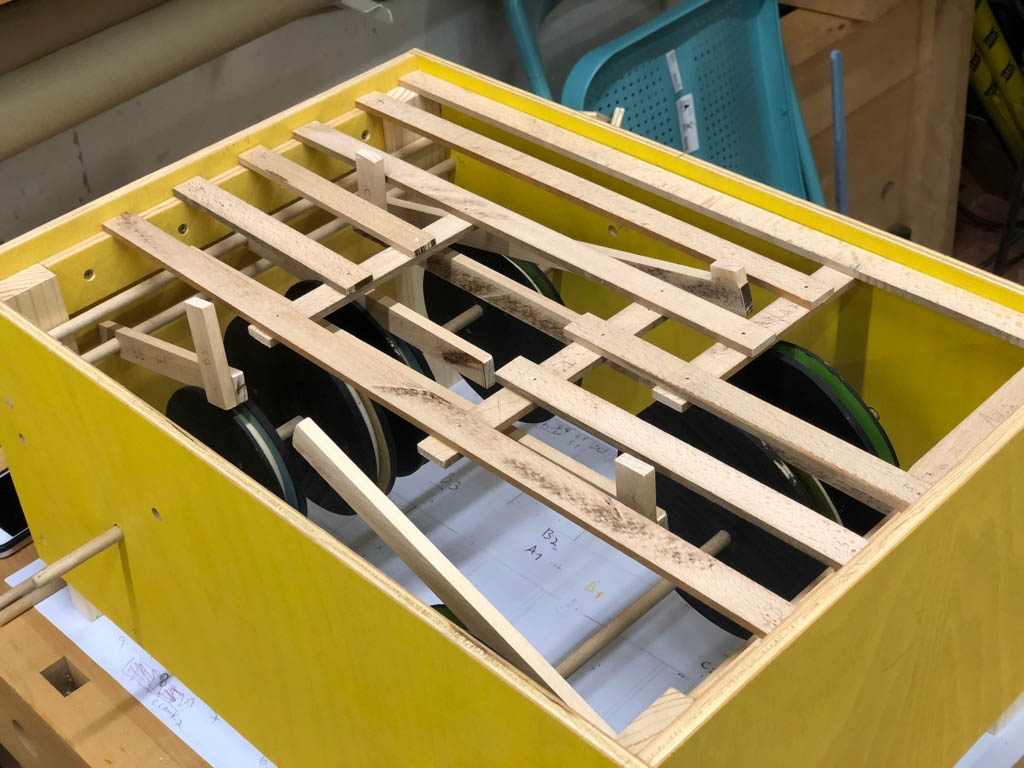
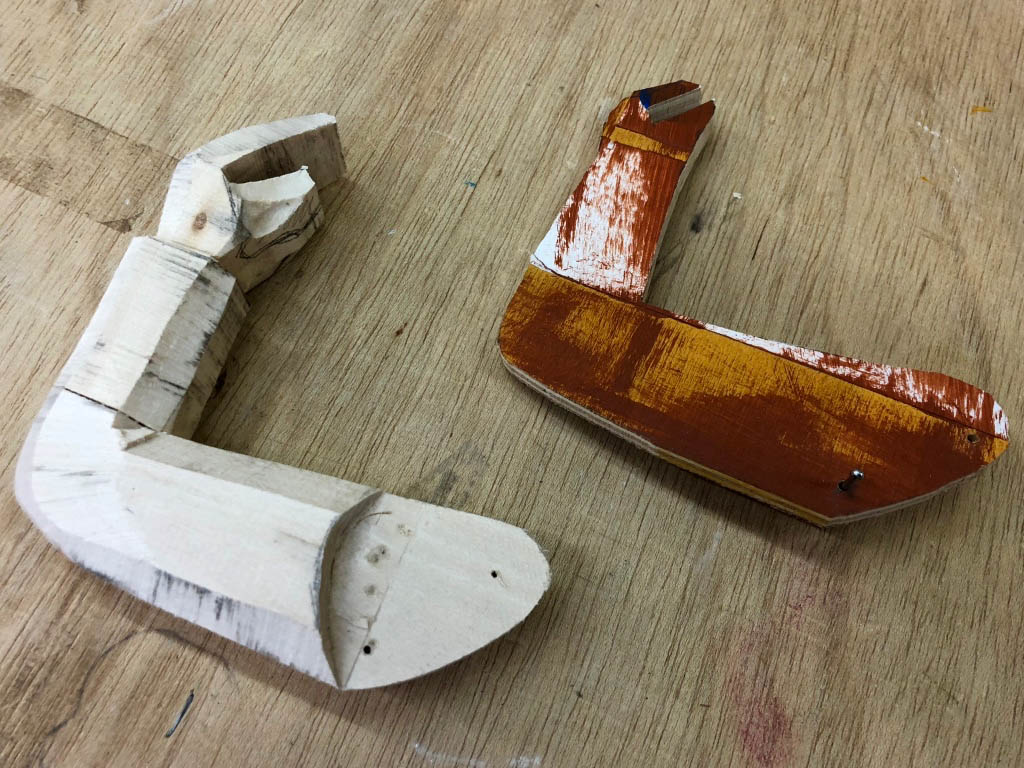
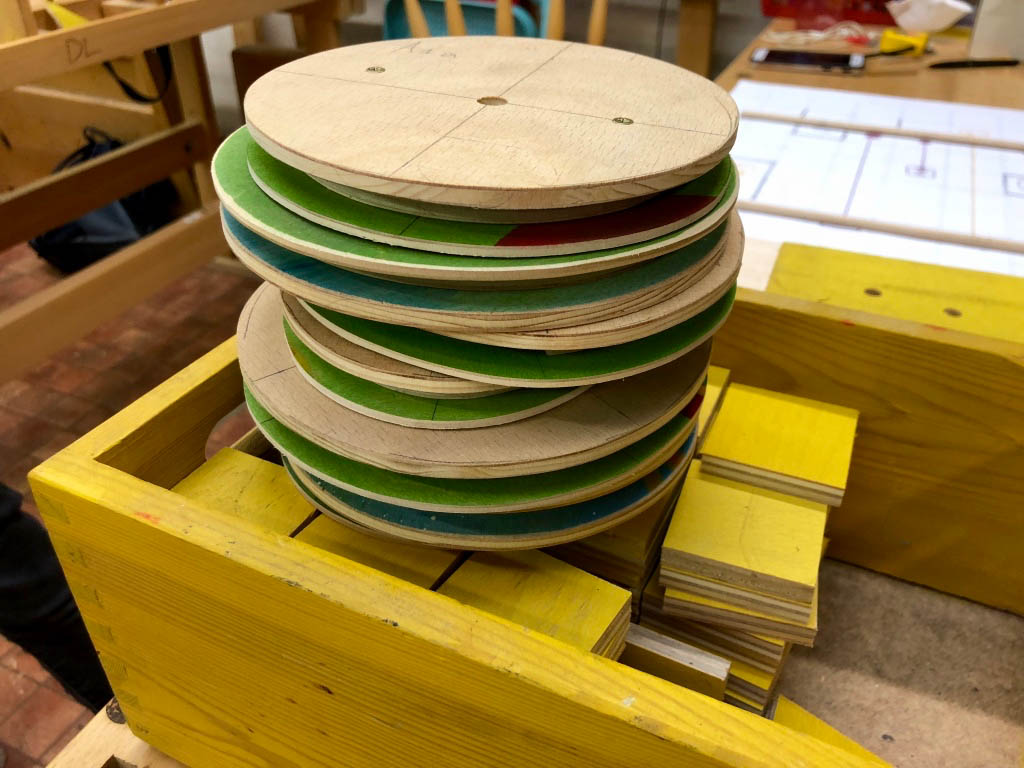
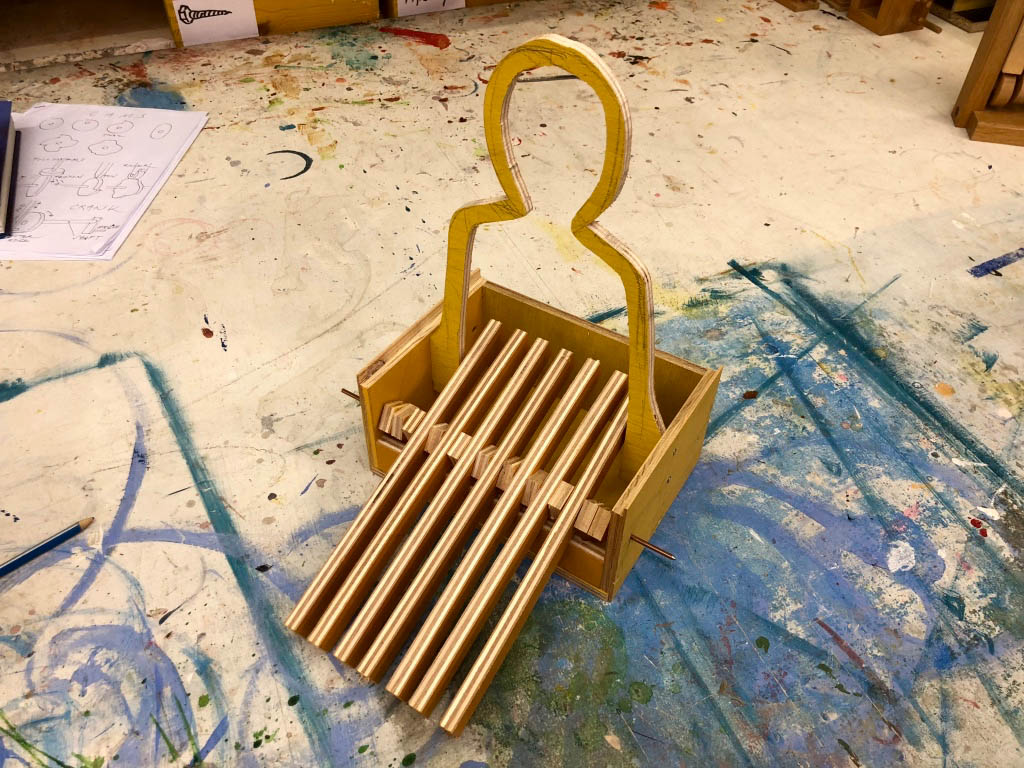
Two MDF discs make a nice, heavy base and a vertical horseshoe is perfect to take a lot of the mechanism. I did wonder for a while, why horses can’t wear shoes with laces. I suppose not having fingers makes doing up your laces kind of hard. Anyway some creative soul came up with nailing a bent metal strip to their hooves and this is such a design classic, that nowadays it is instantly recognisable as equine footwear and not at all boring.

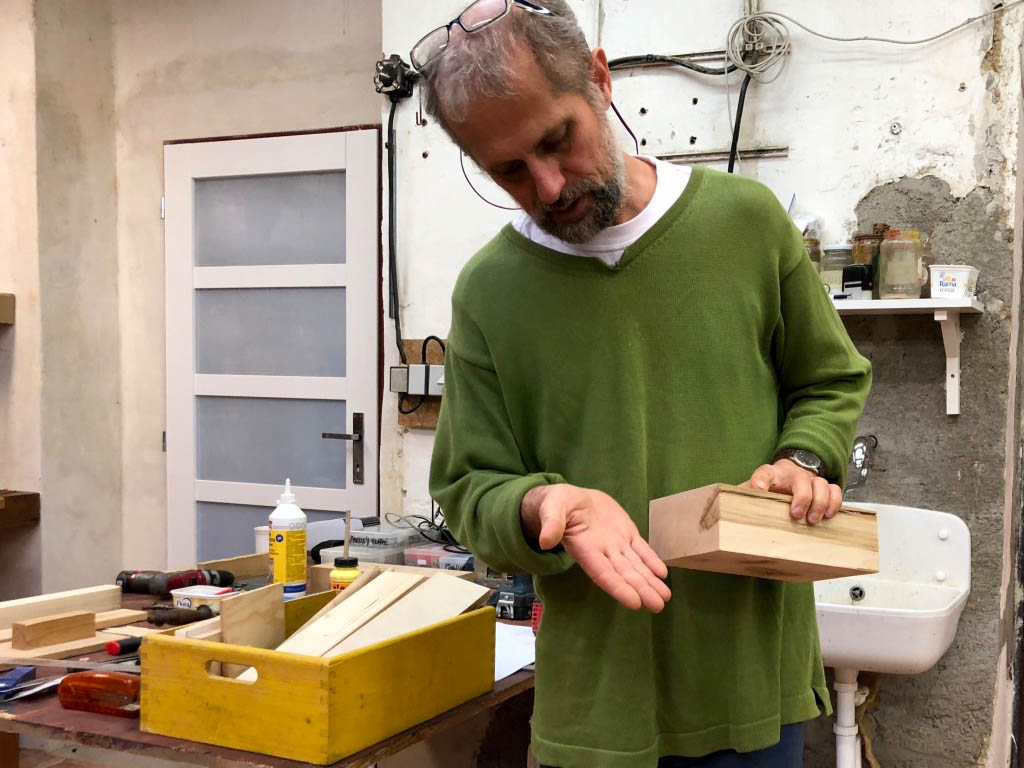
However magical it is, a unicorn needs a horn, a head, a neck, a body, a tail and four legs. The neck must have a splendid mane of course. For the mane, drill a few holes at regular intervals along the neck. Measure the required diameter by using pliers to pull out a tuft of bristles from the brush that is to supply the mane. The empty hole that is left in the brush is the size that you need in the neck. Just push the bristles into the neck, with a small dab of glue on the end.


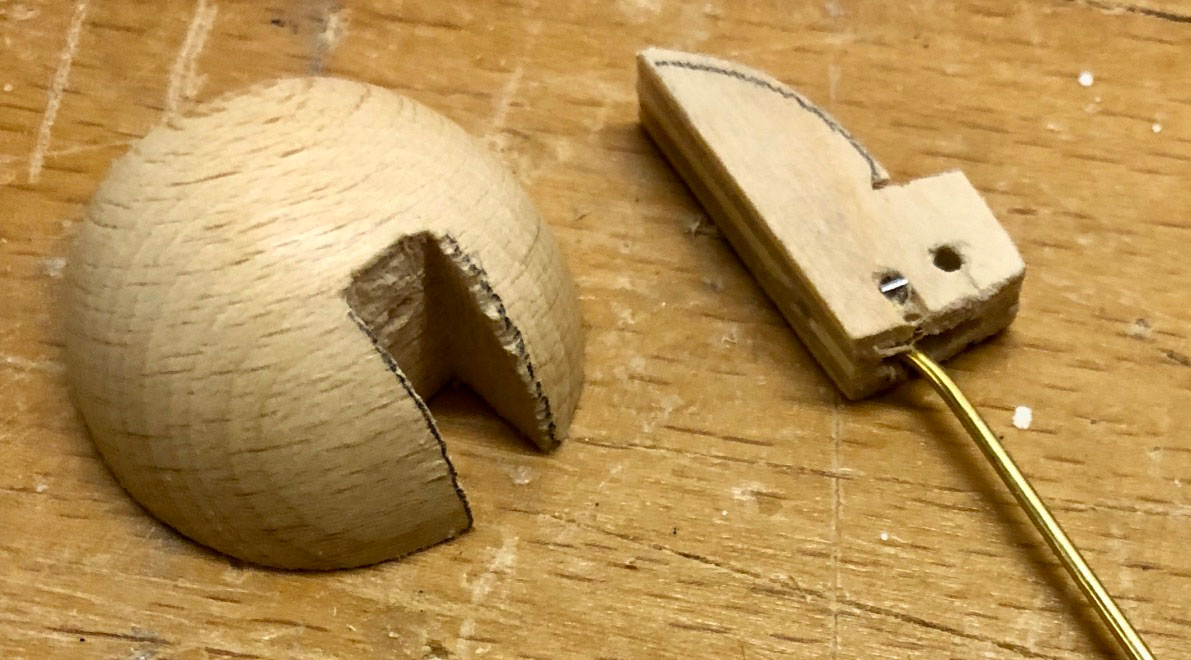
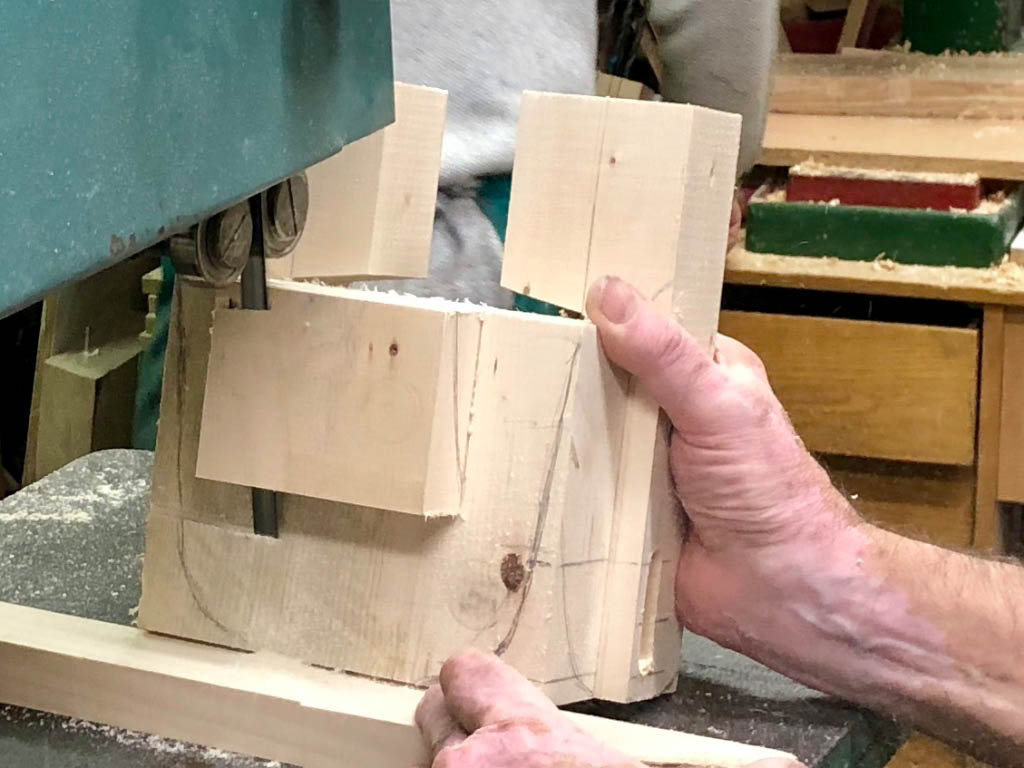
The body is the thickest part as you have to chisel out slots for the tail and for the neck.

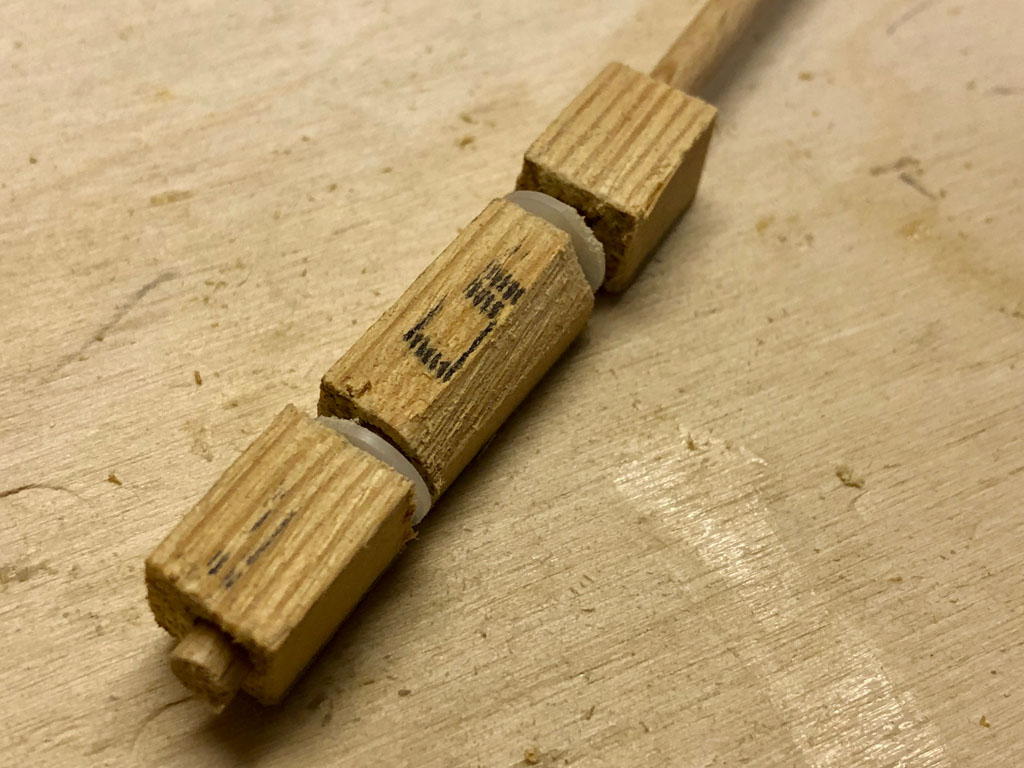
The slots have to be wide enough to allow free movement. I then used 1.6 mm welding rod for the hinges, drilling 1.6 mm for a tight fit and 2.0 mm for a loose fit to allow movement.

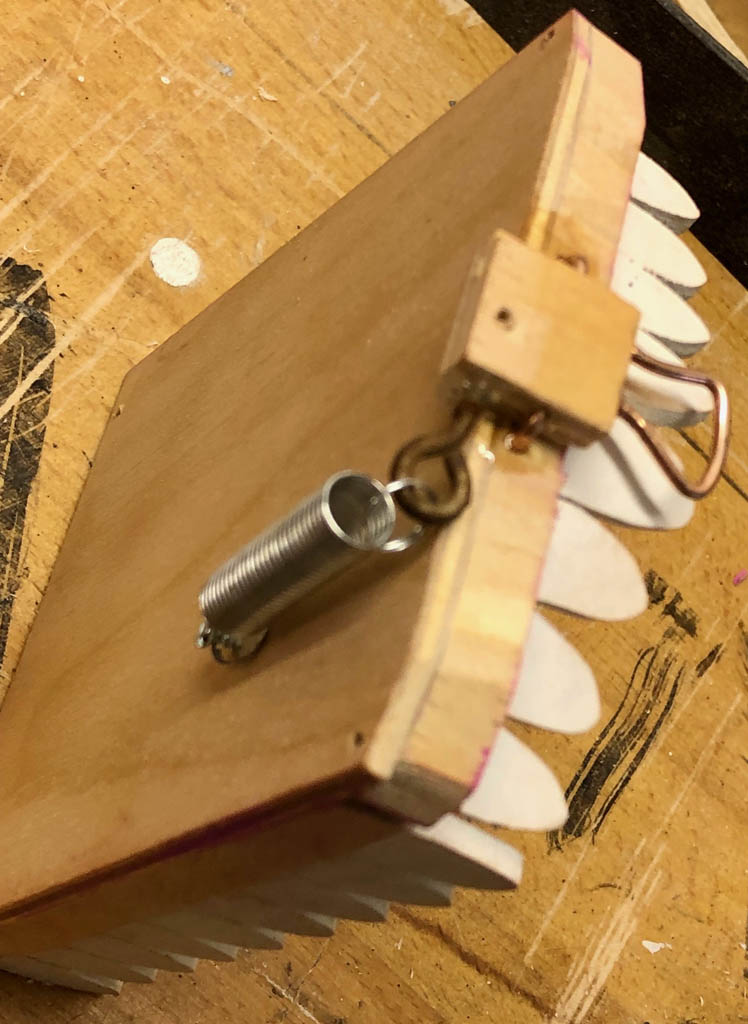
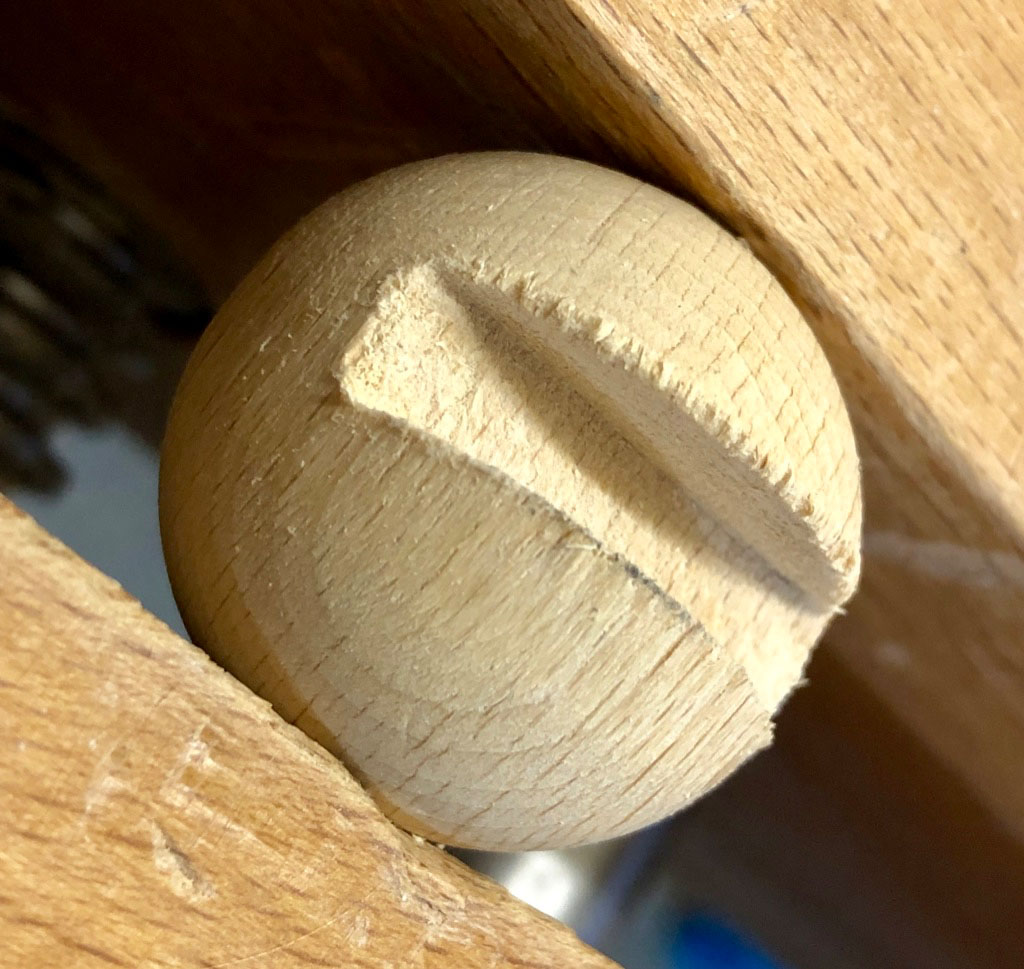
The crank is the handle that you turn to get the unicorn galloping. A small sphere on one end prevents the loop on the end of the central rod from coming off. A small sphere on the other end is painted bright red to say “this is what you turn”. Plastic washers reduce friction

The central rod slides easily up and down through this block of wood, which can turn easily in the top of the horseshoe. The hemisphere on the end stops the axle from slipping towards the back.

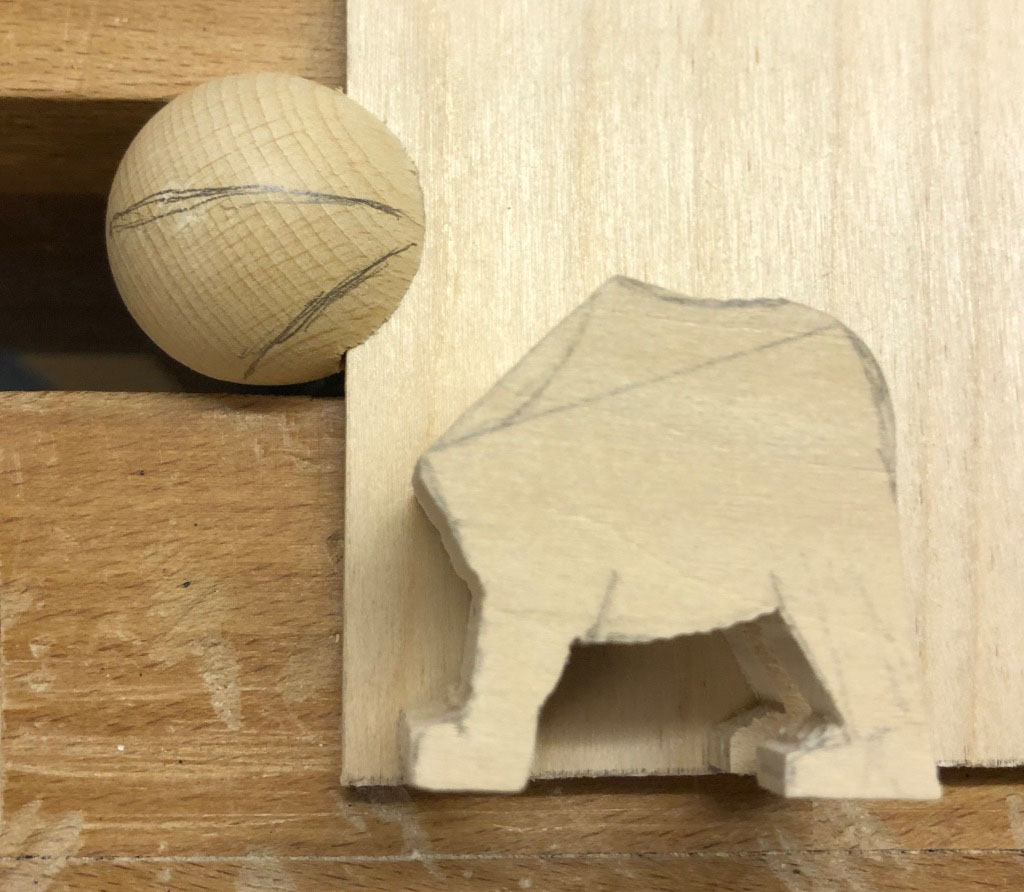
While fiddling about to get everything right, it’s useful to leave bent “handles” on the rods which serve as axles for the head, neck, tail and legs. Once everything is OK, then these can be cut off at the correct length. The two leg axles are glued right at the end to keep the pairs of legs firmly joined together. It’s much easier to paint the parts before the final assembly. Rods which pivot in the horseshoe and in the legs and tail protrude enough so that a small wooden hemisphere can be glued on to prevent them from slipping out and to prevent inexperienced jockeys from getting accidentally stabbed by sharp ends.
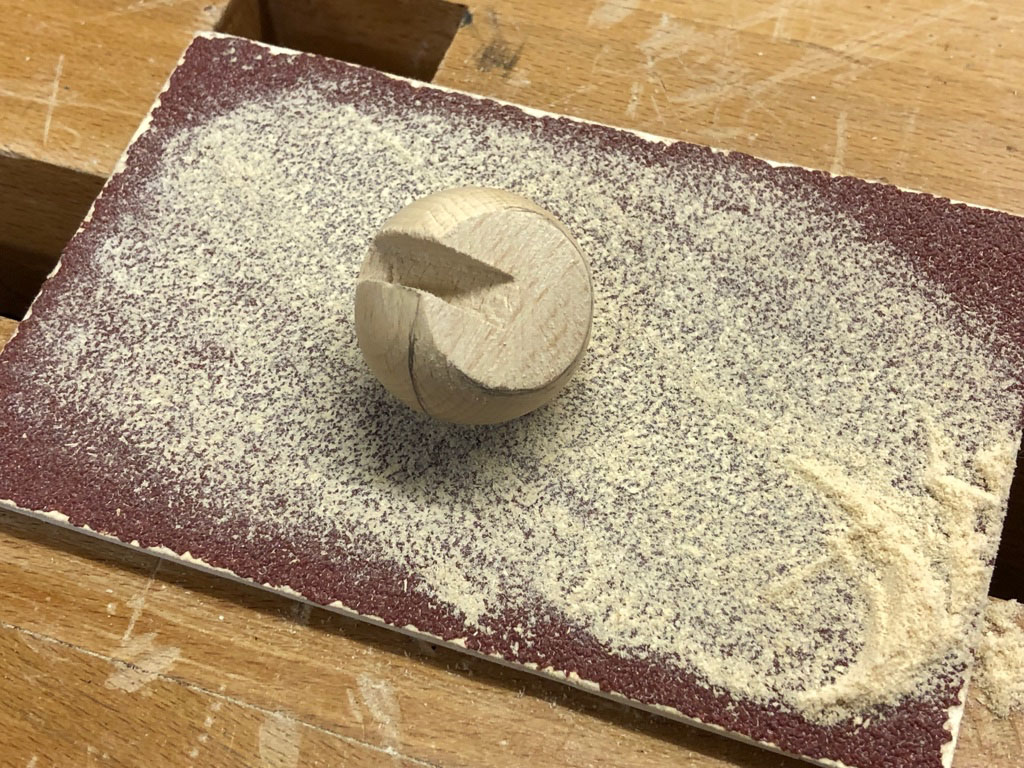
Once the rod hinging the head to the neck has been cut to size, glue hemispheres on top to conceal the holes and prevent the rod from sliding out and, when painted, they make beautiful eyes. For the ears, I cut rubber sheeting to a suitable shape, rolled it around a thin pin, tied it with cotton thread to prevent it from unrolling and drilled a small hole to take the pin. Two-component epoxy resin glue, fairly liberally applied holds everything together and in place.

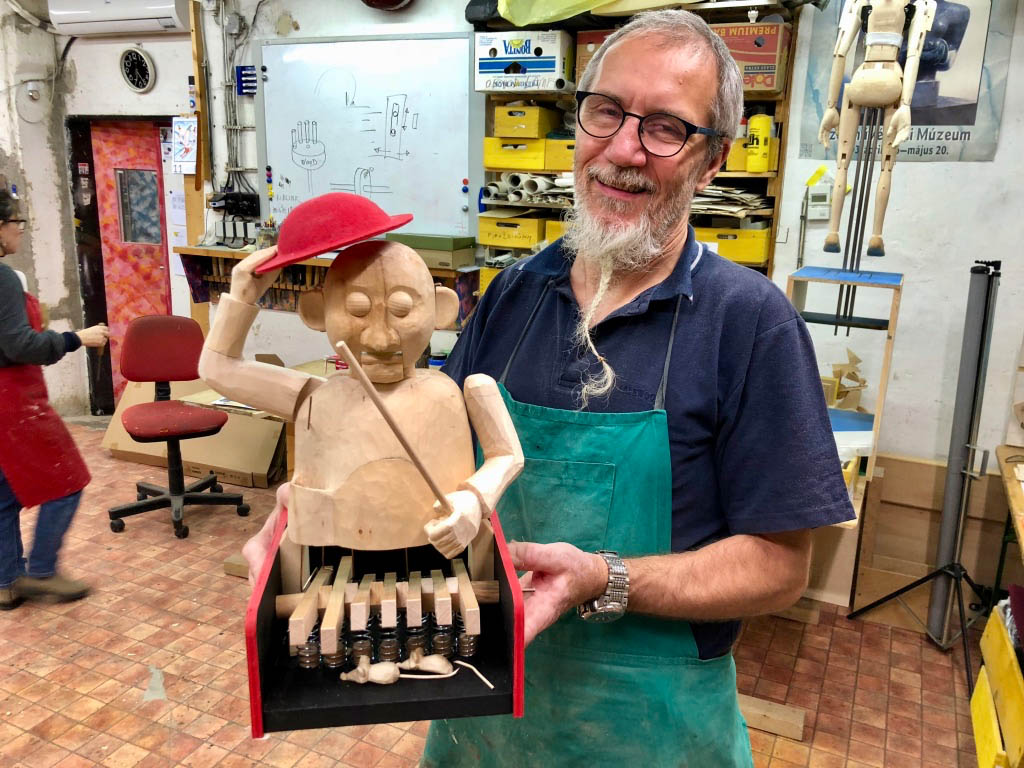
Fully assembled and painted the base looks like this –


There are apparently people around who believe in unicorns and even think they can ride them.
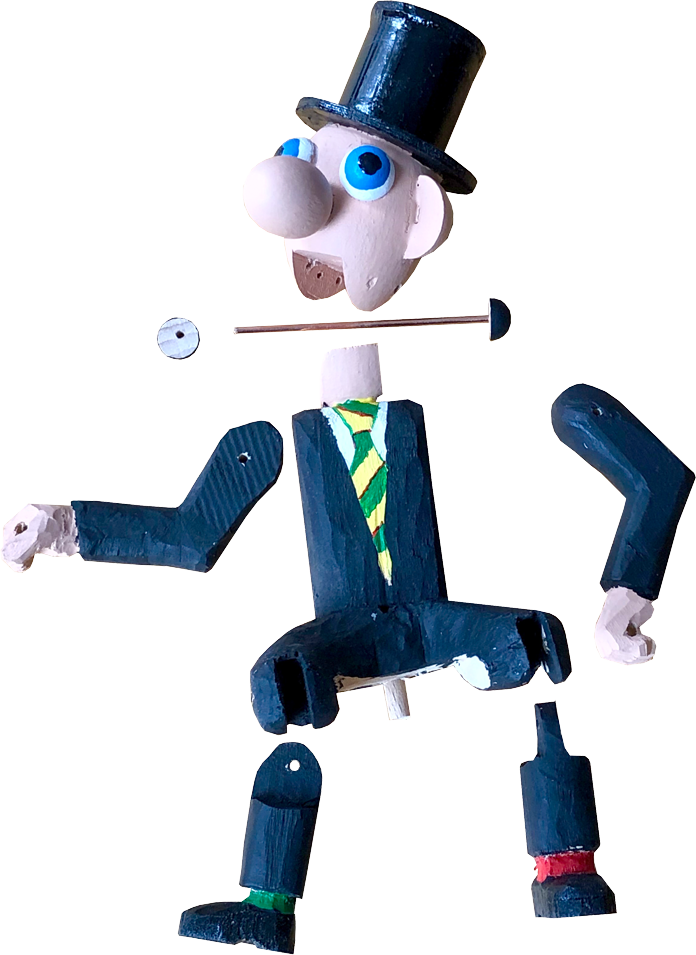
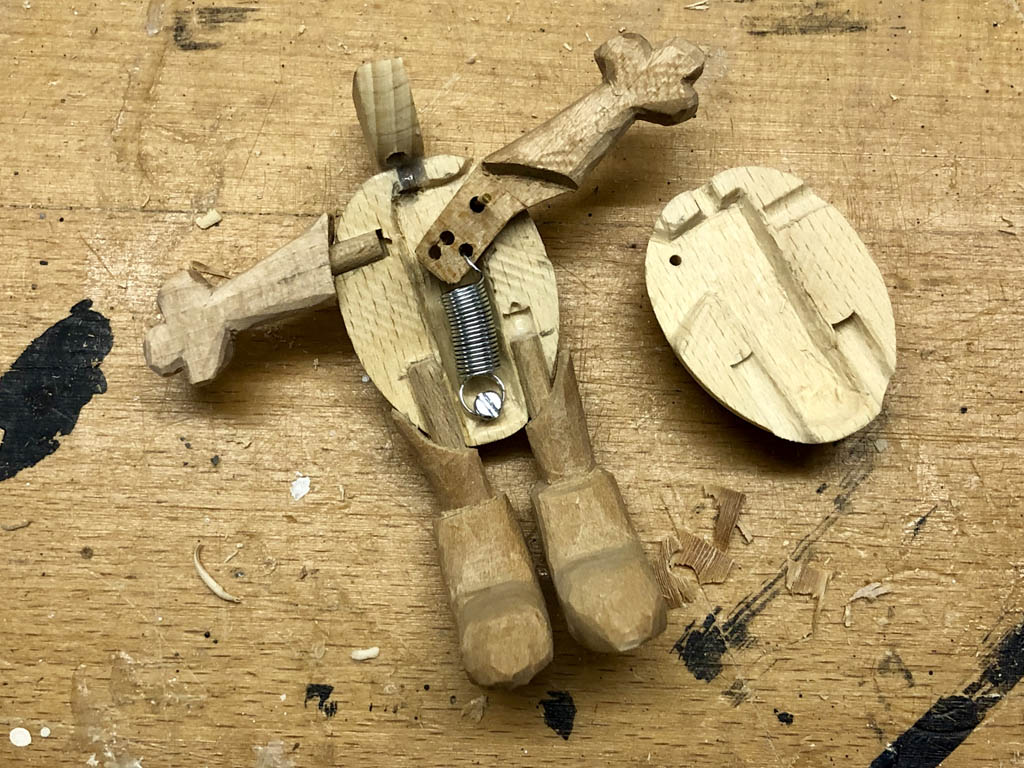
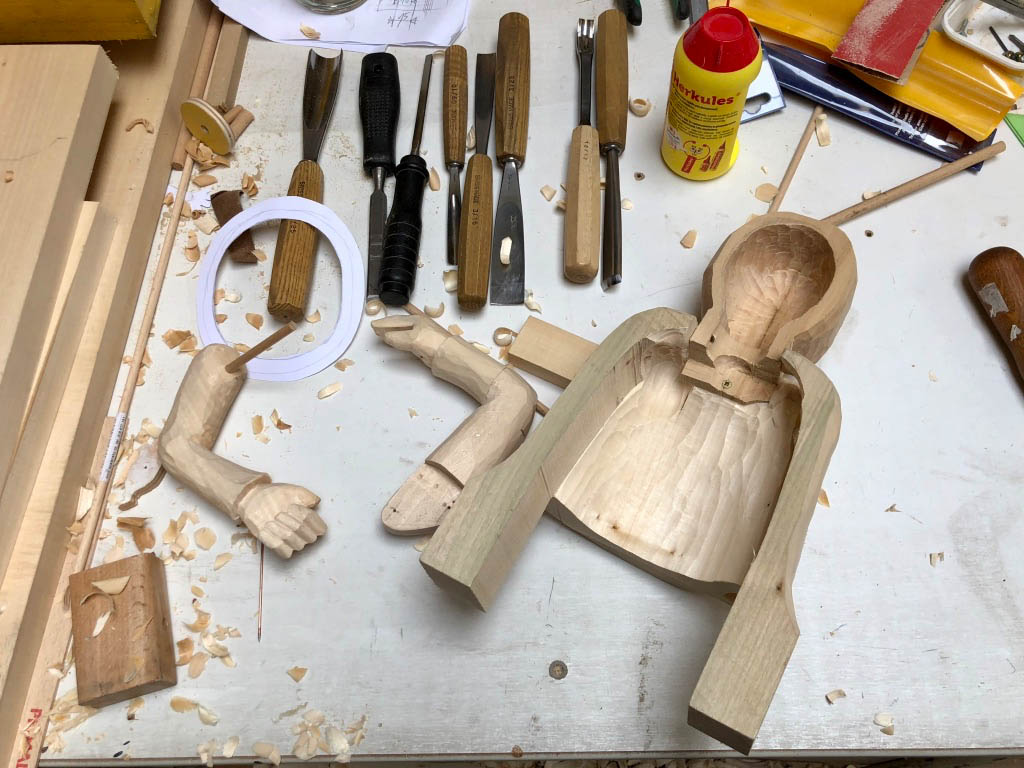
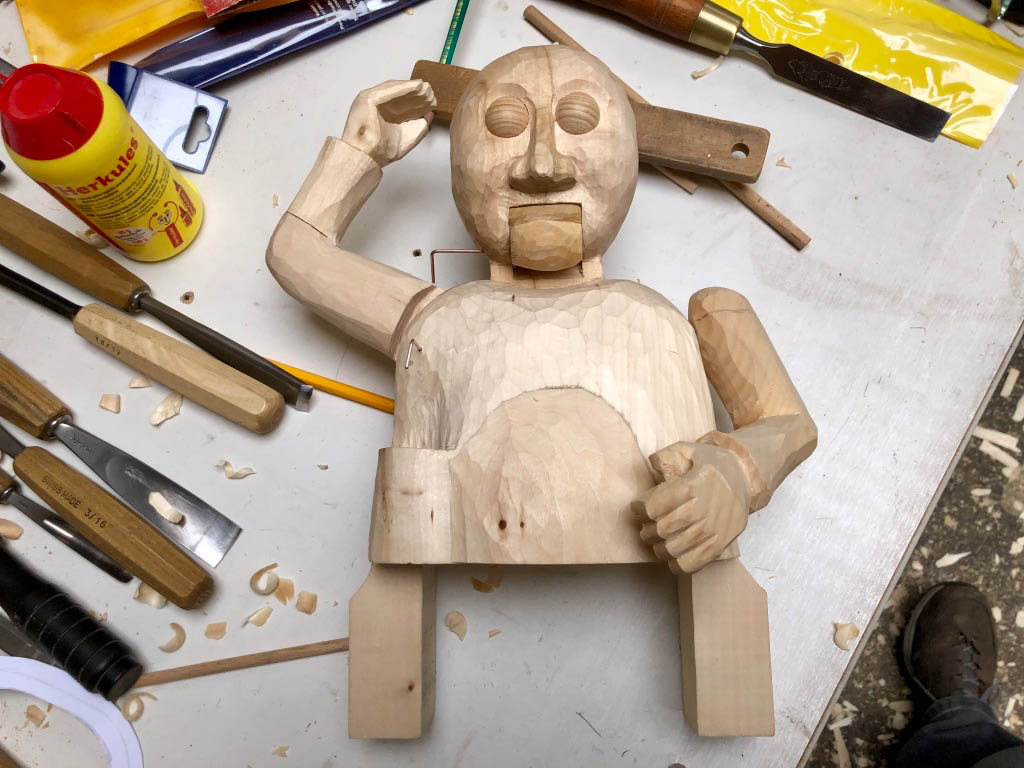
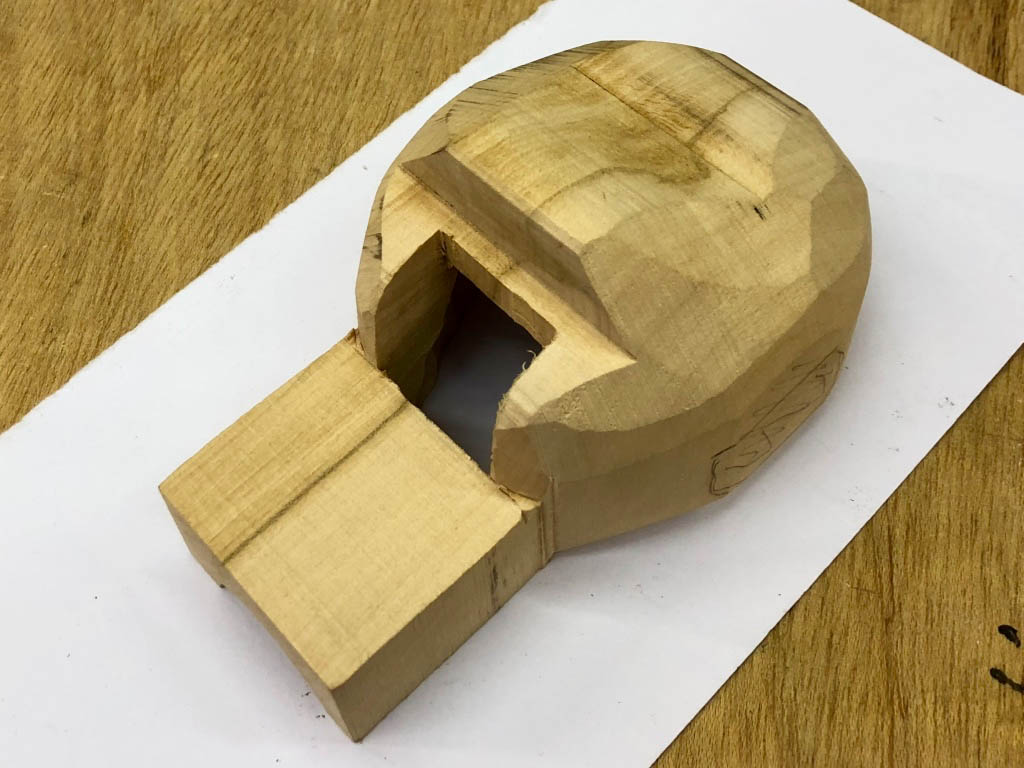
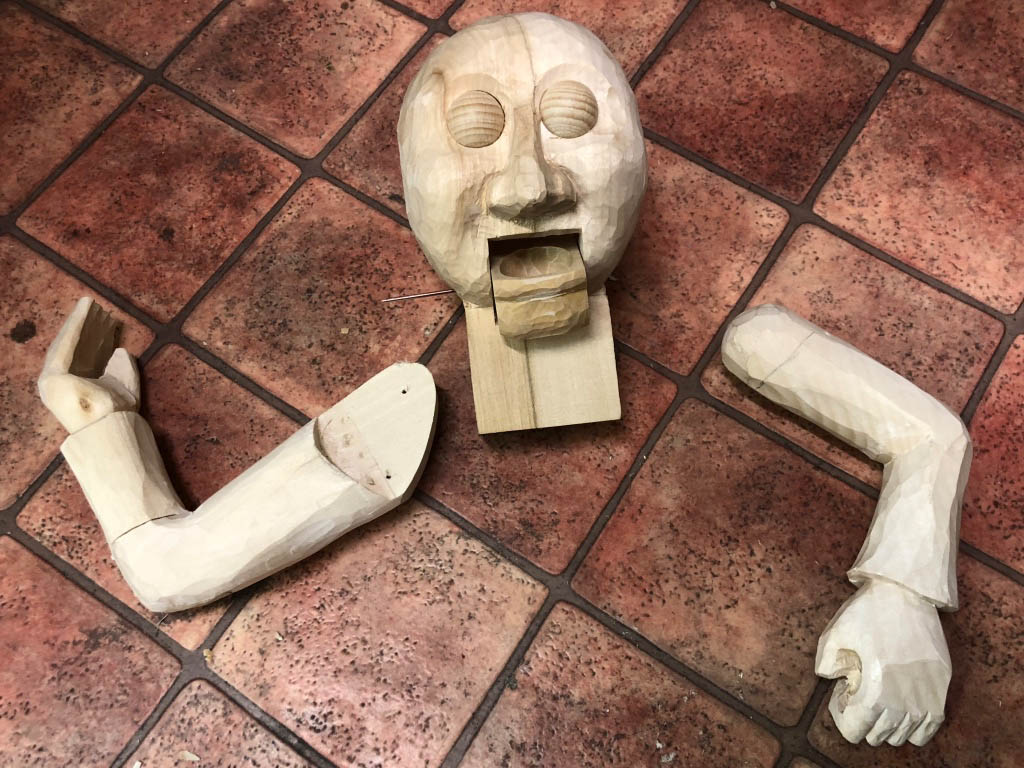
This small, smartly dressed fellow is carved from lime wood with his arms and lower legs hinged on 1.6 mm rods. His head is a beechwood egg with the jaw cut out and glued firmly to his shoulders. A rod through a hole at the back of the jaw allows his head to flop forwards and backwards as the unicorn gallops. There is a hole drilled through each hand for the reins. When the unicorn points skyward, the reins pull tight and lift the rider’s arms, his head flops back and his mouth opens in a silent appeal for salvation. At the other extreme, the reins are slack, his arms drop and his mouth closes in relief.


There is an English saying that discourages you from waking sleeping dogs. Doing so is to risk provoking a defensive reaction, a baring of teeth and a concert of barks to wake the entire neighbourhood. This sounds like a great place to keep your valuables safe. Like keeping your favourite chocolate bar safe from your little sister. The only problem is that a real dog might like chocolate too, however unhealthy it is for them, so it will have to be a wooden dog. A wooden dog that knows how to keep its jaws clamped shut until it wakes up, and goes barking mad at any attempt to snaffle what’s in its mouth. Man’s ingenuity knows no bounds so here is the latest product from Berlin’s high-tech animalatronic workshop, a sleeping dog!
Here are most of the bits that make up our ferocious friend.

This dog has false teeth! You can take them out, which makes them easier to align so that they overlap nicely without touching and painting is very much easier too. The upper set of teeth sit on wooden blocks to create a hidden space for the strings attached to the nose, which move ears and eyes. This space also hides the spring for the catch which keeps the jaws locked together until the nose is moved.
The small black microswitch is activated when the upper jaw is lifted. The little circuit board comes ready to use from a hobby shop and this replays your recorded sound when the microswitch triggers. I replaced the standard speaker with a smaller, dog-sized one and glued this to the partition. The sound is quite cheerful for our purpose, as we won’t be playing Beethoven’s 9th.
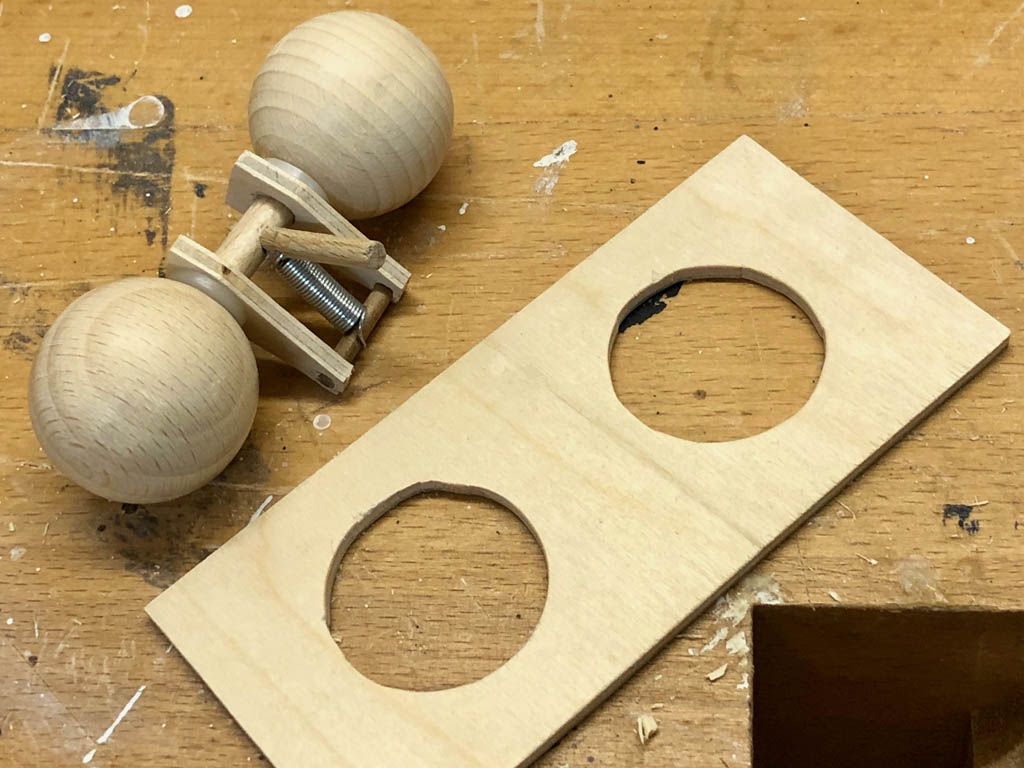
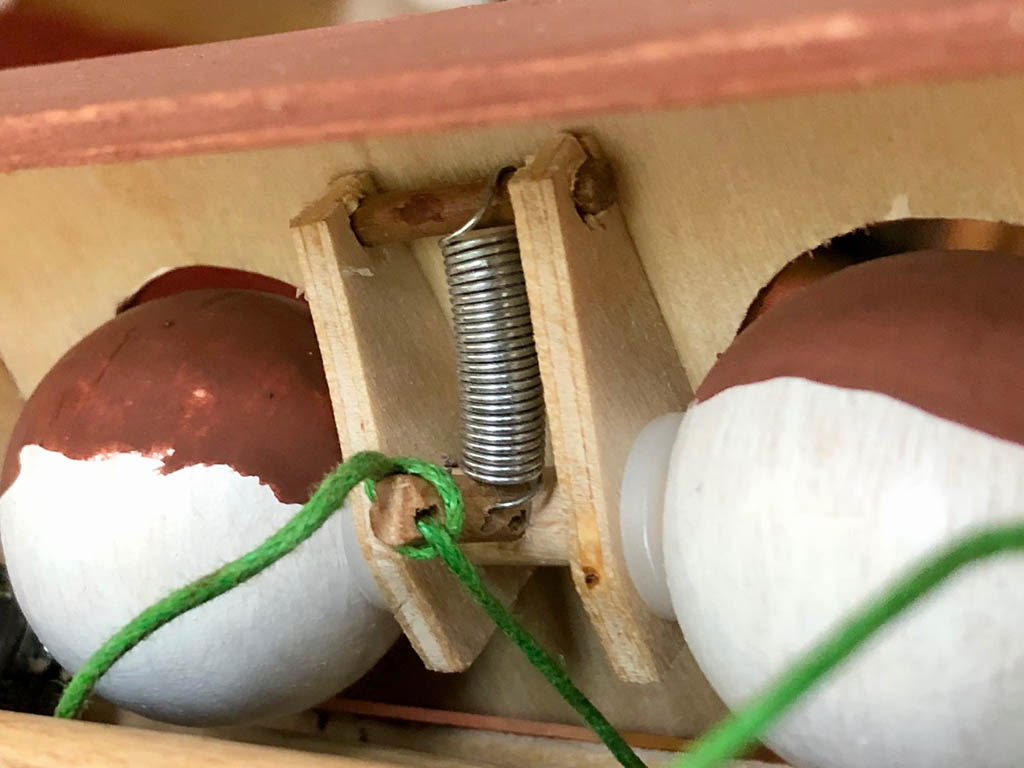
The eyes are only held in the centre on a piece of wooden dowel. A spring keeps the eyes closed until a tug on the string pulls the lever to open them. The eyes don’t touch the panel so that the paint doesn’t rub off and allows for alignment errors when drilling the wooden balls. Two plastic washers keep the friction down.


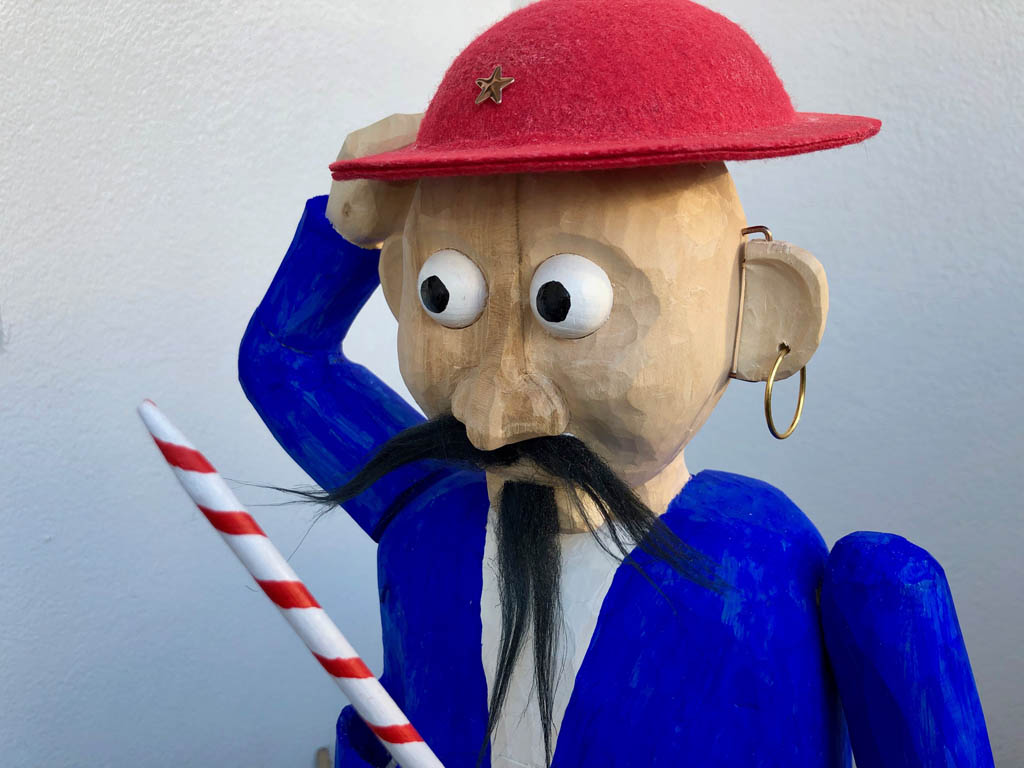
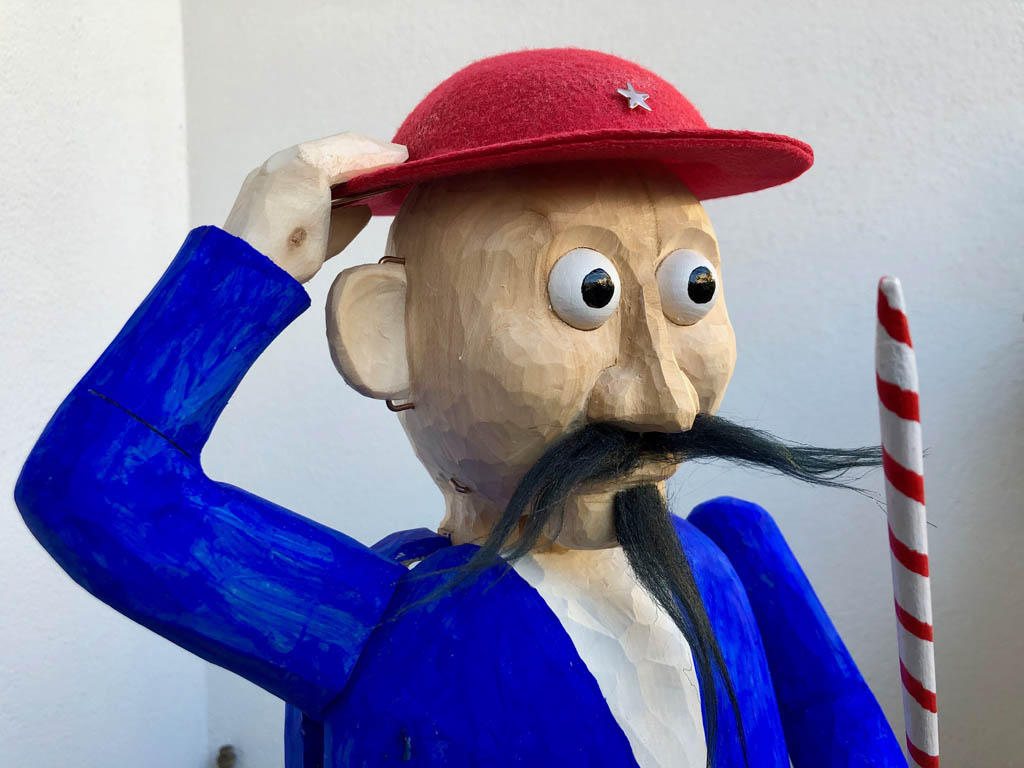
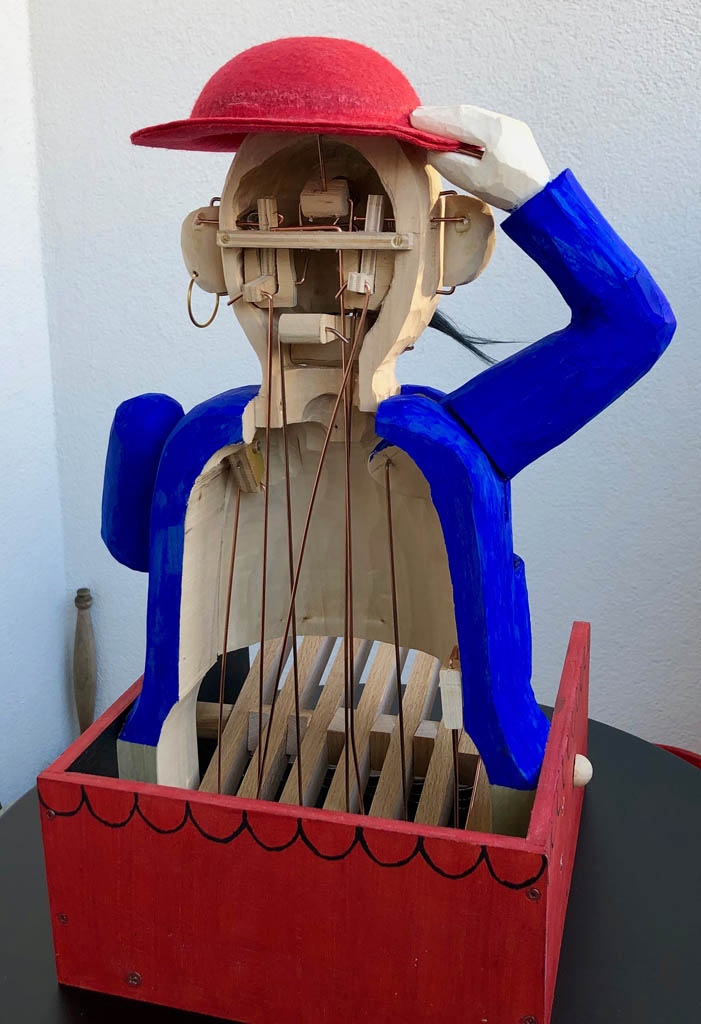
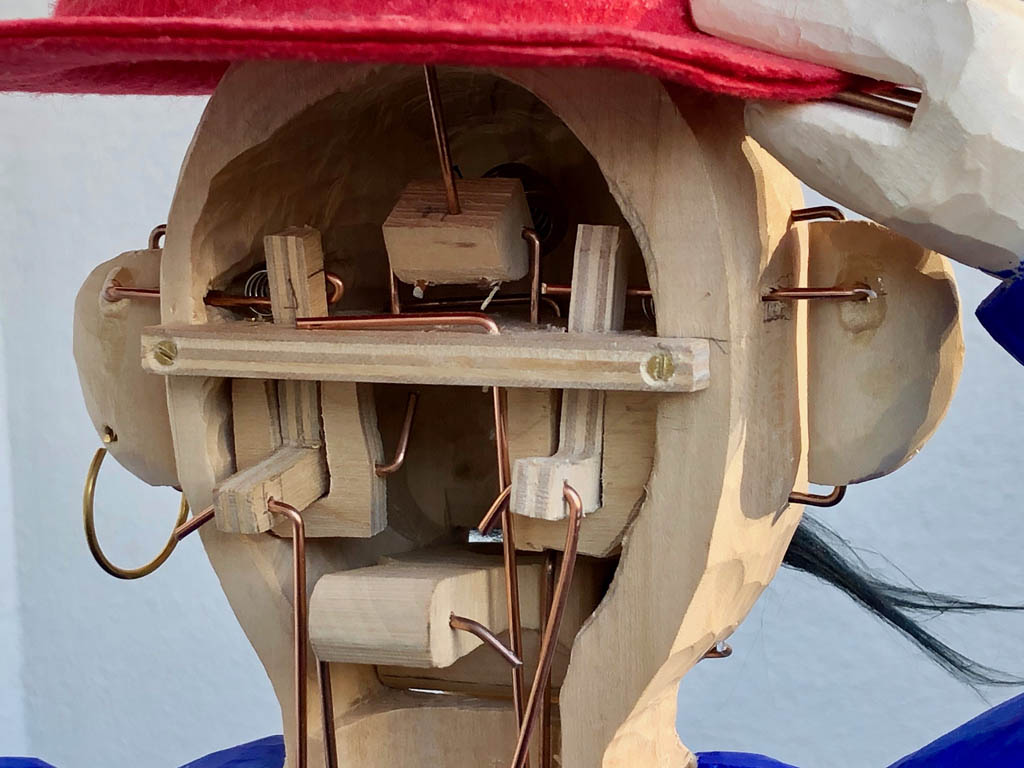
Wooden figures are more interesting if they can talk. This basically means wagging their chin as thousands of puppets have done over the years. I thought it would be interesting to try an alternative, keeping a stiff lower chin and wagging everything else. This results in a vivacious little figure, full of temperament, so she obviously had to get a dramatic, expressive hairdo and some dangly ear rings to round things off.
Here’s the original rough design showing how the figure’s left arm is pivoted, with holes for the spring and the connecting rod to the head.
 Here’s the reality, after cutting the wooden egg in two and carving out hollows for the spring and the left arm to move. The right arm and legs are attached using 3 mm dowel into drilled holes.
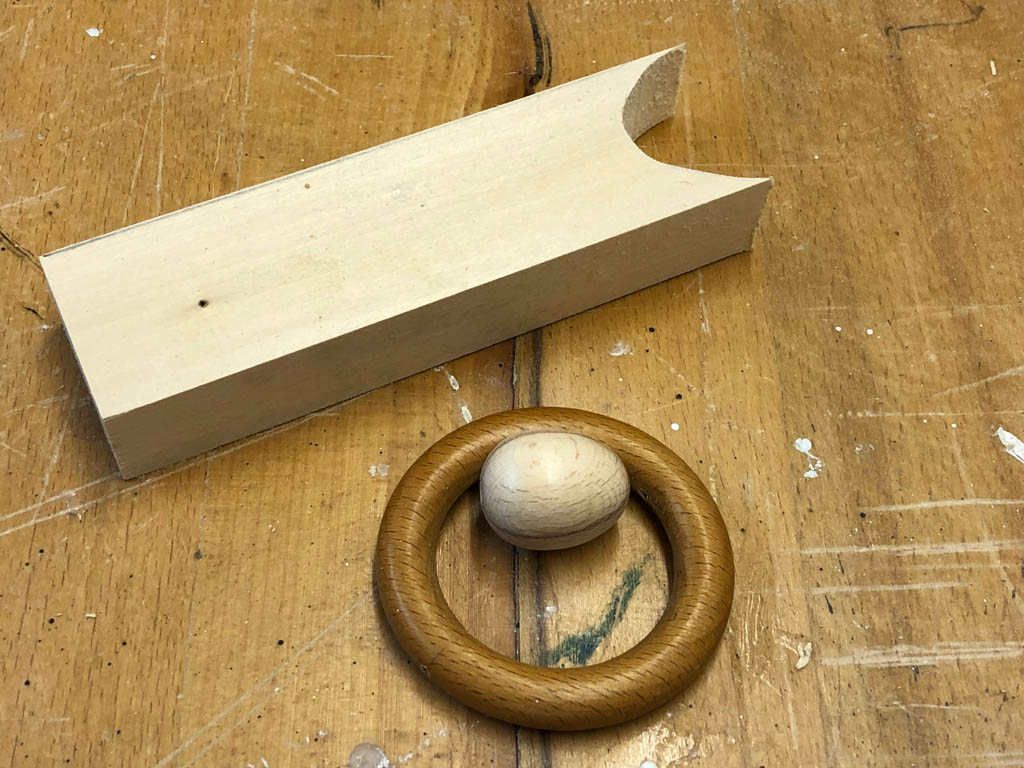
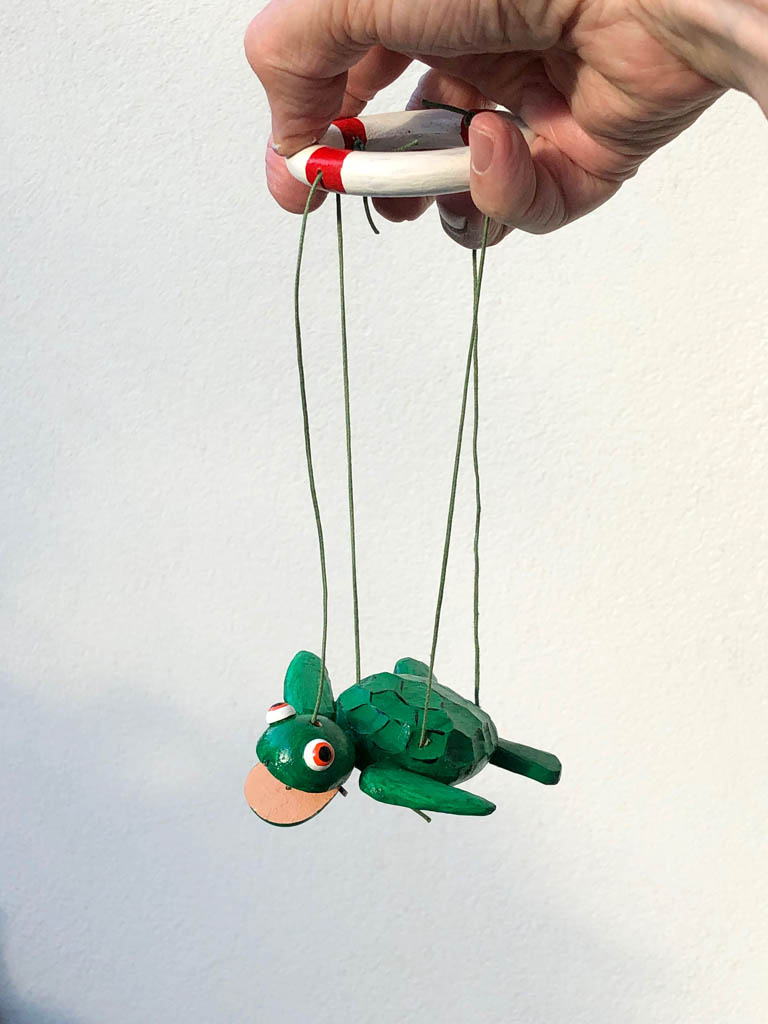
You need a piece of lime wood for the body and the fins, a beechwood egg for the head, and wooden ring as a controller to attach the strings. I had a few old wooden curtain rings lying about which was handy, otherwise craft shops often stock them. 2 small wooden hemispheres serve for the eyes and a piece of welding rod hinges the mouth.
First draw a turtle template on a piece of card
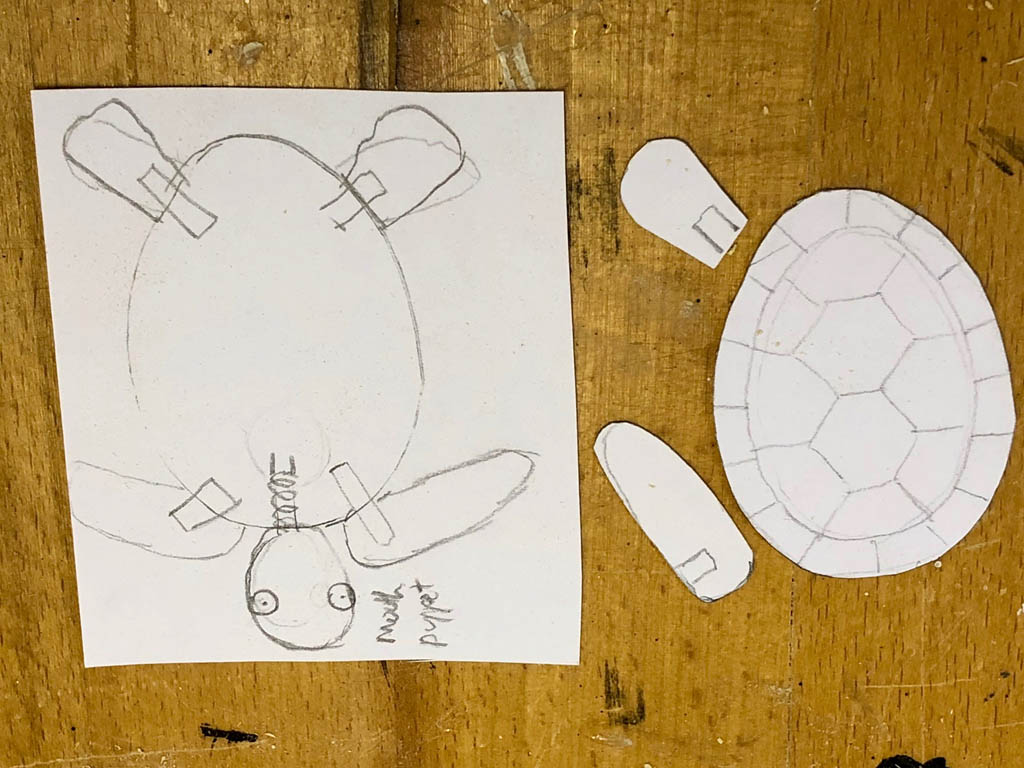
Use the templates to cut out the basic shapes and then curve them.
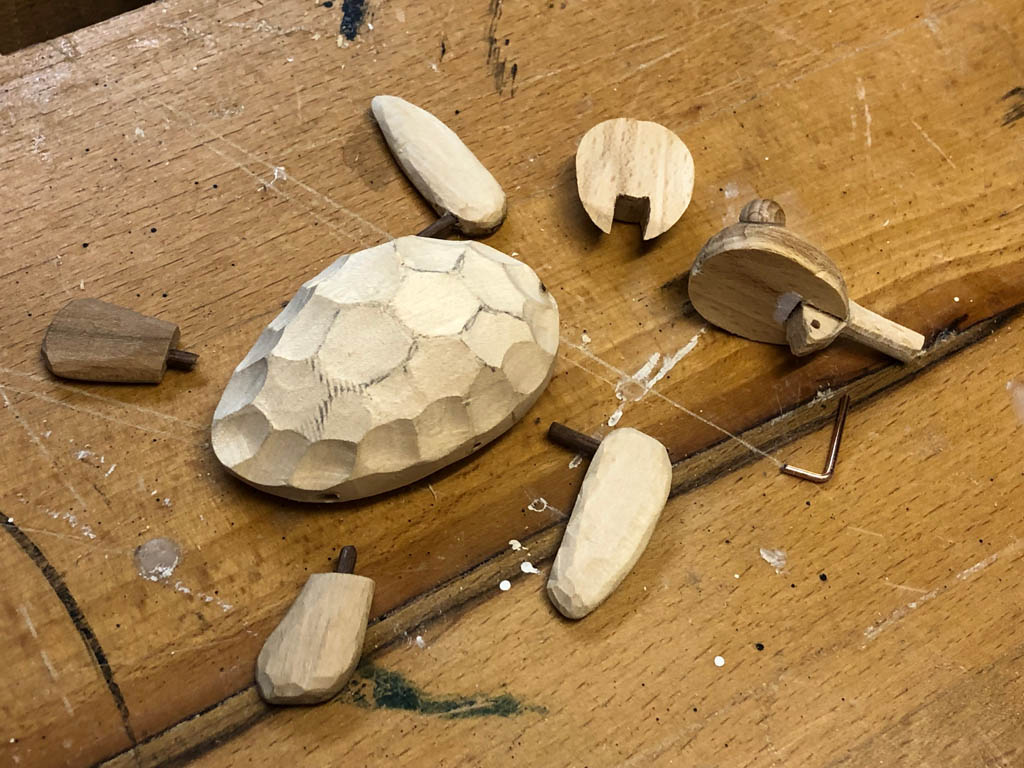
The head is made from the wooden egg, which you first have to cut into two pieces. You then need a notch in each piece to attach to the neck.
I made the neck from plywood. Glue it to the top of the head and sand the protruding stem to make it round.

The lower half of the head is hinged onto the neck piece.
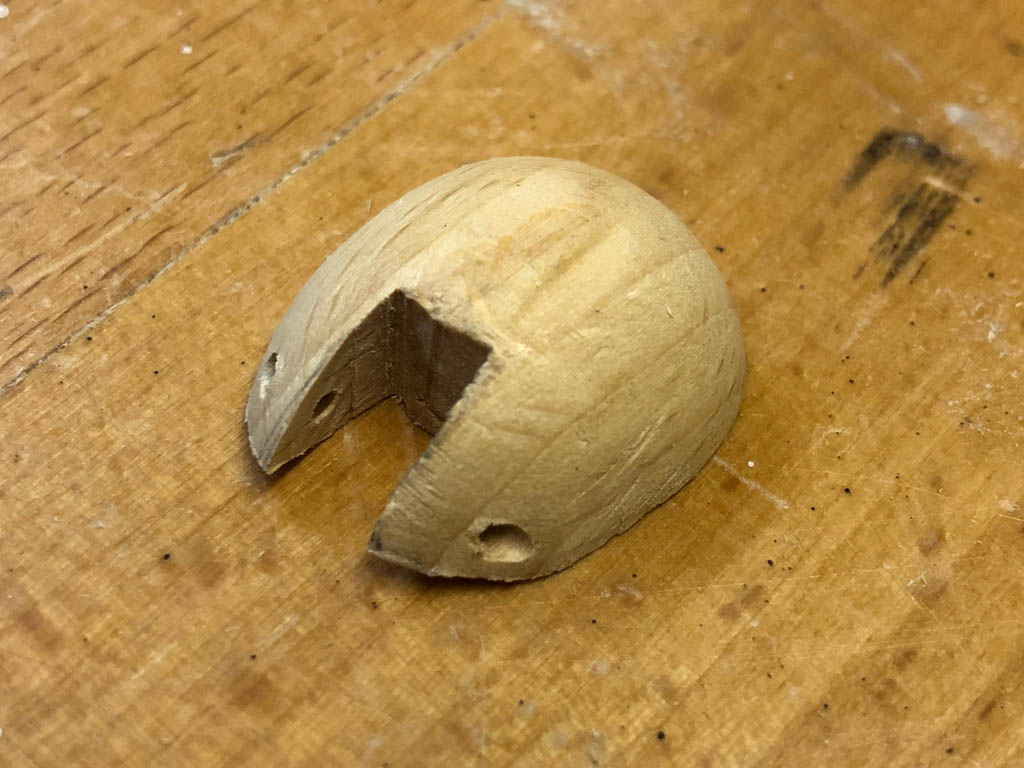
The plywood neckpiece makes the centre piece of the hinge and a piece of 1.6 mm welding rod is pushed through to make a nice loose hinge.
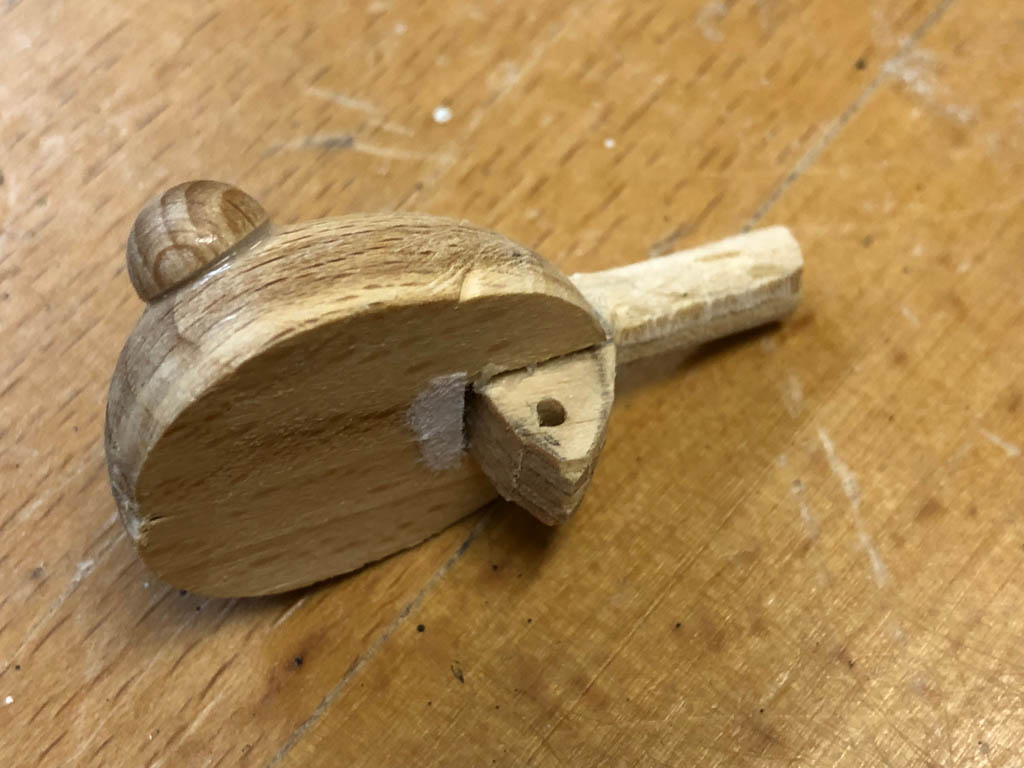
Drill holes to take the strings. The hole in the top of the head is larger so that the string moves easily without jamming. The hole through the jaw is smaller so that a simple knot will keep the string in place and not pull through the hole.
To add to the feeling of a stiff salty breeze I painted the ring like a ship’s life-saving ring. This makes the controller a visible part of the show, not something to be hidden high up in the darkness. Only four strings and the very simple controller reduce the risk of the terrifying tangle that sometimes ties up more complicated puppets.
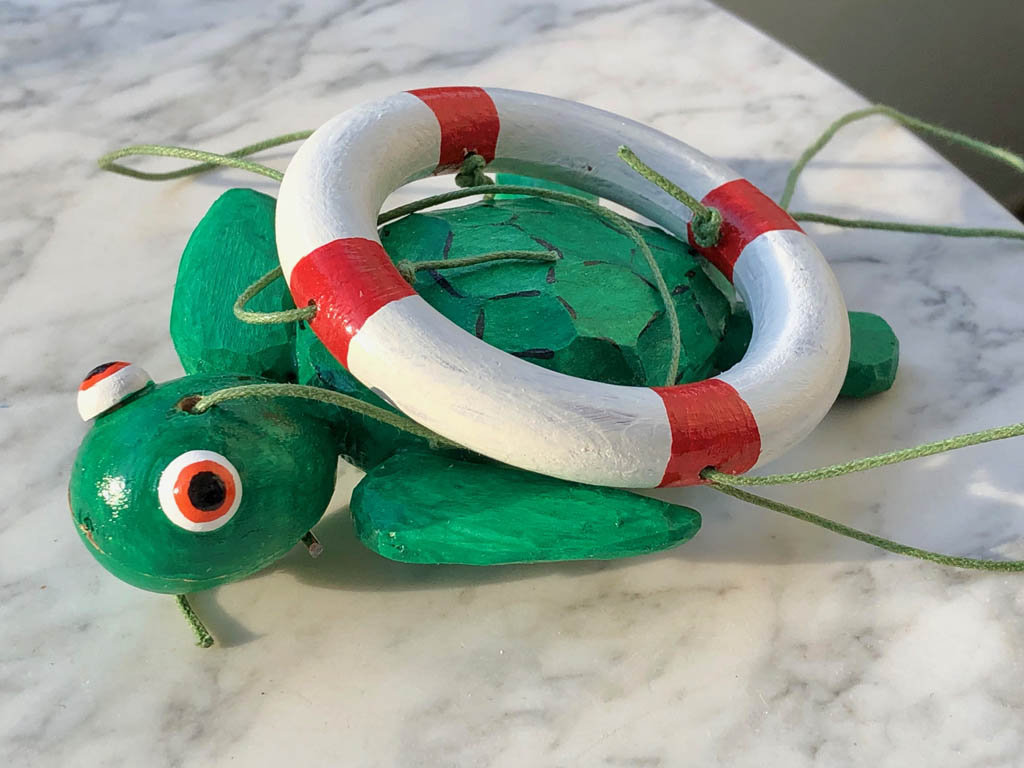
I left the jaw string slack so that the turtle’s mouth is usually open. If you then press the front string the mouth will then close, so that the turtle can talk.
The latest product from Berlin’s booming startup scene, a touch-sensitive smart chicken! An extremely low maintenance cockerel which operates on just the environmentally friendly pressure of one finger. No feed or batteries required and guaranteed free from electromagnetic emissions and all unpleasant odours.
What does this cock a doodle do? Eternally patient it pecks away at its state of the art miniature smartphone. Dreadful anti-avian discrimination by the developers mean that every attempt with his beak is bleak. With feathers but no fingers this bird of little brain will forever be barred from crowing onto the Internet, which is probably no bad thing.

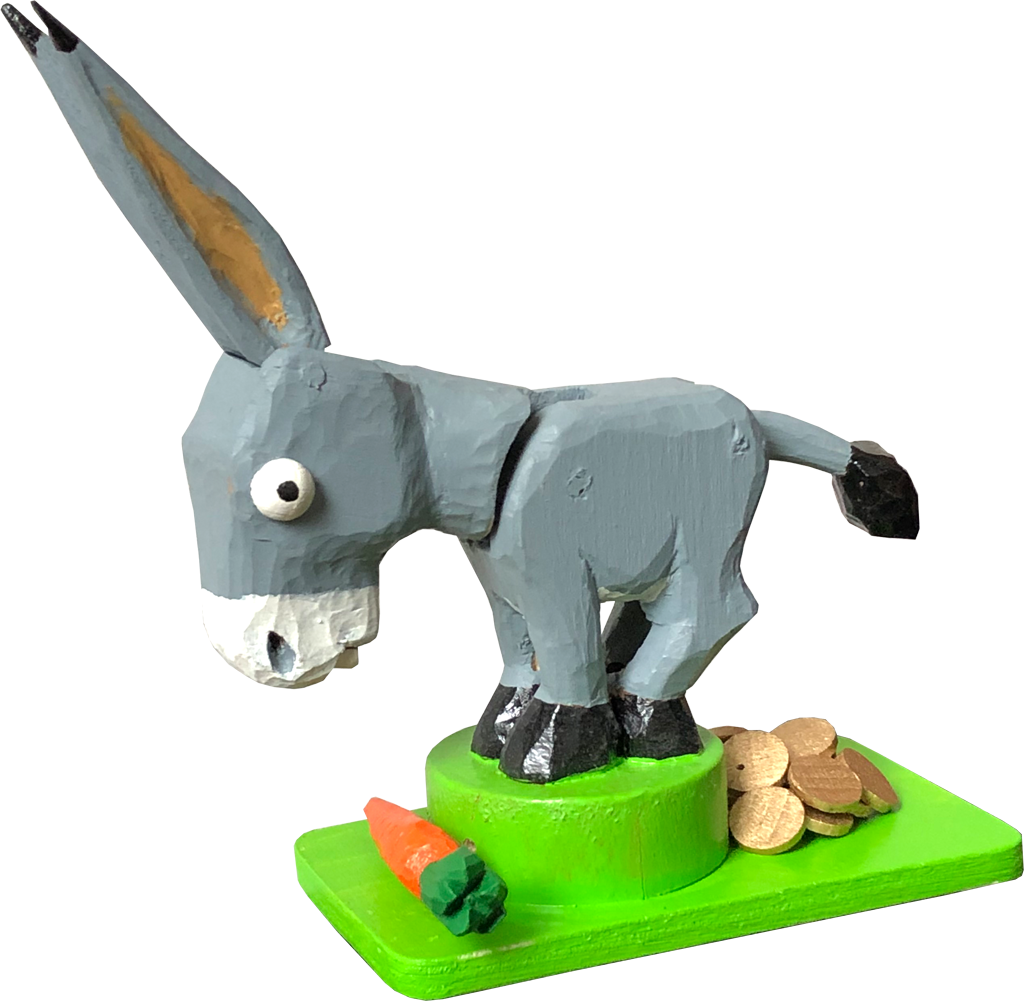
Goldesel plays a role in one of the European fairytales collected by the Brothers Grimm.
According to the fable, all you have to do is say “bricklebrit” and Goldesel’s droppings will turn to pure gold ducats!
This wooden version of that fabulous animal has its own magic. Touch its single carrot and Goldesel will lift its head in wonder and, delicately used, Goldesel will waggle one of its ears. That can’t compare with the 24 carats heaped at the other end, but if you can find the one special, magical ducat, Goldesel will respond by politely lifting his tail. Unfortunately, so far despite lifting its tail “bricklebrit” doesn’t seem to have the desired effect with my limewood version. Maybe it’s my pronunciation, but I haven’t given up hope yet.
The latest product from Berlin’s booming startup scene, a touch-sensitive smart chicken! An extremely low maintenance cockerel which operates on just the environmentally friendly pressure of one finger. No feed or batteries required and guaranteed free from electromagnetic emissions and all unpleasant odours.
What does this cock a doodle do? Eternally patient it pecks away at its state of the art miniature smartphone. Dreadful anti-avian discrimination by the developers mean that every attempt with his beak is bleak. With feathers but no fingers this bird of little brain will forever be barred from crowing onto the Internet, which is probably no bad thing.
I was inspired by a number of clothes peg automata, starting with a beautiful bird by the amazing Martin Lhotak (which you can see here https://www.youtube.com/watch?v=mkBWAJ83Yv0 ). It’s quite a simple mechanism where squeezing against a spring causes two parts to move relative to one another. Clothes pegs are fine if you want to clip your creation to something, but are not so good if you want it to stand on a surface. I went for an egg shape as it’s a chicken. In this case the chicken came first and then the eggs!
Draw a chicken without any legs and then cut out that shape on a piece of card. Draw an egg, or pinch an egg from hyperspace if you are geometrically challenged like me. Cut it out on a piece of card. These are the templates to mark a piece of lime wood for the body and two pieces of thin plywood for the egg-shaped base.
Scroll cut the body
Scroll cut two egg shapes in thin plywood.
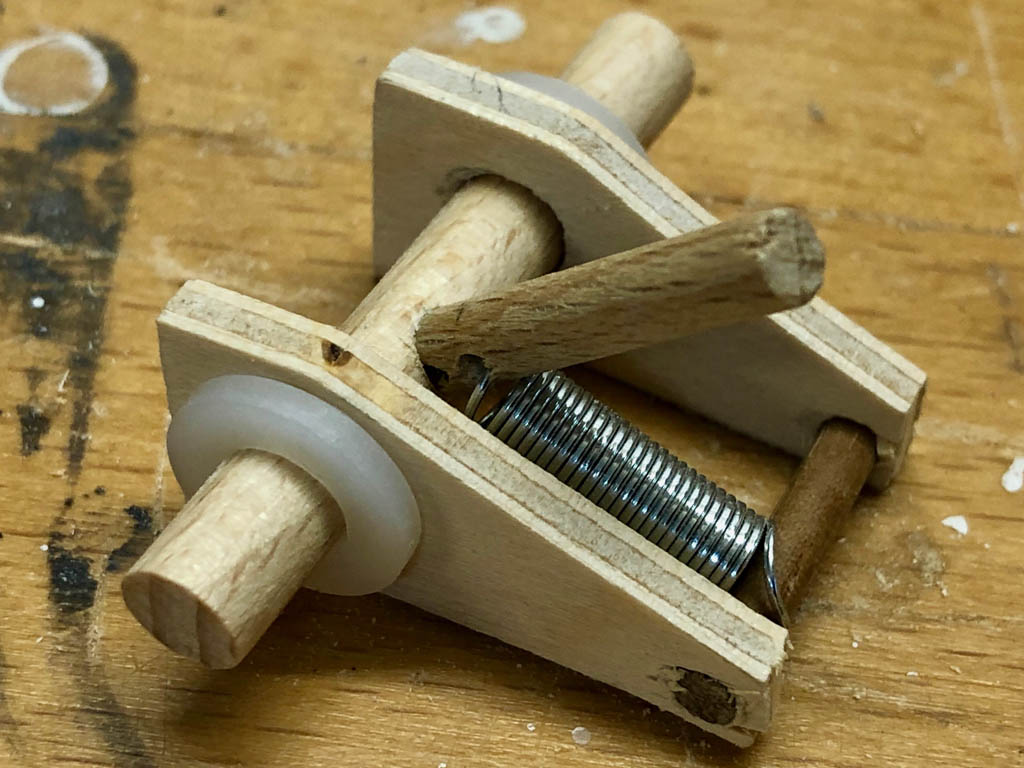
Make a wooden hinge to go towards the fat end of the eggs, located between the two eggs. This is three bits of roughly 10 mm x 10 mm strip with a hole drilled through the middle to take a piece of dowel. I added a couple of plastic washers which are probably not necessary as the rotation of the hinge is minimal and friction is not too important. You will however have to round the correct corners of all 3 pieces to allow enough rotation to get the cockerel pecking properly.
Carve the body to make it look like a cockerel. I glued on small ready-made hemispheres for the eyes for a nice popeye look.
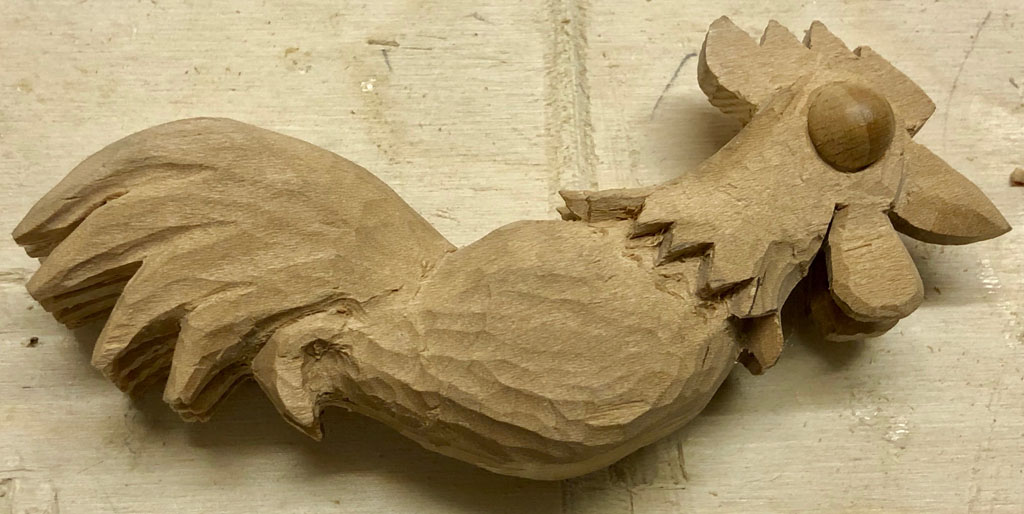
Make two feet. Note that the chicken’s left foot is a tight fit for its brass leg and its right foot allows its brass leg to move freely.
The holes in the side of the body are at the same height but the hole in the right side is about 5 mm further back. This offset means that when the right leg is pushed up relative to the left leg, it makes the body tilt forward and our cockerel starts pecking away. Between the two eggs, the right leg is fixed to the bottom egg.
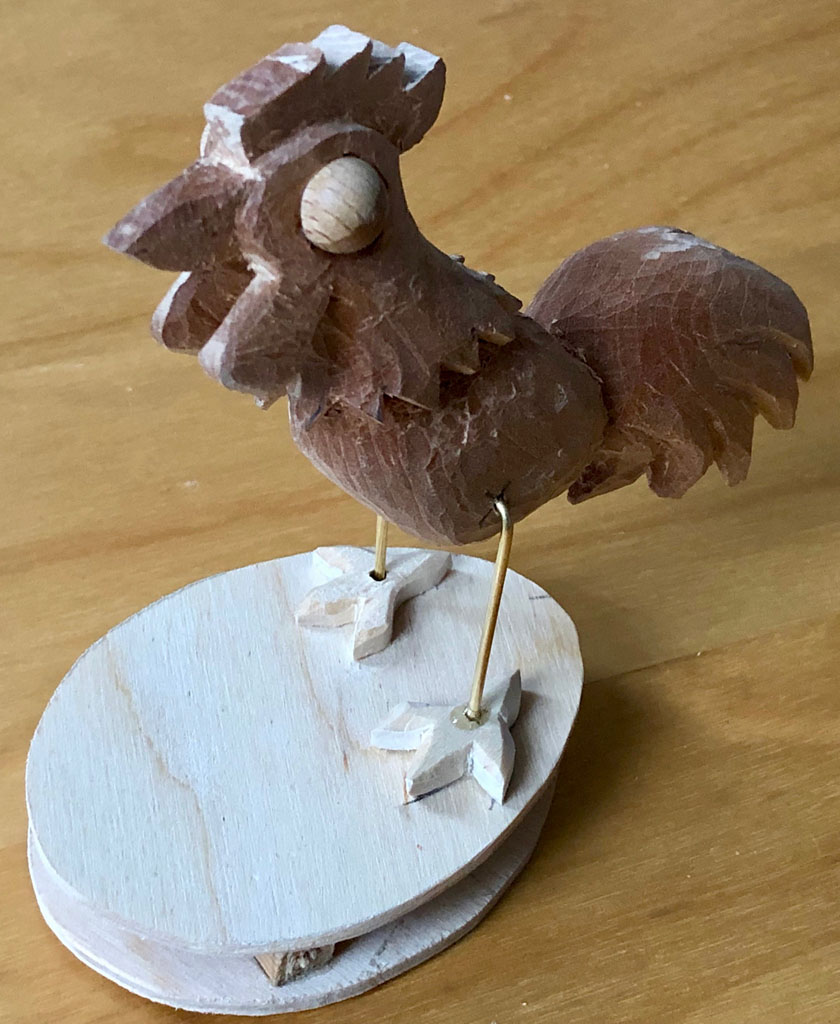
A spiral spring between the eggs pushes them apart and keeps the chicken upright.
As you can see, the spring pushed the eggs a bit too far apart, so I glued in another piece of 10 mm x 10 mm (not shown) in front of the hinge to correct that.
A very small piece of plywood serves as the smartphone. As it was too small for me to paint, I printed out a small image of a phone and glued it on.
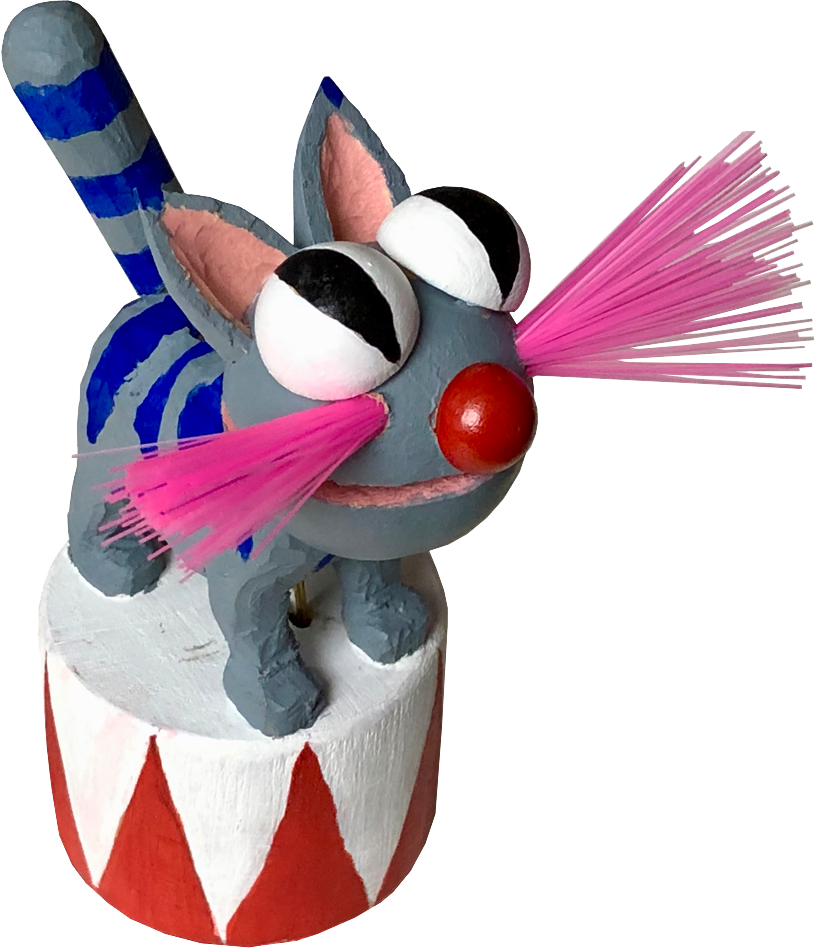
May I present to you a fantastically ferocious feline who can be persuaded to miaow on cue and can even wag her superior striped tail. Recently returned from an amazing tour with Kim’s Kabarett, she is eminently suitable for the smallest of lion tamers. I give you Magnificent Moggie the Circus Cat!
(Youtube link to the video is https://www.youtube.com/watch?v=eYXjcz8zUH4)
 What was the brief?
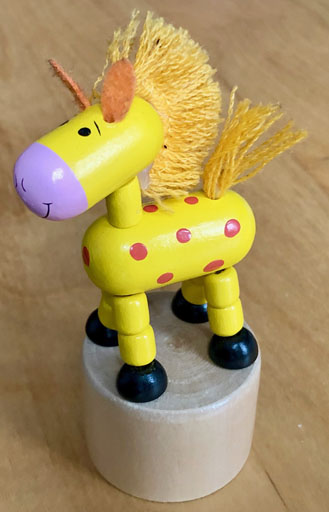
Thumb push puppets are classic toys which come in hundreds of variations, but they all seem to share the idea of something collapsing when you push the base in. Horses like this one are quite popular, when you push the base, it first lowers its head and when you push harder it flops completely down. Wooden toys like this usually use turned parts to keep the price down.
I thought why not make a thumb puppet which does something else besides flopping and decided on a cat. To give a reason for the round base I thought she could be a circus cat, waiting for her tamer’s command. Push the front of the base and it opens its mouth, push the back and its tail moves (flops). So what makes a cat a cat? Those distinctive cat’s eyes with the vertical, ellipse-shaped slits? Whiskers? Big ears, a bushy tail and stripes? Well that was my recipe for cattiness.
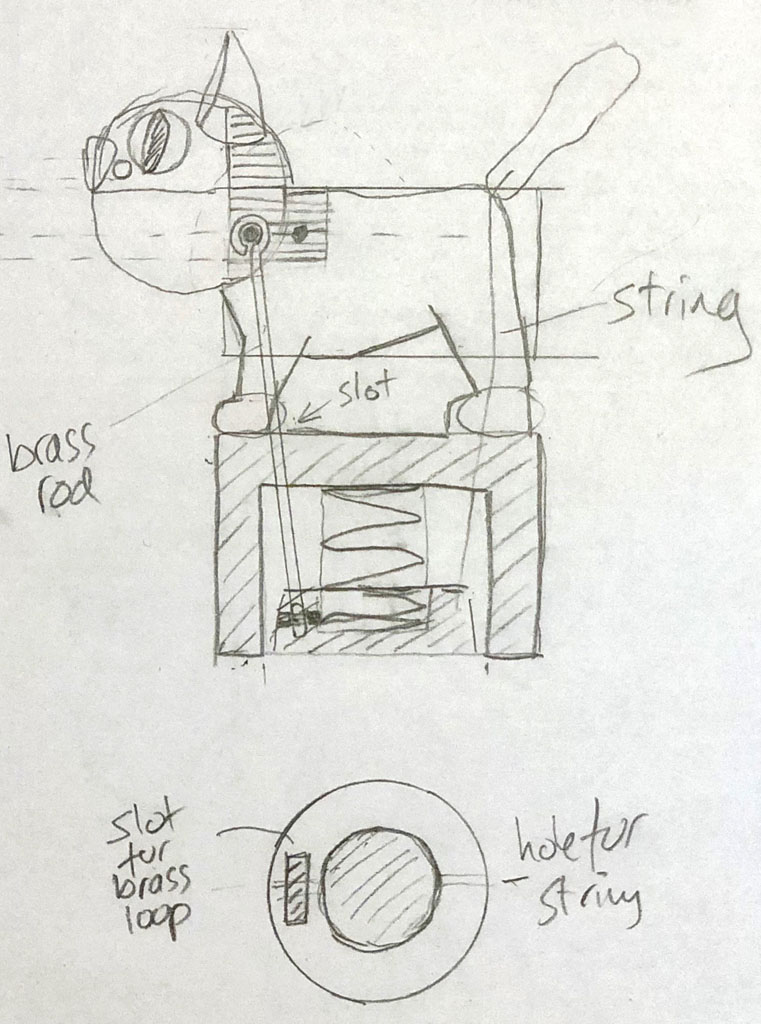
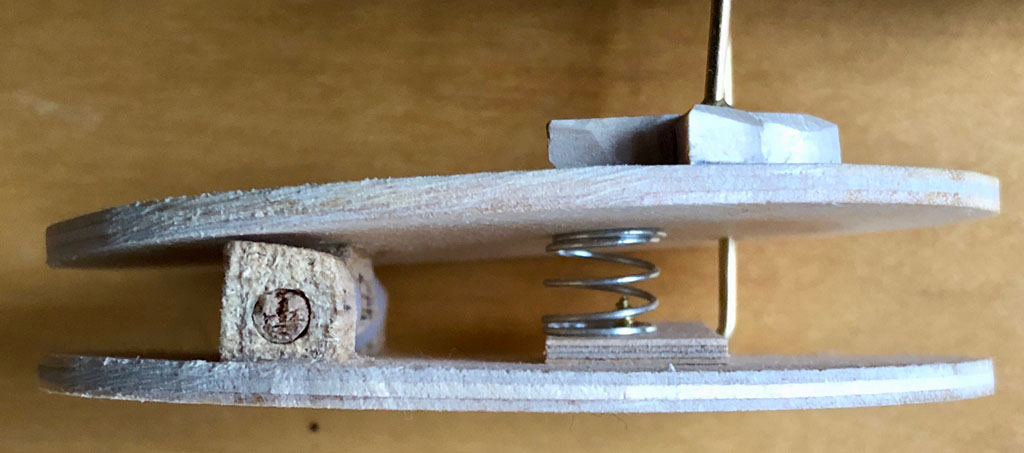
Here’s a rough sketch. The single spiral spring in the cylindrical base tries to expand, applying downward force
– keeping the tail proudly erect, via a piece of fishing line, which shouldn’t break with such a small fish
– keeping the cat’s mouth closed, via a slim brass rod
Press the base up and the tail will slacken and/or the cat’s mouth will open. The operator is responsible for the miaow.
I went for a spherical head and huge hemispherical eyes and a small nose made from beechwood. The body, tail and ears are made from carved lime wood as I won’t be charging anyone for my time to do that little bit of carving.
I reused an existing wooden base which had originally been turned.
Once the rough design was ready, this fairly simple toy only took a few hours over a weekend to make, with a bit of fiddling about for the final assembly.
Putting it all together was tricky and required quite a bit of patience as I could only bend the top loop on the push rod once it had been fed through the body. With hindsight, I should have cut slots which were long enough to let the loop through. That would not have detracted from the general impression. That’s life innit? When you only make one of anything, you never get it quite right.
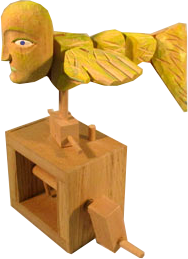
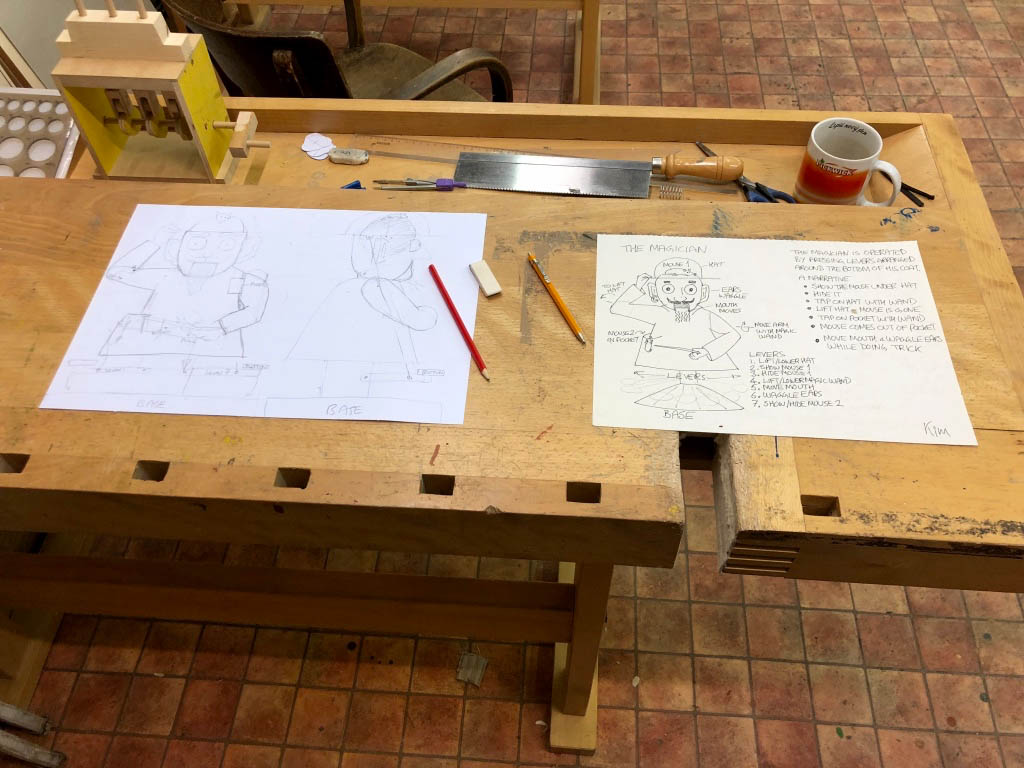
Hello, I am The Marvellous Mechanical Mouse Magician
Welcome to my modest show!

With my astrological buttons, you too can work magic! Press the digits to show off your prestidigitation.
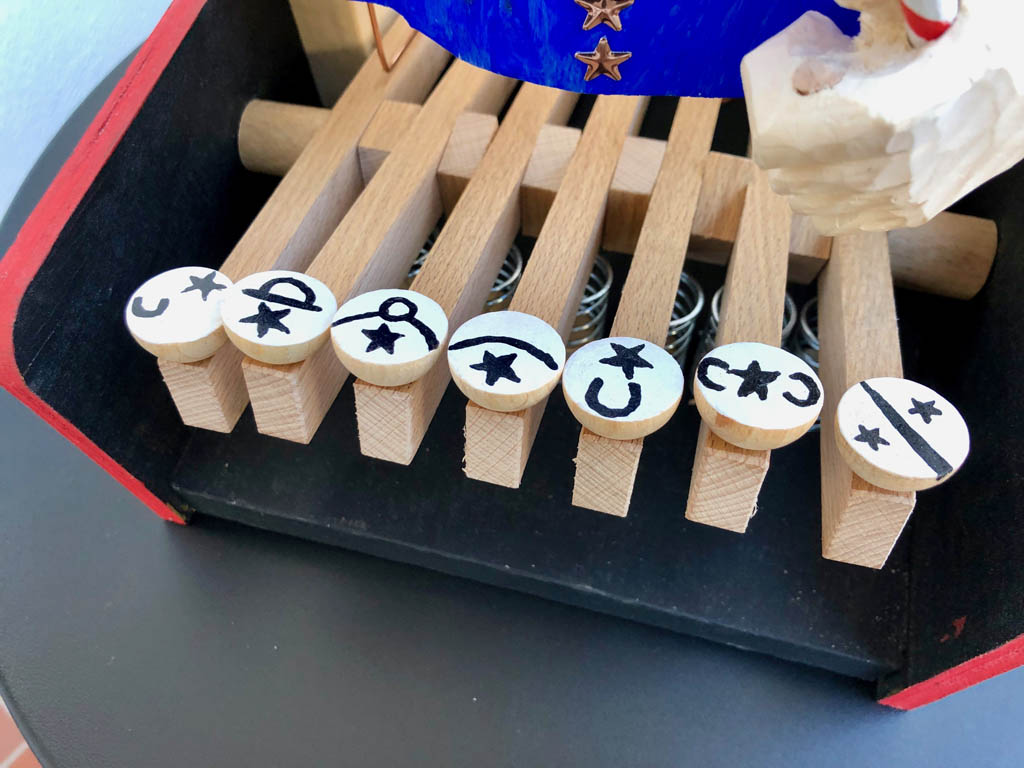
First you need to summon my assistant Humphrey.
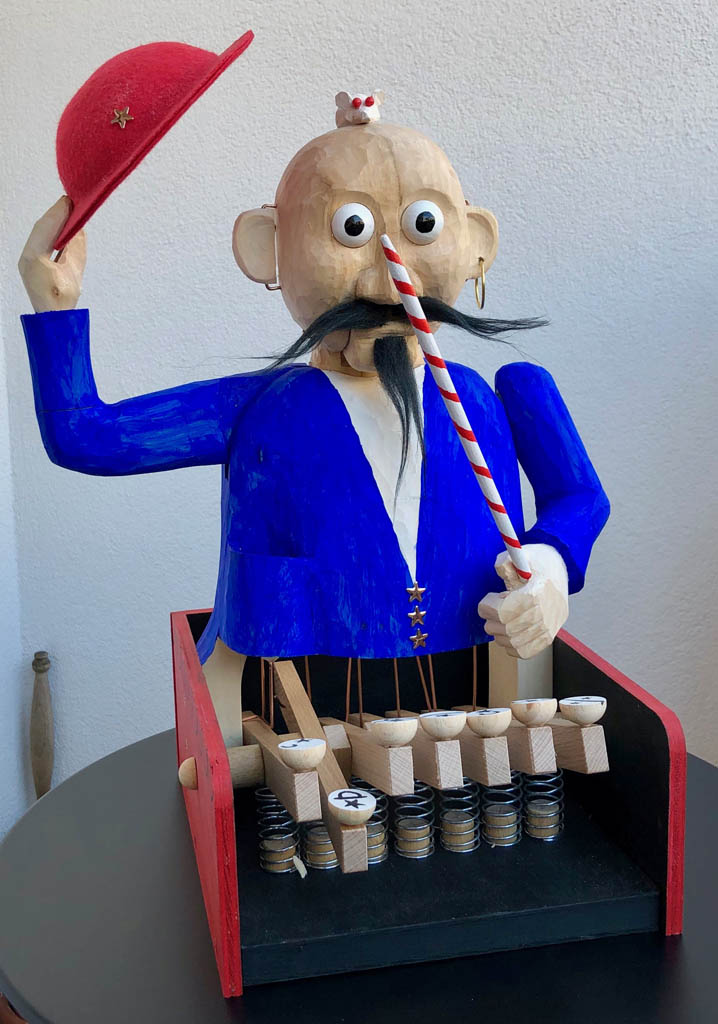
Then lower my magical hat carefully over him and tap it three times with the magic wand.
If he doesn’t disappear, try waggling my ears to shake my magic earring.
Once he has disappeared, say the magic phrase “Maus, Maus, komm heraus” and be amazed at the stupendous power of your own magic.
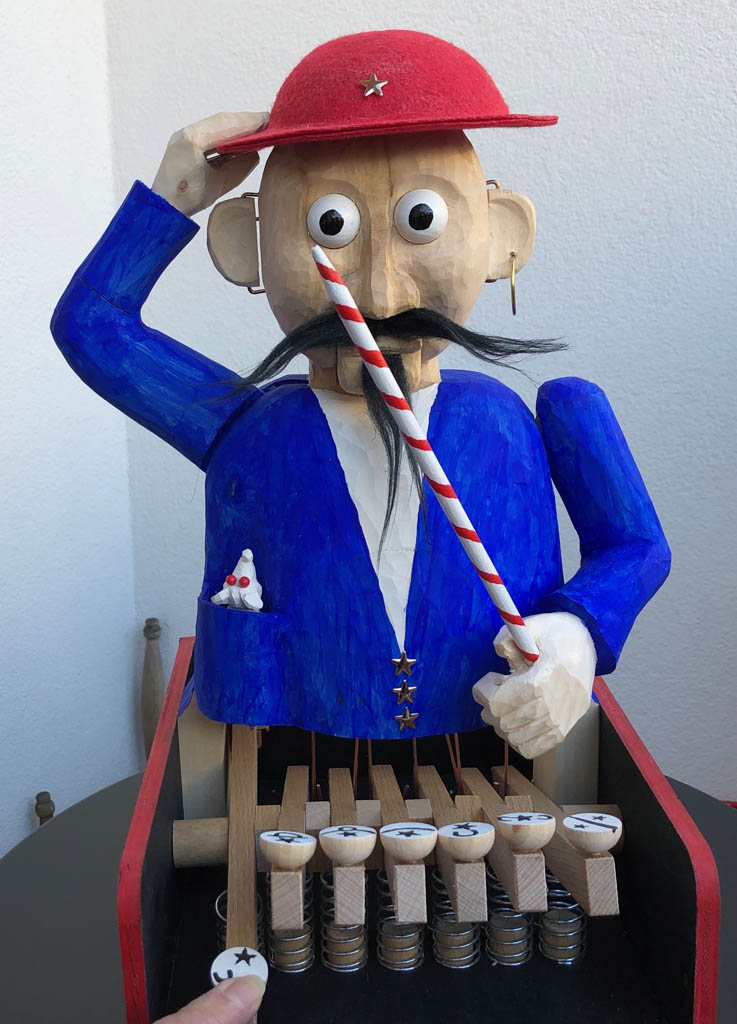
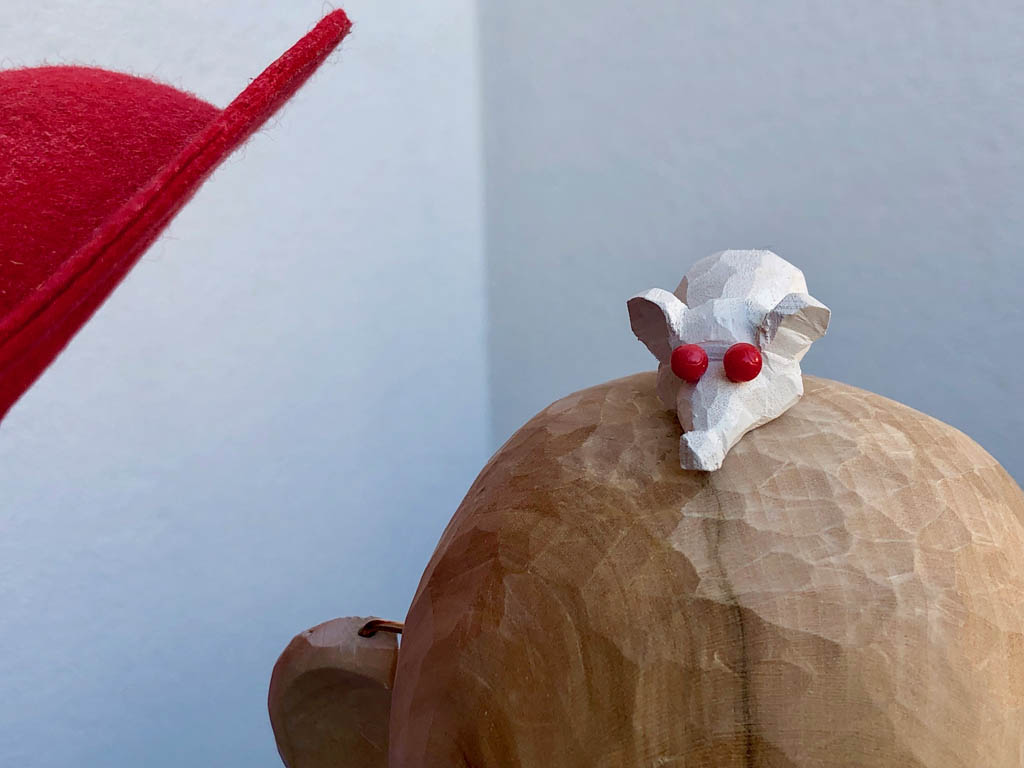
Take great care however, not to try this when the moon is full or you may find yourself transformed into a small white mouse with hypnotic red eyes.
The secret of the trick
All shall now be revealed
Be astounded about the wondrous, never-ending miracles of the universe
Children, ask your parents’ permission before looking any closer
Thanks to all of the woodworking wizards of Puppets in Prague who made me into the magician I am today!
09:30 – 17:30 Final assembly.
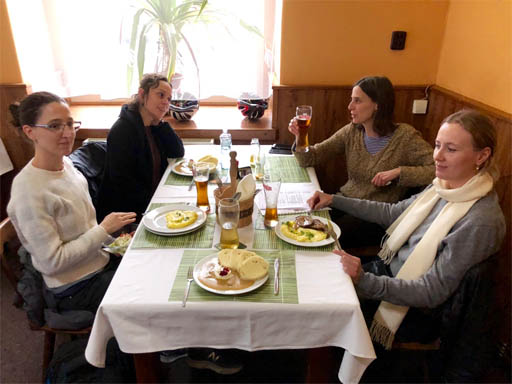
Dinner at Leah and Mirek’s
A new base in the right size, with holes in the right place.
New levers in nice wood.
Take the hat out of its mould and iron the rim flat.
Take the glued together blocked up body which dried overnight and trim it roughly to shape.
Try the head and body together.
Add the jaw.
Paint the assembled base.

Glue the head to the body and screw it into the base and start fitting the mechanisms as used in the maquette. Zdar is a real star!
Elena’s mousemousemouse freshly painted.
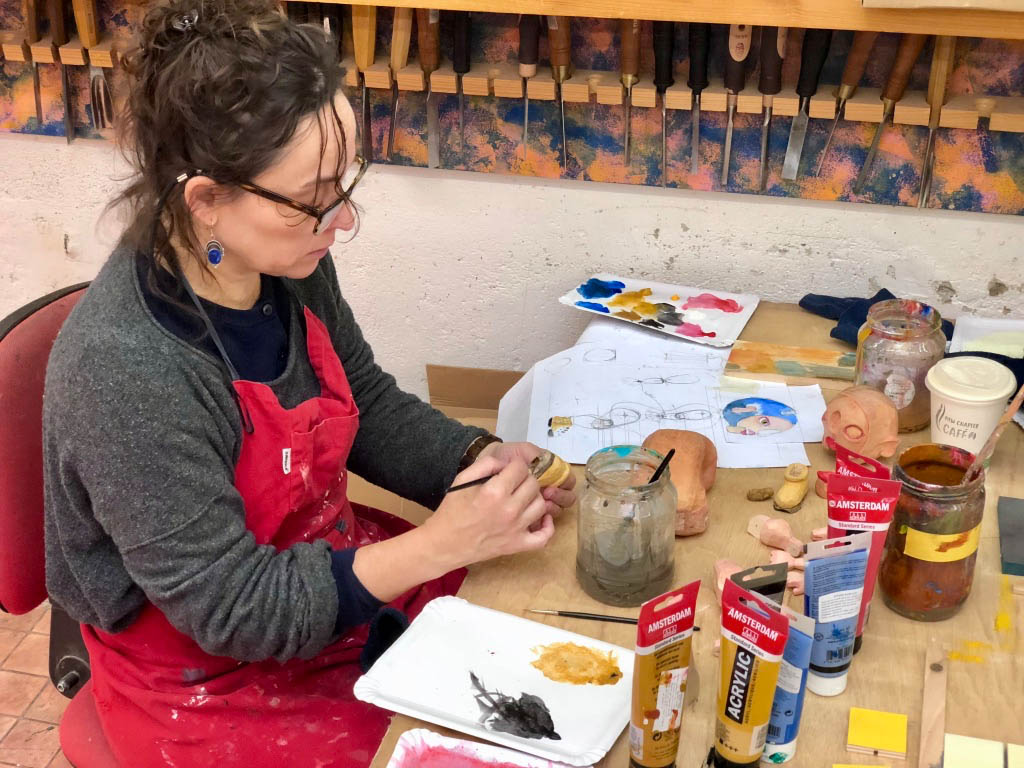
Flavia painting.
Earthquake mechanism.
Whale in sight.
09:30 – 18:00 Project realization, cutting wood, carving, painting. Final assembly.
Cutting the left arm on the bandsaw from the marquette.
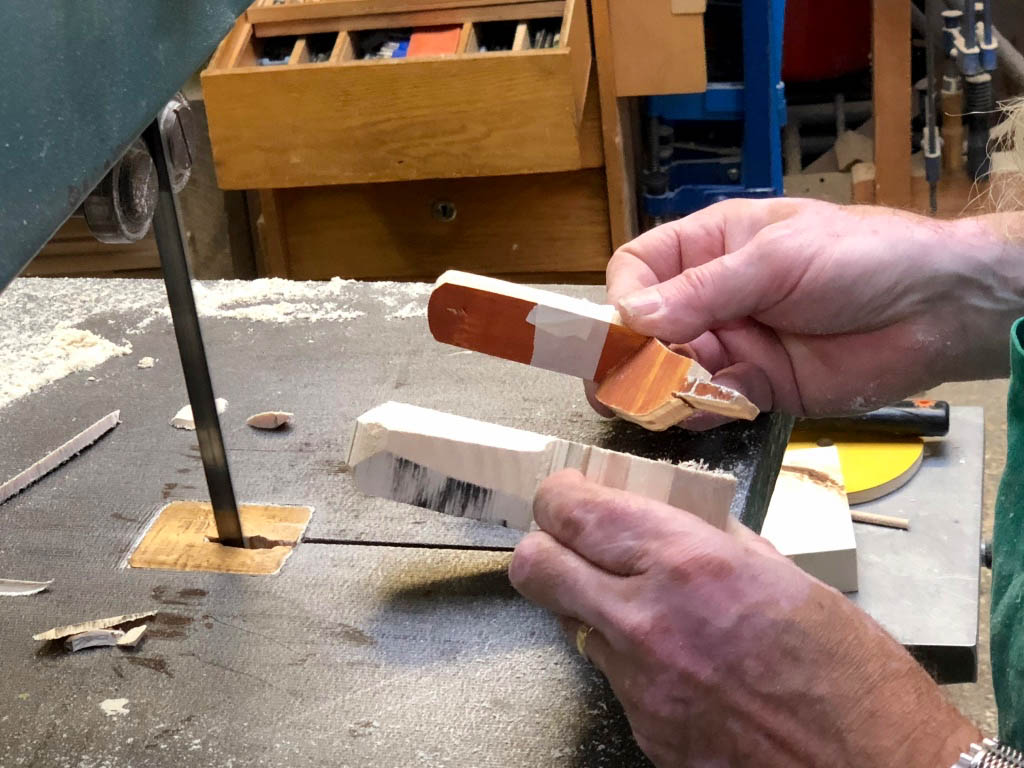
As finished from the bandsaw.
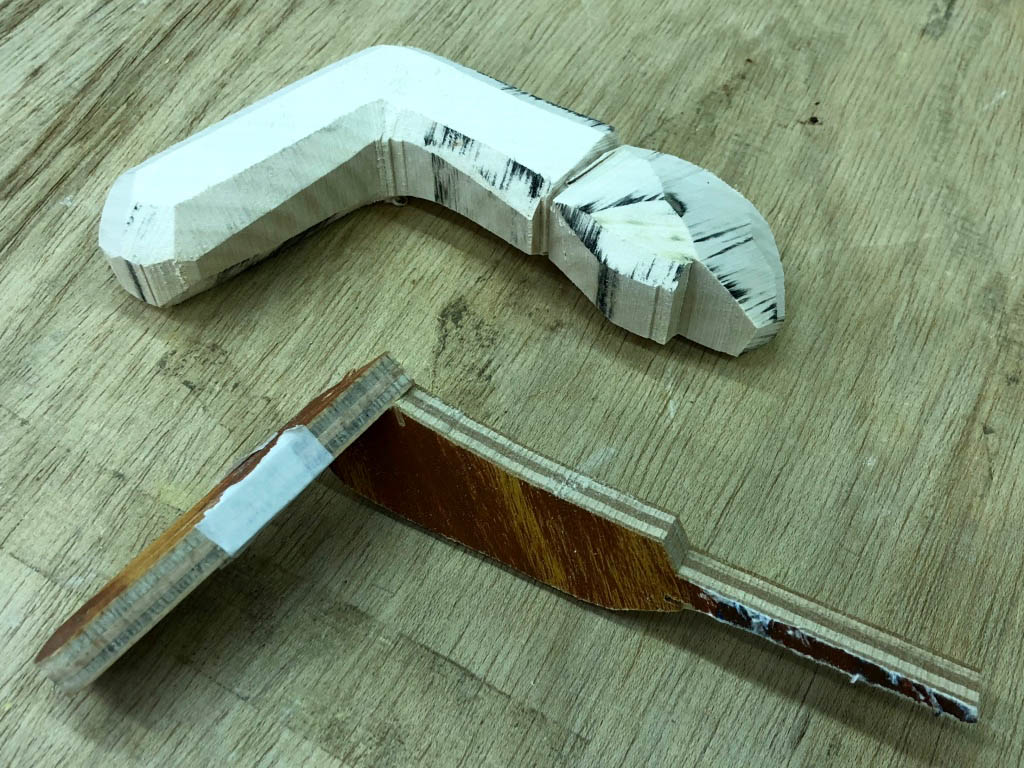
Same for the right arm.
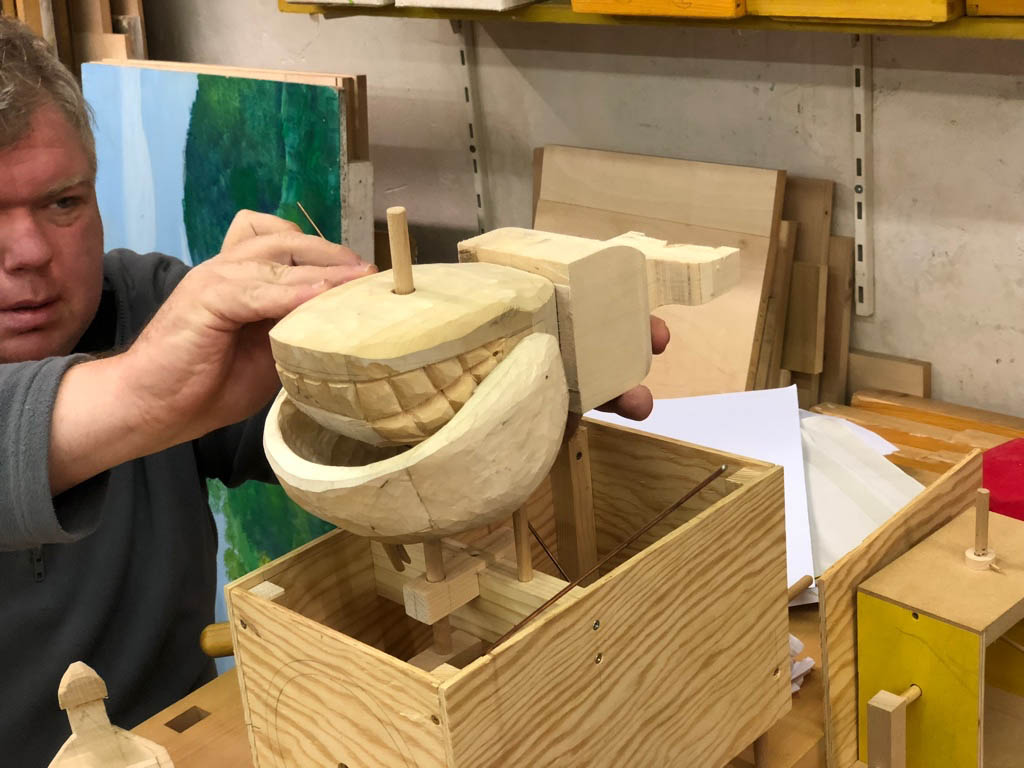
The head’s a bit more complicated…
After carving.
Zdar making a hat from two layers of felt soaked in glue.
Trying the ears for size.

Earthquake 1
Earthquake 2
09:30 – 17:30 Project realization, cutting wood, carving


Day off, out of the workshop.
Trip to Nativity museum in Trebechovice (GoogleMaps link) and to visit Renate and Martin Lhotak.
 Flavia & I ate a traditional Czech specialty, svíčková na smetaně in Restaurace na Roli.
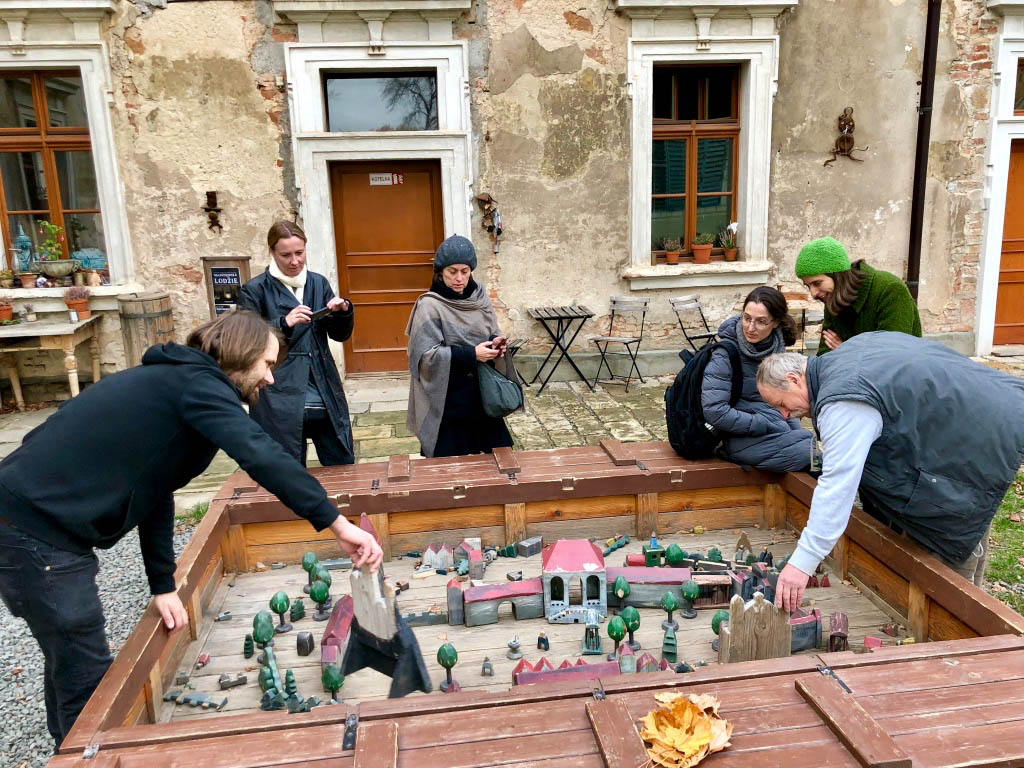
Town planning for children
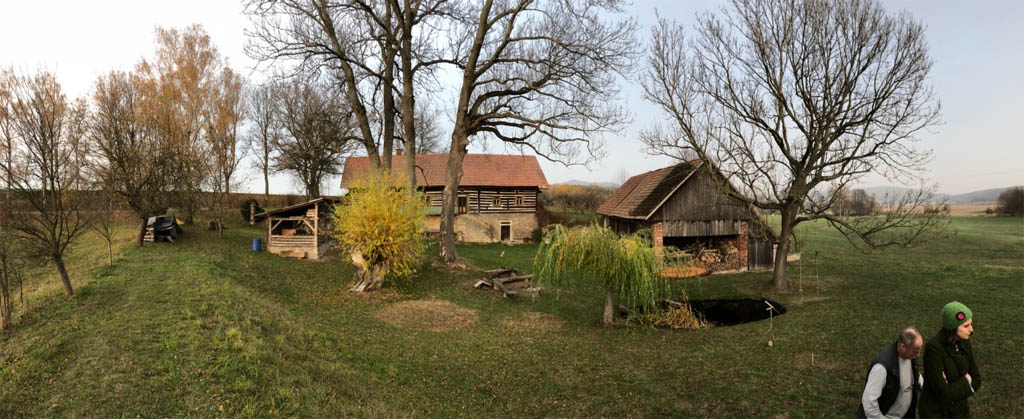
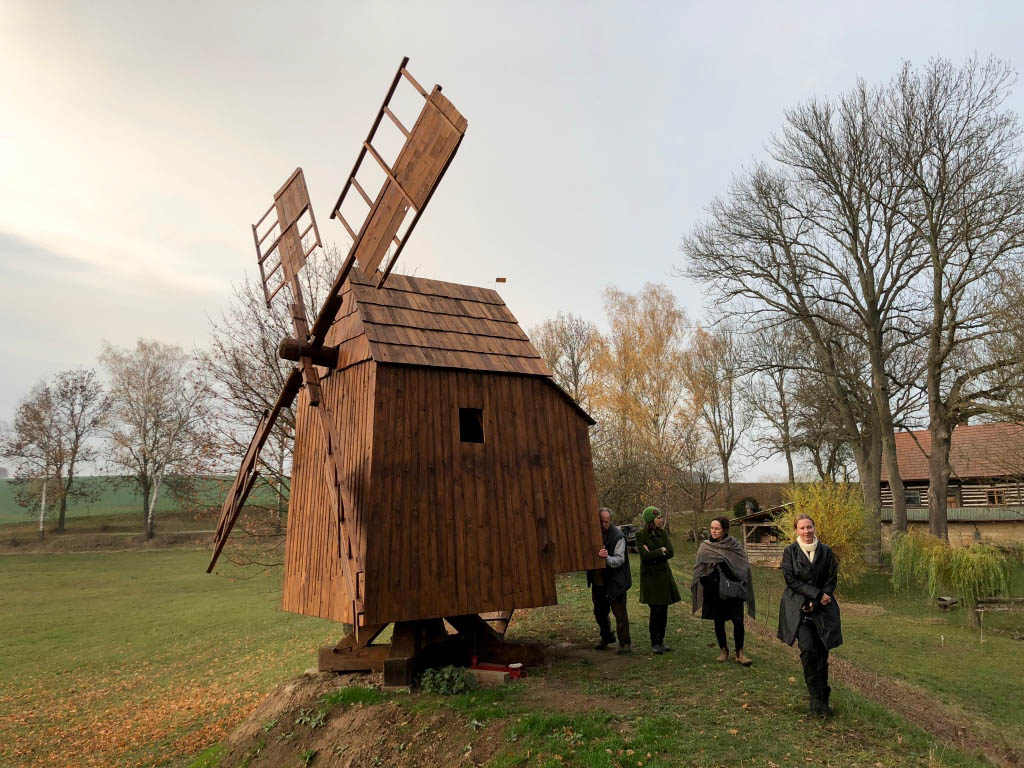
Renata was really welcoming and cooked a wonderful meal for us all!
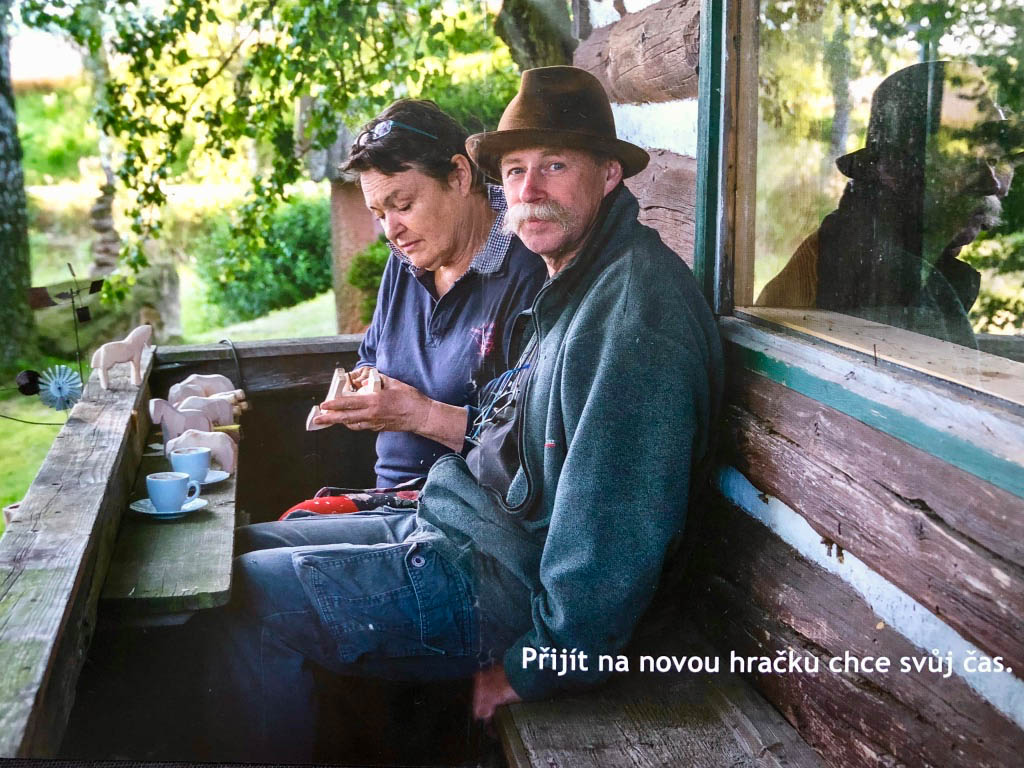
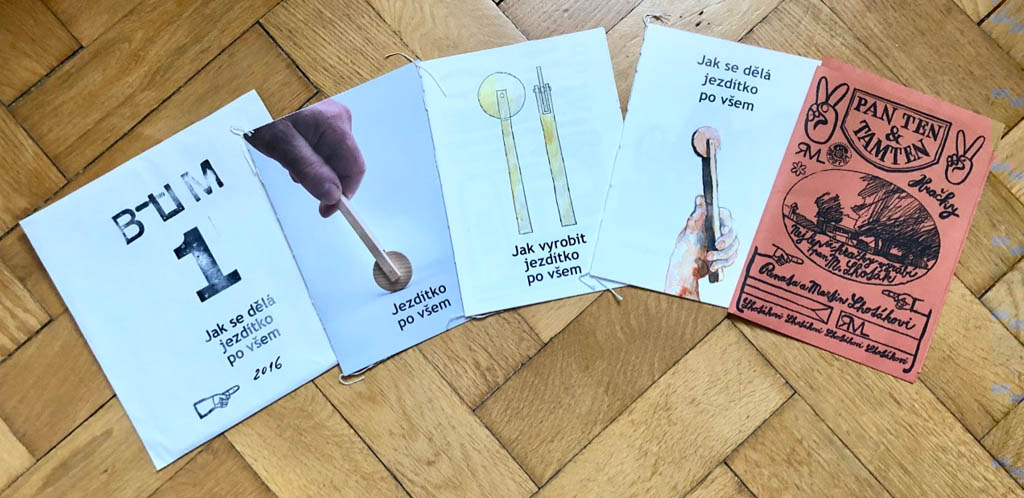
Clothes peg bird
And Renata even gave us instructions on how to make one.
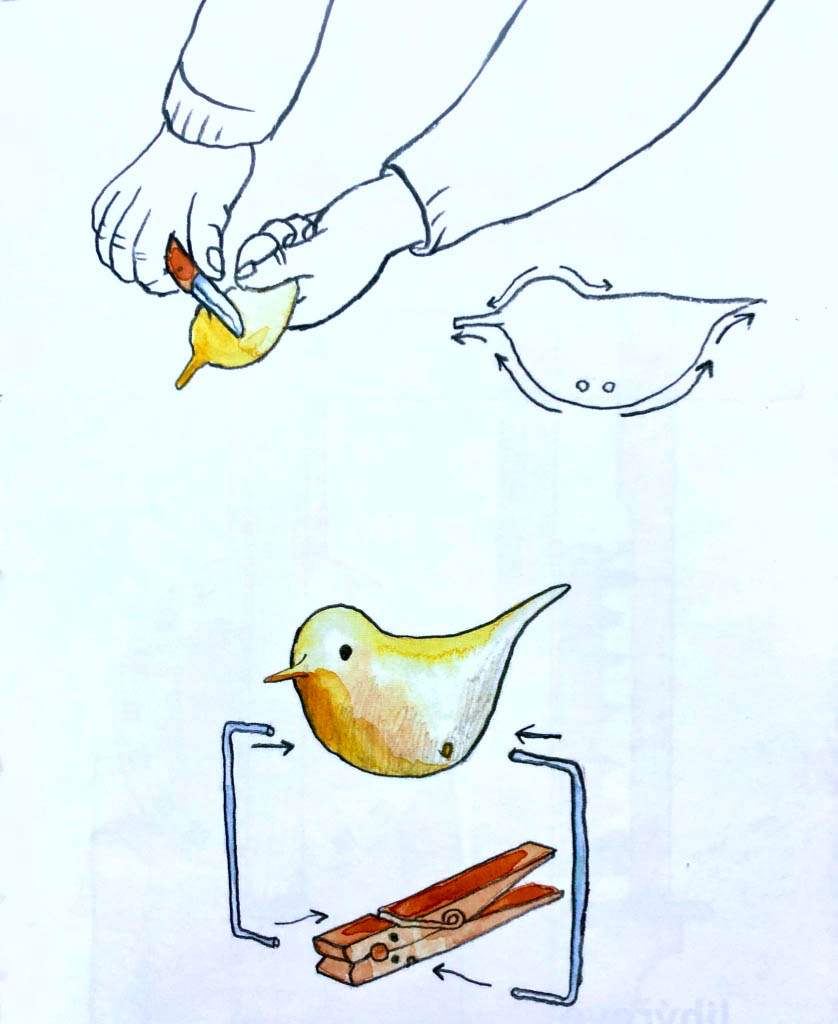
In a brochure made by one of Martin’s students.
Ballerina on horseback driven by the heat of cooking
Martin turning a pear spinner for each of his guests, pedal-powered!

The secrets in Martin’s magical workshop. In German this is called a “Hui Maschine“, and according to Wikipedia in English it’s called a Gee haw whammy diddle
09:30 – 17:30 Project realization, cutting wood, carving.
Demo: Robots.
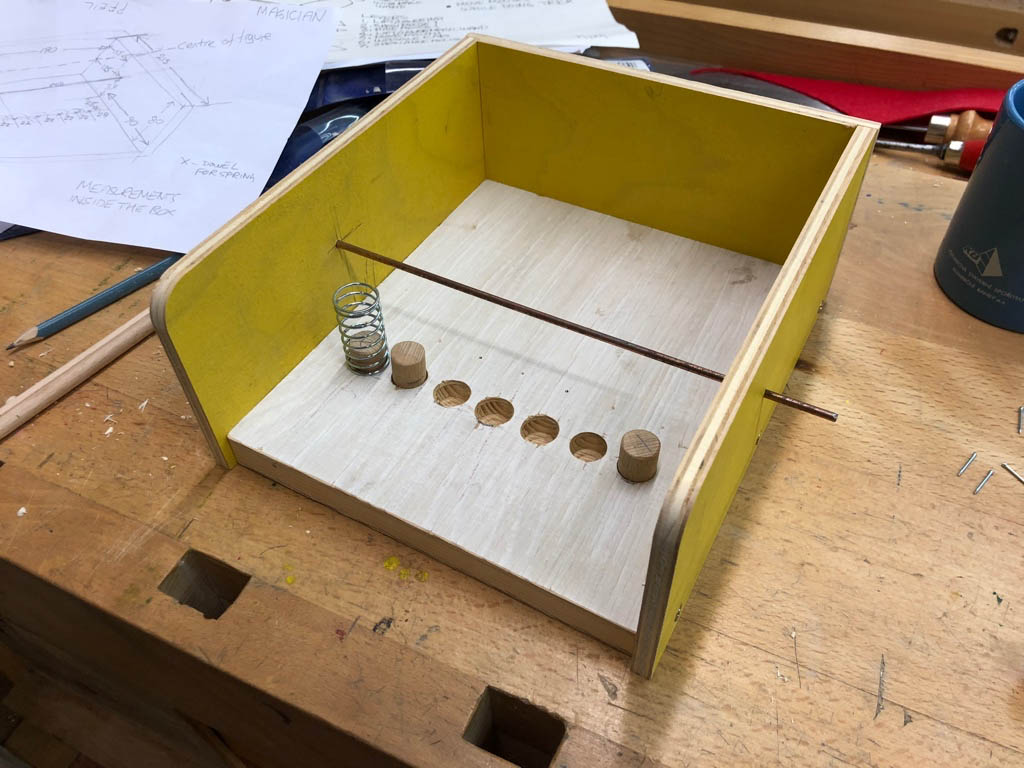
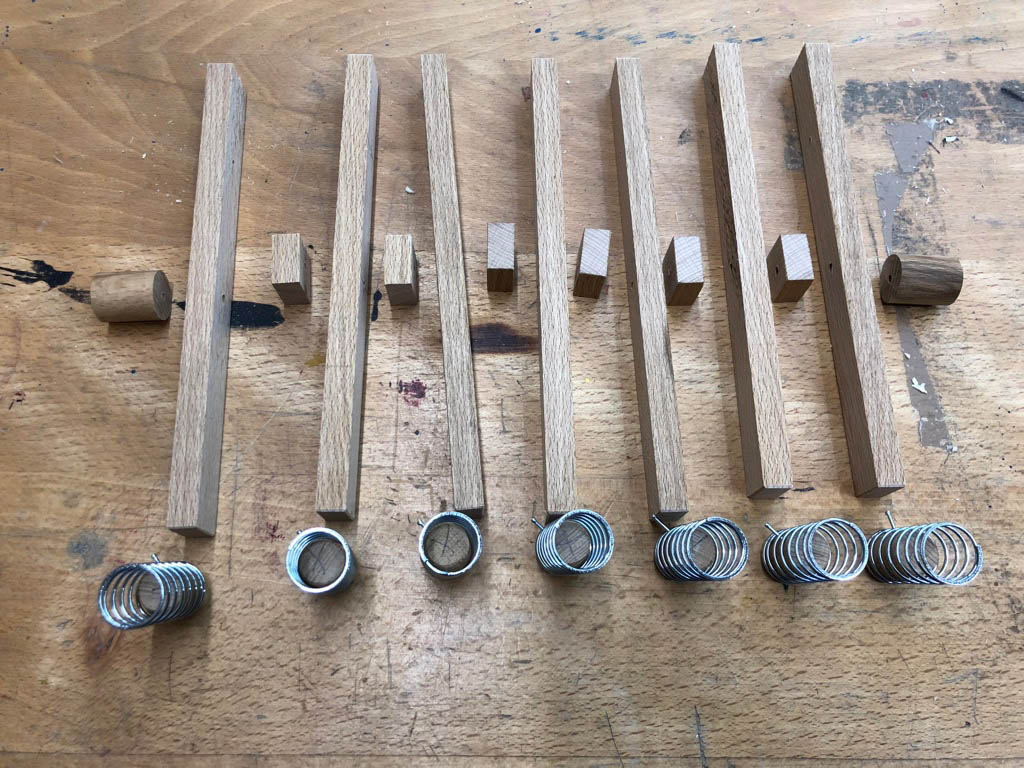
Zdar building a base box to give Kim a quick start with his magician maquette.
The basic magician maquette, with seven levers and a simple outline of the figure.
Cut out parts in card, if they are OK, cut them in plywood.
Two mechanisms already proven on the maquette, he can politely raise his hat and wave his magic wand..
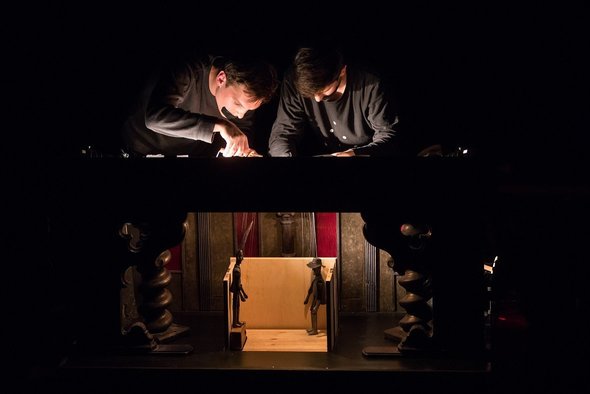
With a little help from your friends.
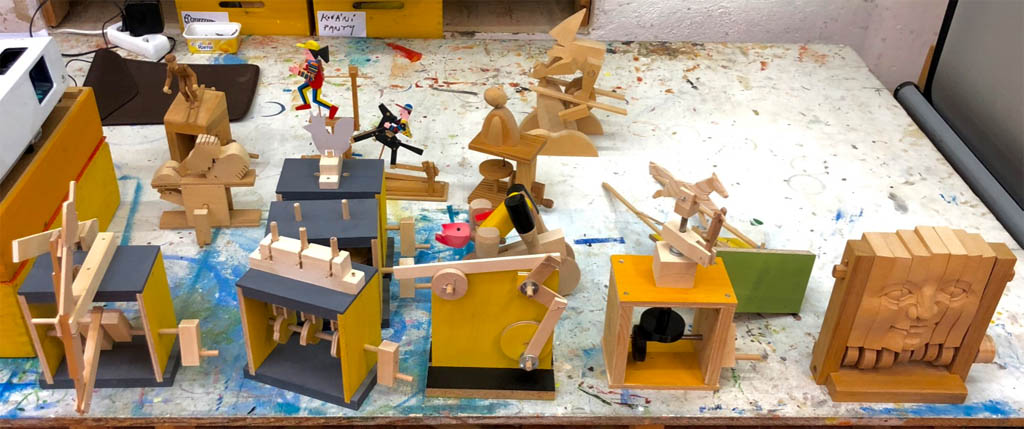
Noa’s maquette.
Flavia’s maquette.
Eeek, a mouse in the workshop!
Some electromechanical movement to end the day with something different.
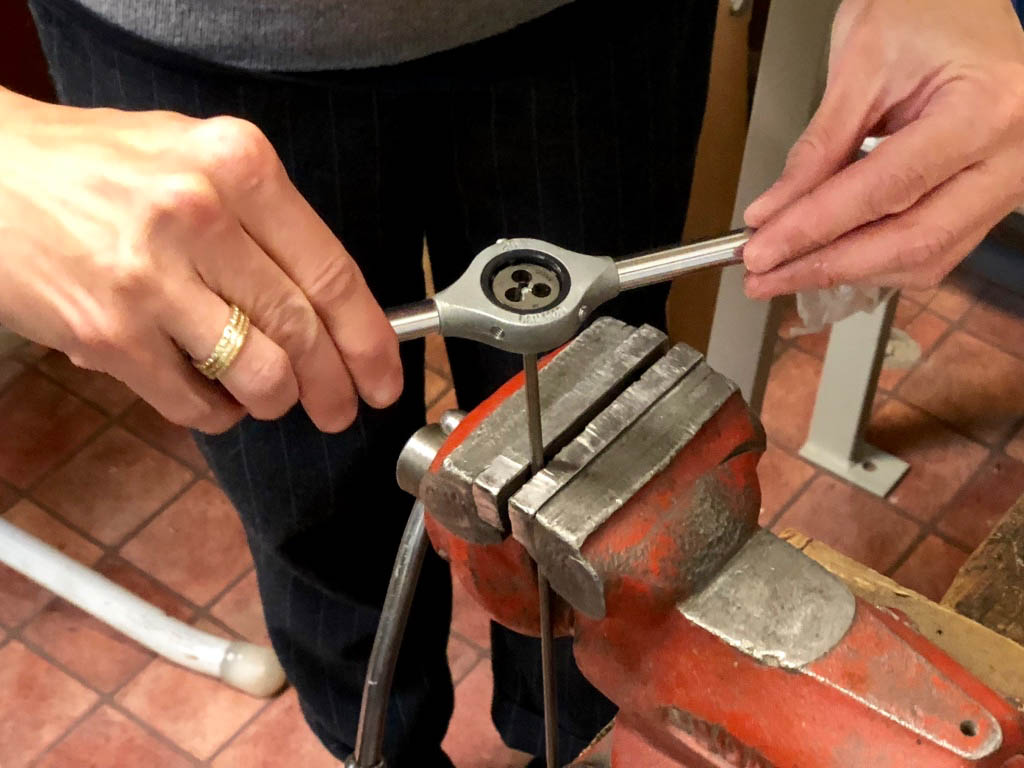
09:30 – 17:30 Lecture: soldering, making screw thread
Finishing of Production of 2 basic mechanisms
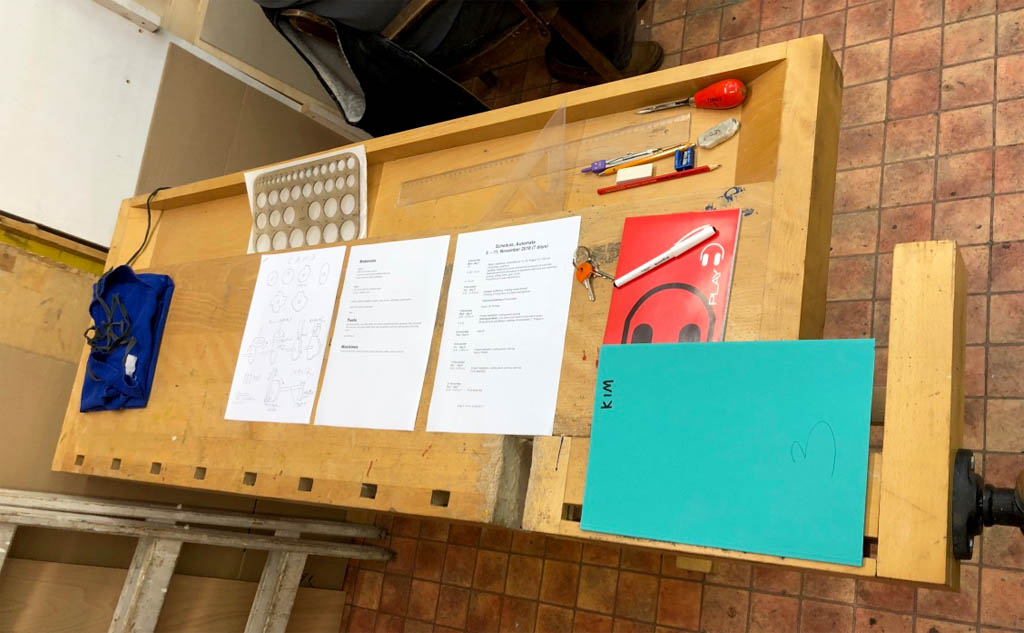
Technical drawing of final project


Kim’s three cams in action.
What’s going on here?
The experts at work.

19:30 Performance, Finale, Jatka78 theatre (GoogleMaps link) on the site of an old, abandoned abattoir.
10:00 Meet in workshop (GoogleMaps link)
Web site showing Mirek’s work.
Meet in the workshop
Introduction, payment.
Introduction to the mechanical movement of automata.
Materials and tools and basics of operations with tools and machines (cutting, drilling, lathe, glue, joints)
Production of 2 basic mechanisms
Here are the raw materials, so we must be in the right place.

One tidy workbench per student ready to get started.
Examples, for inspiration and to understand the basic mechanisms.
Mirek with some of his small friends hanging around behind him and some online inspiration.

Types of material and their quality.
Mechanisms, theory and practice.

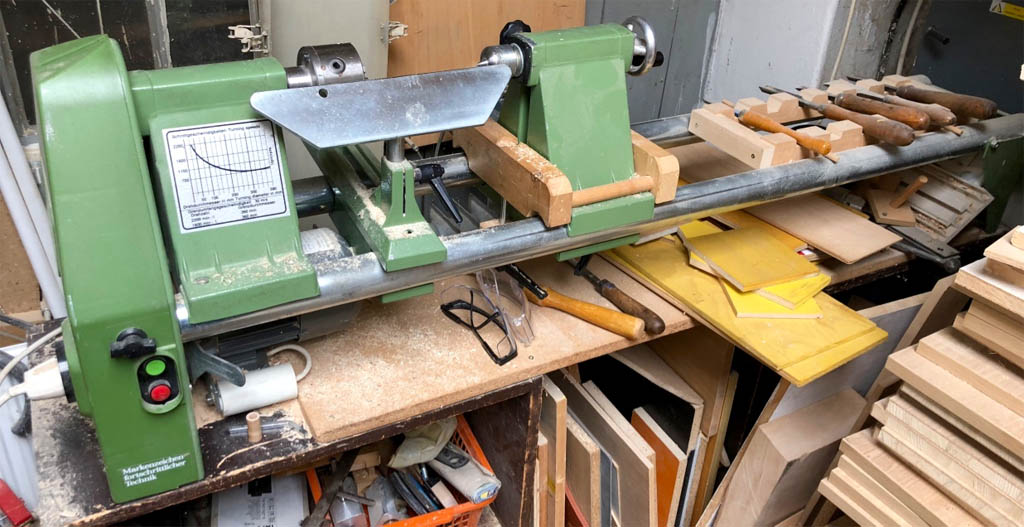
The lathe ready to turn some wooden wheels.
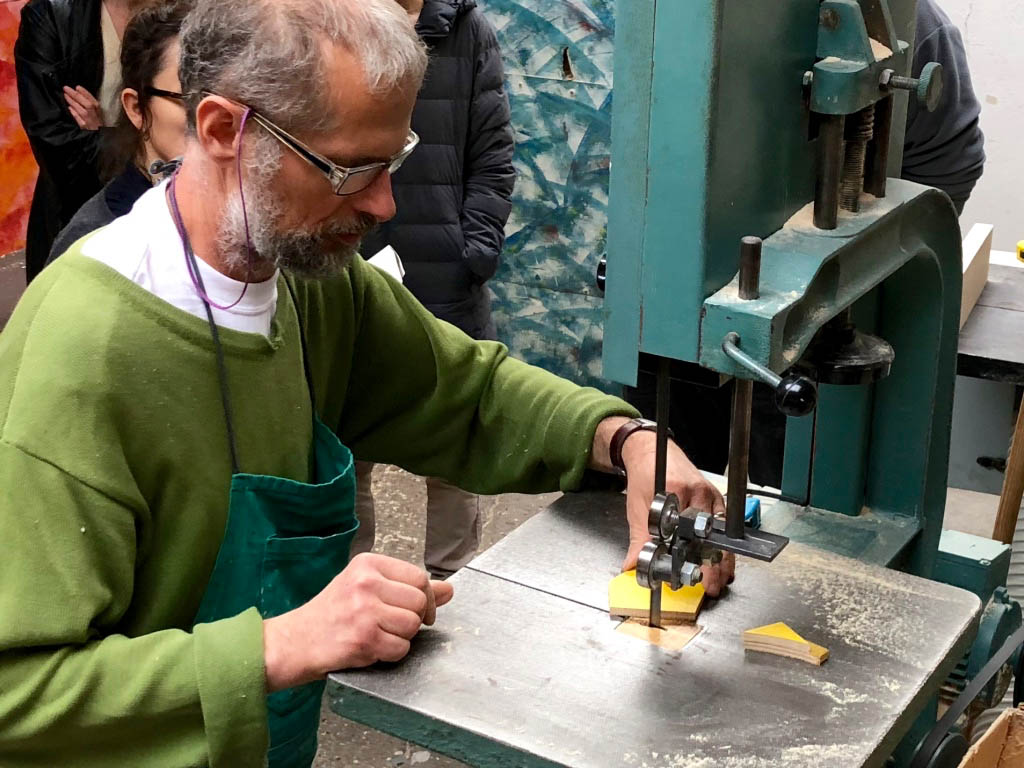
How to use a bandsaw properly.
Chisels, sizes, shapes and their care.
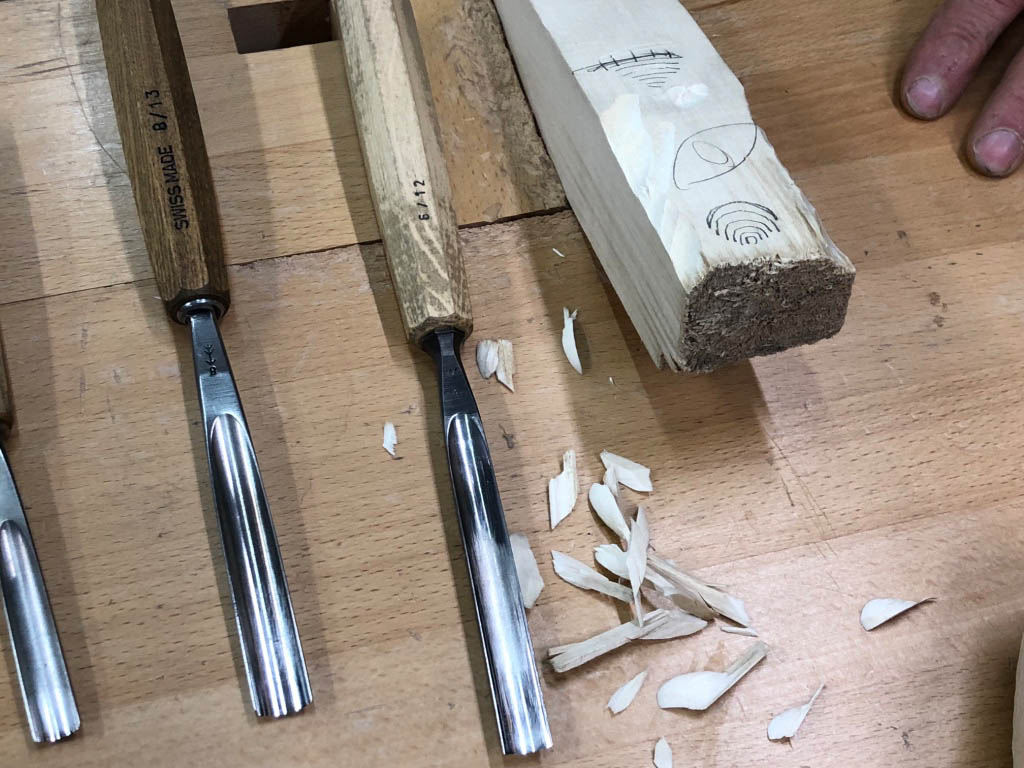
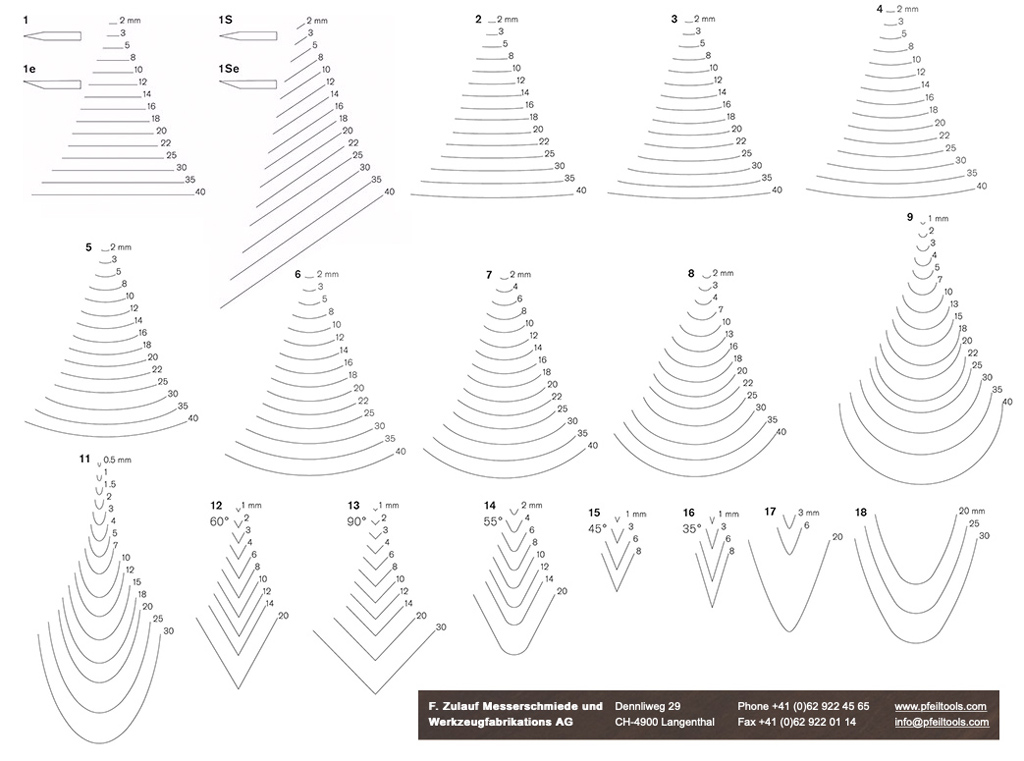
The naming system for Pfeil chisels (see their web site)
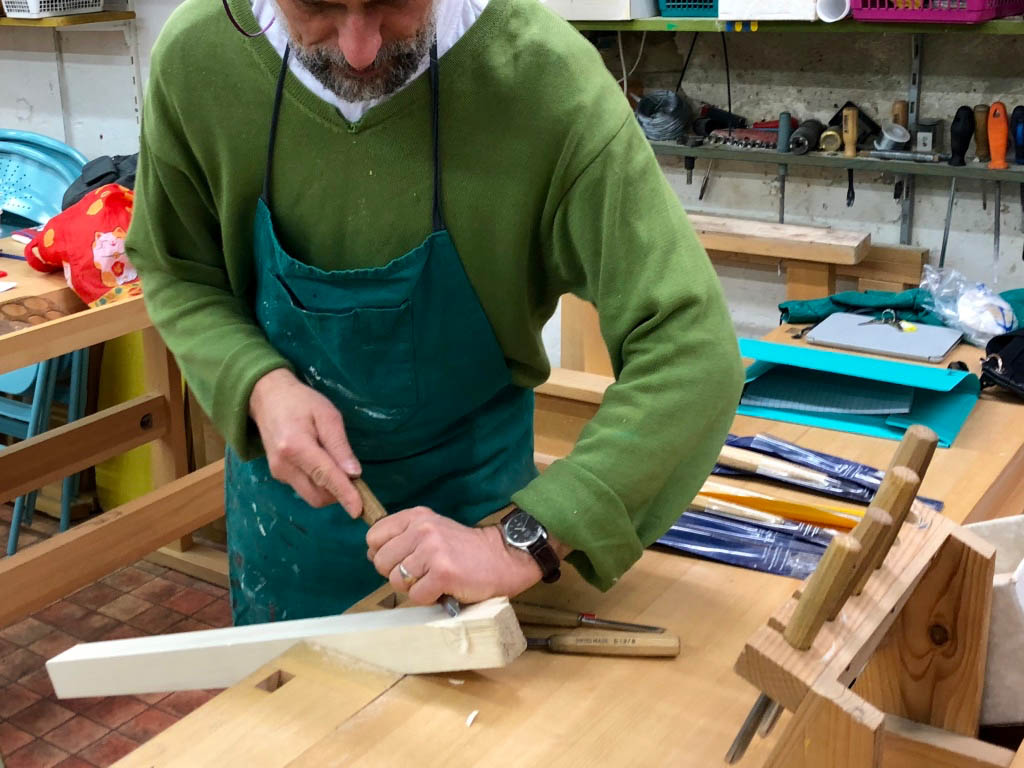
Using a chisel.
Mirek has made plenty of base kits so that we can try out the mechanisms ourselves.

One of Mirek’s demonstration pieces.
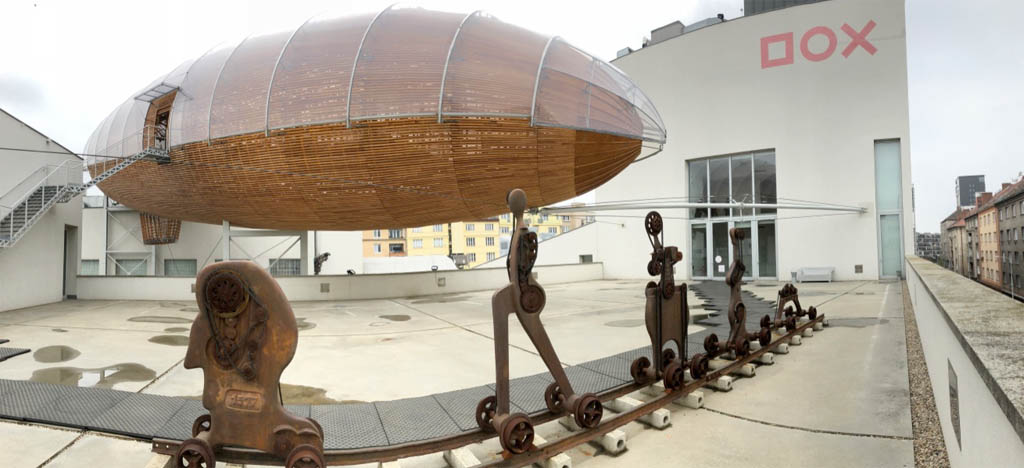
One day for sightseeing before the course starts so today I went to the DOX museum of contemporary art, then walked via the metronome monument to Marionette Truhlář.
[catlist id=101]


The plot
After years away from home, the hero returns to the family estate to solve the series of strange deaths that happened at the castle. He is gradually confronted with all his inhabitants and the distrustful commissioner in charge of the investigation. The story has a fixed beginning and end, but the course of the performance changes, depending on which variant the viewers are in.

Palác Akropolis

As a 10 year old boy in in the sanatorium in Davos, Switzerland, we sang Brahm’s lullaby (Wiegenelied) every night before the lights were turned out and we were supposed to sleep. Counting sheep is supposed to help you sleep too.
Sing along if you like.
Guten Abend, gut’ Nacht,
mit Rosen bedacht,
mit Näglein besteckt,
schlupf unter die Deck’:
Morgen früh, wenn Gott will,
wirst du wieder geweckt.
There’s even an English version, which is new to me
Lullaby and goodnight,
With roses bedight,
With lilies o’er spread
Is baby’s wee bed.
Lay thee down now and rest,
May thy slumber be blessed.
Even Bing Crosby had a go (link to Youtube)
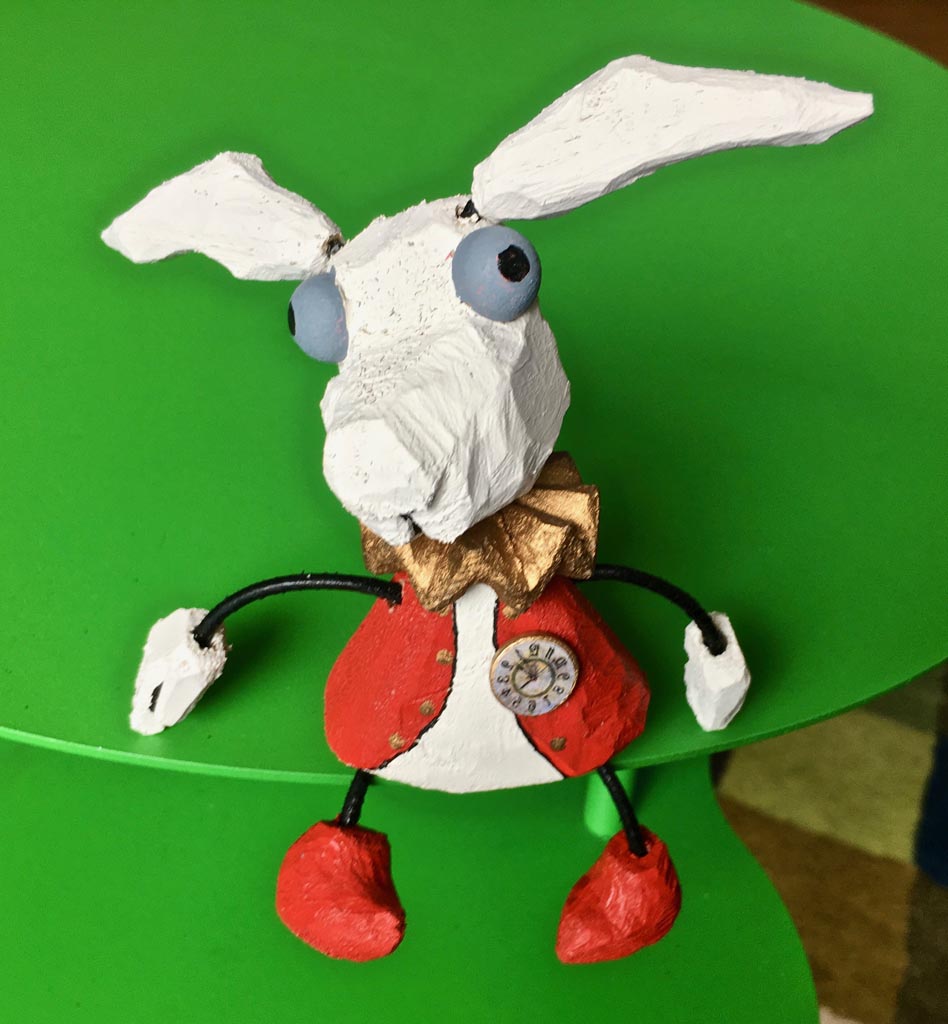
I’m late, I’m late!
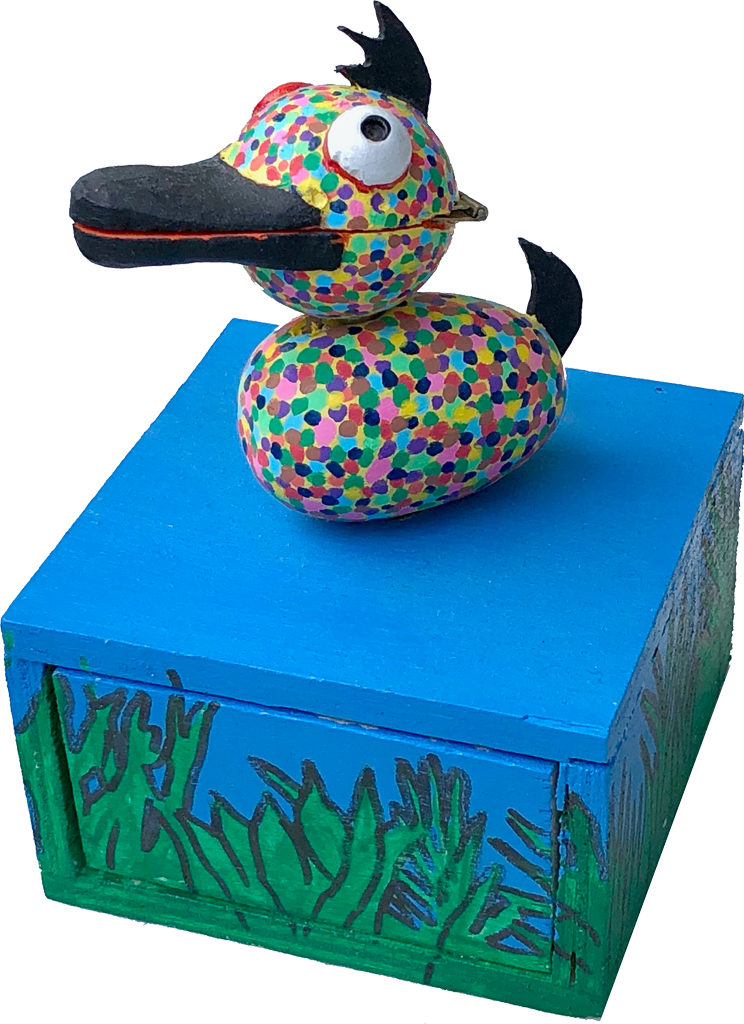
This duck spins so fast that she gets spots in front of her eyes.

This is like Kim’s dog, but it can do two tricks. It can open its jaw (press its right leg) AND wag its tail (press its left leg).
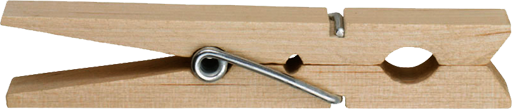
Take a wooden clothes peg, a dandy brush and a few other bits & pieces and this is what you get.
In the meantime she has grown legs and acquired a family – the Brush-heads (Familie Bürstenkopf)

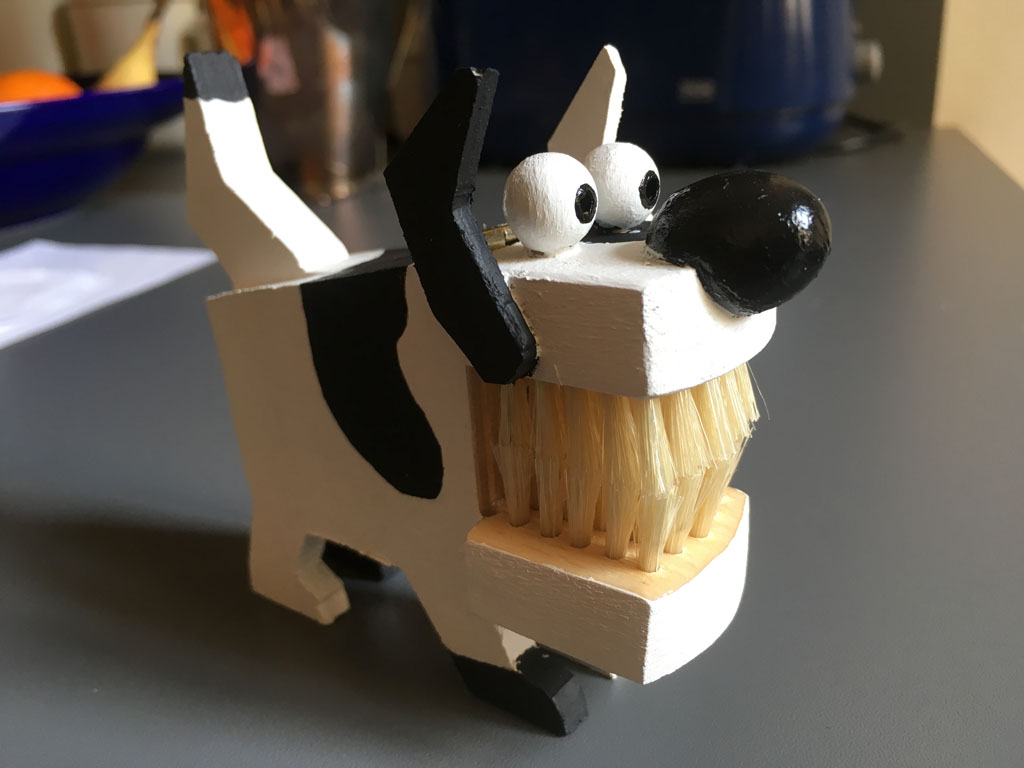
Kim’s dog can do a trick. If you squeeze its tummy, it opens its jaw. It’s a close relative of Mechanical Mutt.
Dedicated to the famous Berlin bear and the invisible Berlin bee, who just love their honey

An old English saying says that you should let sleeping dogs lie. Wake this one up at your peril!

 Location- the old Asbach Uralt distillery.