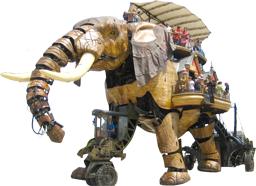
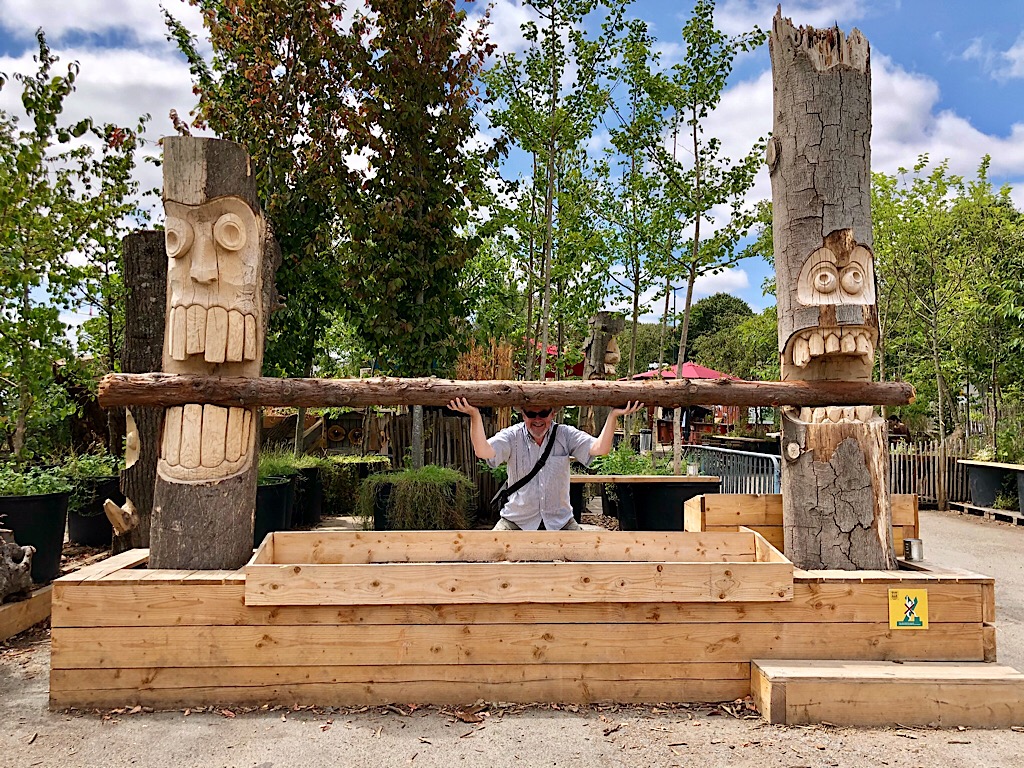
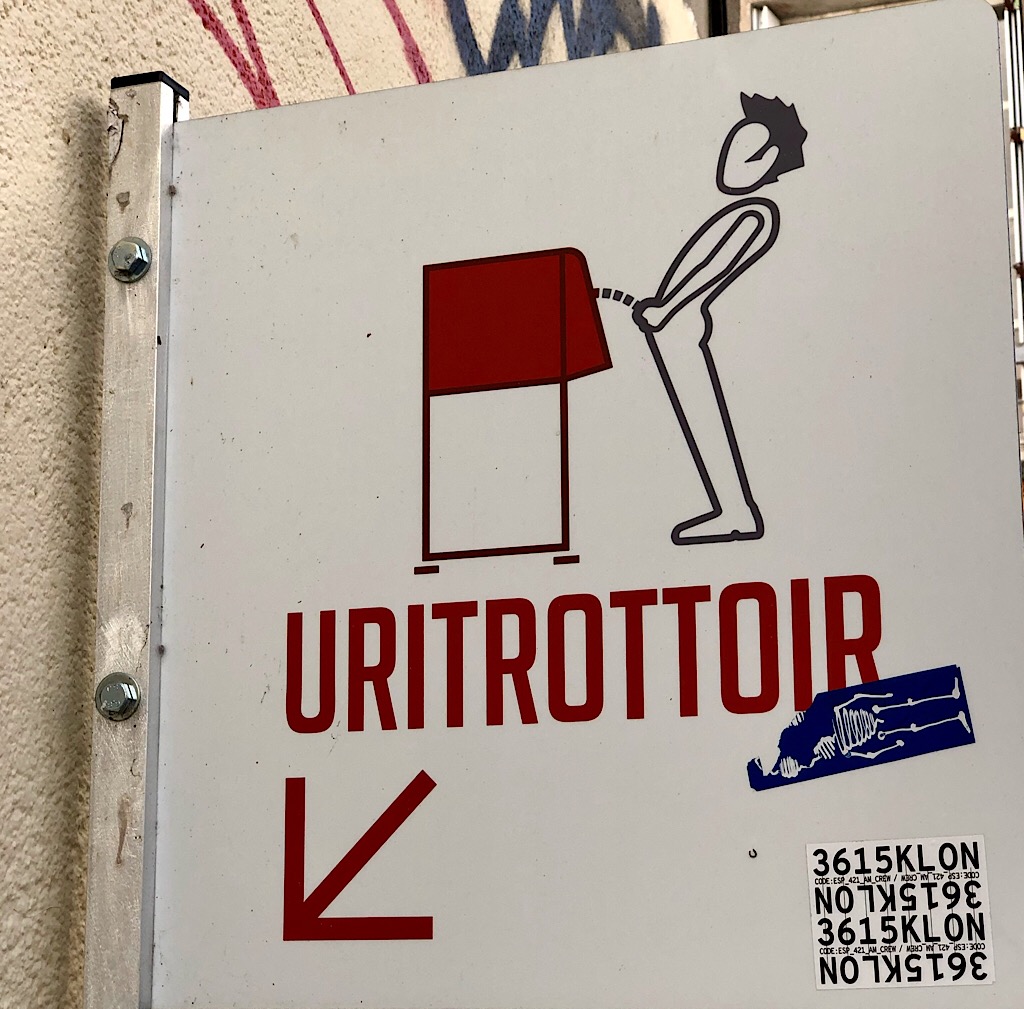
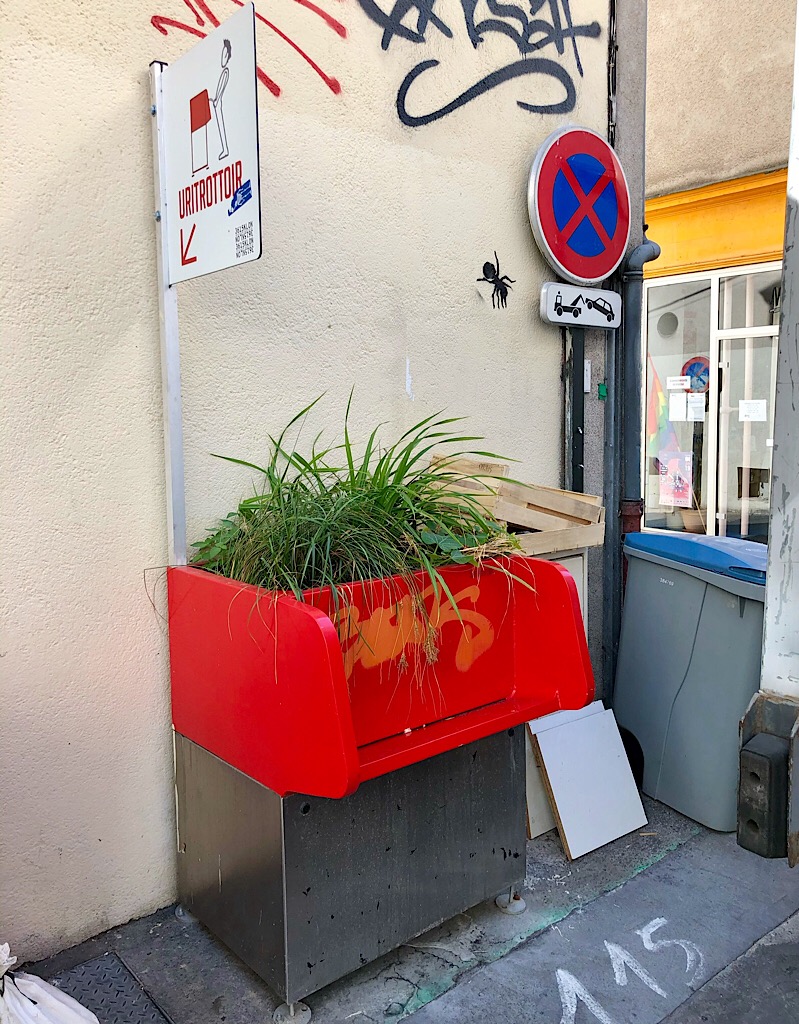
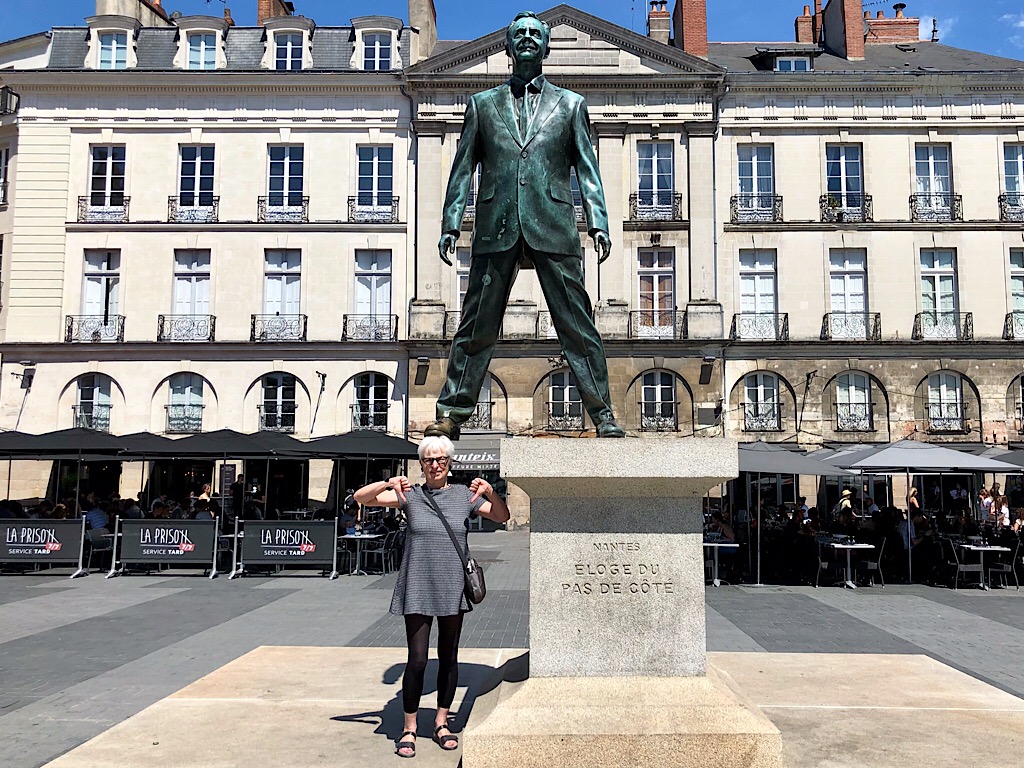
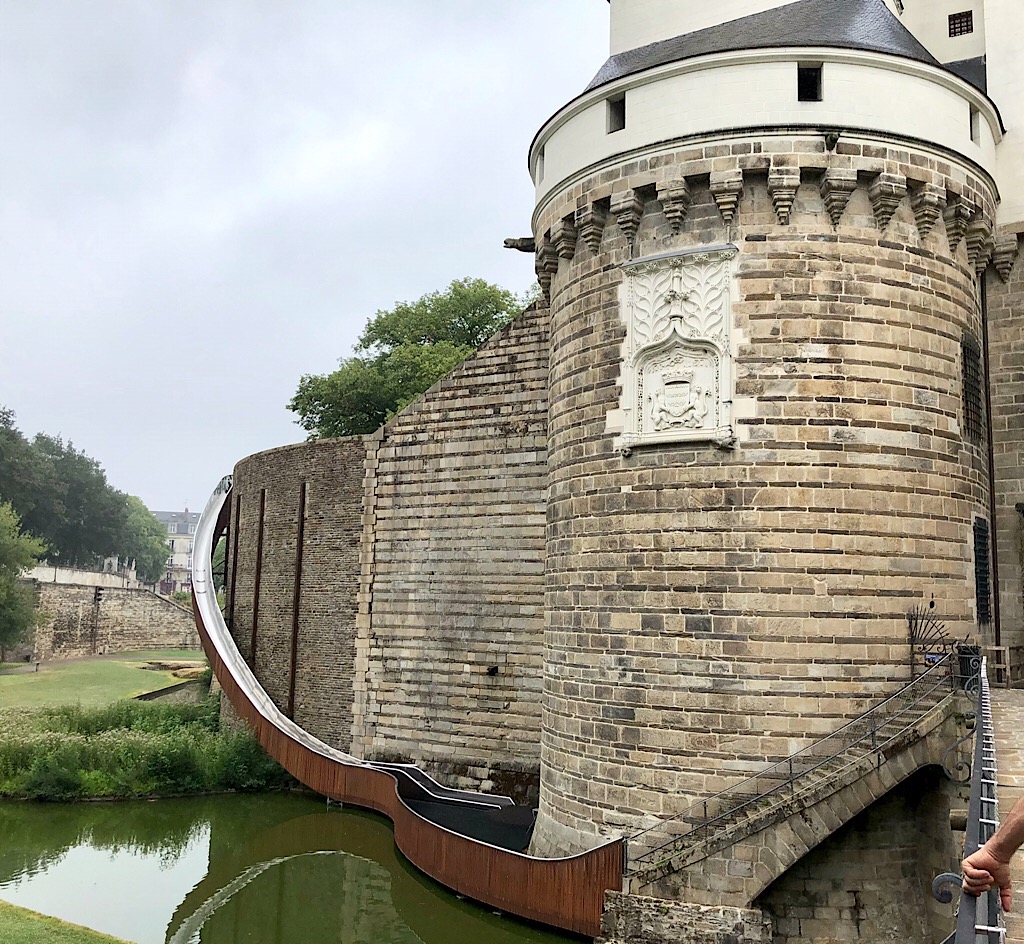
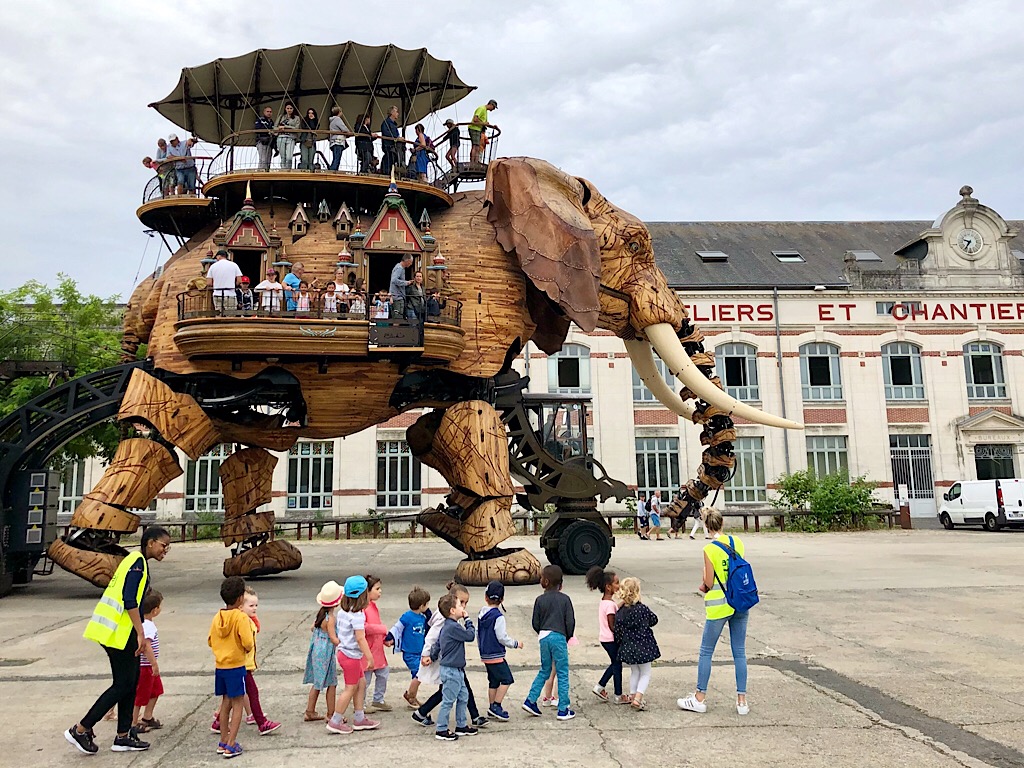
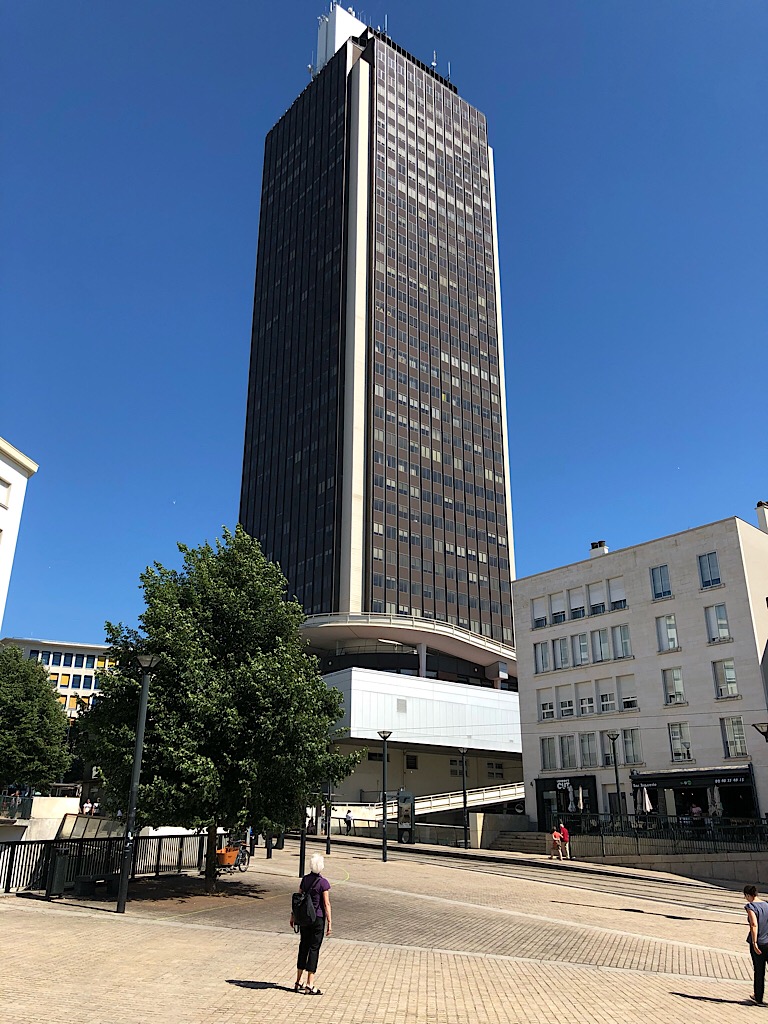
“La Voyage à Nantes” is a regular summer event designed to promote the currently not very well known city of Nantes, which in 2019 took place from 6th July to 1st Sept. It is very simply organised around a long green line painted on the floor which leads visitors through the streets, passing both temporary and permanent artworks, including the amazing giant elephant which David Soulsby described in the January 2019 edition of the magazine.
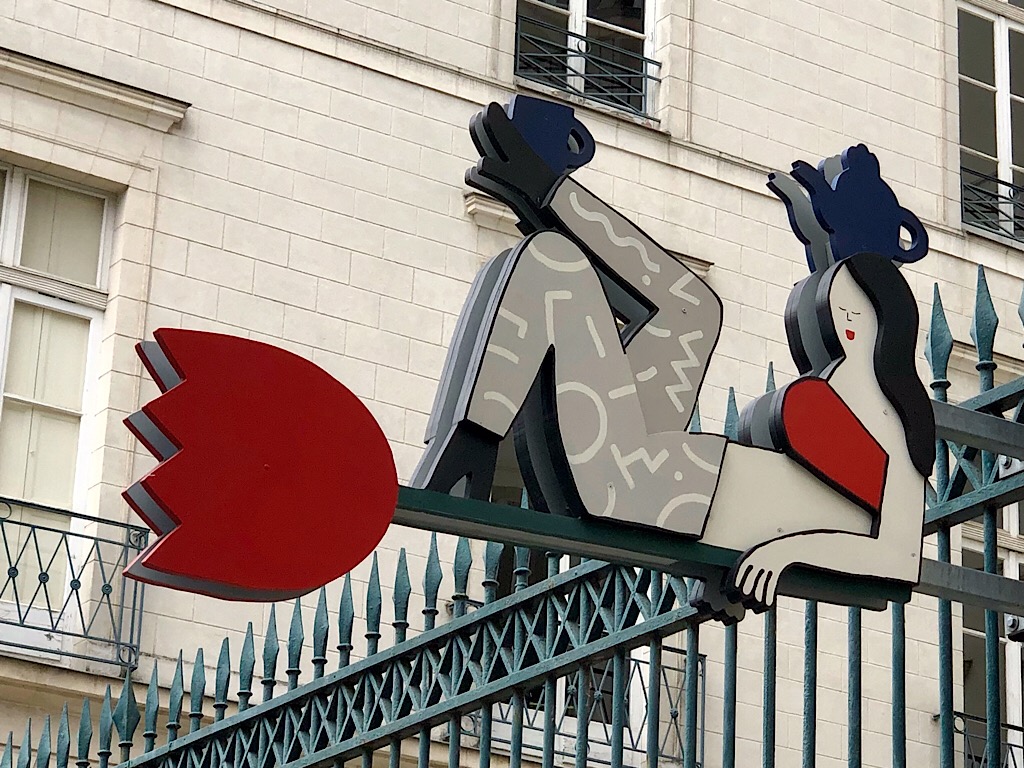
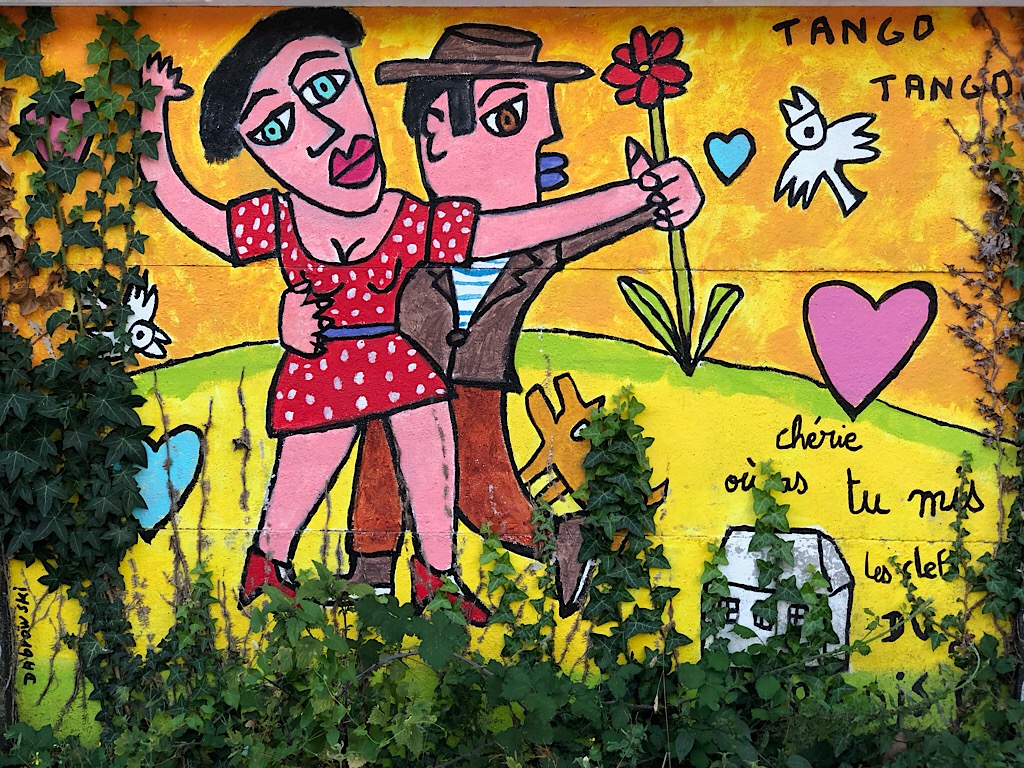
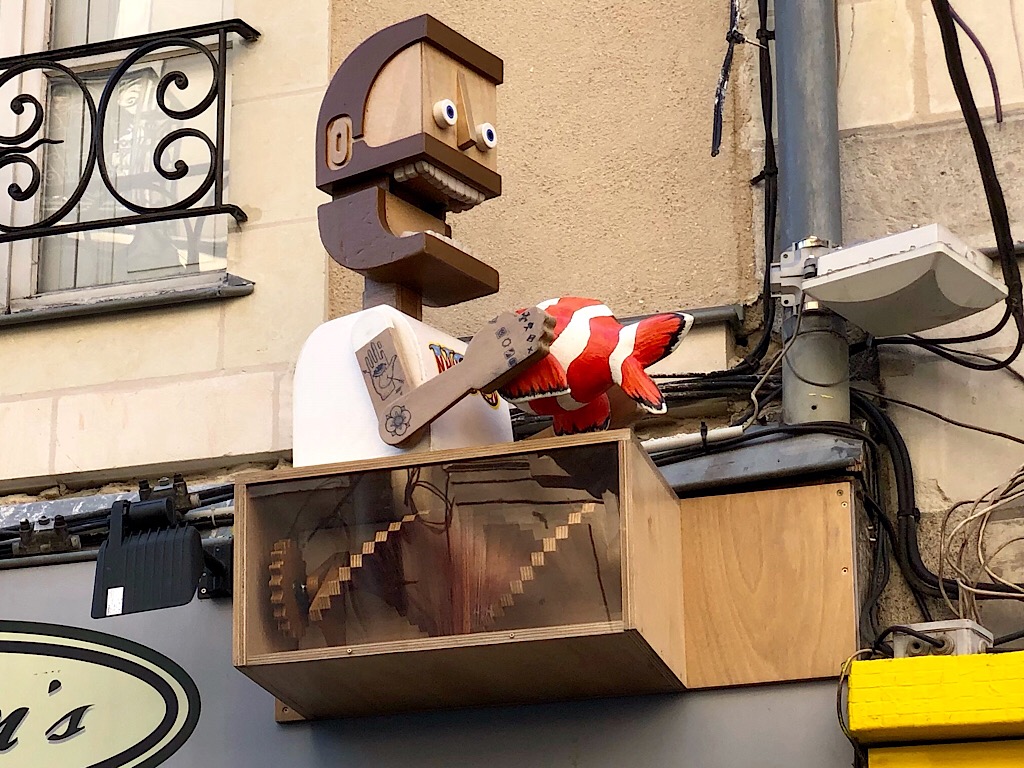
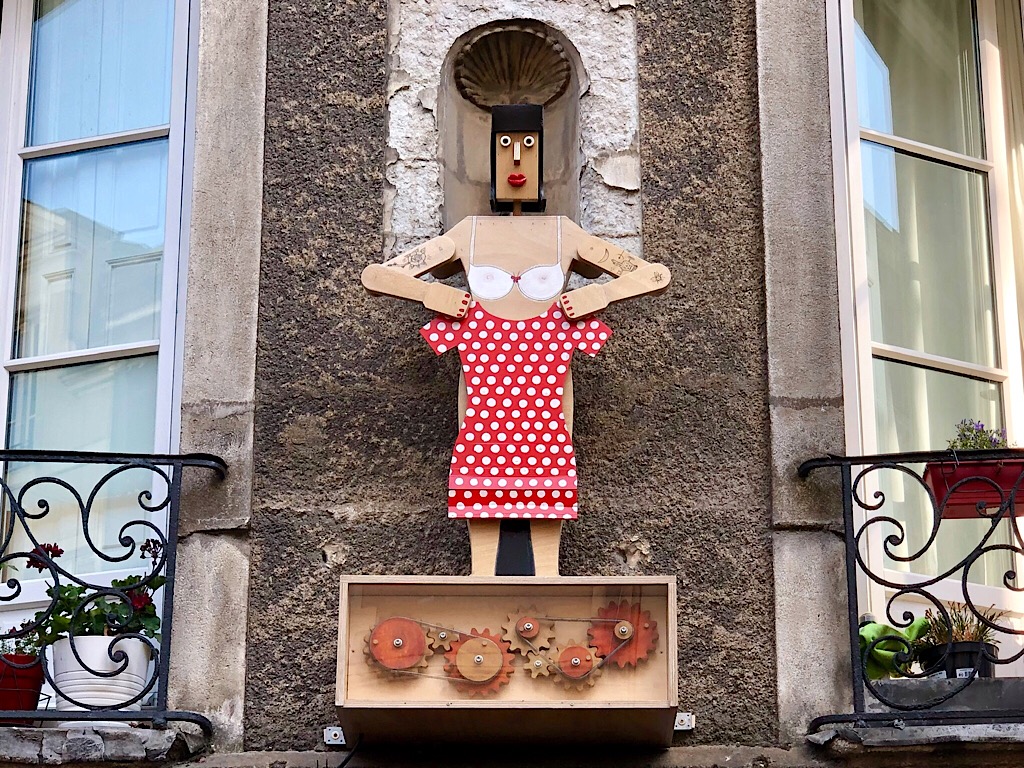
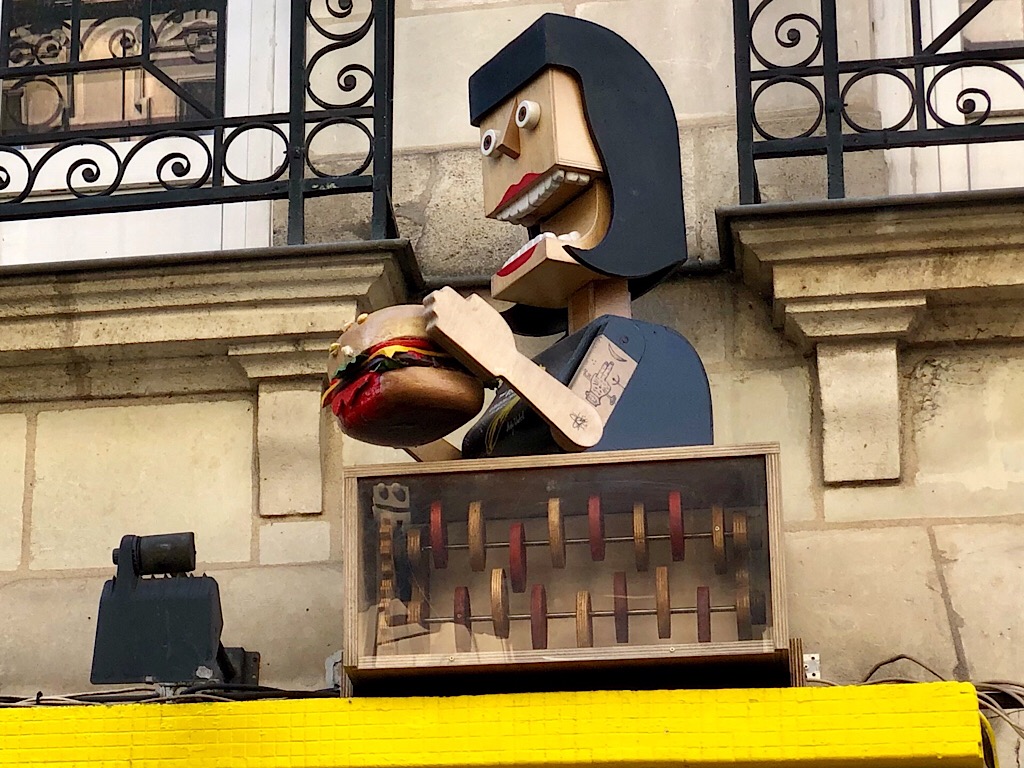
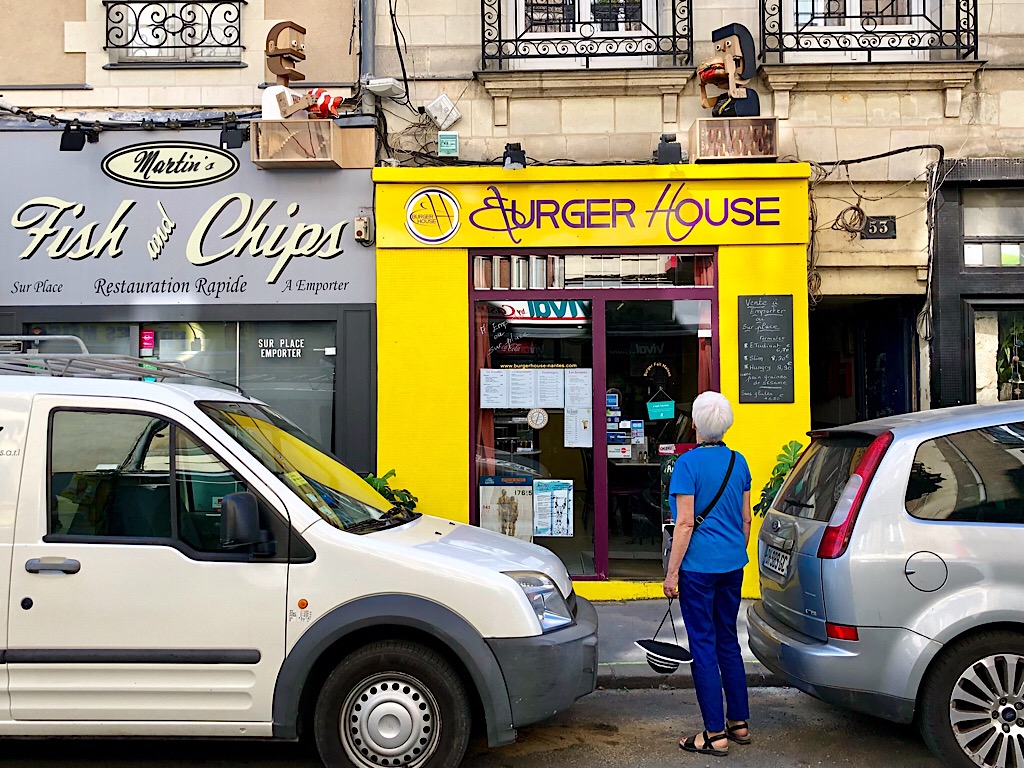
The green line also leads you through the rue du Maréchal Joffre. This small, trendy French street includes a baker, hairdresser, bookshop, burger joint, which is no surprise, but if you look up a little you will find that things are on the move. Over the hairdresser’s shop, there is a barber with that curious critical pose which is so typical of his trade, all the while his scissors snipping incessantly. In the base with its transparent cover, a giant comb moves back and forth. Over the vintage clothes shop a woman keeps trying on the same red and white spotted dress, the gearwheels of indecision spinning beneath her feet. All along the street there are a good dozen of these creations, which can be seen during the annual event held in France’s 6th largest city, Nantes which is near to the Atlantic coast and the Bay of Biscay.
The automata were designed by Nantes-based English artist & illustrator Gavin Pryke. He is quoted as saying “I like the idea of making an interactive work that appeals to children and their grandparents alike.” Implementation of the full size automata started in December 2014 with a team of 8 people involved in their production and installation. Installed above shops and restaurants they are quite large so that they can be easily seen and enjoyed from across the street. The bases are reminiscent of the bases of table top automata where turning a handle visibly puts cogs and levers in motion. In rue du Maréchal Joffre the real mechanisms are concealed and the bases have a transparent front revealing mechanisms which are part of the show but do not actually make things move. It’s a hard life as an outdoor automaton, so they are only installed for the duration of the Voyage à Nantes event during July and August. At night the wooden performers are allowed to rest, to get ready for their next action-packed day. After the event they are taken down and moved indoors for some tender loving care to make them fit and ready for the next year.
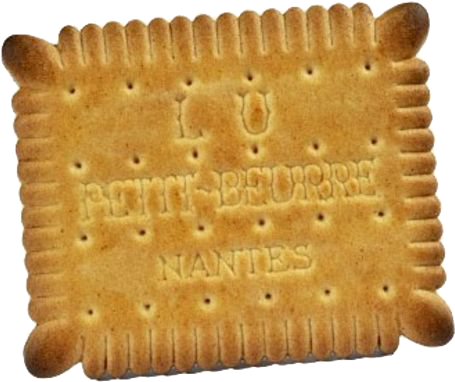
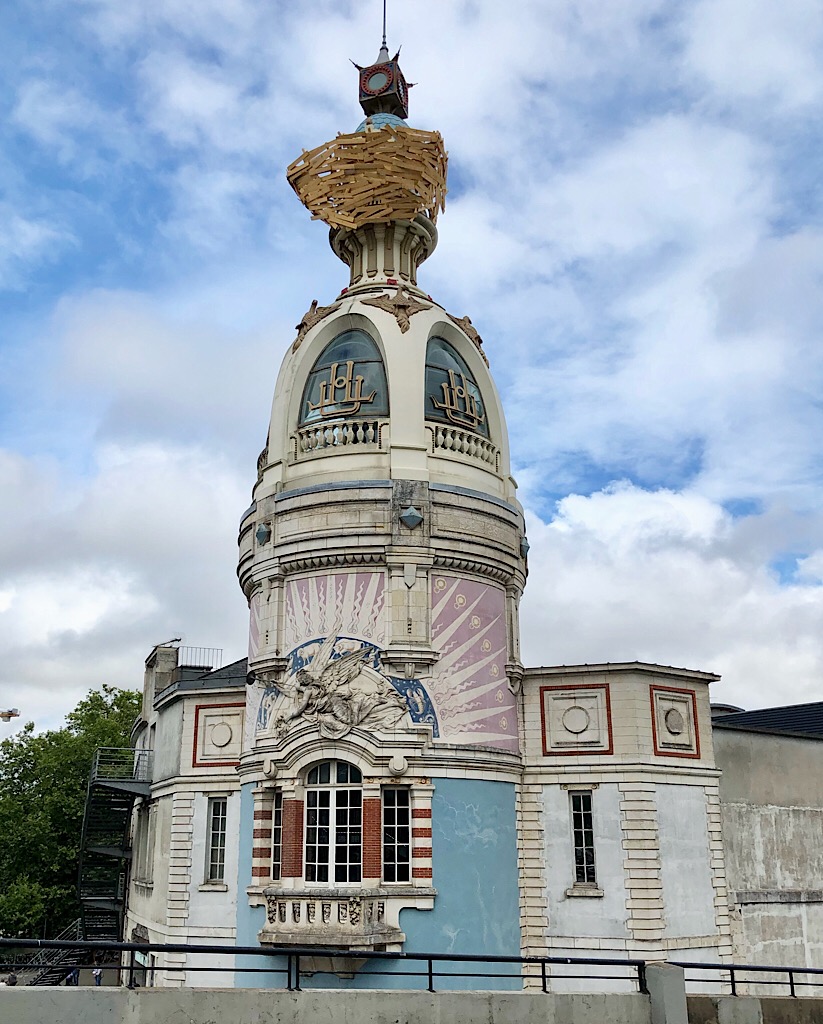
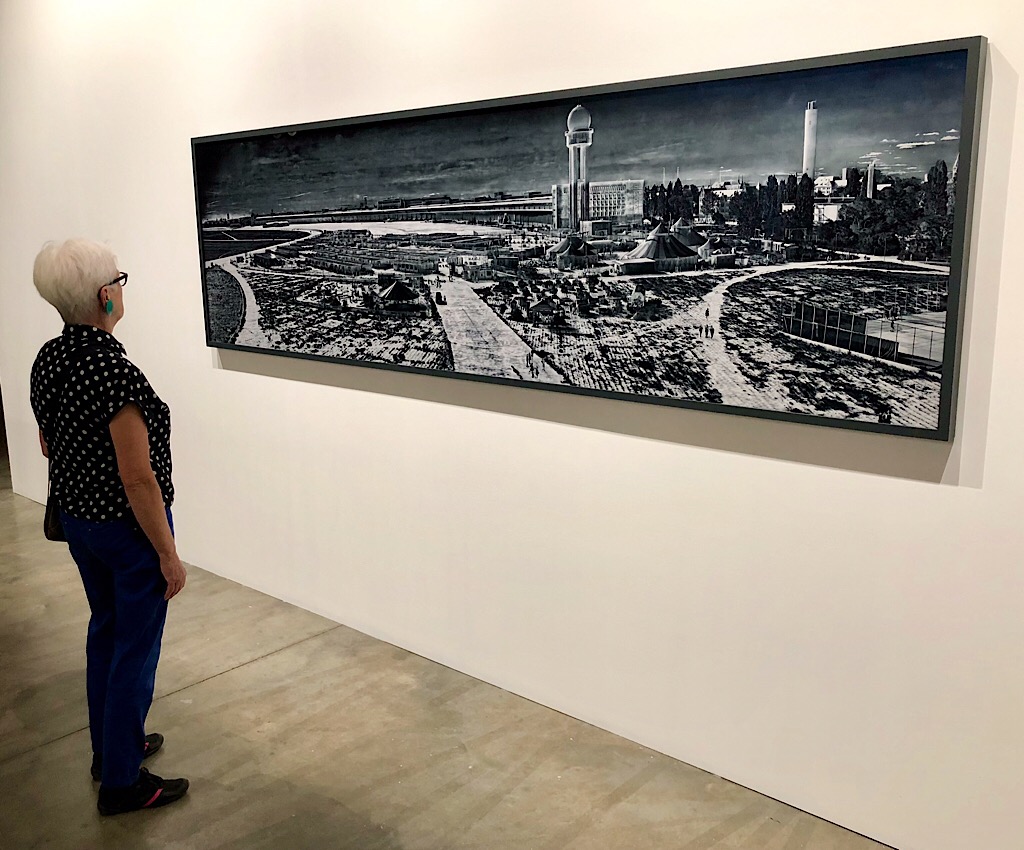
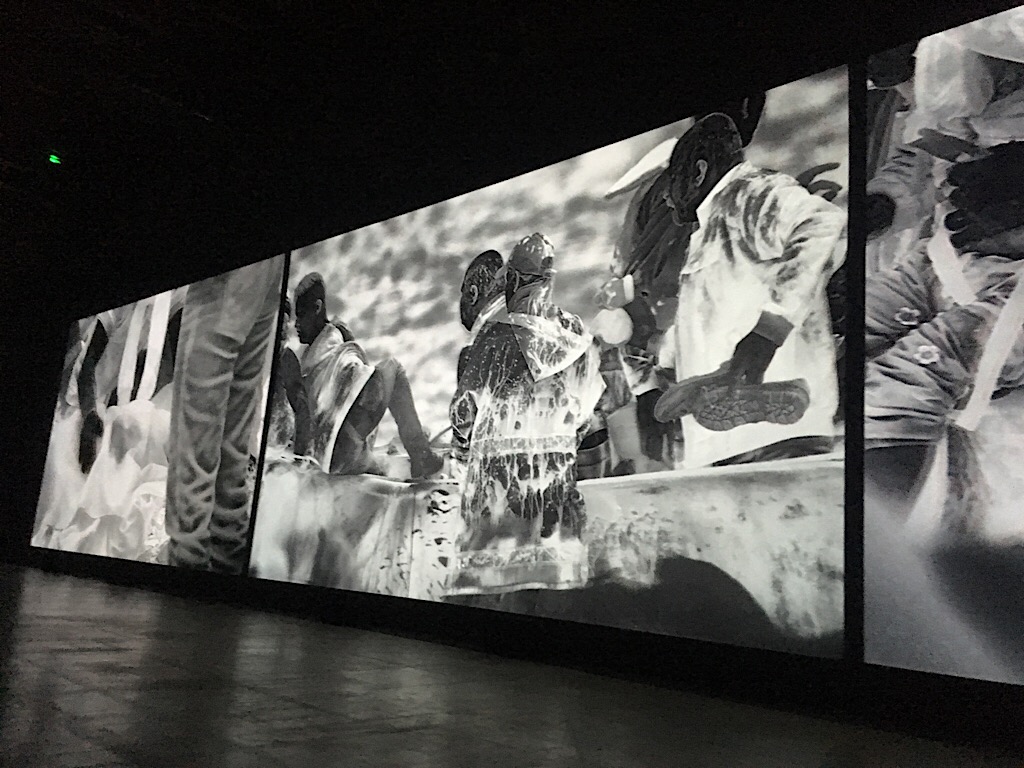
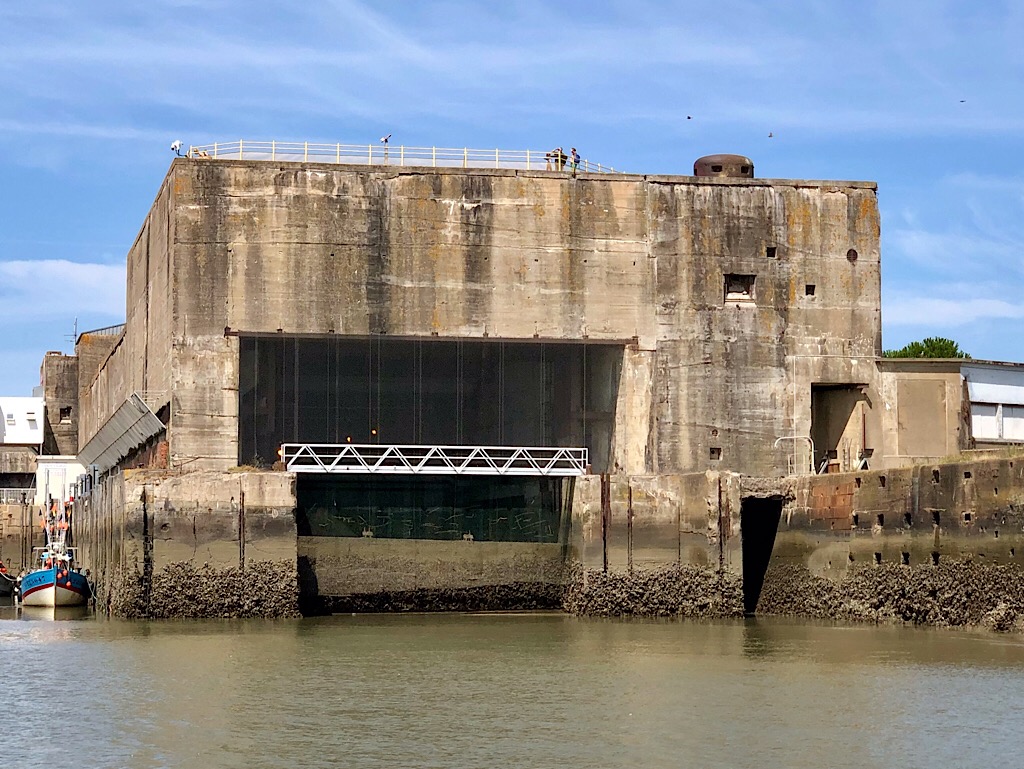
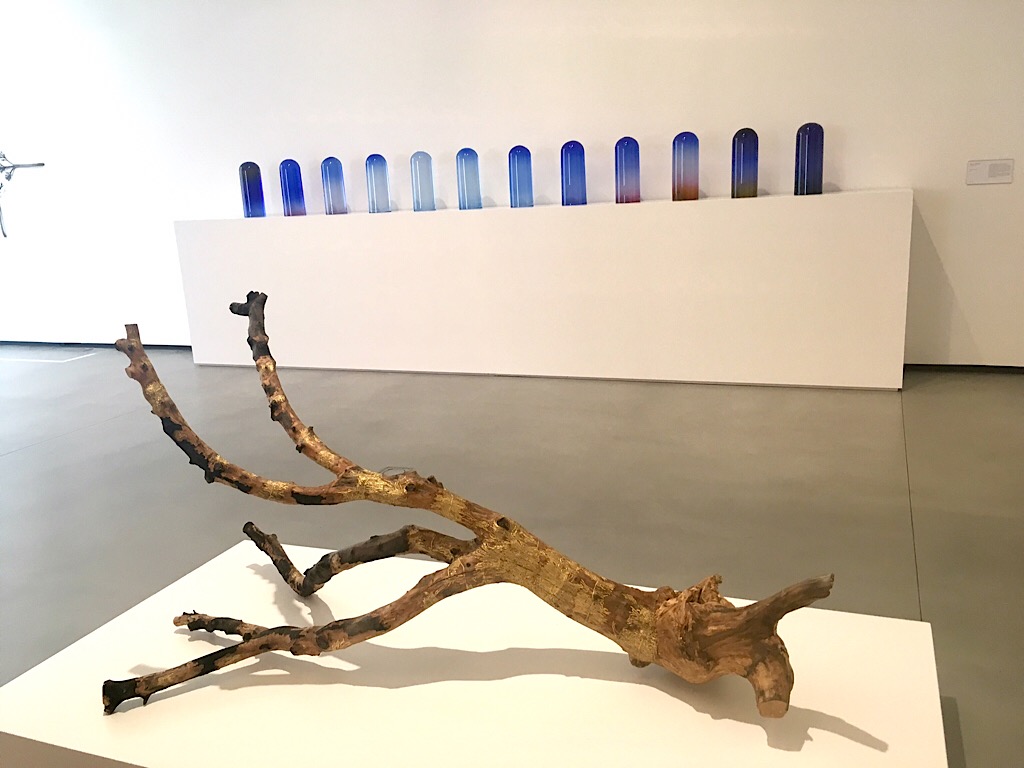
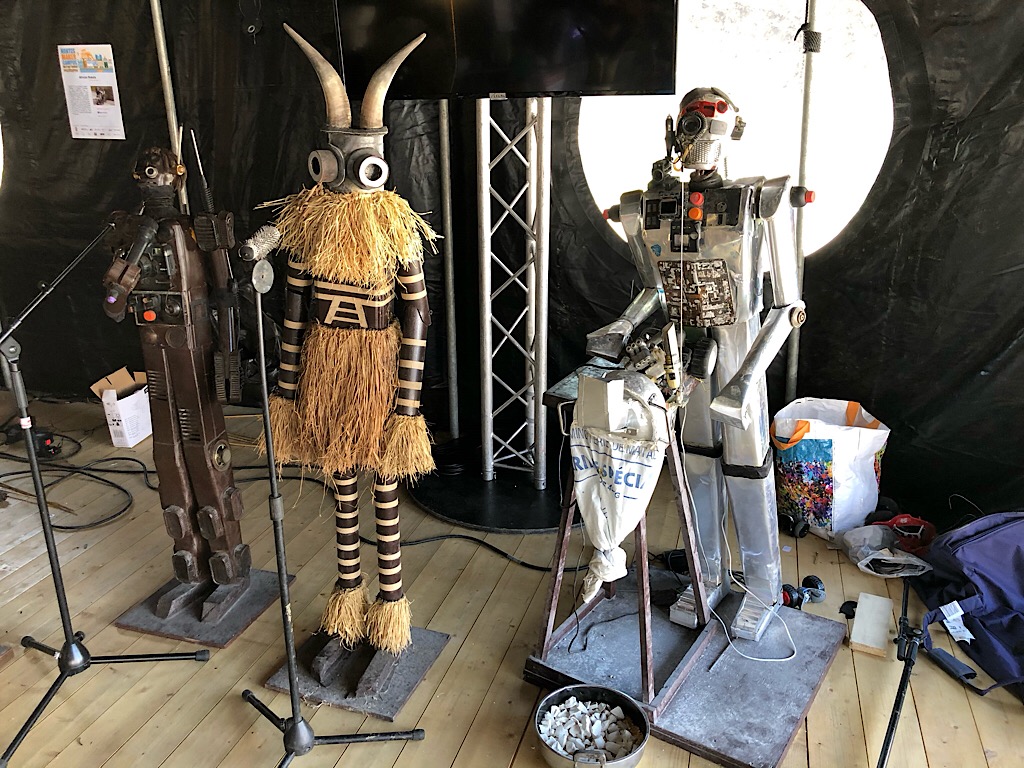
Today we went to the old LU biscuit factory to see a Richard Mosse exhibition. Funny to travel all the way to Nantes to see a huge infrared picture of Berlin’s old Tempelhof airport.
The video “Incoming” was very impressive.
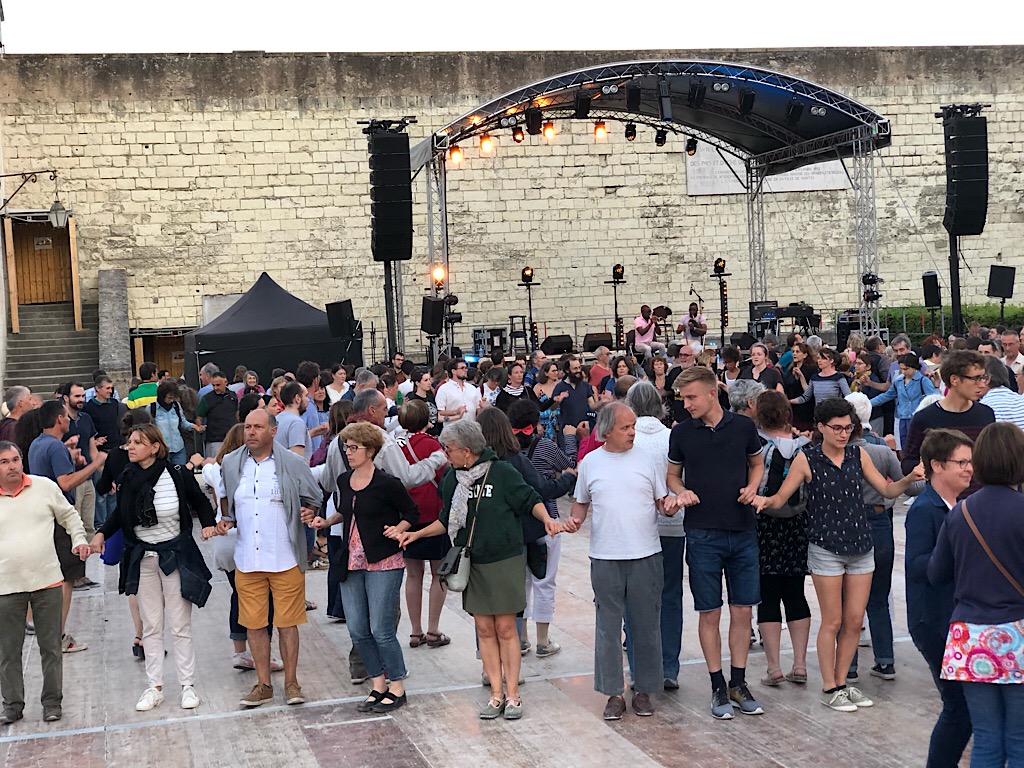
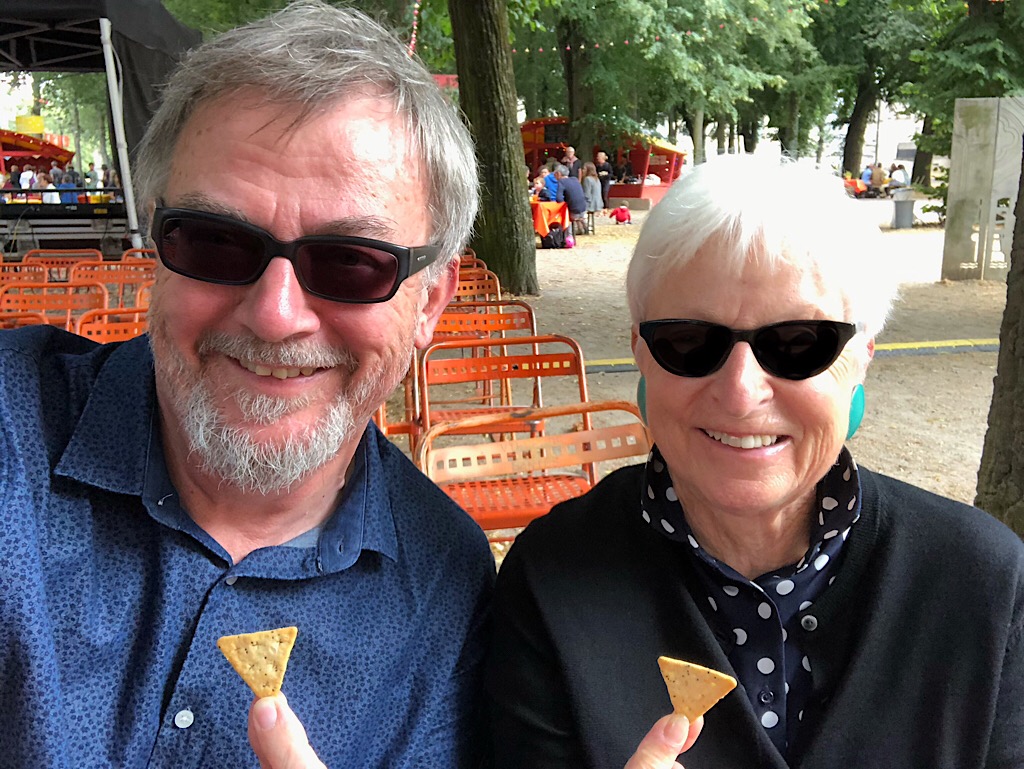
Then we prepared a picnic, split a nice bottle of French red into two plastic water bottles and found a good spot behind the cathedral for the free concert.
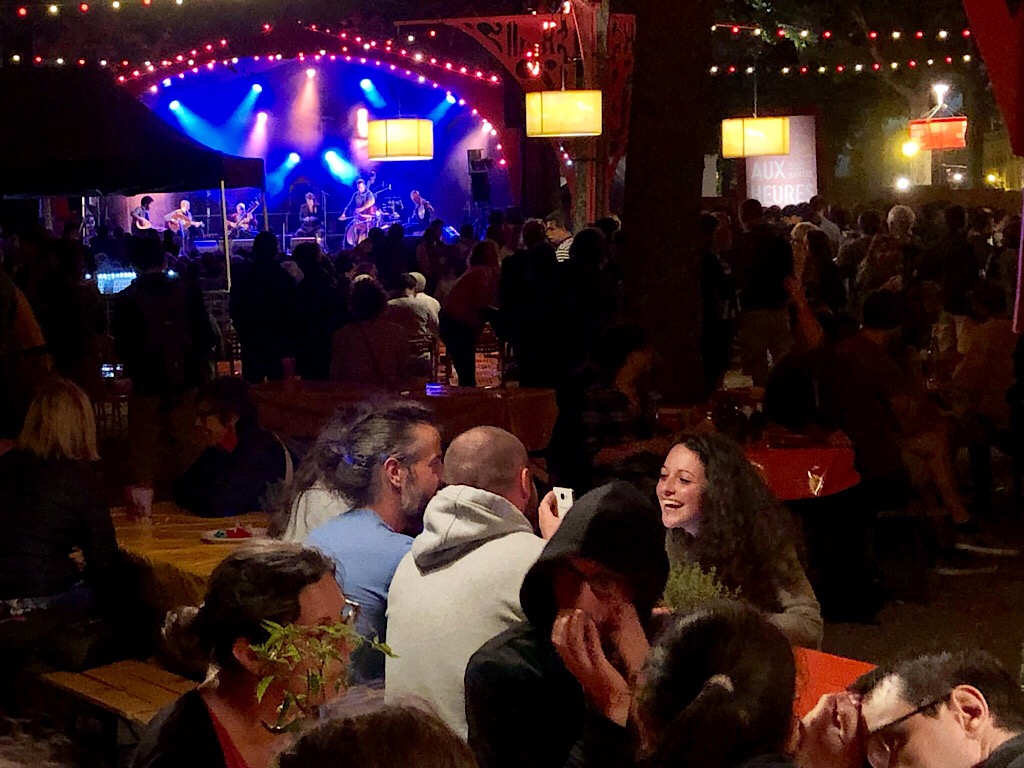
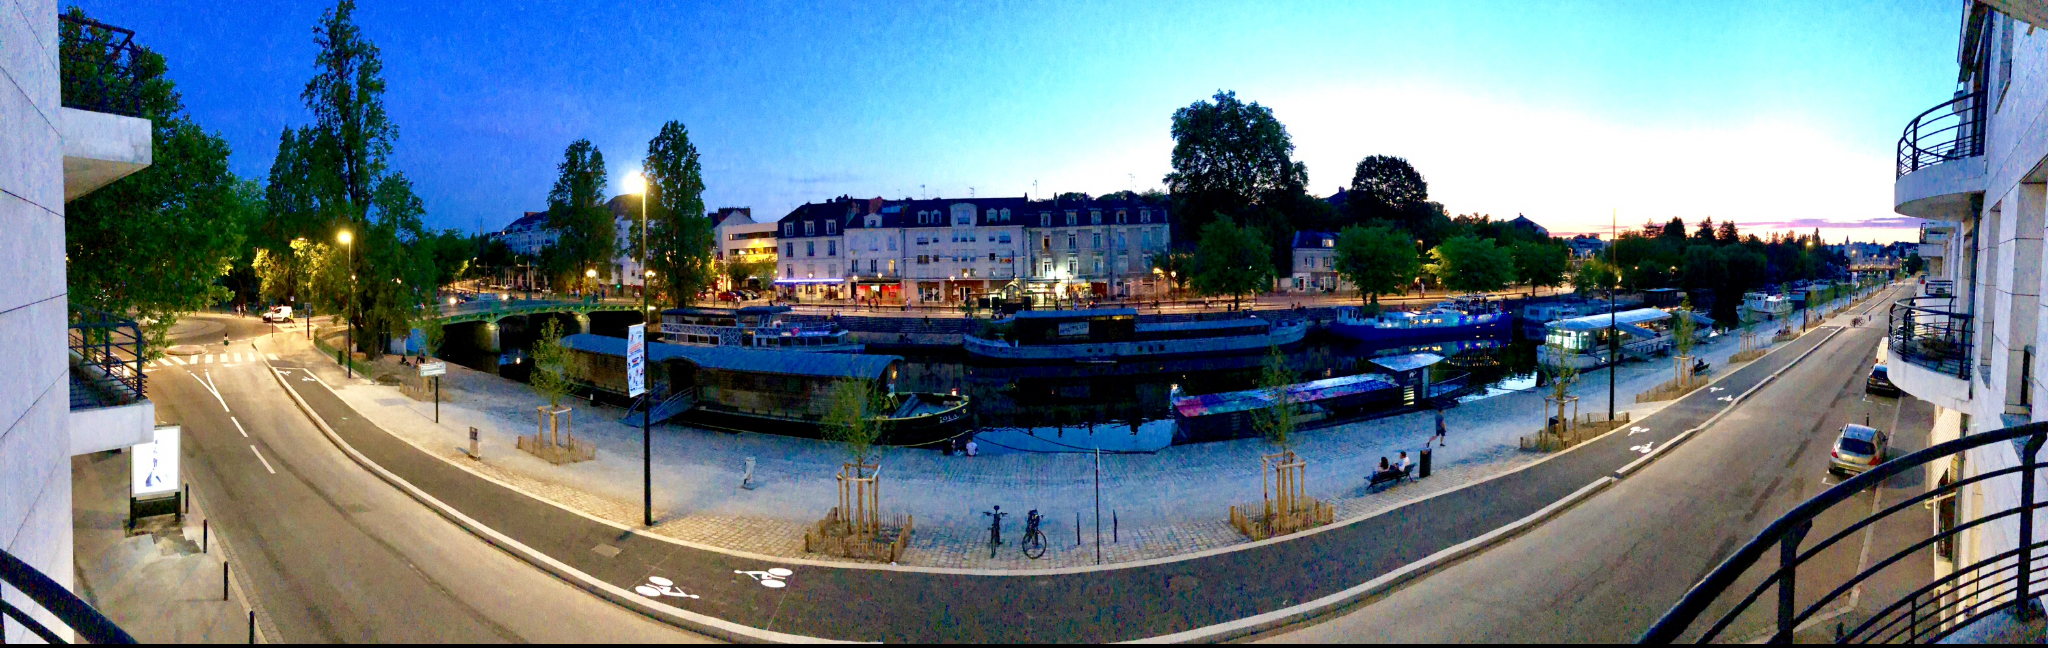
Tables for your picnic, lamps hung from the trees, two great bands and a mild Nantes evening.
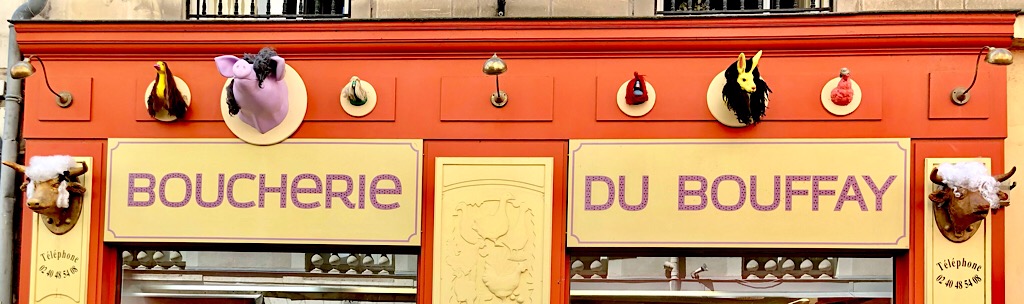
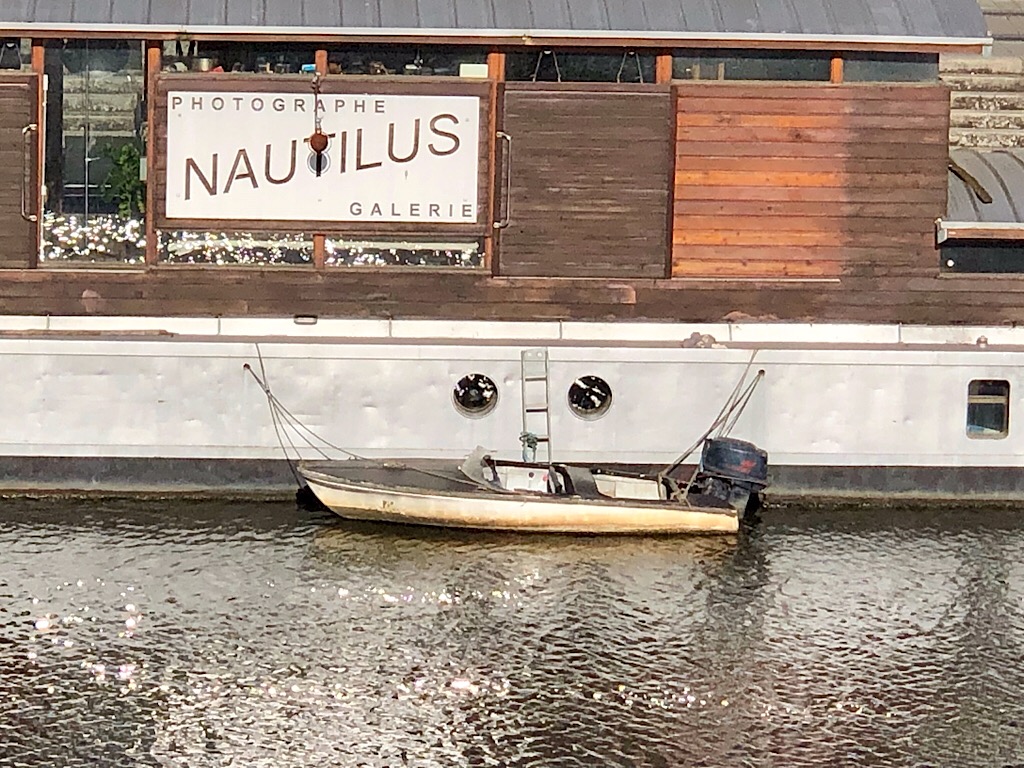
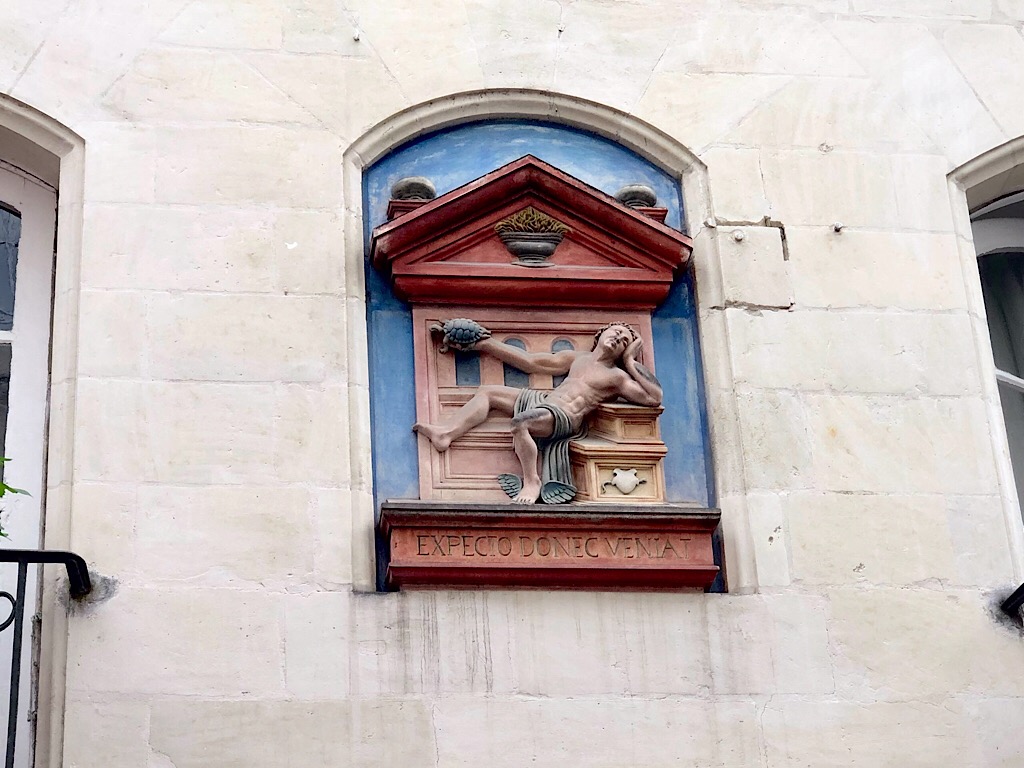
It took us a while to discover that this shop sign is of a “Gouty Rat” which was the eccentric name of a shop familiar to the young Jules Verne.
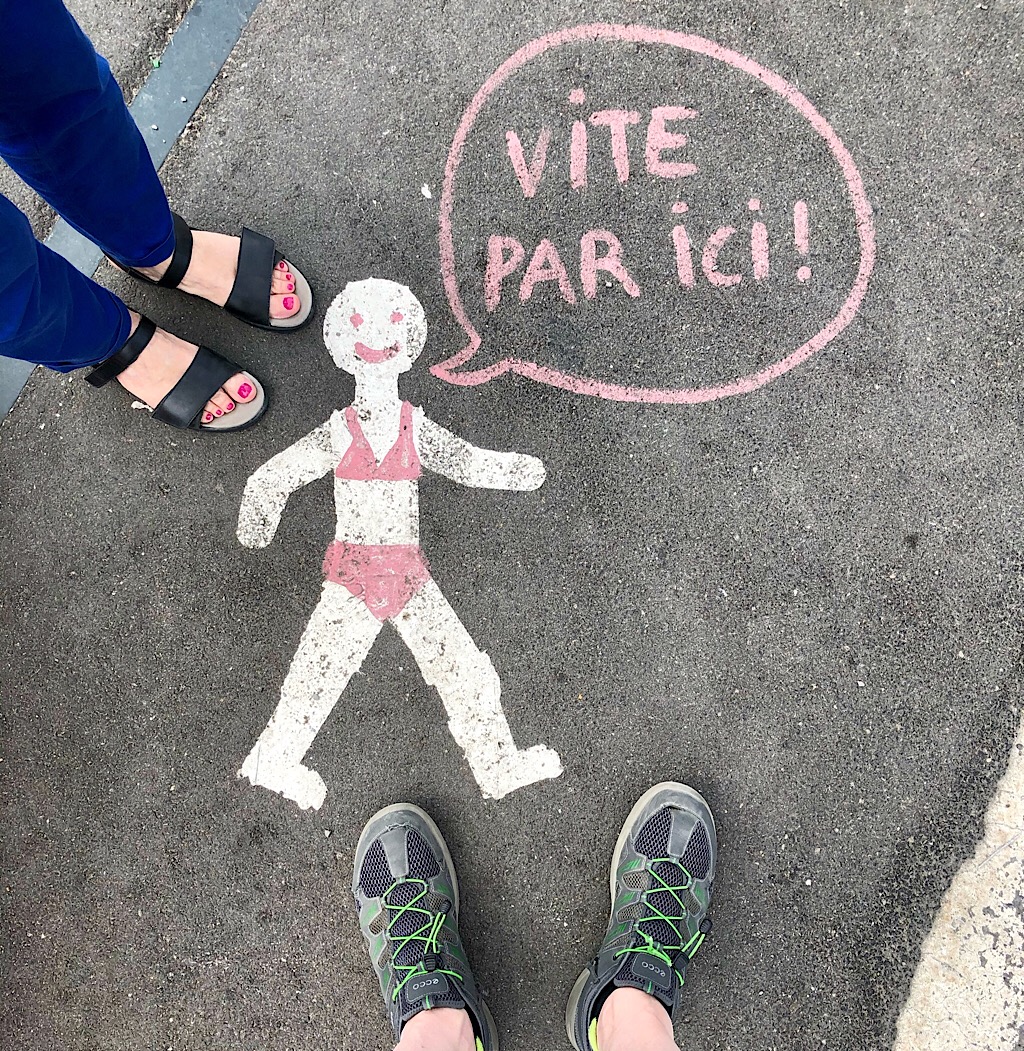
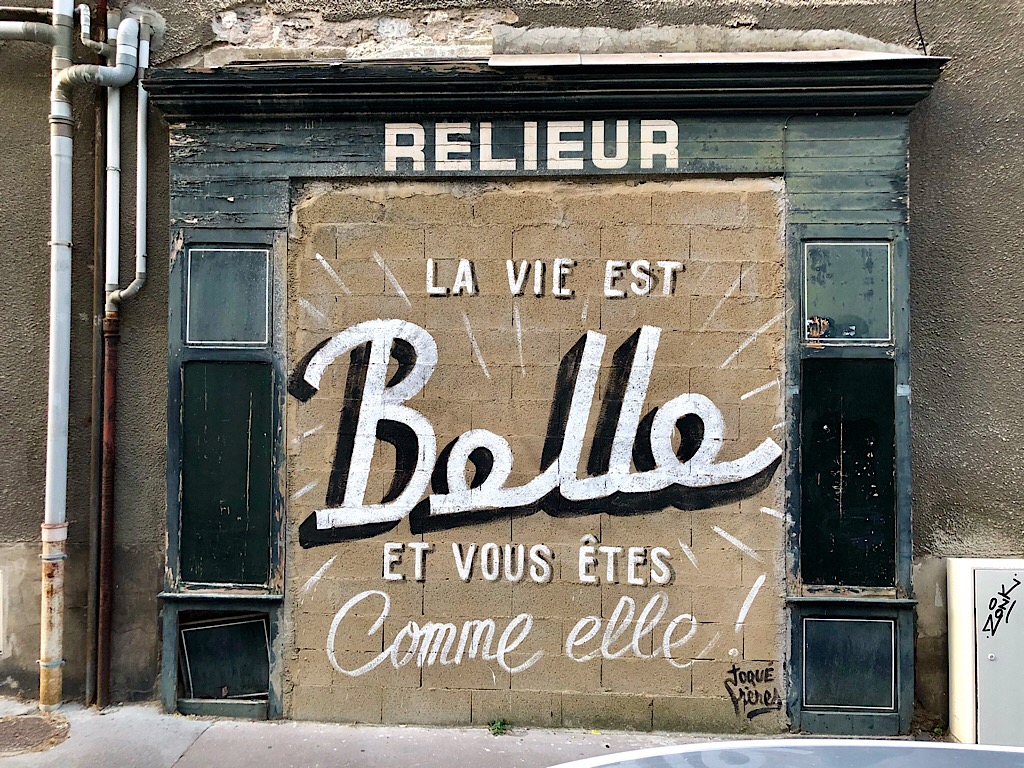
21:30 Choeur Mikrokosmos in front of Museum d‘histoire naturelle. Sat on comfy shop step until we got bored and drifted off to find this nice little rhyme, loosely translated if rhyme-free as “life is beautiful, just like you”.
Which was also used in “les enfants de paradis”… Go on, try out your French comprehension!
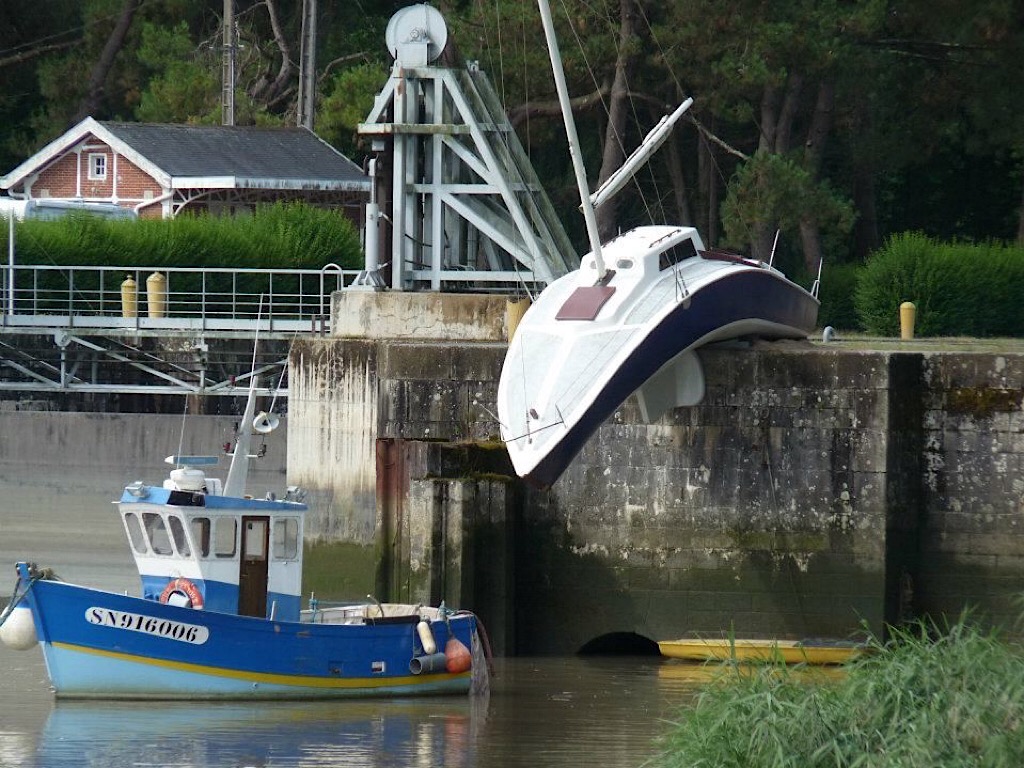
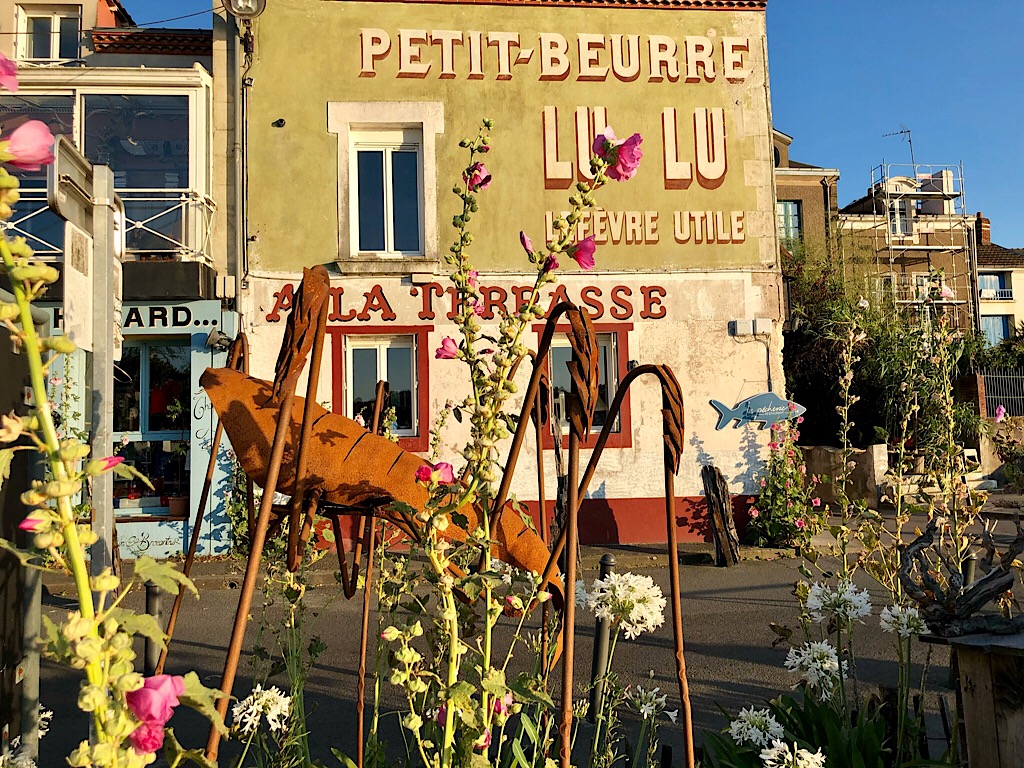
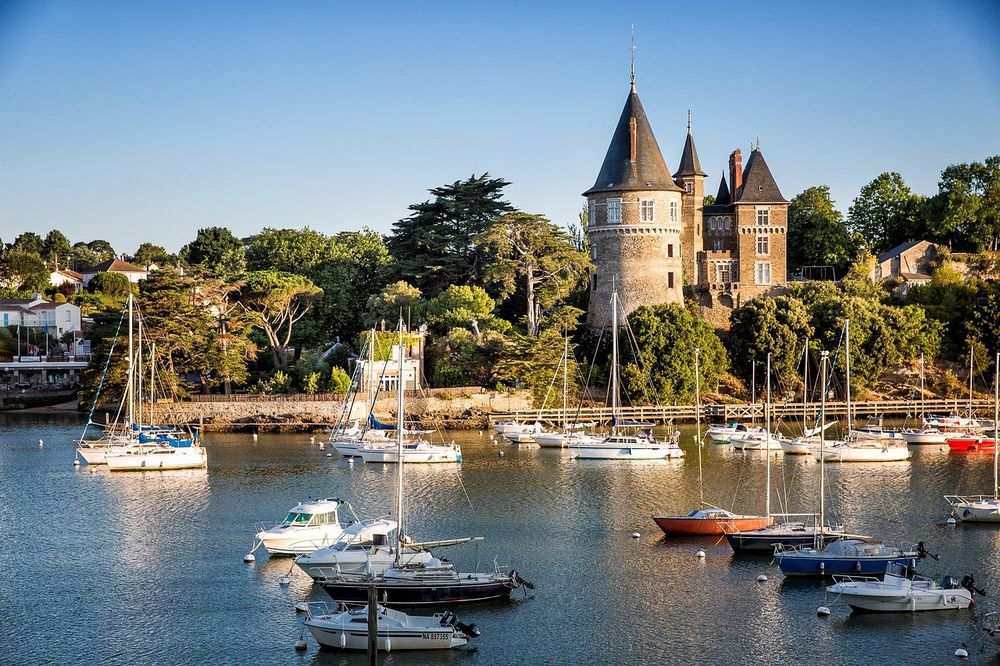
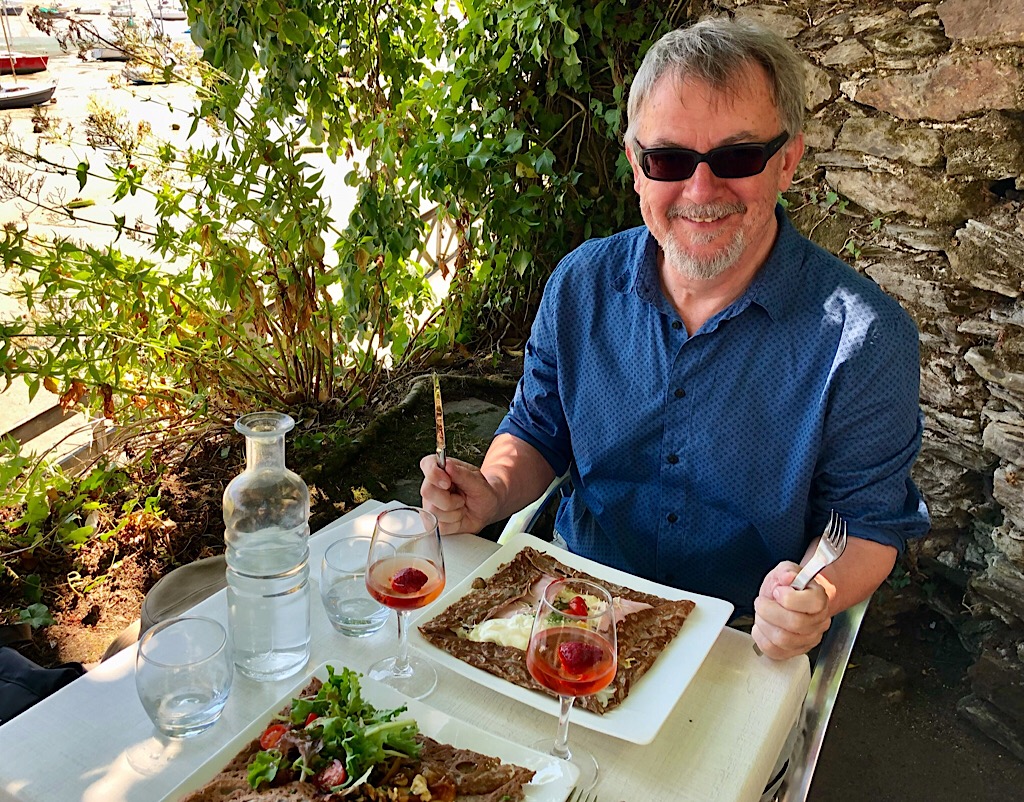
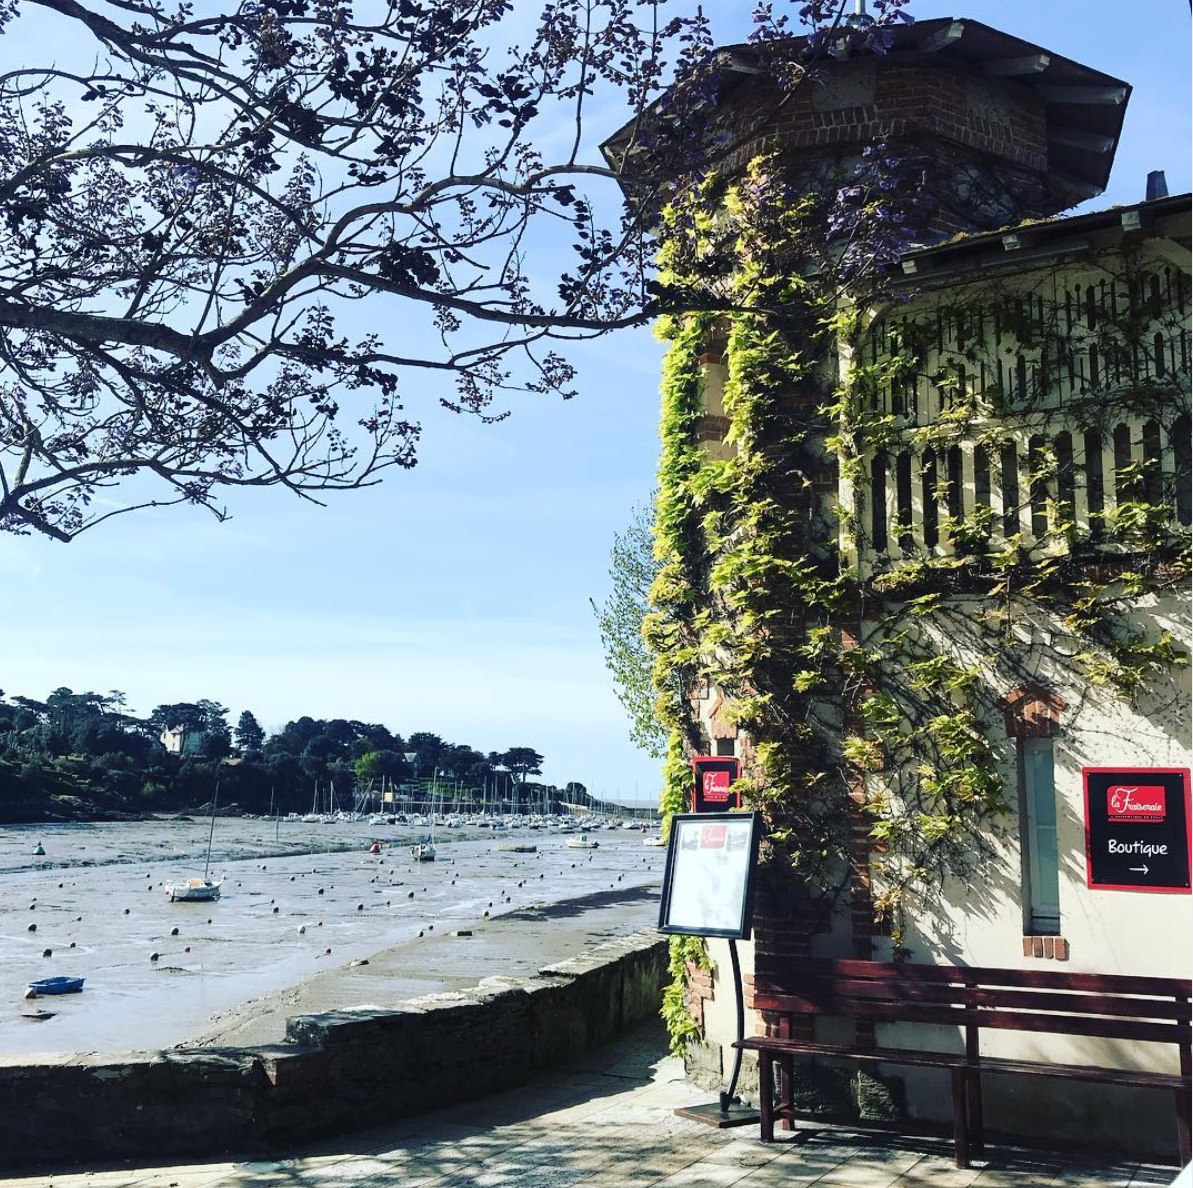
Today we took the train to Pornic which is about 43 km away on the Atlantic coast and was the favourite seaside village of the nice woman in the tourist office.
Cooler than Nantes it was still too hot to be in the sun for long.
And a beautiful view from the garden while we enjoyed our crepes, after a strawberry and rosé wine aperitif. Hence Kim‘s strawberry nose.
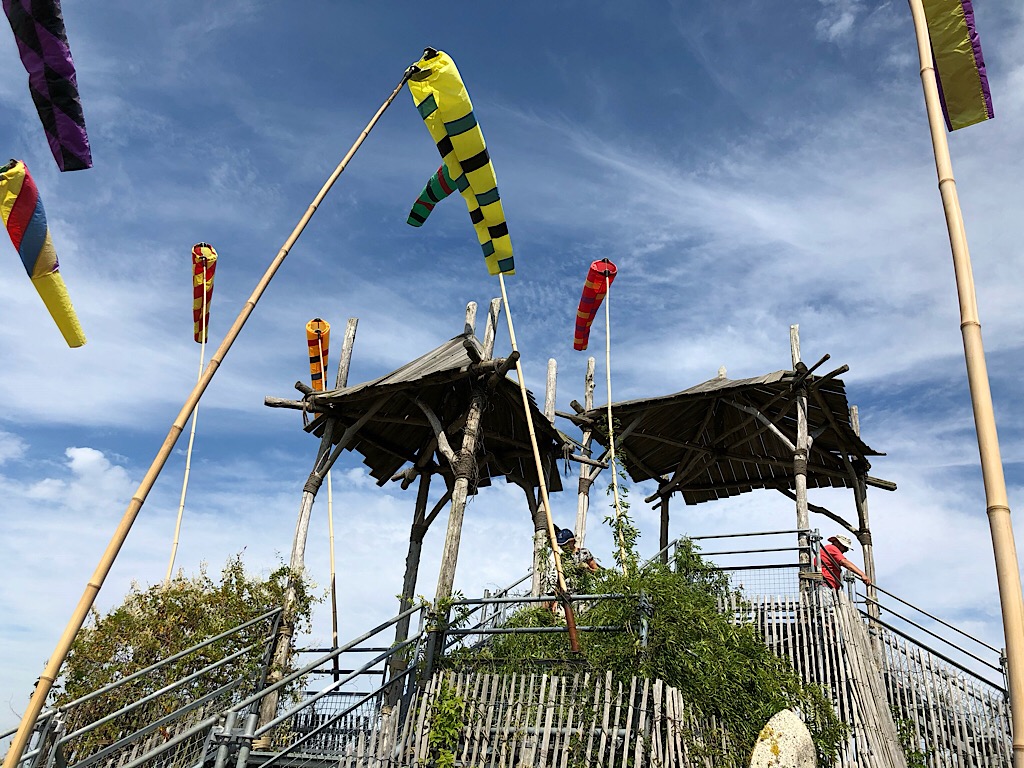
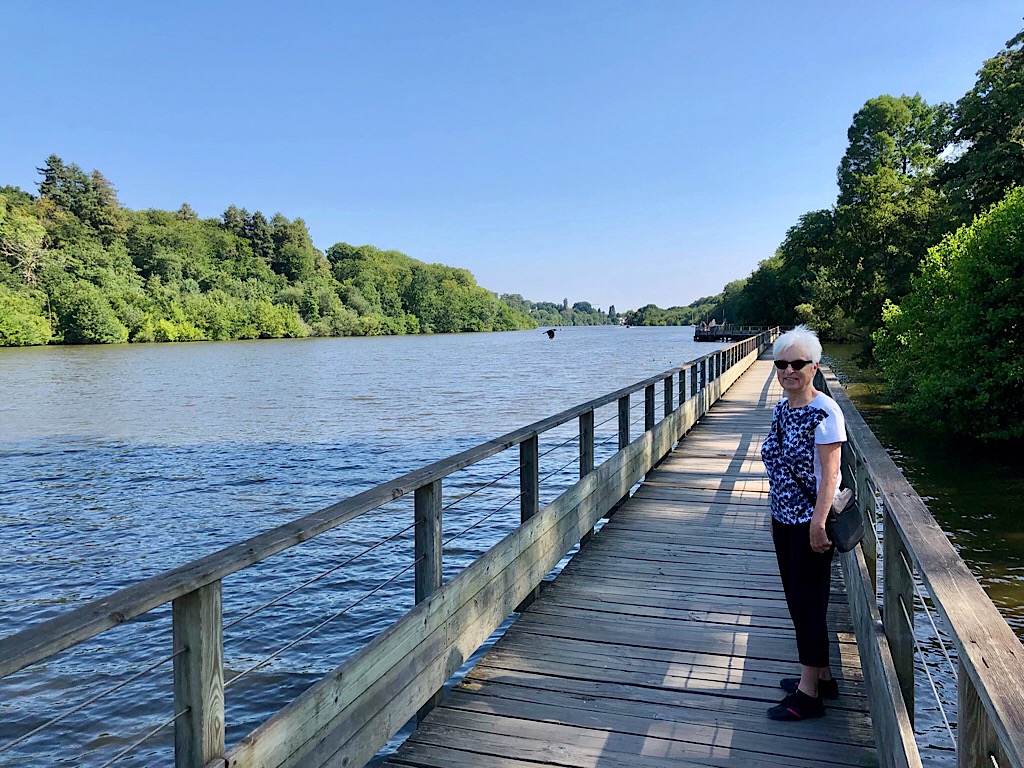
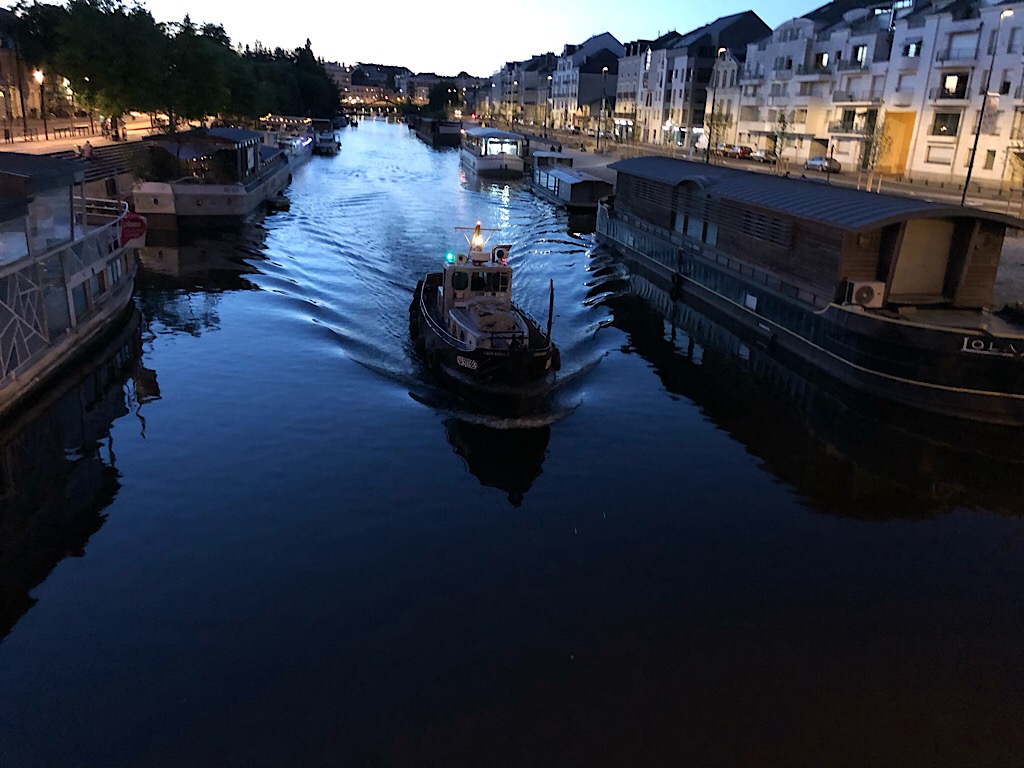
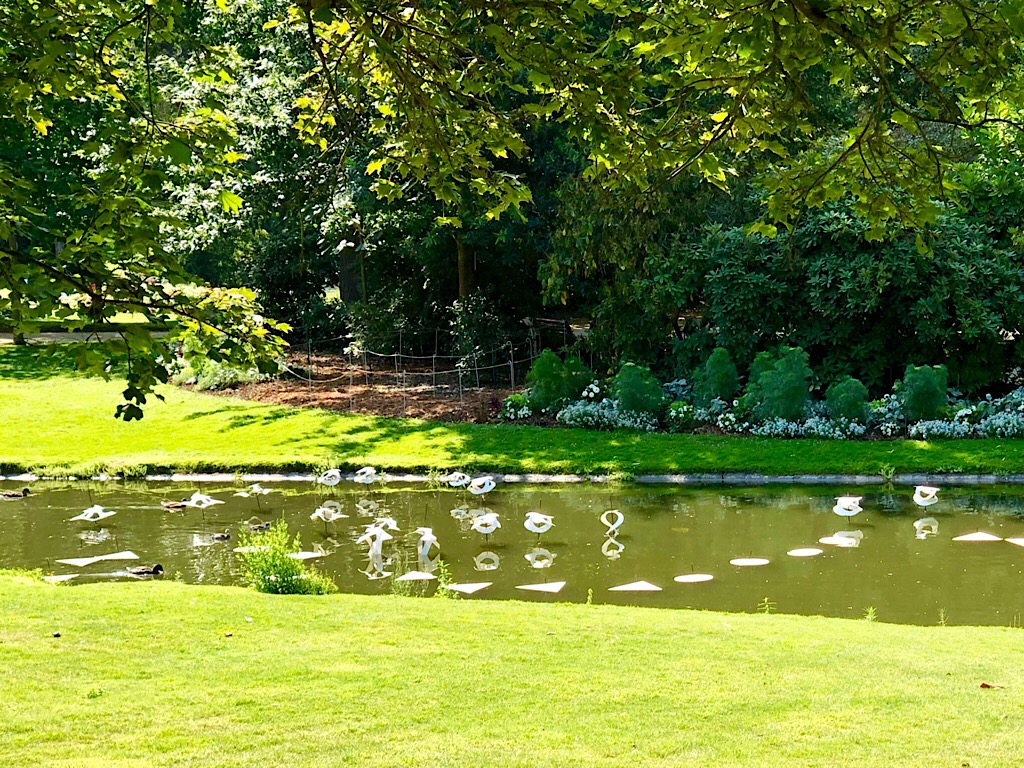
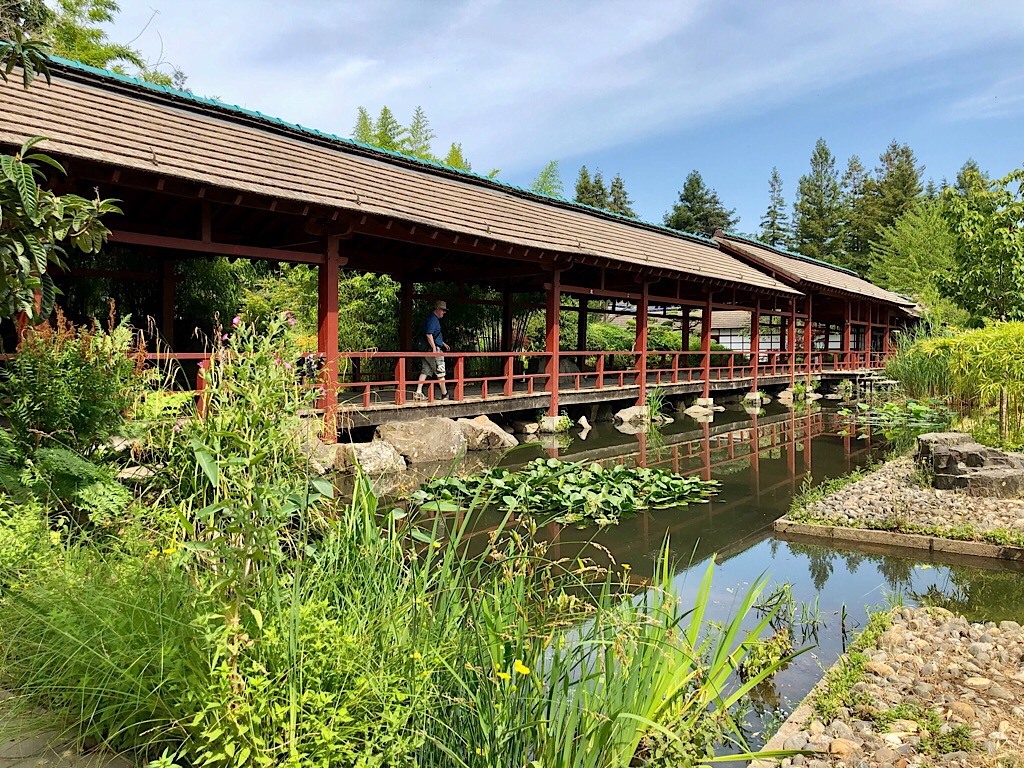
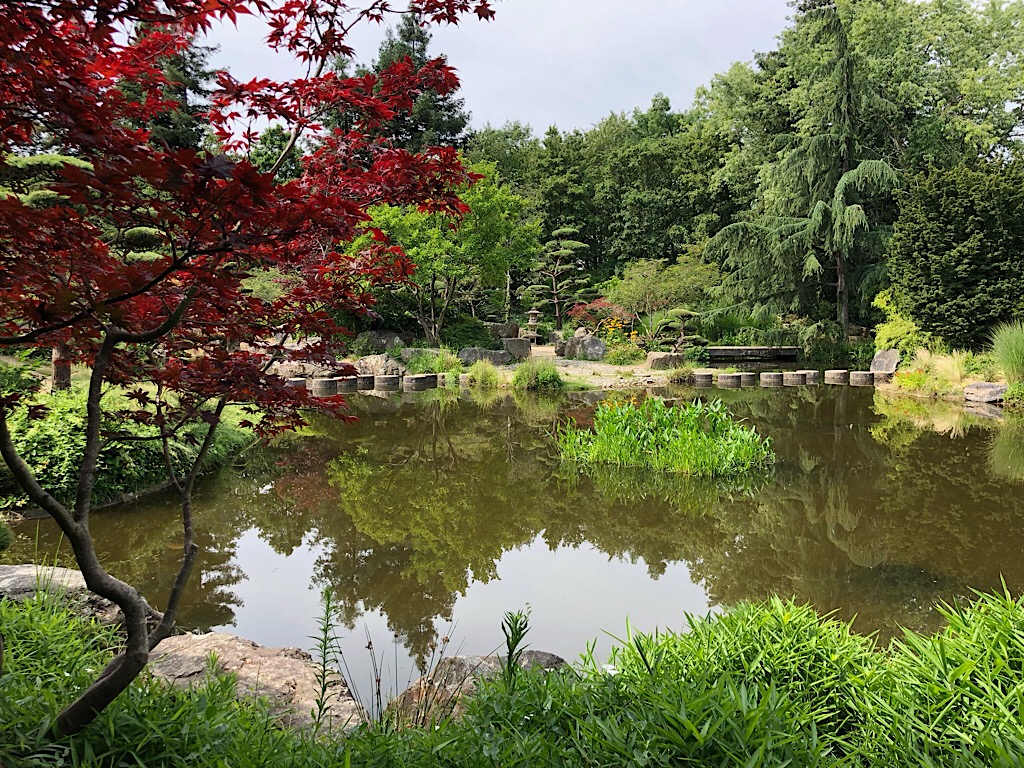
There is a bridge over the river Erdre, but where does it go? No not Japan, l’île de Versaille, Nantes.
Lots of picknicking going on here and whyever not?
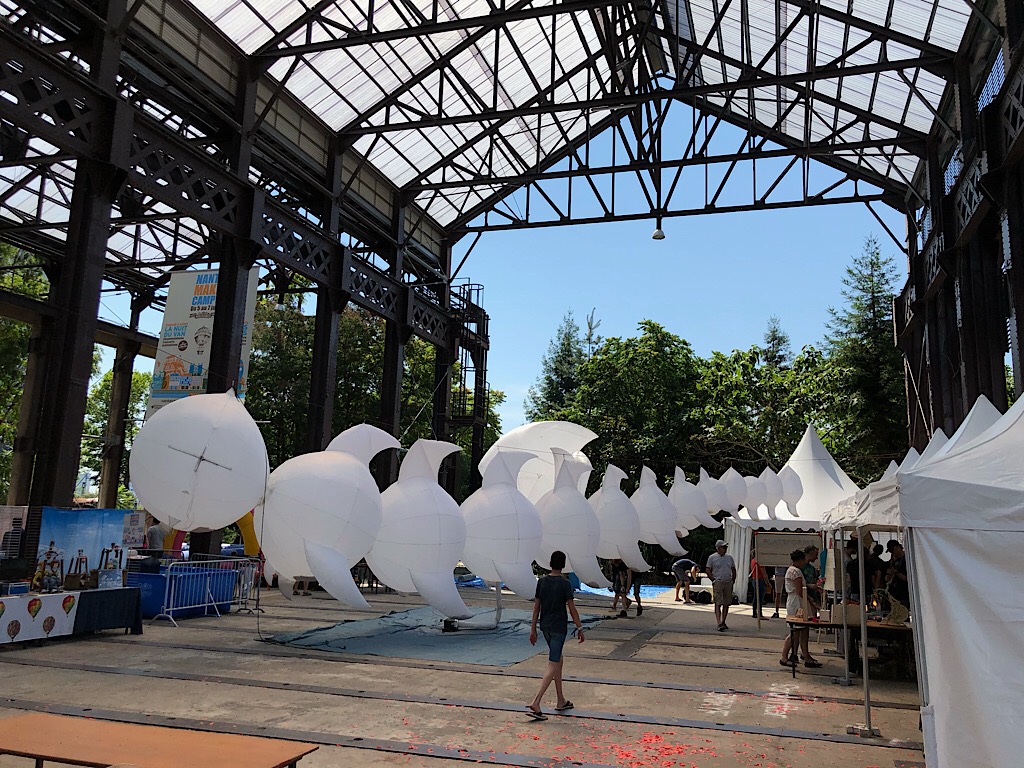
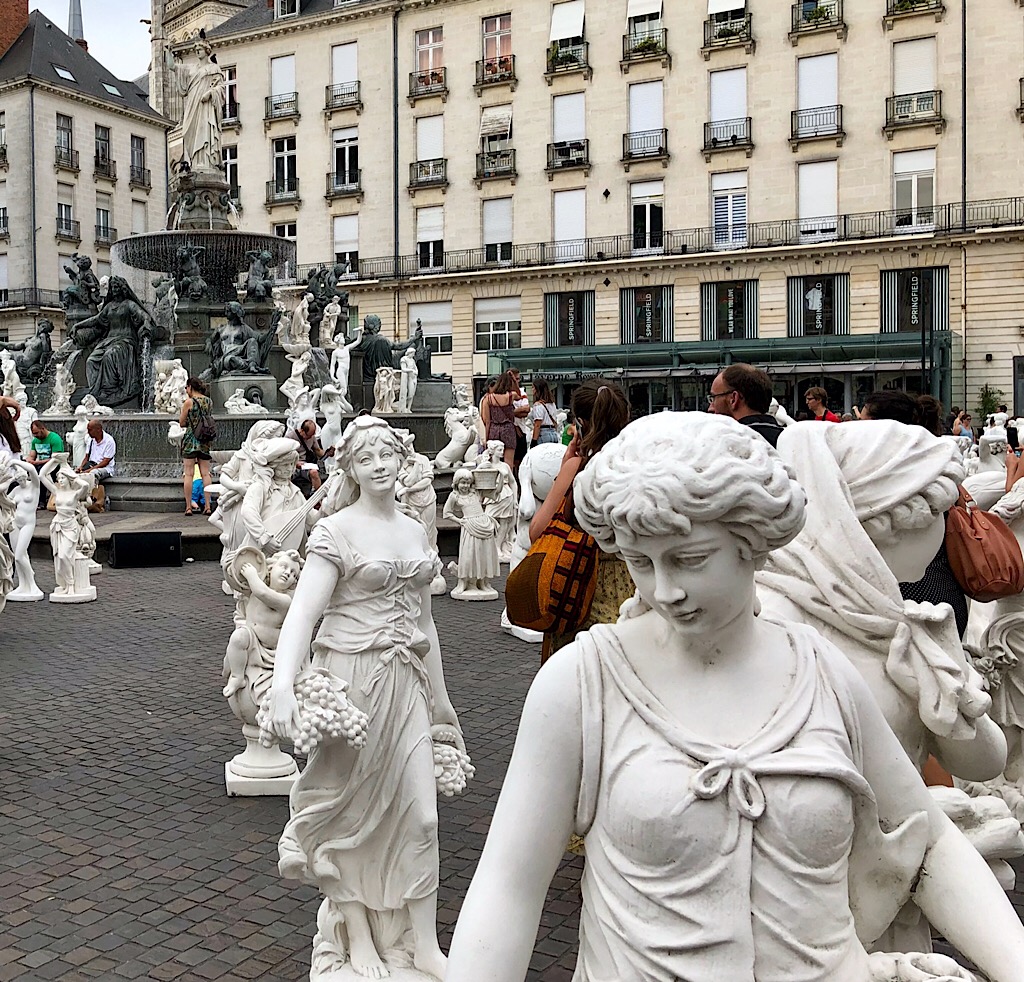
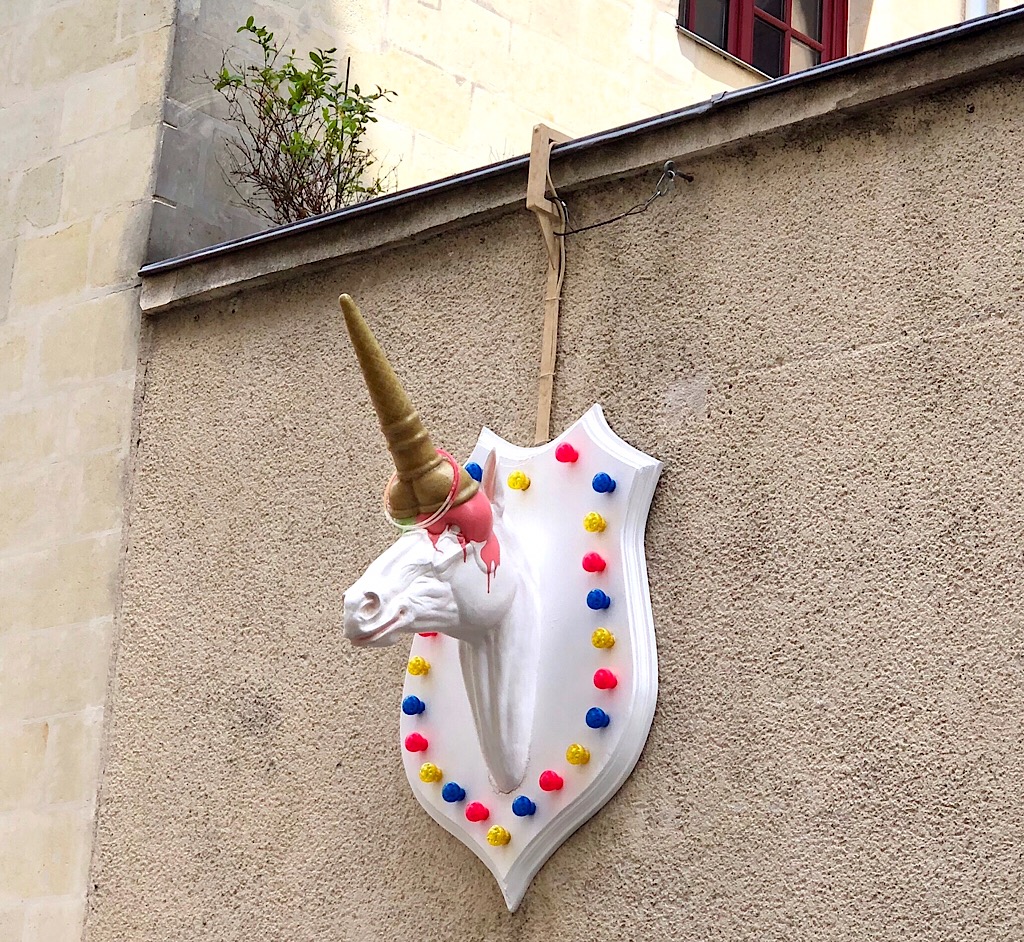
The unicorns have found their way here too
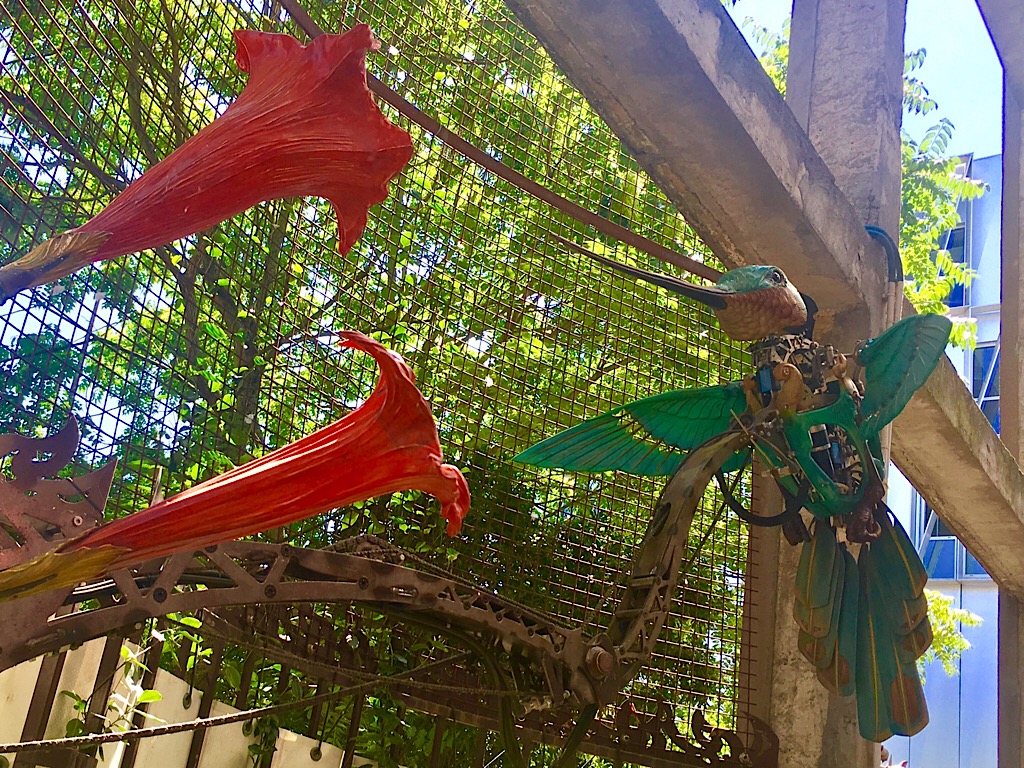
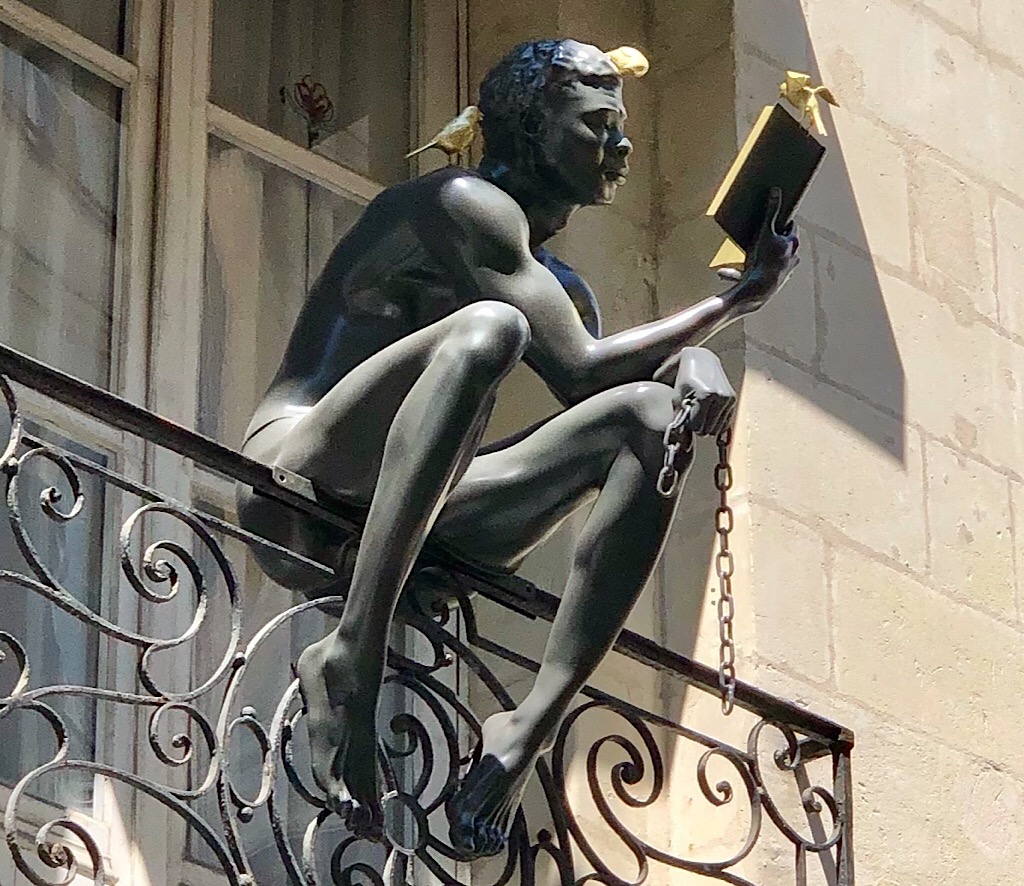
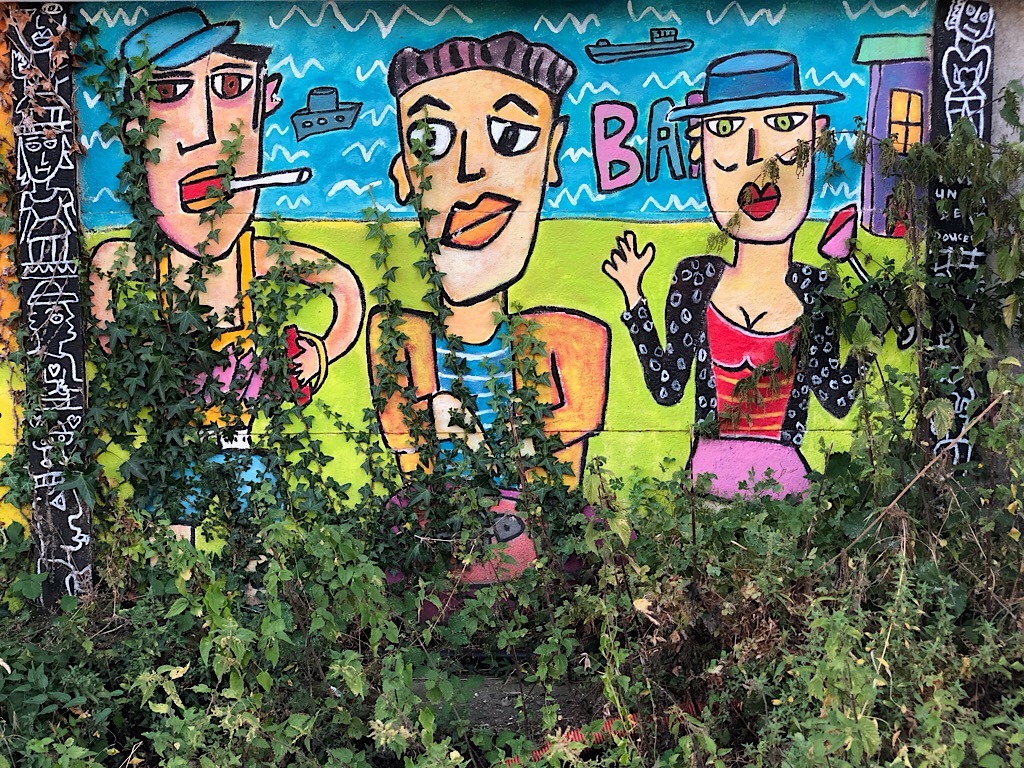
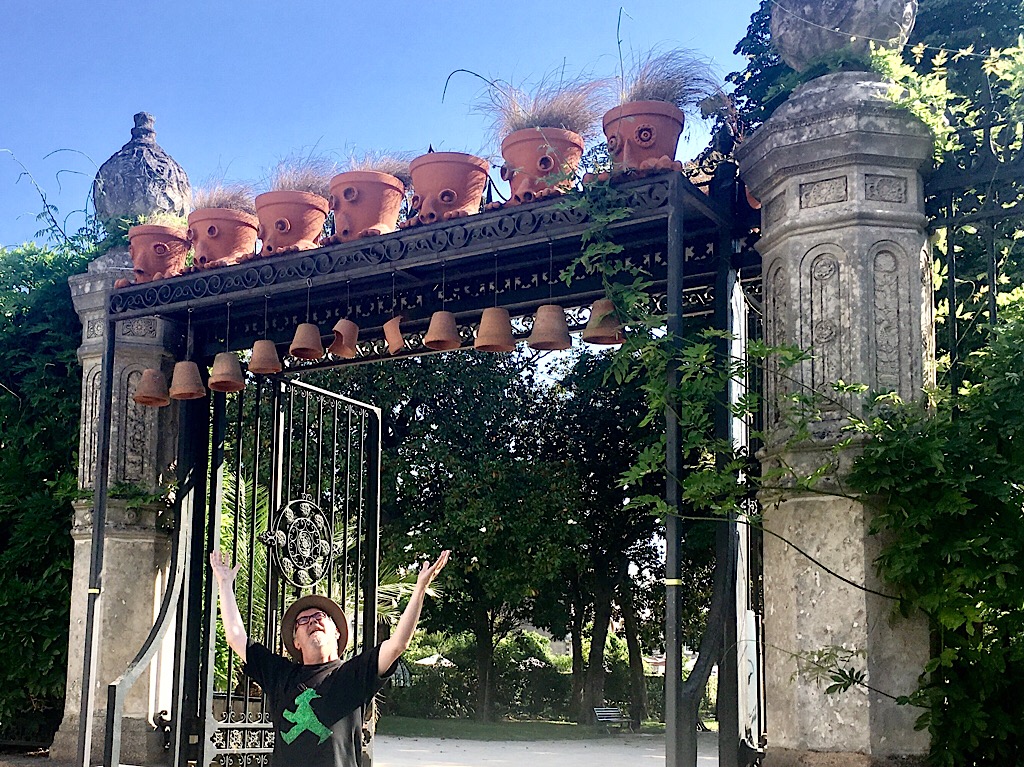
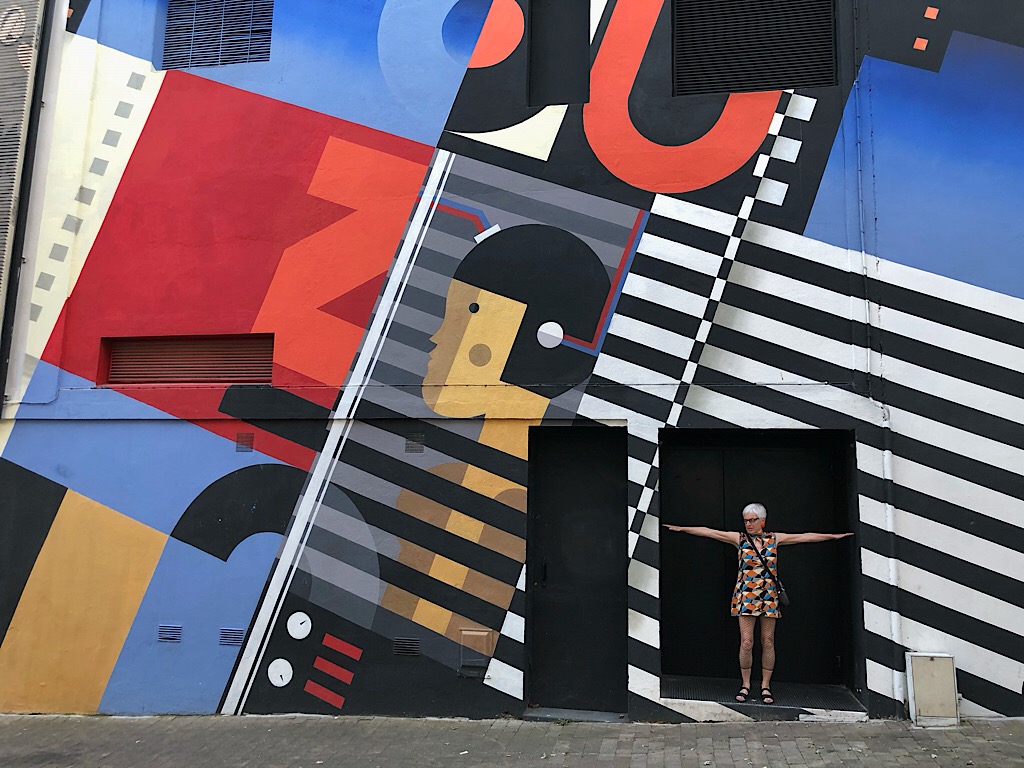
They like strange things over the streets here.
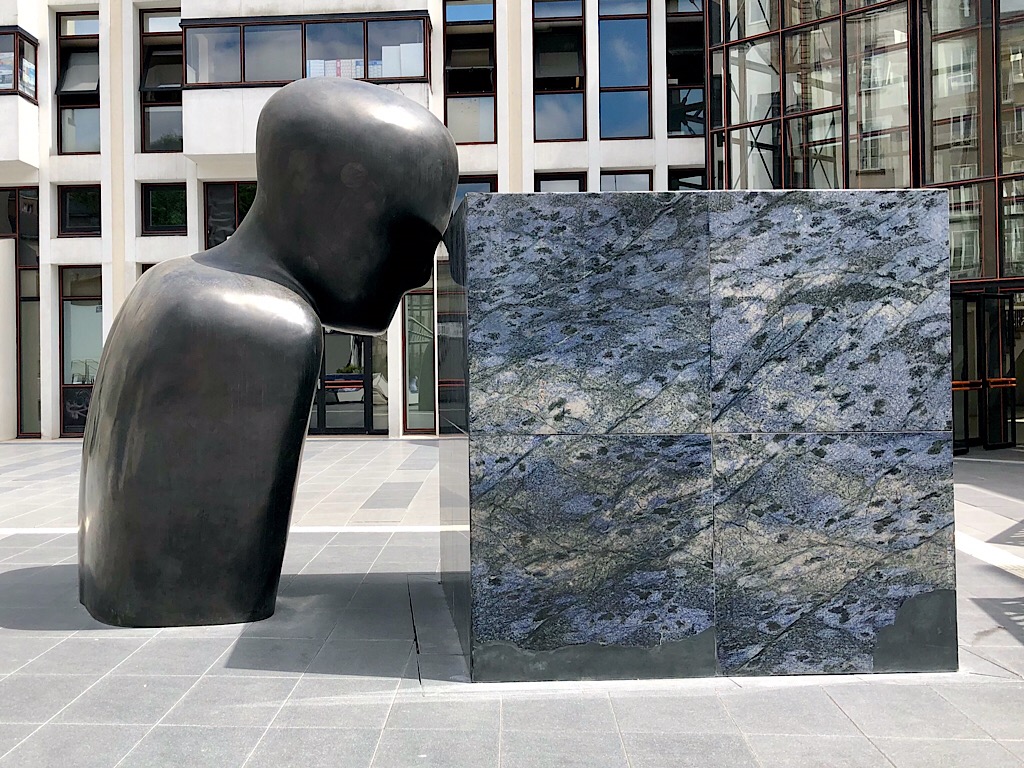
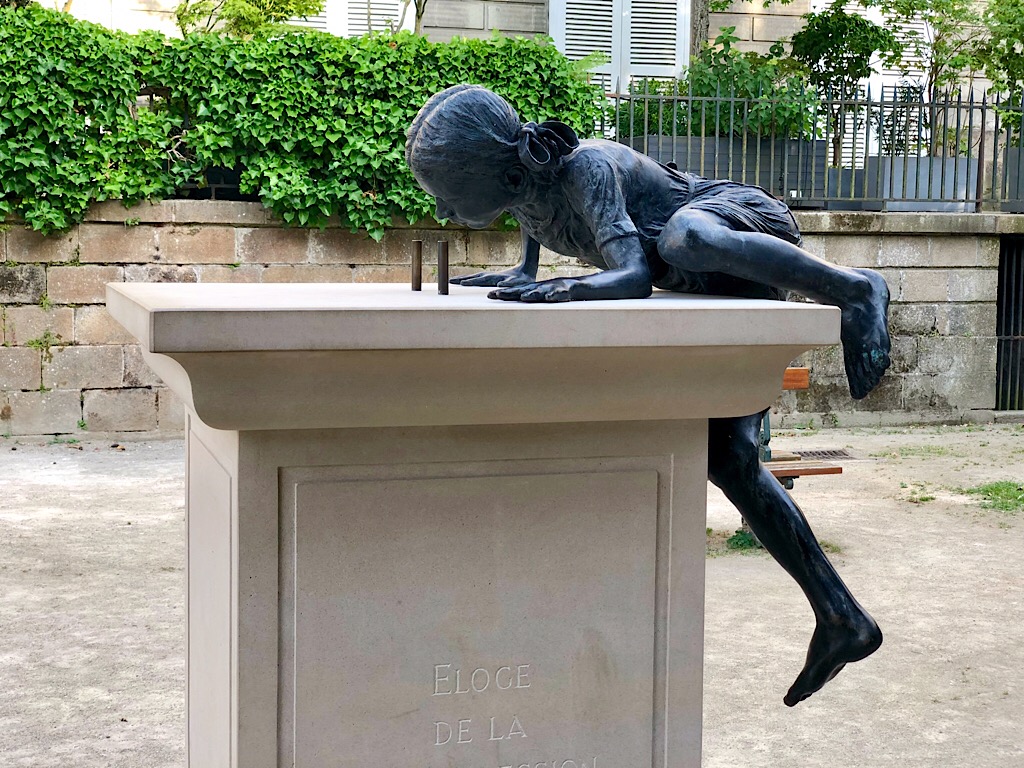
The locals describe this as an enigmatic bas relief. Google offers this.
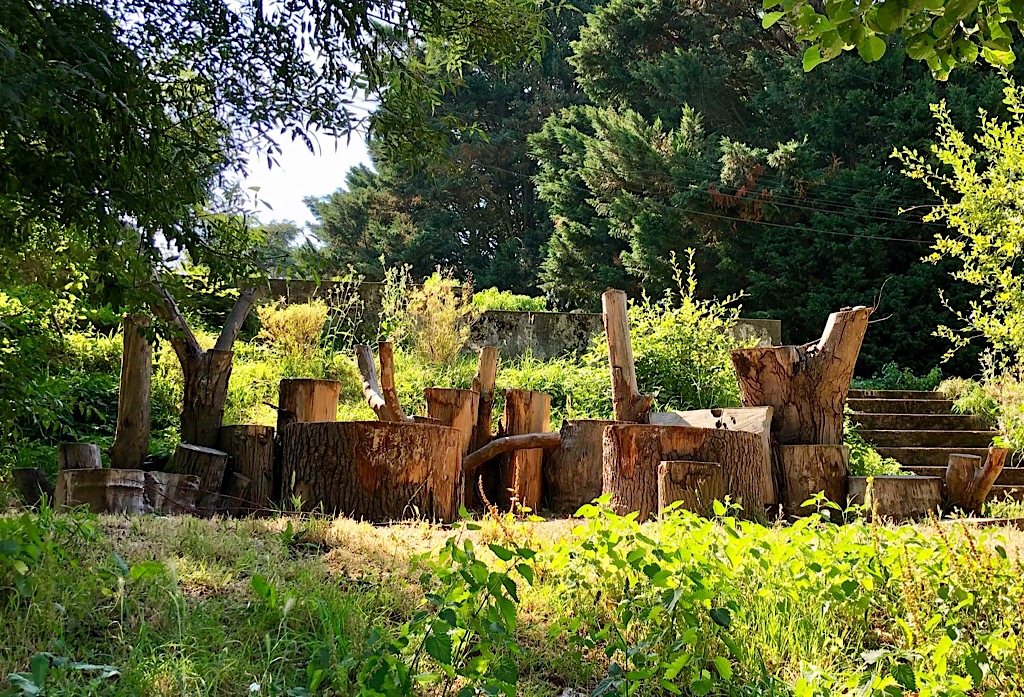
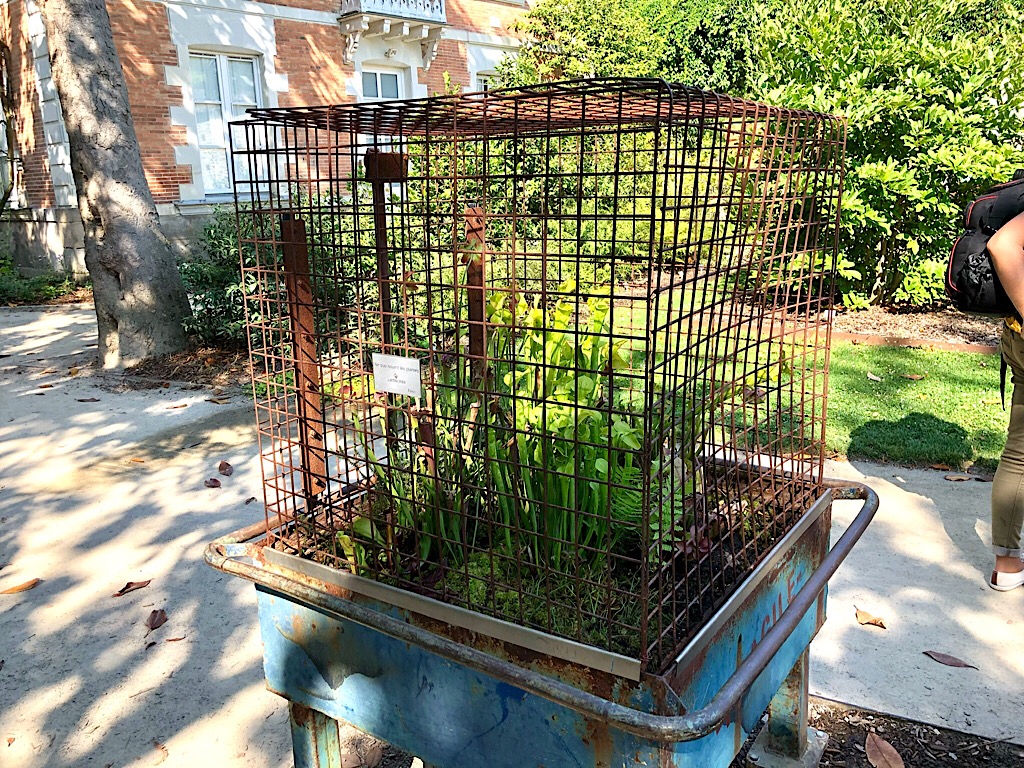
The „jungle“ art installation in the middle of the shopping district.
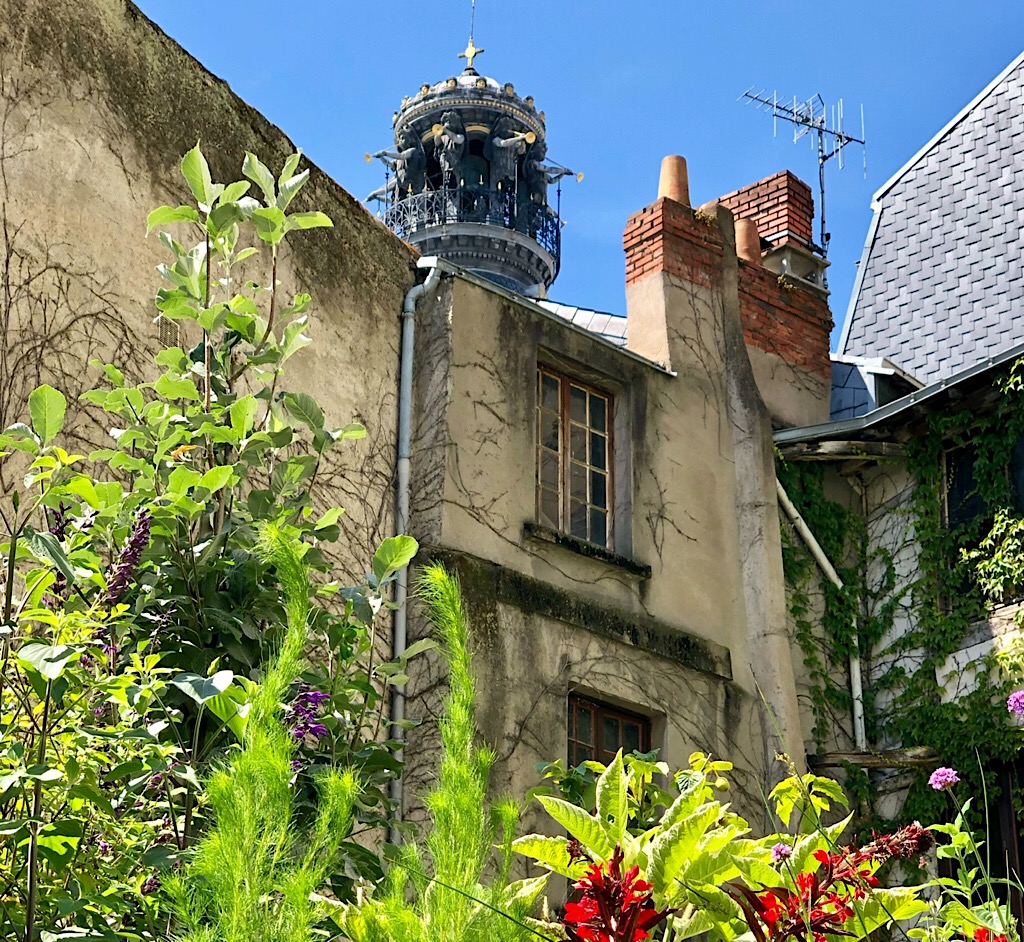
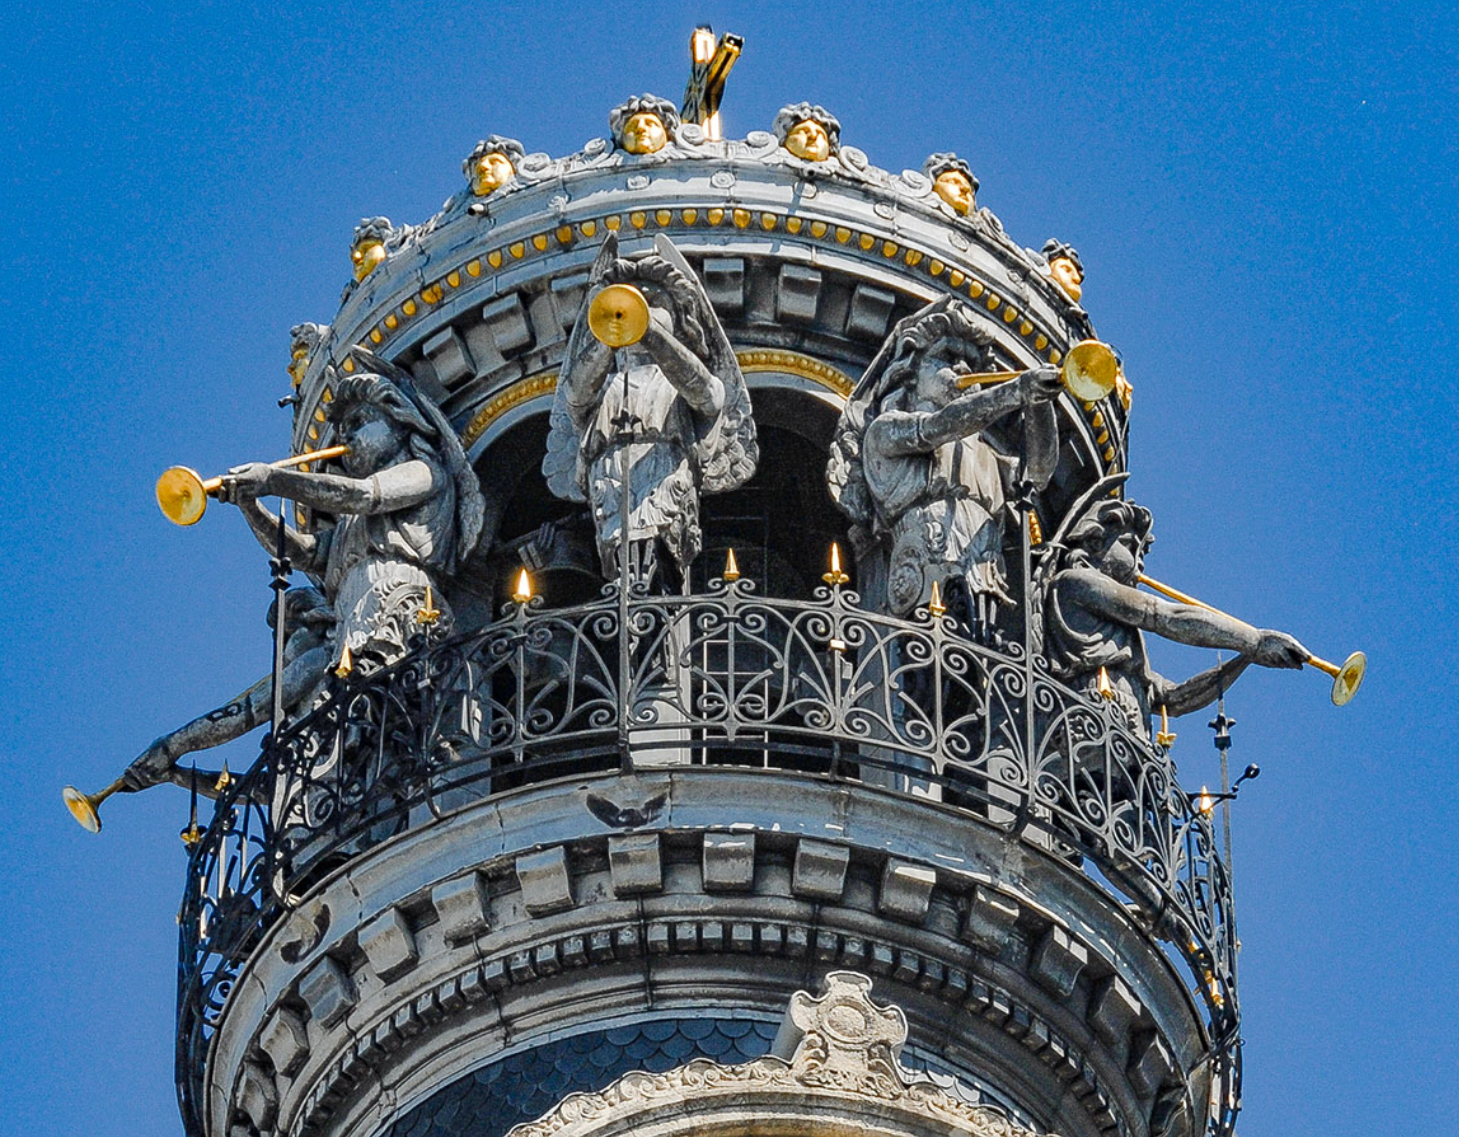
Nice update to the Sainte Croix church added in 1860, even if Kim was disappointed that the bells rang, but the trumpeters neither trumpeted nor moved an inch.
Wikipedia tells us that the unicorn is a legendary creature that has been described since antiquity as a beast with a single large, pointed, spiralling horn projecting from its forehead. So of course I had to make one.
There are already plenty of horsey automata around. Rob Ives designed a brilliant paper Pegasus, a flying horse, using a clothes peg to hold the mechanism (https://www.robives.com/product/pegasus/). Keith Newstead has designed some fantastic winged horses (https://www.keithnewsteadautomata.com/slide/pegasus/) and there are a number of laser-cut wood/MDF kits available for both Pegasus and flying unicorns. It’s great to be able to see how other folk approach similar problems to see how they coped with the various challenges of making something quite mythical.
Some time ago I bought and assembled a laser-cut MDF Pegasus kit. The movement is good, but my 3 year old friend managed to break off the thin MDF handle at first go, and it is so light that it skates around the table while you turn the crank, meaning you need a second hand to hold the base still. So my first requirement is that it must be sturdy and heavy enough to be worked with just one hand, especially if it’s only 3 years old. A rubber mat under the base should prevent it from slipping about.
The force applied to the handle as you turn it varies. The handle must be positioned so that you are pushing down when the most force is applied and pushing up when the least force is required. Again this will make one-handed operation easier.
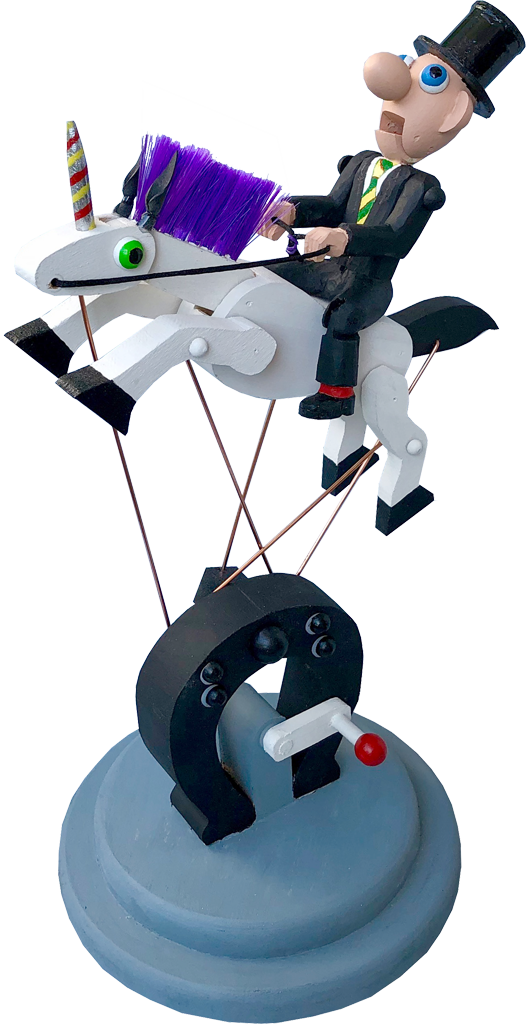
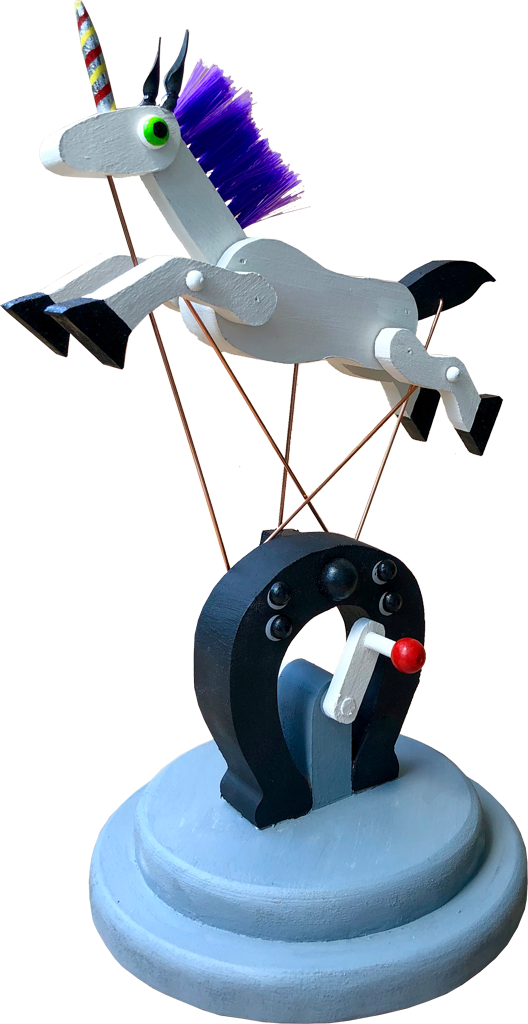
As a genuine unicorn, it has to have a spiral horn, horsey ears, a splendid mane, a bushy tail and friendly eyes. The base is part of the show, so it shouldn’t be boring.
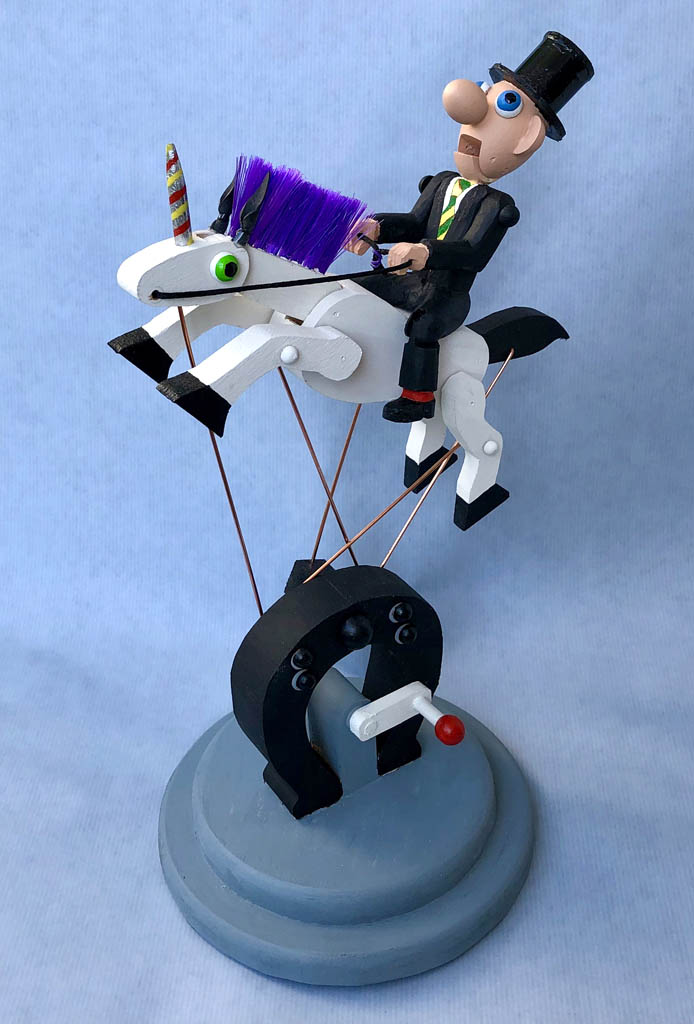
The unicorn would be interesting just by itself (see the inset image), but I thought a hapless rider would add to the fun, stylishly dressed but fearful of the unicorn’s movement, opening his mouth to protest each time that he might fall off backwards, rescued only by holding tight to the reins.
Pencil sketch of the unicorn
Card templates
From the pencil sketch it’s not too hard to make some card templates which makes it easy to mark the wood for cutting with a bow saw.
The base
Two MDF discs make a nice, heavy base and a vertical horseshoe is perfect to take a lot of the mechanism. I did wonder for a while, why horses can’t wear shoes with laces. I suppose not having fingers makes doing up your laces kind of hard. Anyway some creative soul came up with nailing a bent metal strip to their hooves and this is such a design classic, that nowadays it is instantly recognisable as equine footwear and not at all boring.
The unicorn
However magical it is, a unicorn needs a horn, a head, a neck, a body, a tail and four legs. The neck must have a splendid mane of course. For the mane, drill a few holes at regular intervals along the neck. Measure the required diameter by using pliers to pull out a tuft of bristles from the brush that is to supply the mane. The empty hole that is left in the brush is the size that you need in the neck. Just push the bristles into the neck, with a small dab of glue on the end.
The body is the thickest part as you have to chisel out slots for the tail and for the neck.
The slots have to be wide enough to allow free movement. I then used 1.6 mm welding rod for the hinges, drilling 1.6 mm for a tight fit and 2.0 mm for a loose fit to allow movement.
The crank and the sliding pivot
The crank is the handle that you turn to get the unicorn galloping. A small sphere on one end prevents the loop on the end of the central rod from coming off. A small sphere on the other end is painted bright red to say “this is what you turn”. Plastic washers reduce friction
The central rod slides easily up and down through this block of wood, which can turn easily in the top of the horseshoe. The hemisphere on the end stops the axle from slipping towards the back.
Test assembly
While fiddling about to get everything right, it’s useful to leave bent “handles” on the rods which serve as axles for the head, neck, tail and legs. Once everything is OK, then these can be cut off at the correct length. The two leg axles are glued right at the end to keep the pairs of legs firmly joined together. It’s much easier to paint the parts before the final assembly. Rods which pivot in the horseshoe and in the legs and tail protrude enough so that a small wooden hemisphere can be glued on to prevent them from slipping out and to prevent inexperienced jockeys from getting accidentally stabbed by sharp ends.
Ears and eyes
Once the rod hinging the head to the neck has been cut to size, glue hemispheres on top to conceal the holes and prevent the rod from sliding out and, when painted, they make beautiful eyes. For the ears, I cut rubber sheeting to a suitable shape, rolled it around a thin pin, tied it with cotton thread to prevent it from unrolling and drilled a small hole to take the pin. Two-component epoxy resin glue, fairly liberally applied holds everything together and in place.
Fully assembled and painted the base looks like this –
The rider
There are apparently people around who believe in unicorns and even think they can ride them.
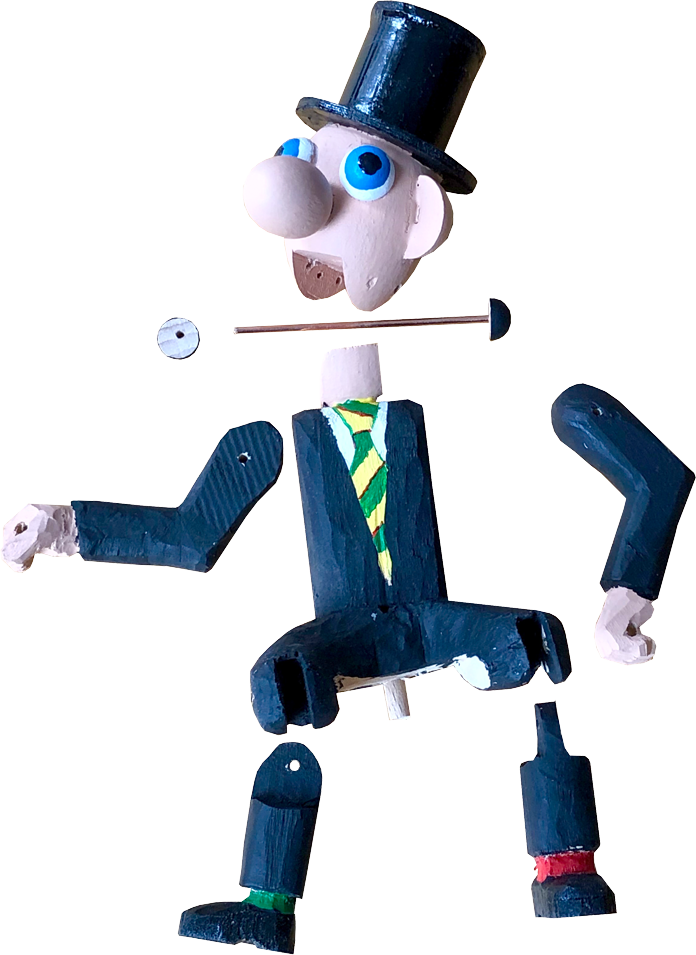
This small, smartly dressed fellow is carved from lime wood with his arms and lower legs hinged on 1.6 mm rods. His head is a beechwood egg with the jaw cut out and glued firmly to his shoulders. A rod through a hole at the back of the jaw allows his head to flop forwards and backwards as the unicorn gallops. There is a hole drilled through each hand for the reins. When the unicorn points skyward, the reins pull tight and lift the rider’s arms, his head flops back and his mouth opens in a silent appeal for salvation. At the other extreme, the reins are slack, his arms drop and his mouth closes in relief.
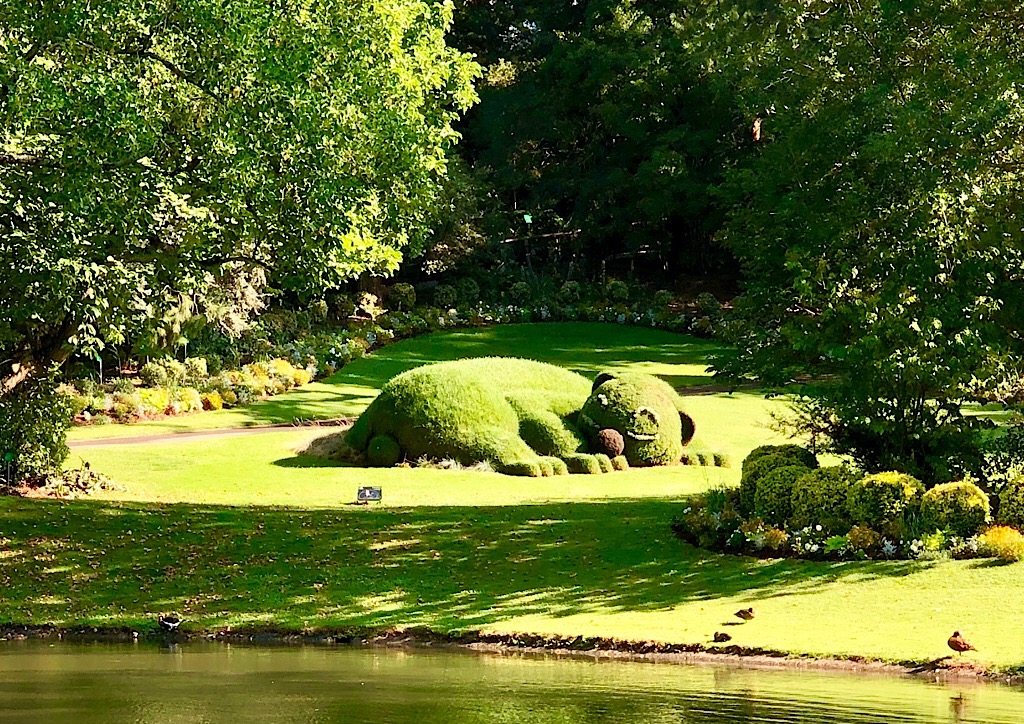
There is an English saying that discourages you from waking sleeping dogs. Doing so is to risk provoking a defensive reaction, a baring of teeth and a concert of barks to wake the entire neighbourhood. This sounds like a great place to keep your valuables safe. Like keeping your favourite chocolate bar safe from your little sister. The only problem is that a real dog might like chocolate too, however unhealthy it is for them, so it will have to be a wooden dog. A wooden dog that knows how to keep its jaws clamped shut until it wakes up, and goes barking mad at any attempt to snaffle what’s in its mouth. Man’s ingenuity knows no bounds so here is the latest product from Berlin’s high-tech animalatronic workshop, a sleeping dog!
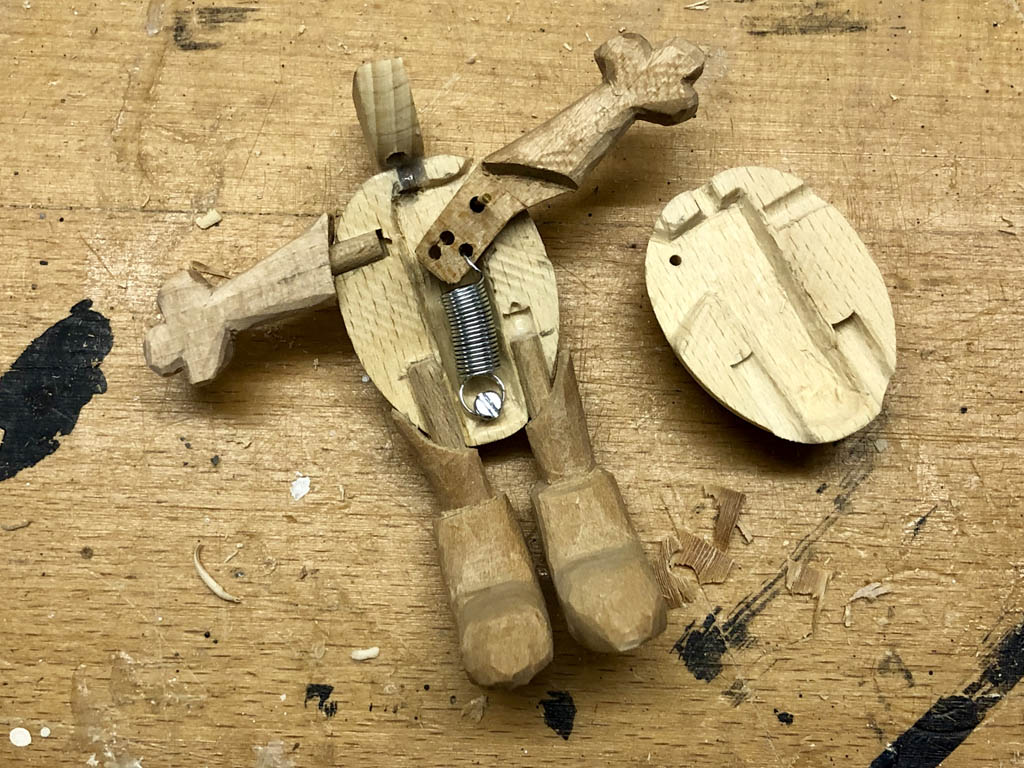
Here are most of the bits that make up our ferocious friend.
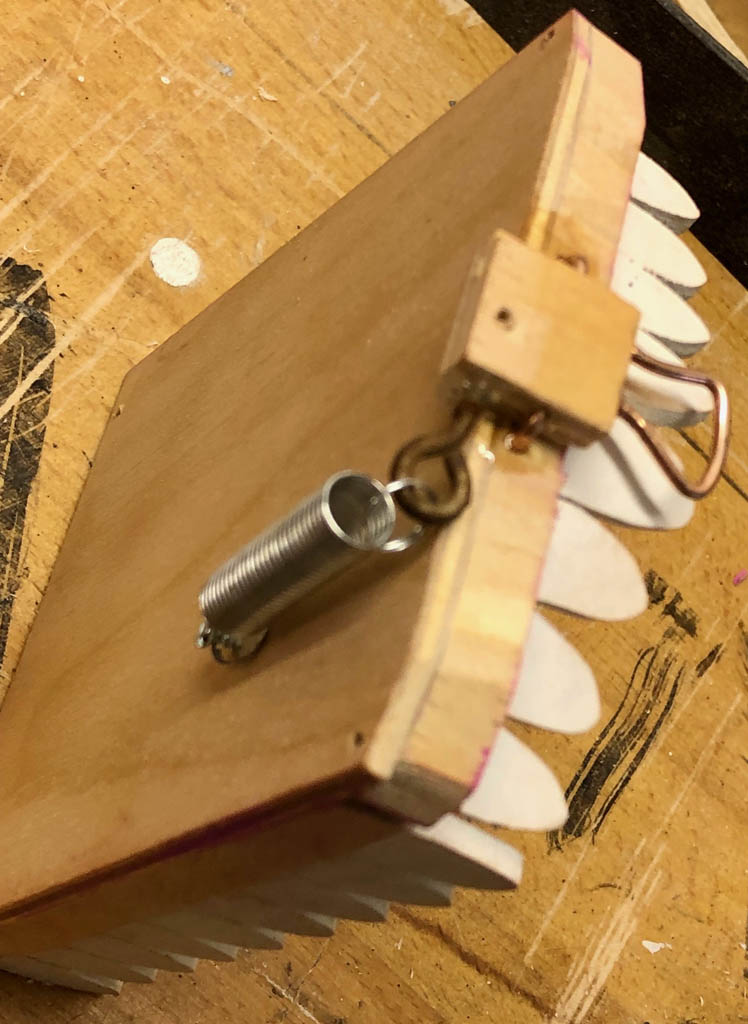
This dog has false teeth! You can take them out, which makes them easier to align so that they overlap nicely without touching and painting is very much easier too. The upper set of teeth sit on wooden blocks to create a hidden space for the strings attached to the nose, which move ears and eyes. This space also hides the spring for the catch which keeps the jaws locked together until the nose is moved.
Spring for the catch
The small black microswitch is activated when the upper jaw is lifted. The little circuit board comes ready to use from a hobby shop and this replays your recorded sound when the microswitch triggers. I replaced the standard speaker with a smaller, dog-sized one and glued this to the partition. The sound is quite cheerful for our purpose, as we won’t be playing Beethoven’s 9th.
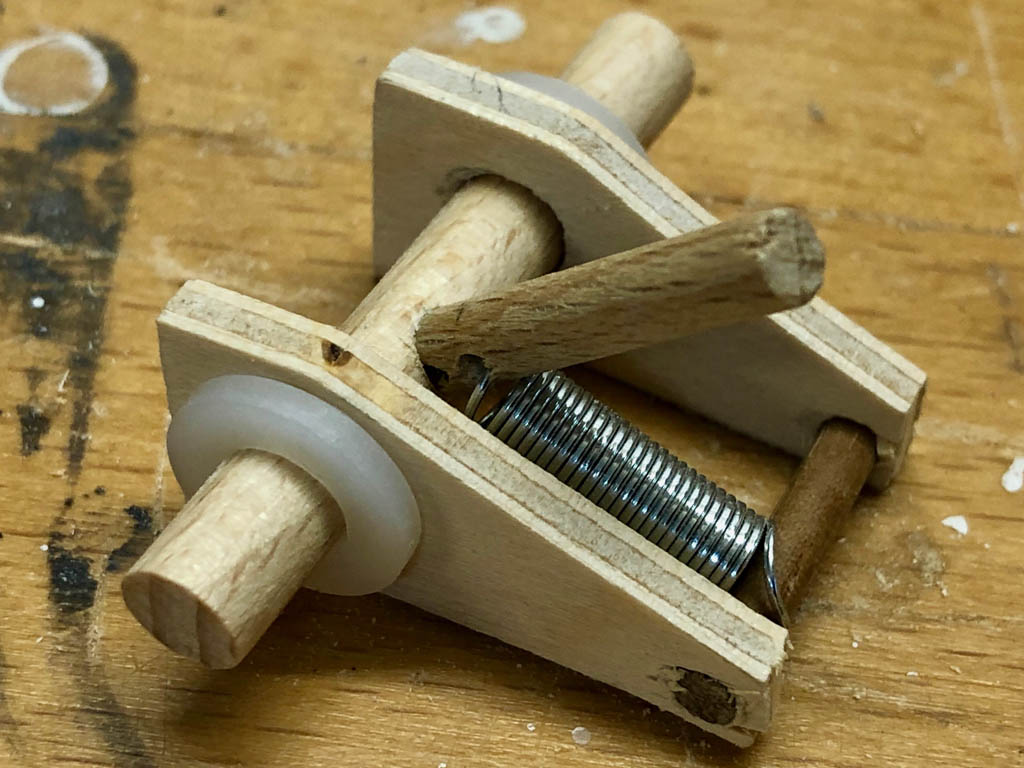
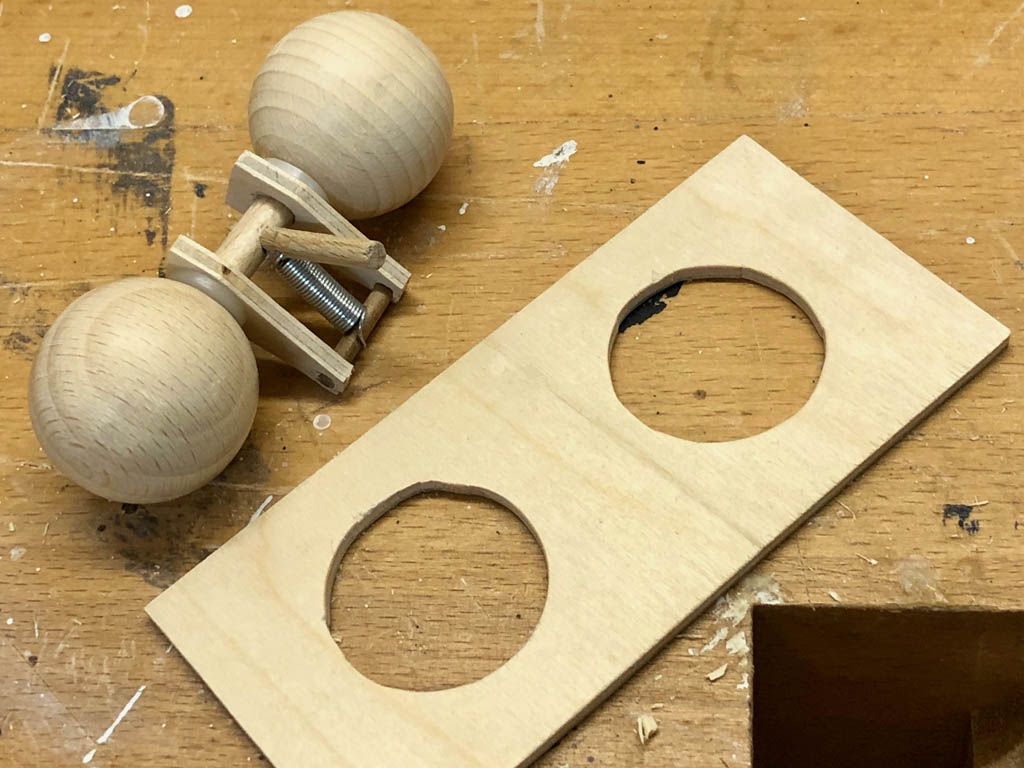
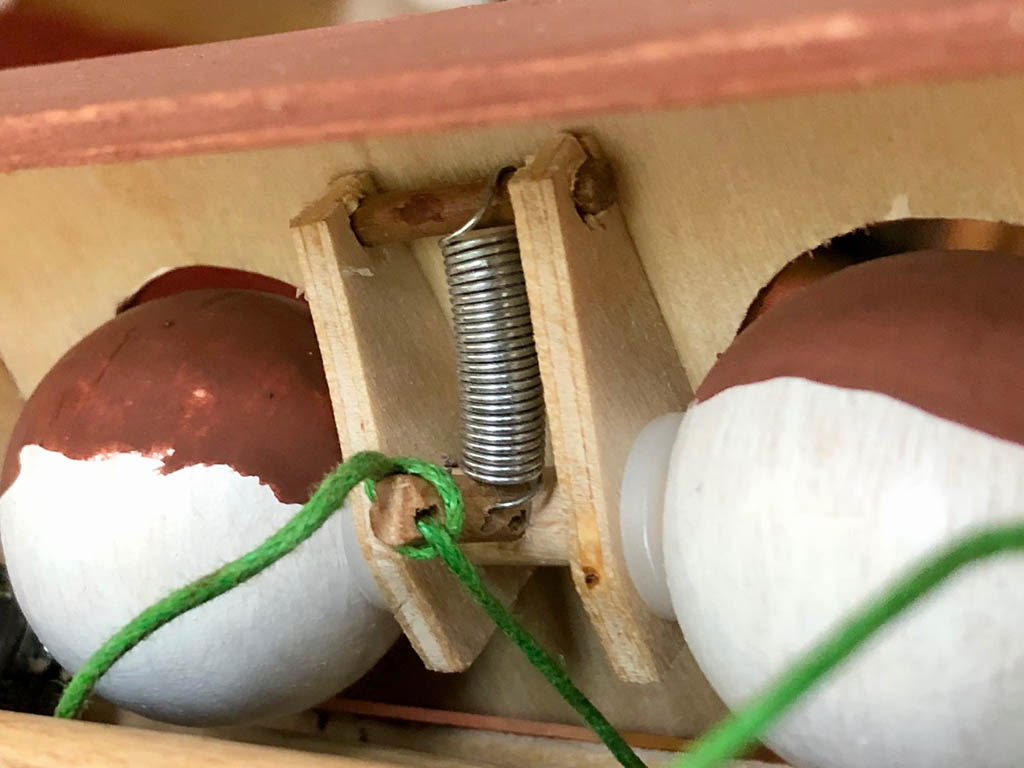
The eyes are only held in the centre on a piece of wooden dowel. A spring keeps the eyes closed until a tug on the string pulls the lever to open them. The eyes don’t touch the panel so that the paint doesn’t rub off and allows for alignment errors when drilling the wooden balls. Two plastic washers keep the friction down.
Eye mechanismEye mechanism half assembledEye mechanism in placeReturn spring for ears
Thank you for your request. Via the following link you can find information on all installations from the art in public space project in the city of Borgloon:http://www.janboelen.be/pit-art-in-open-space/
Gijs Van Vaerenbergh: Reading Between the Lines (2011-permanent)
Architect duo Gijs Van Vaerenbergh’s (B) see-through church ‘Reading Between the Lines’ in Borgloon is a 10-metre-high structure that weighs 30 tons. It is made of 100 stacked layers of steel plates in the shape of a church of Loon. The structure enables seeing the surrounding landscape through the church both from far away and up close; the church is both present and absent in the landscape.
Fred Eerdekens: Twijfelgrens (2011-permanent)
Wooden-like sculpture by Fred Eerdekens (B) appears as a folded line in the landscape; from the right angle, the line forms a word ‘twijfelgrens,’ a ‘doubt border.’ The work continues Eerdekens’ use of language as a medium.
Tadashi Kawamata: Project Burchtheuvel (2011–2017)
Tadashi Kawamata’s (JP) wooden sculptures in the open space can be labeled social constructions, as he lets the local community help build the sculptures. In Borgloon, Kawamata built a wooden sculpture around and on top of Burchtheuvel, a historically significant place. He worked with twenty visual arts, architecture and interior design students, who researched how Burchtheuvel could again play a full-fledged role in the city centre.
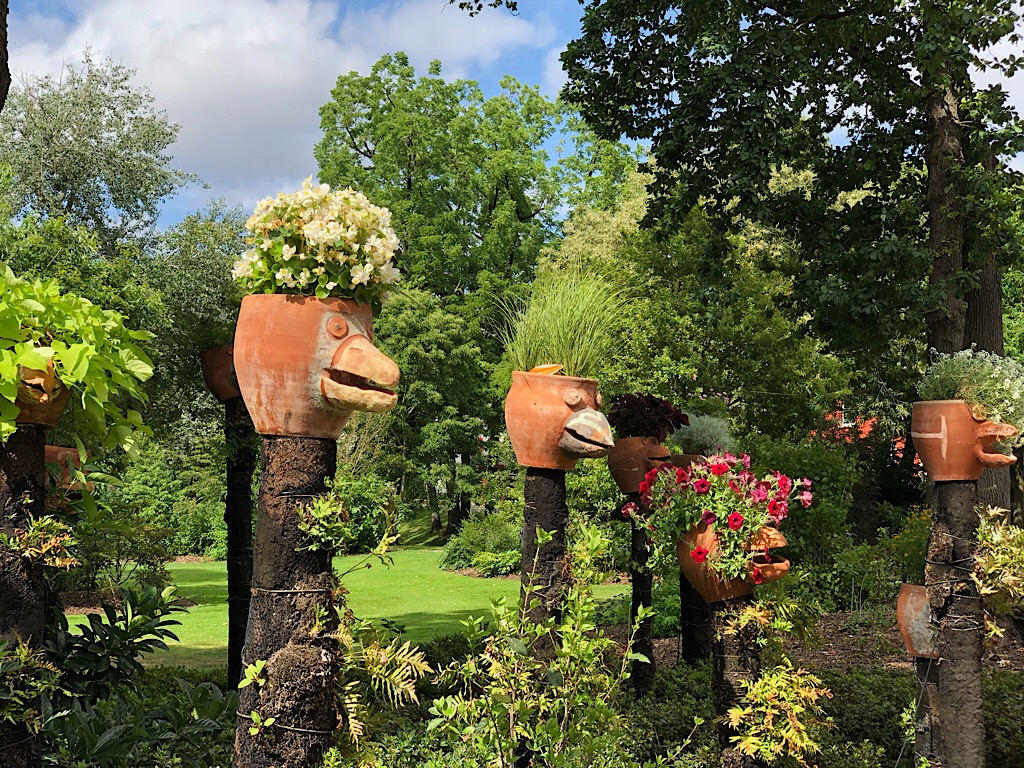
Dré Wapenaar: Tranendreef (2011-permanent)
Tear-shaped sculptures by Dré Wapenaar (NL) are hanging from the trees and provide an alternative form of accommodation in Haspengouw. Situated on the border of architecture and sculpture, Wapenaar’s sculptures are often temporarily placed tent structures. Social interaction around the work is of great importance for the artist.
Ardie Van Bommel: Pure Nature (2011-permanent)
Ardie van Bommel (NL) brings a sitting, washing, toilet and barbecue unit to Tradentdreef, at the tree tents by Dré Wapenaar. The units are based on the palettes of fruit chests often seen in the Haspengouw landscape.
Paul Devens: Proximity Effect (2012-permanent)
‘Proximity Effect’ by sound artist Paul Devens (NL) is located at the Servatius church in Groot-Loon. Through speakers and sensors, the site-specific sound installation in the 12th-century church plays a game of tones, sounds of outside recordings, acoustics, echo and space.
Wesley Meuris: Memento (2012–permanent)
‘Memento,’ a sculpture by Wesley Meuris (B) at the Central Burial of Borgloon, is an anchor point in the sloping landscape. The architectural structure of the work provides an experience of looking and dwelling. The experience of intimacy reflects the memory of the sculpture’s surroundings. The sculpture is initiated by De Nieuwe Opdrachtgevers.
Aeneas Wilder: Untitled #158(2012–permanent)
Aeneas Wilder (UK) builds an architectural structure in the landscape near the Monastery of Colen in Kerniel. The round construction with a magnificent 360-degrees view is aligned with uniform vertical wooden slats. According to the artist, the work functions as a lens where the visitor can focus his thoughts and emotions with the landscape of Kerniel as a background.
Wooden figures are more interesting if they can talk. This basically means wagging their chin as thousands of puppets have done over the years. I thought it would be interesting to try an alternative, keeping a stiff lower chin and wagging everything else. This results in a vivacious little figure, full of temperament, so she obviously had to get a dramatic, expressive hairdo and some dangly ear rings to round things off.
Here’s the original rough design showing how the figure’s left arm is pivoted, with holes for the spring and the connecting rod to the head.
Here’s the reality, after cutting the wooden egg in two and carving out hollows for the spring and the left arm to move. The right arm and legs are attached using 3 mm dowel into drilled holes.
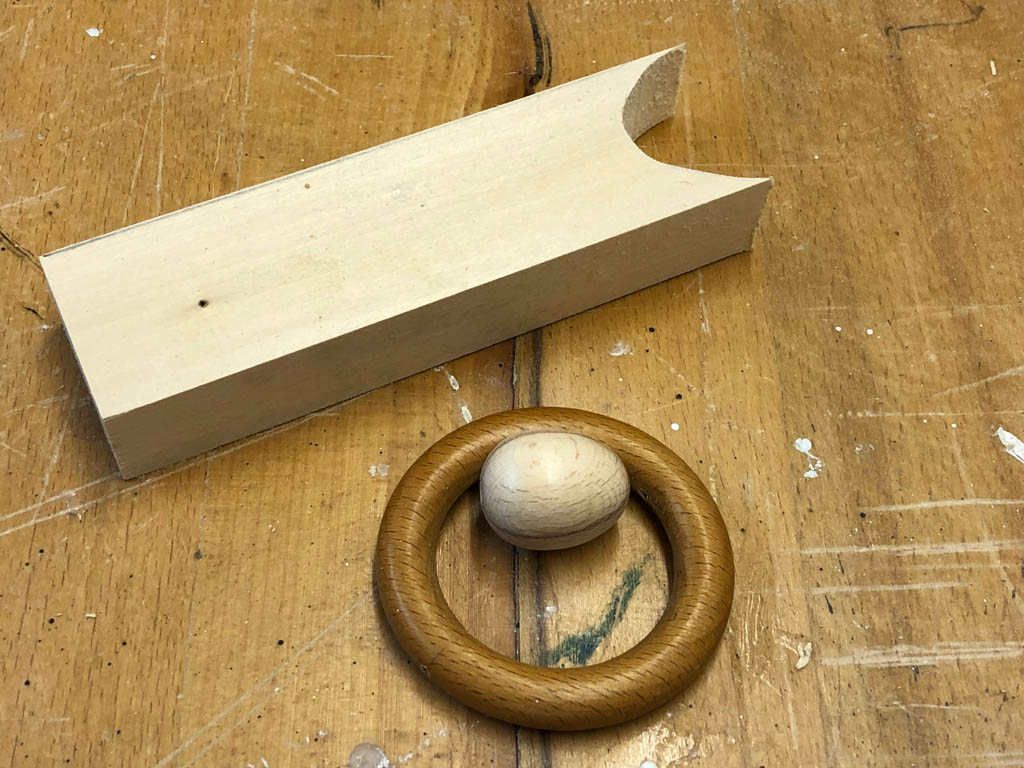
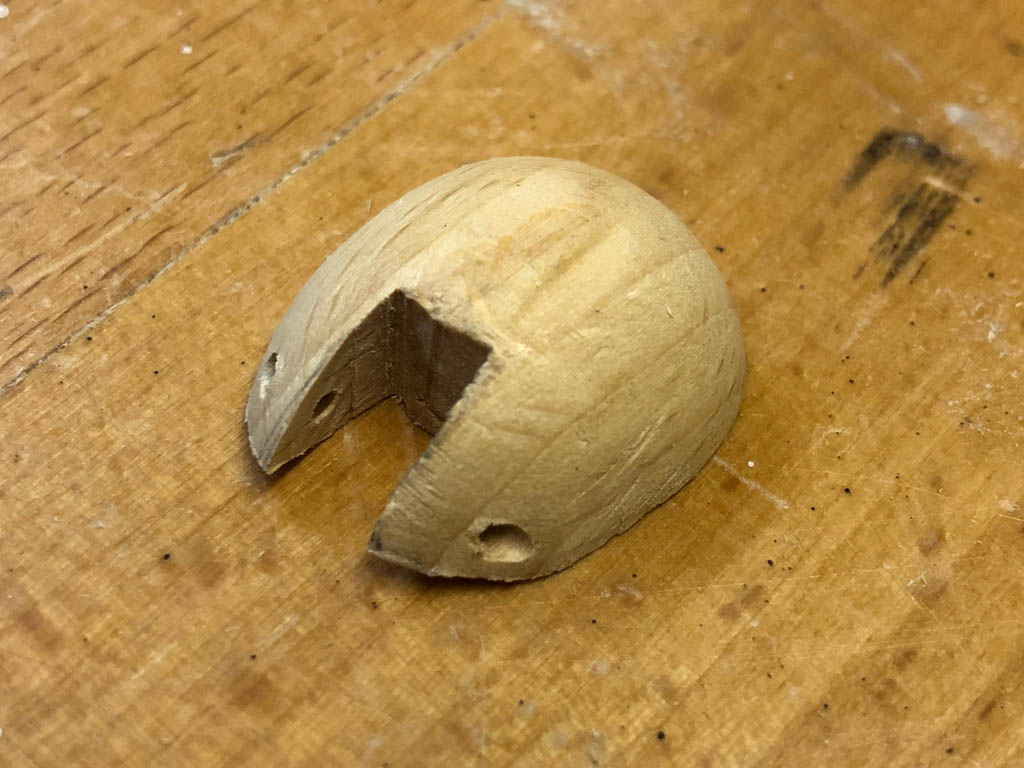
You need a piece of lime wood for the body and the fins, a beechwood egg for the head, and wooden ring as a controller to attach the strings. I had a few old wooden curtain rings lying about which was handy, otherwise craft shops often stock them. 2 small wooden hemispheres serve for the eyes and a piece of welding rod hinges the mouth.
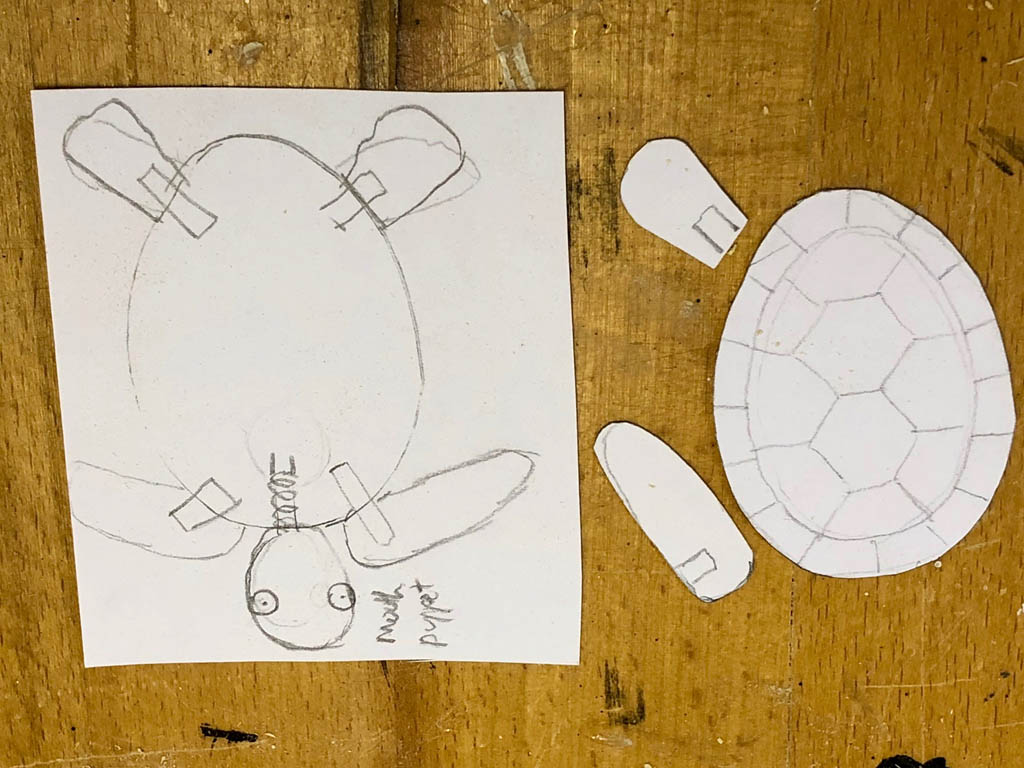
First draw a turtle template on a piece of card
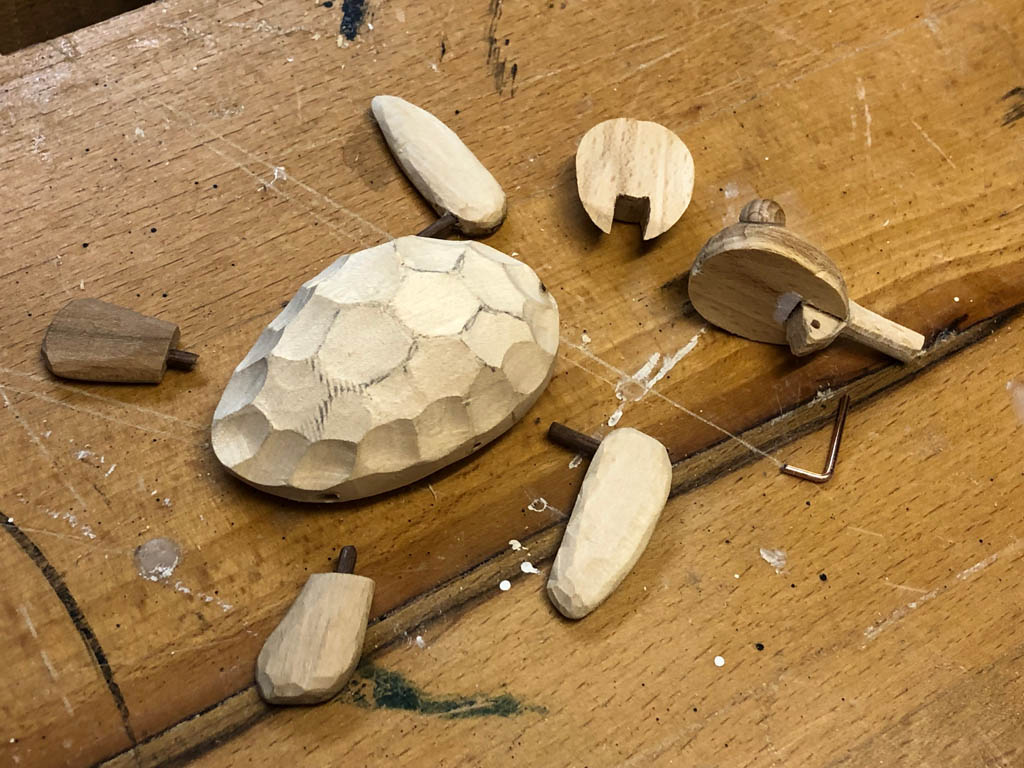
Use the templates to cut out the basic shapes and then curve them.
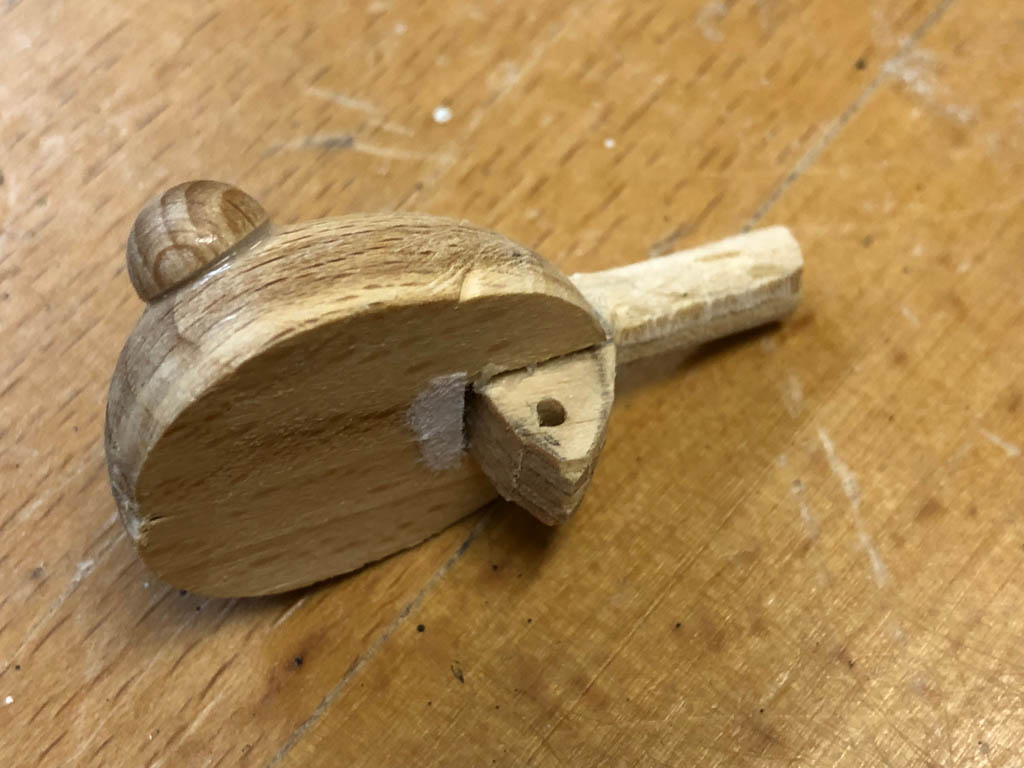
The head is made from the wooden egg, which you first have to cut into two pieces. You then need a notch in each piece to attach to the neck.
I made the neck from plywood. Glue it to the top of the head and sand the protruding stem to make it round.
The lower half of the head is hinged onto the neck piece.
The plywood neckpiece makes the centre piece of the hinge and a piece of 1.6 mm welding rod is pushed through to make a nice loose hinge.
Drill holes to take the strings. The hole in the top of the head is larger so that the string moves easily without jamming. The hole through the jaw is smaller so that a simple knot will keep the string in place and not pull through the hole.
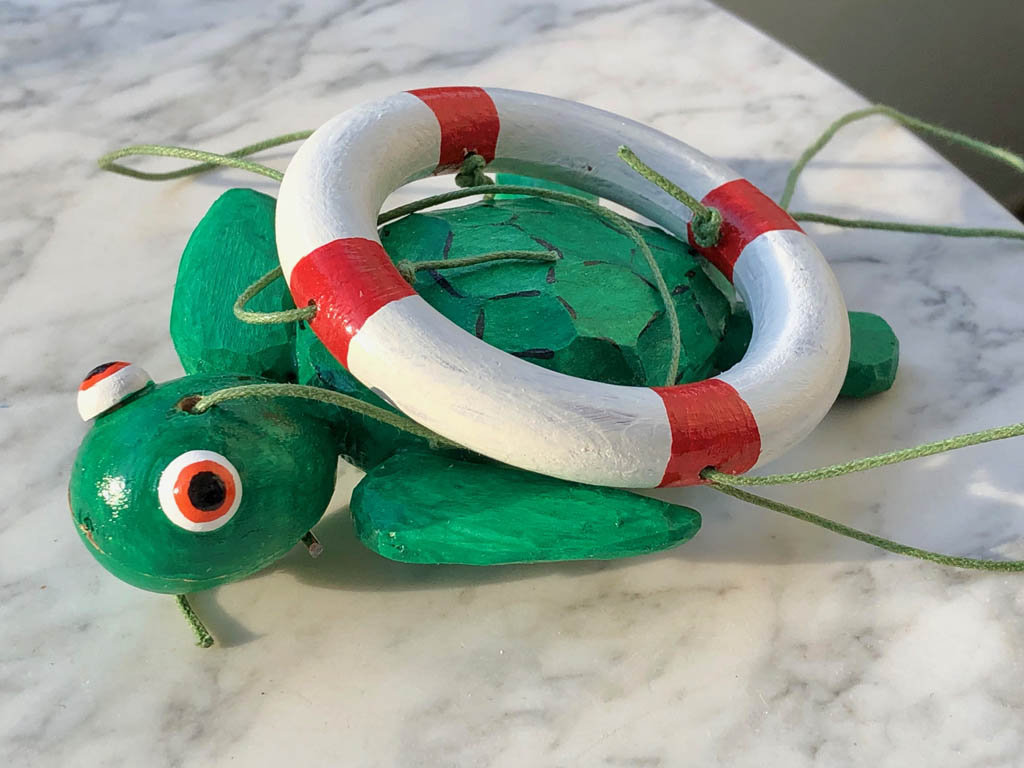
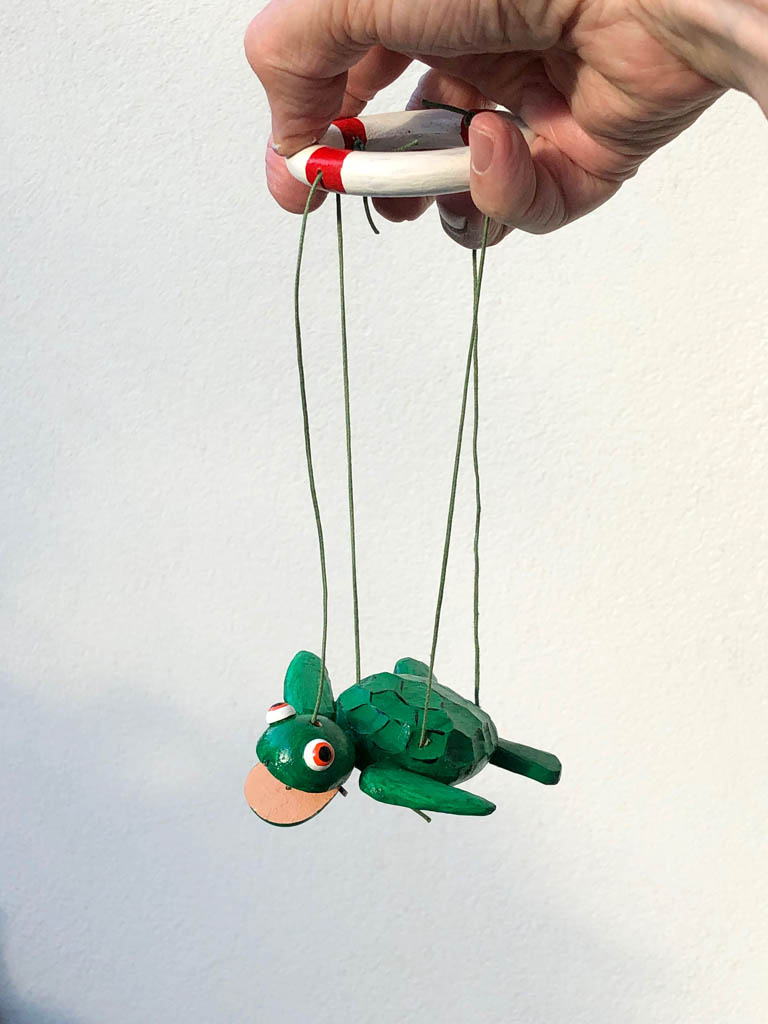
To add to the feeling of a stiff salty breeze I painted the ring like a ship’s life-saving ring. This makes the controller a visible part of the show, not something to be hidden high up in the darkness. Only four strings and the very simple controller reduce the risk of the terrifying tangle that sometimes ties up more complicated puppets.
I left the jaw string slack so that the turtle’s mouth is usually open. If you then press the front string the mouth will then close, so that the turtle can talk.


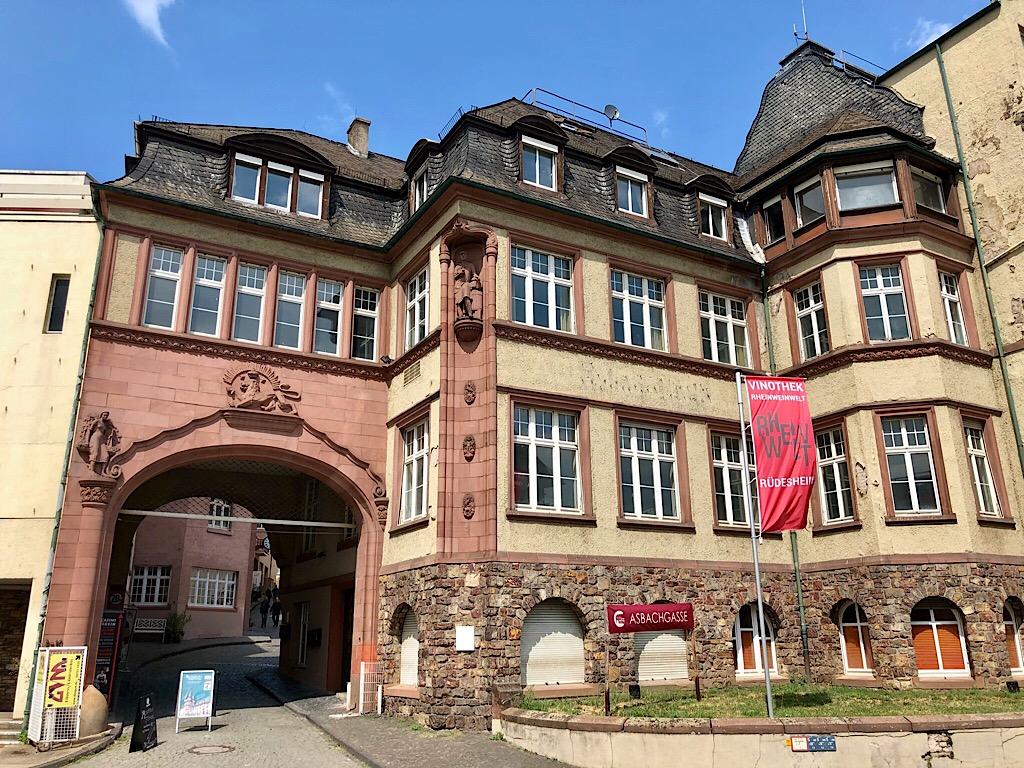
 Location- the old Asbach Uralt distillery.