Riding a snow white unicorn,
He thought it would be easy,
But hanging on for dear life,
Did feel a little queasy.
Background
 Wikipedia tells us that the unicorn is a legendary creature that has been described since antiquity as a beast with a single large, pointed, spiralling horn projecting from its forehead. So of course I had to make one.
There are already plenty of horsey automata around. Rob Ives designed a brilliant paper Pegasus, a flying horse, using a clothes peg to hold the mechanism (https://www.robives.com/product/pegasus/). Keith Newstead has designed some fantastic winged horses (https://www.keithnewsteadautomata.com/slide/pegasus/) and there are a number of laser-cut wood/MDF kits available for both Pegasus and flying unicorns. It’s great to be able to see how other folk approach similar problems to see how they coped with the various challenges of making something quite mythical.
Some examples in YouTube
- https://www.youtube.com/watch?v=5vZgSu_Ykxc
- https://youtu.be/DcH3nhik6mo
- https://www.youtube.com/watch?v=JmRBzpKx2TU
The requirements
Some time ago I bought and assembled a laser-cut MDF Pegasus kit. The movement is good, but my 3 year old friend managed to break off the thin MDF handle at first go, and it is so light that it skates around the table while you turn the crank, meaning you need a second hand to hold the base still. So my first requirement is that it must be sturdy and heavy enough to be worked with just one hand, especially if it’s only 3 years old. A rubber mat under the base should prevent it from slipping about.
The force applied to the handle as you turn it varies. The handle must be positioned so that you are pushing down when the most force is applied and pushing up when the least force is required. Again this will make one-handed operation easier.
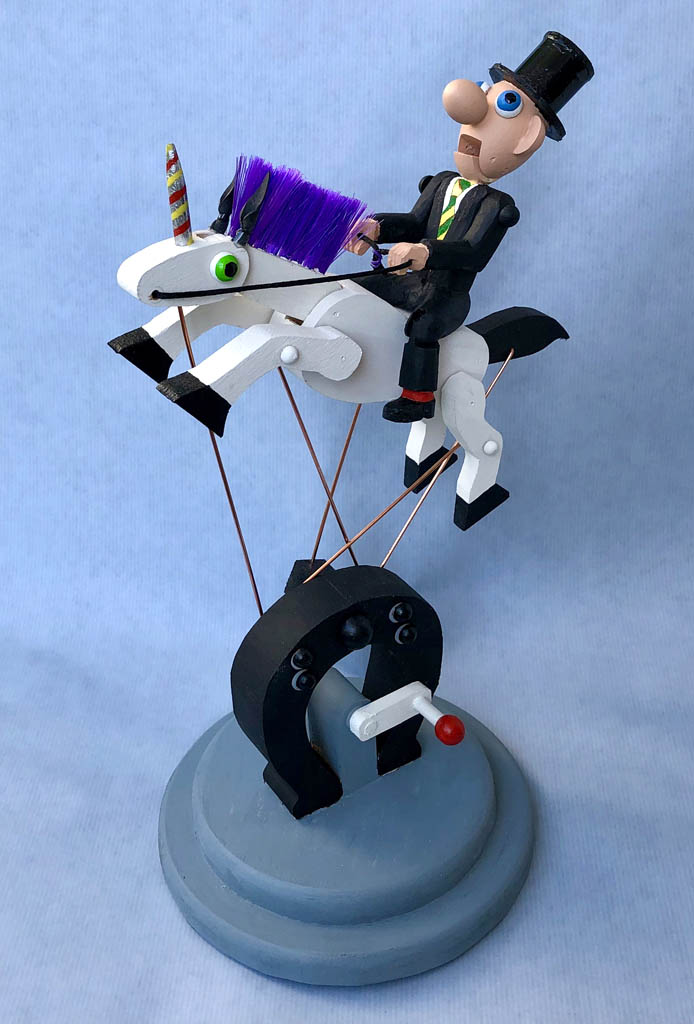
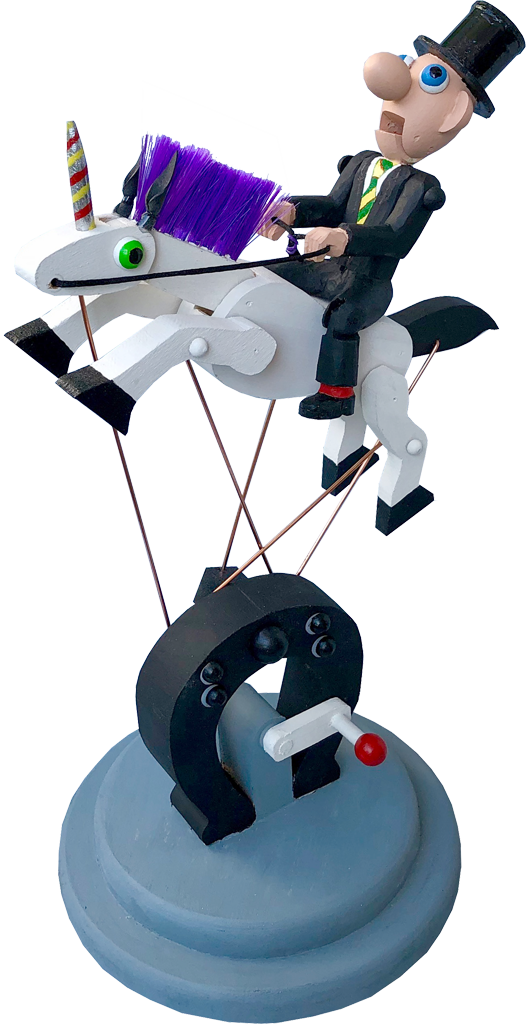
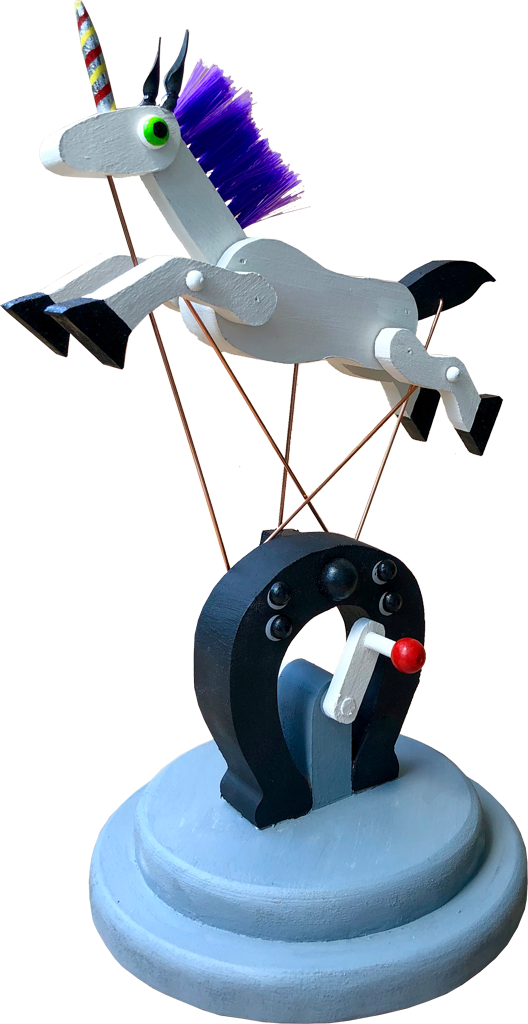
As a genuine unicorn, it has to have a spiral horn, horsey ears, a splendid mane, a bushy tail and friendly eyes. The base is part of the show, so it shouldn’t be boring.
The unicorn would be interesting just by itself (see the inset image), but I thought a hapless rider would add to the fun, stylishly dressed but fearful of the unicorn’s movement, opening his mouth to protest each time that he might fall off backwards, rescued only by holding tight to the reins.
Pencil sketch of the unicorn

Card templates
From the pencil sketch it’s not too hard to make some card templates which makes it easy to mark the wood for cutting with a bow saw.

The base
Two MDF discs make a nice, heavy base and a vertical horseshoe is perfect to take a lot of the mechanism. I did wonder for a while, why horses can’t wear shoes with laces. I suppose not having fingers makes doing up your laces kind of hard. Anyway some creative soul came up with nailing a bent metal strip to their hooves and this is such a design classic, that nowadays it is instantly recognisable as equine footwear and not at all boring.

The unicorn
However magical it is, a unicorn needs a horn, a head, a neck, a body, a tail and four legs. The neck must have a splendid mane of course. For the mane, drill a few holes at regular intervals along the neck. Measure the required diameter by using pliers to pull out a tuft of bristles from the brush that is to supply the mane. The empty hole that is left in the brush is the size that you need in the neck. Just push the bristles into the neck, with a small dab of glue on the end.


The body is the thickest part as you have to chisel out slots for the tail and for the neck.

The slots have to be wide enough to allow free movement. I then used 1.6 mm welding rod for the hinges, drilling 1.6 mm for a tight fit and 2.0 mm for a loose fit to allow movement.
The crank and the sliding pivot

The crank is the handle that you turn to get the unicorn galloping. A small sphere on one end prevents the loop on the end of the central rod from coming off. A small sphere on the other end is painted bright red to say “this is what you turn”. Plastic washers reduce friction

The central rod slides easily up and down through this block of wood, which can turn easily in the top of the horseshoe. The hemisphere on the end stops the axle from slipping towards the back.
Test assembly

While fiddling about to get everything right, it’s useful to leave bent “handles” on the rods which serve as axles for the head, neck, tail and legs. Once everything is OK, then these can be cut off at the correct length. The two leg axles are glued right at the end to keep the pairs of legs firmly joined together. It’s much easier to paint the parts before the final assembly. Rods which pivot in the horseshoe and in the legs and tail protrude enough so that a small wooden hemisphere can be glued on to prevent them from slipping out and to prevent inexperienced jockeys from getting accidentally stabbed by sharp ends.
Ears and eyes
Once the rod hinging the head to the neck has been cut to size, glue hemispheres on top to conceal the holes and prevent the rod from sliding out and, when painted, they make beautiful eyes. For the ears, I cut rubber sheeting to a suitable shape, rolled it around a thin pin, tied it with cotton thread to prevent it from unrolling and drilled a small hole to take the pin. Two-component epoxy resin glue, fairly liberally applied holds everything together and in place.

Fully assembled and painted the base looks like this –


The rider
There are apparently people around who believe in unicorns and even think they can ride them.
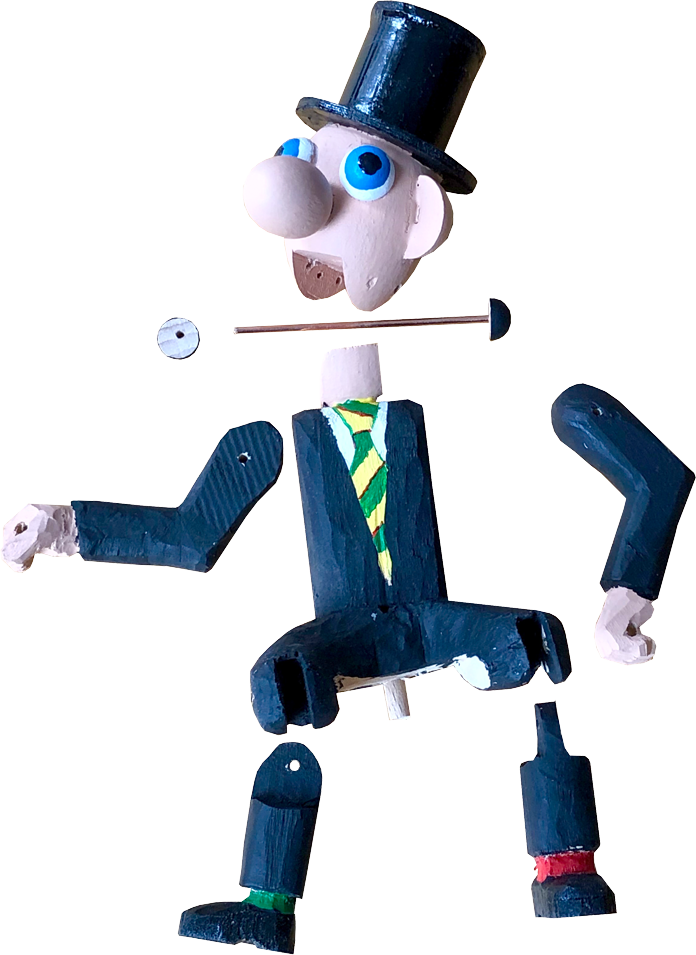
This small, smartly dressed fellow is carved from lime wood with his arms and lower legs hinged on 1.6 mm rods. His head is a beechwood egg with the jaw cut out and glued firmly to his shoulders. A rod through a hole at the back of the jaw allows his head to flop forwards and backwards as the unicorn gallops. There is a hole drilled through each hand for the reins. When the unicorn points skyward, the reins pull tight and lift the rider’s arms, his head flops back and his mouth opens in a silent appeal for salvation. At the other extreme, the reins are slack, his arms drop and his mouth closes in relief.