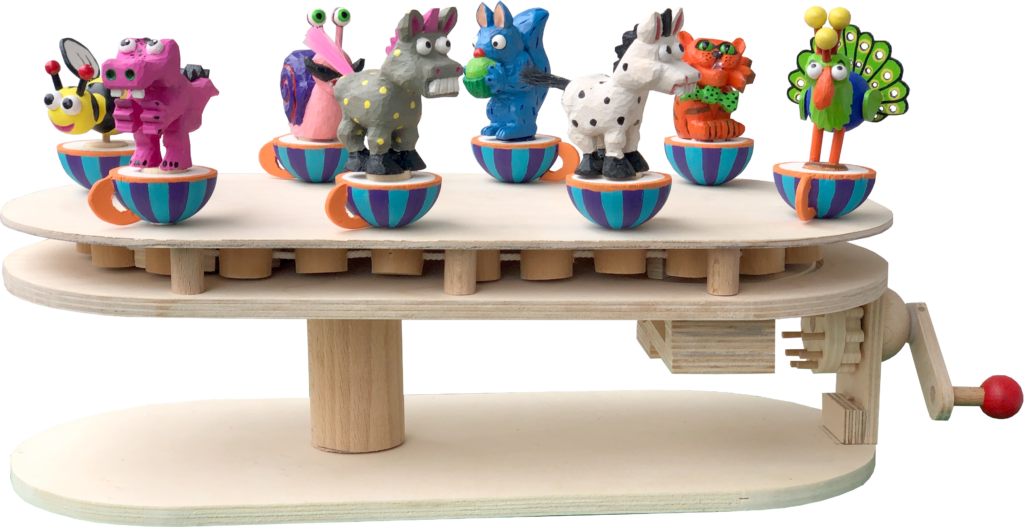
What’s the idea?
Ever since I visited Probošt’s Christmas Crib in the Czech Republic a few years ago and saw the model wooden conveyor belt (https://youtu.be/s4F3INnuzLk) exhibited there, I wanted to have a go at making my own version. I decided to cheat a bit and avoid the complexity and size of making a completely wooden chain. The top of my version is completely solid, with an uninterrupted smooth surface for figures to glide along, propelled by an invisible, magical force. This magical force also gives the figures a spin as they move around. We all know about flying saucers hovering in the sky and these are their earthbound counterparts – Flying Teacups, which have a cosy hole in the top for plug-in figures to nestle in.
The magical bit
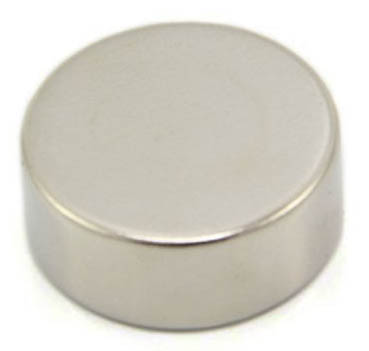
The magic comes from small neodymium alloy magnets. These are widely available and have a really strong magnetic field. Mucking about with a couple to see what their limits are, I found that, even when separated by a sheet of plywood, they are still very strongly attracted to one another. I was also happy when I found that when turning one of them through 90° (from horizontal to vertical) they maintained the attraction with a twist. The twist was that when I dragged the vertical one along beneath my sheet of plywood it not only pulled its horizontal mate along on top of the sheet, it also made it rotate. Magic!
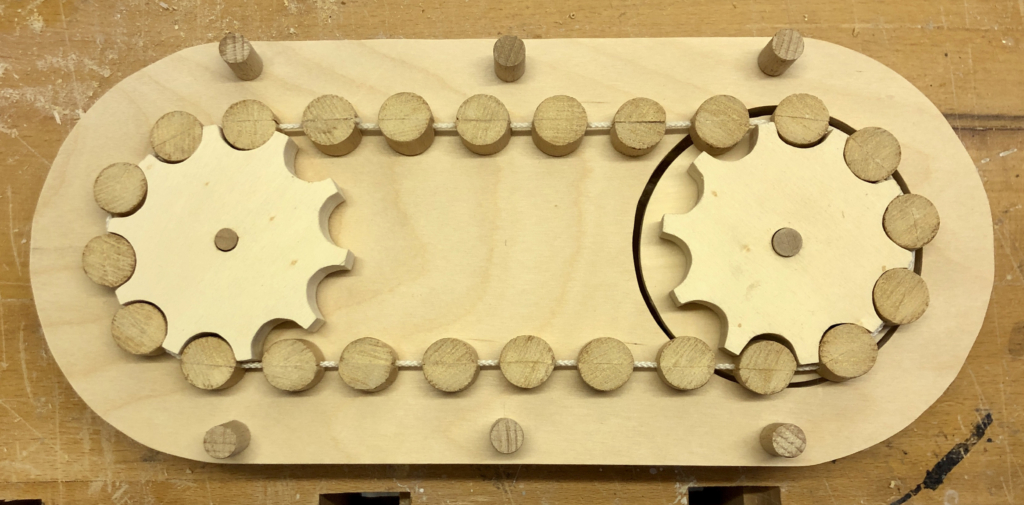
The Chain
To drive the figures endlessly round and round, I needed a chain, like a bicycle chain, to be driven by a cog. Here is my finished chain –
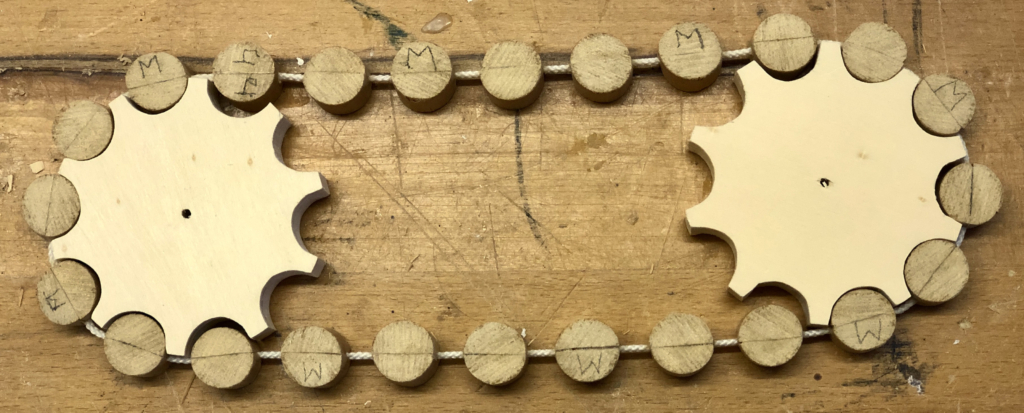
The chain is made of some strong polyester cord and pieces of dowel.
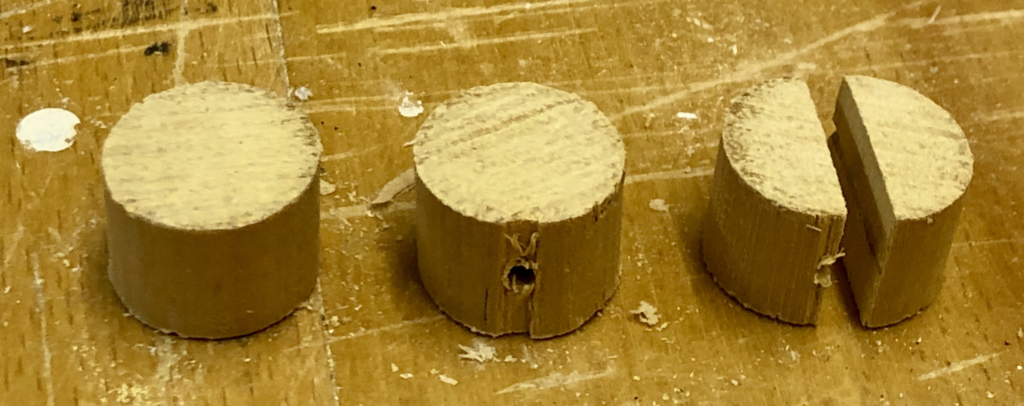
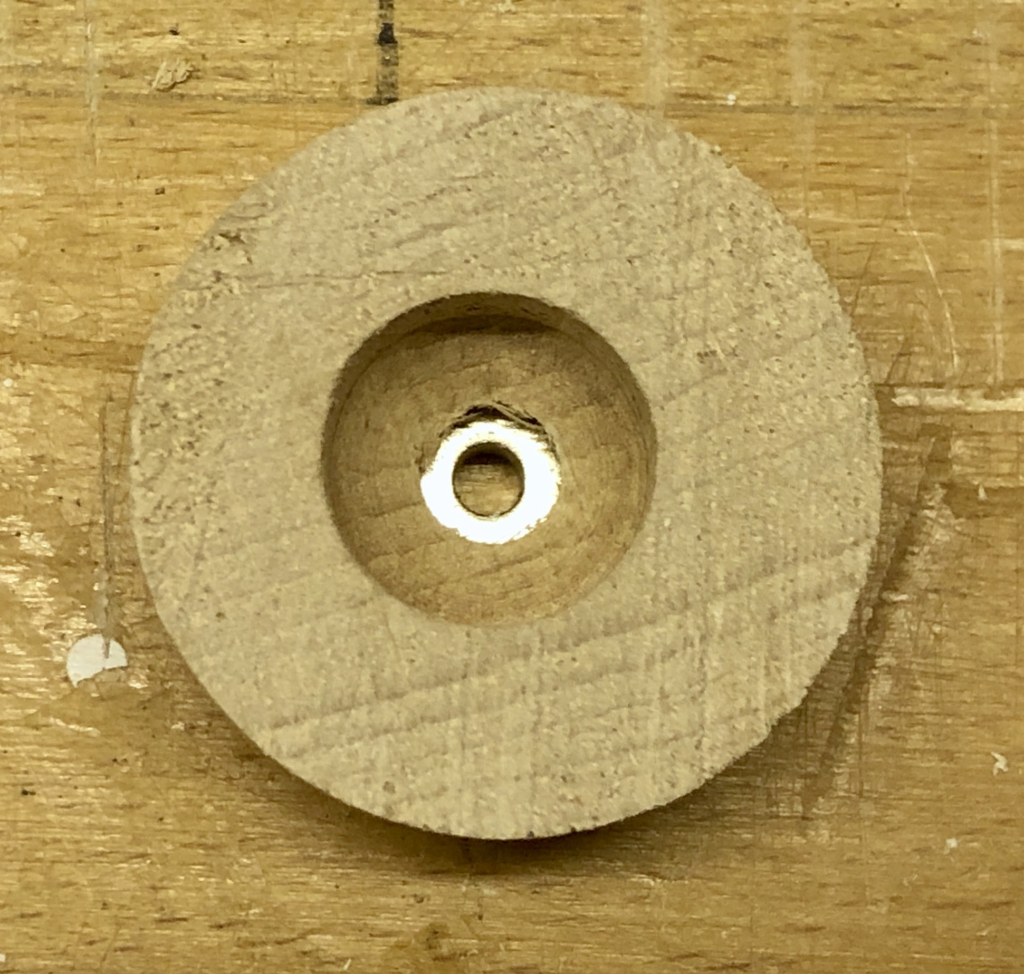
First I cut 24 pieces of 20 mm diameter dowel to the same size, about 15 mm high. Then I drilled a hole to take the polyester cord. To be able to properly glue the cord, I then cut the dowel in half. This means that I could apply glue along the drilled hole to fix the cord. The cord outside of the dowel remains free from glue and stays flexible.
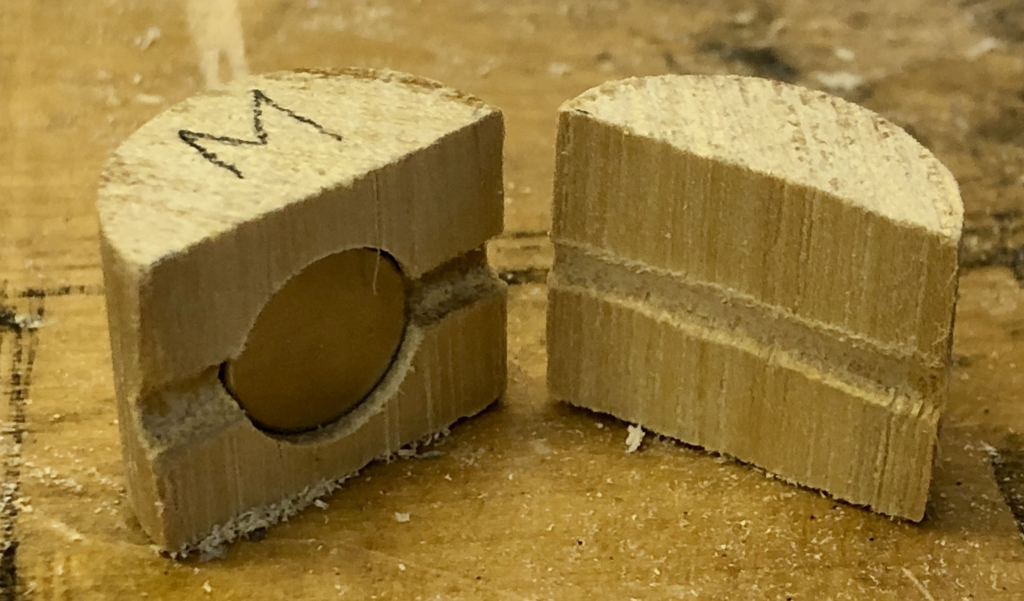
In every third piece I also drilled a 10 mm diameter hole for a magnet.

While the glue dried, I used a small clamp to press the pieces together. The spacing of the recesses in the cogs defines how long the free piece of cord needs to be.
The Cogs
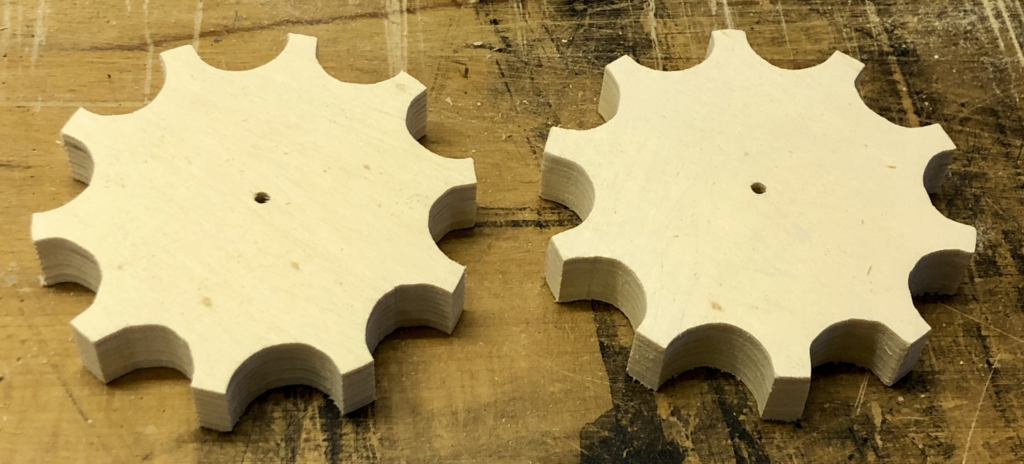
The cogs are cut from two pieces of 8 mm plywood glued together for a total thickness of 16 mm. The 10 cutouts are 20 mm arcs into which the pieces of dowel fit. Here, the chain is not transmitting force to second cog to make it turn anything. This means that the second cog could have been just a smooth disc instead. The useful force is transmitted via the magnets embedded in the chain.
The Pinwheel Gears
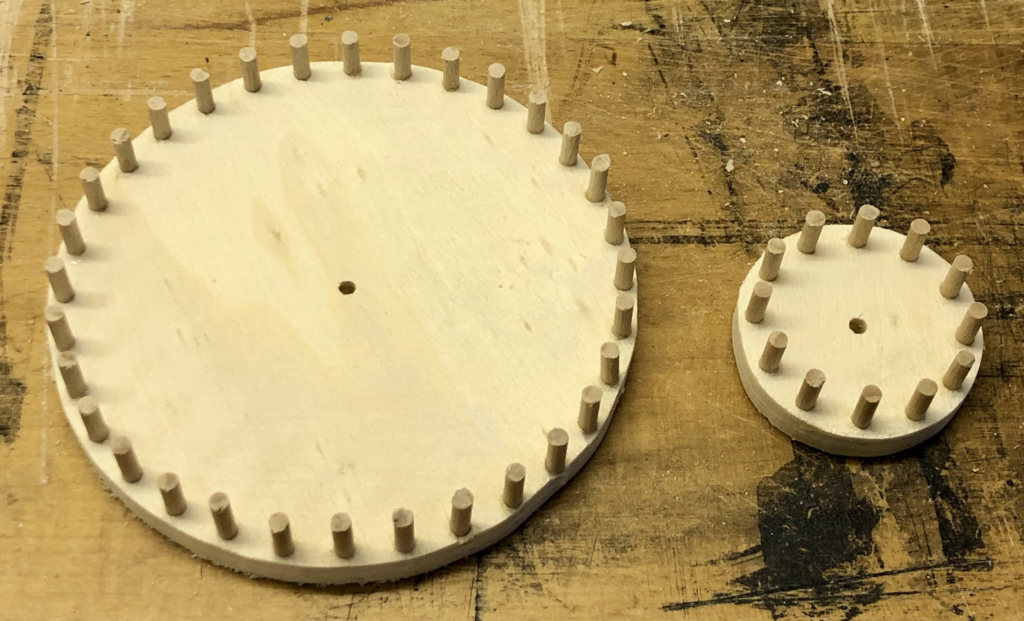
Two pinwheel gears are needed. The large, 32 pin, gear is glued to the back of one of the cogs. The small, 12 pin, gear is mounted vertically and is turned by the external crank handle.
The Three Oval Pieces
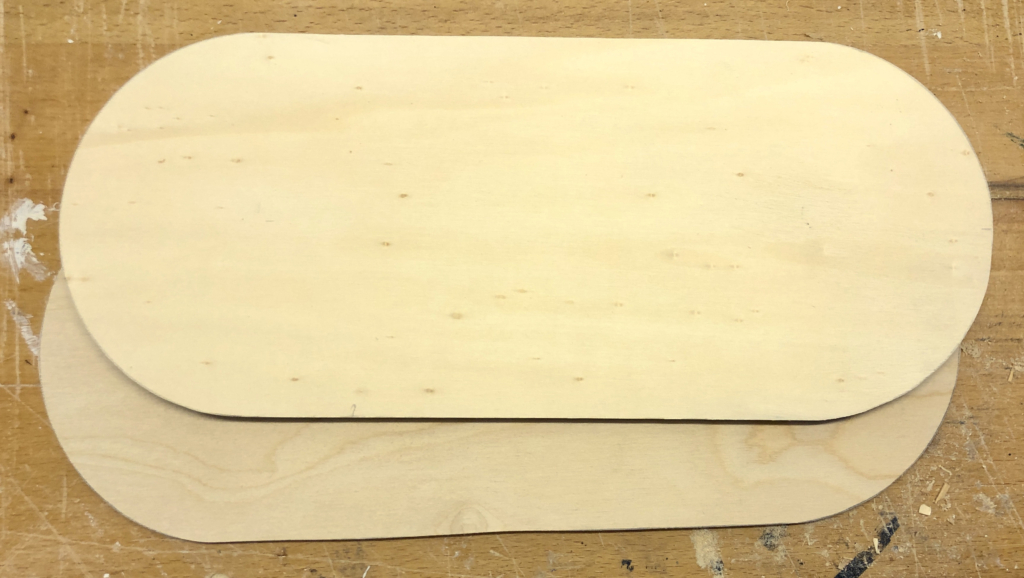
The three oval pieces all have the same outer shape.
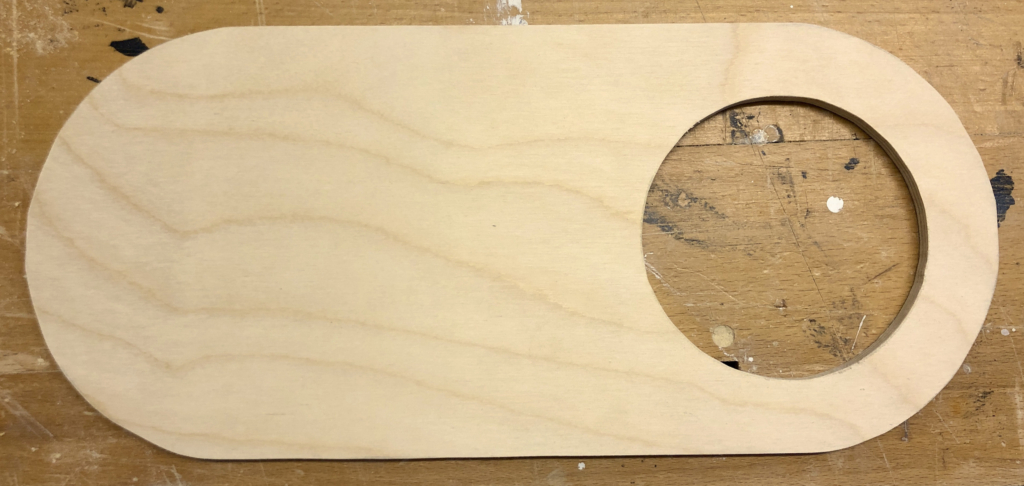
The middle oval has a round hole cut in it which allows the large pinwheel to turn easily.
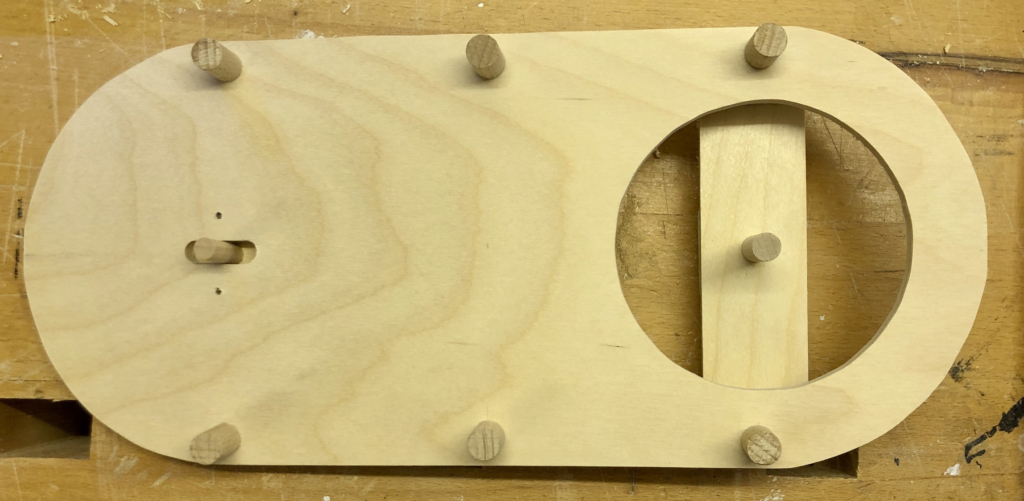
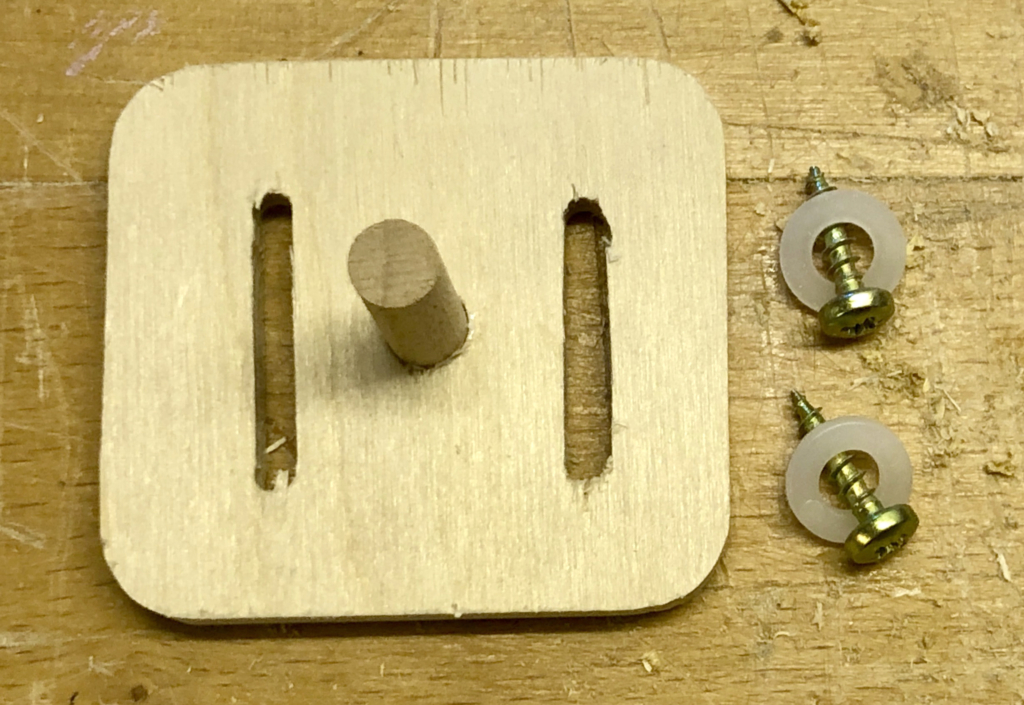
An axle is required for each cog. The right-hand one is fixed and provides a bearing for the large pinwheel gear and its attached cog. The left-hand one is moveable to allow the chain tension to be adjusted.
There are 6 dowel spacers to hold the top oval, leaving just enough space for the chain to move easily while preventing the magic dowel pieces from twisting when pulled upwards by a magnet in the base of a teacup.
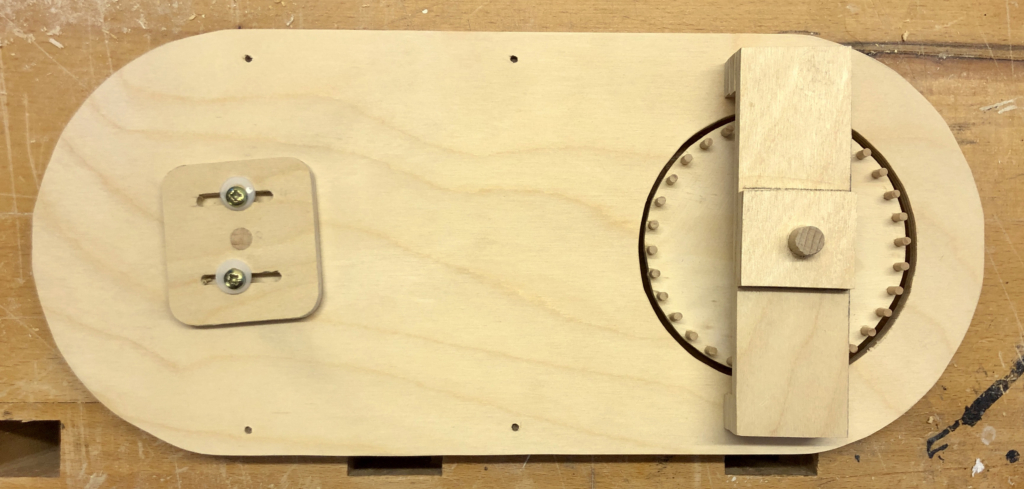
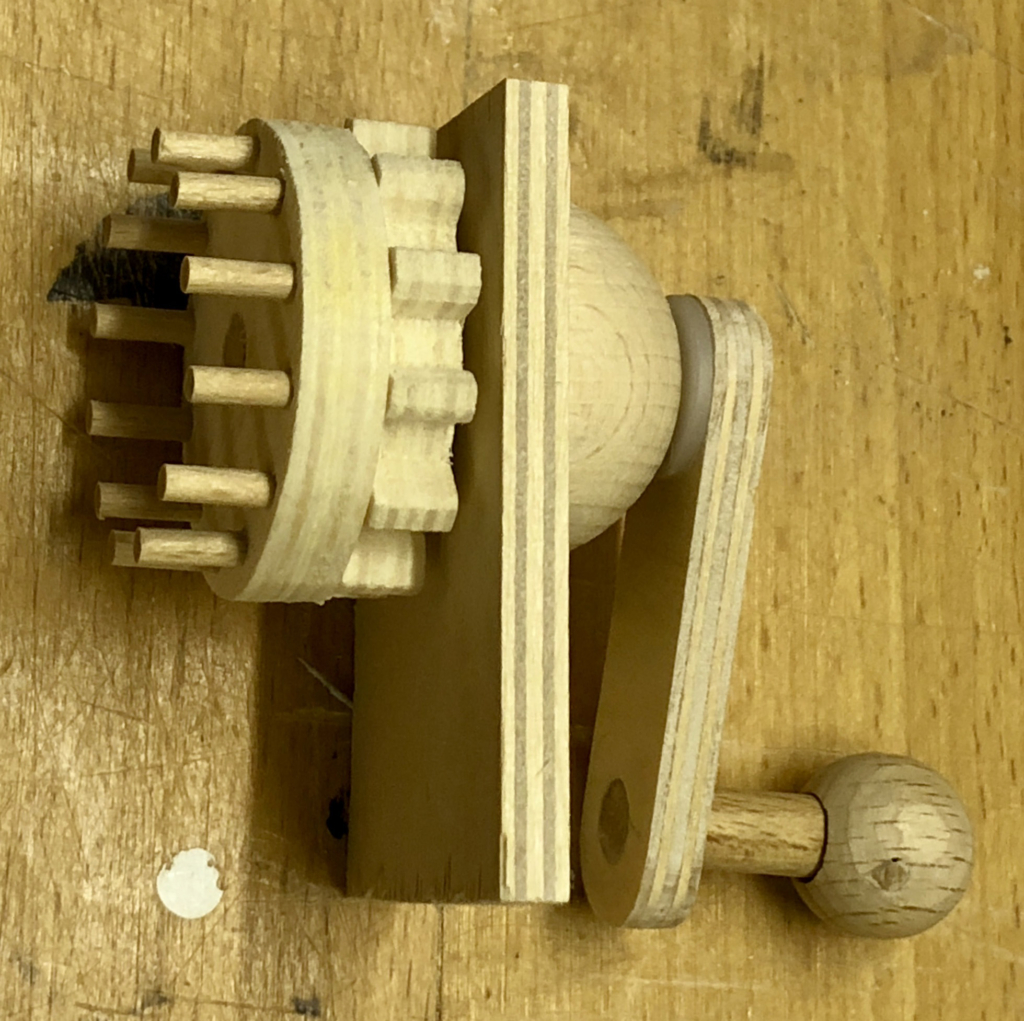
In the bottom view, on the right you can see the large pinwheel gear which is glued to the right-hand cog. Turning the gear turns the cog which moves the chain. On the left you can see the adjustable axle for the left-and cog.
Sliding the adjustable axle to the left increases the tension in the chain. This is handy for the initial set-up as well as later on to correct for any stretching of the chain.

A piece of chunky 40 mm diameter dowel serves to join the top assembly to the base together with the crank assembly at the right-hand end. Now you can see how the small pinwheel gear engages with its larger brother. With no teacups in place everything moves quite freely. Each teacup added increases the friction, but the gear ratio of 12 to 32 keeps the force needed to turn the crank down to a sensible level.
The Teacups
The teacups are made from 40 mm diameter balls cut in half. In the top there is a 17.5 mm hole to plug in a figure. In the bottom a 10 mm hole holds a neodymium alloy magnet. The teacup’s handle is made of 3 mm plywood.
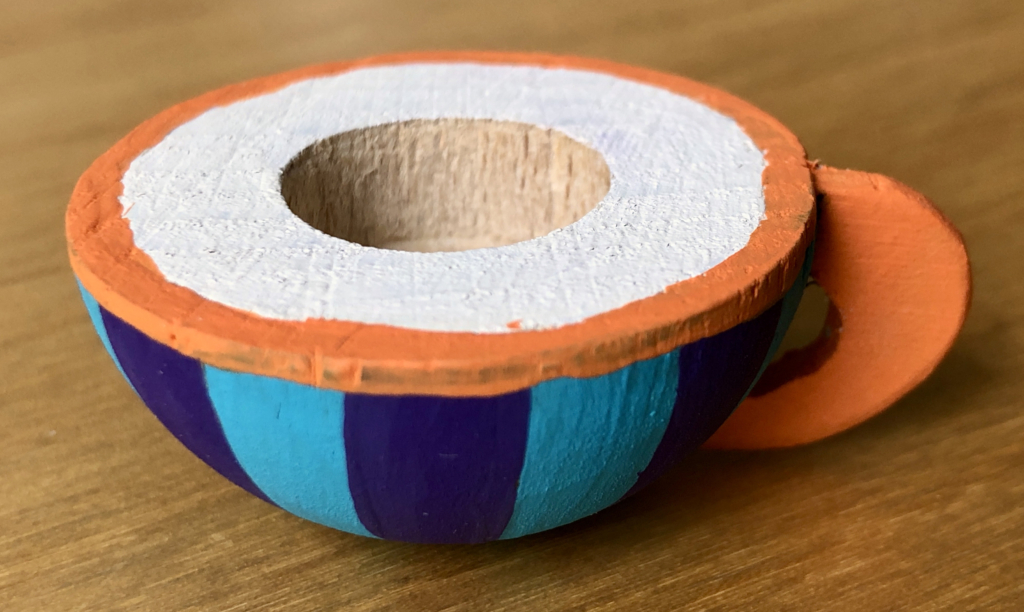
Add some nice vertical stripes to emphasise the spinning motion and a teacup is ready.
I chose not to paint the main structure for practical reasons. Even though the magnets have a smooth surface, dragging the teacups around the surface will inevitably result in abrasion. Scratching off a painted surface would not look good. If the marks left on the bare wood bother me in future, I can always sand them off.
The Figures
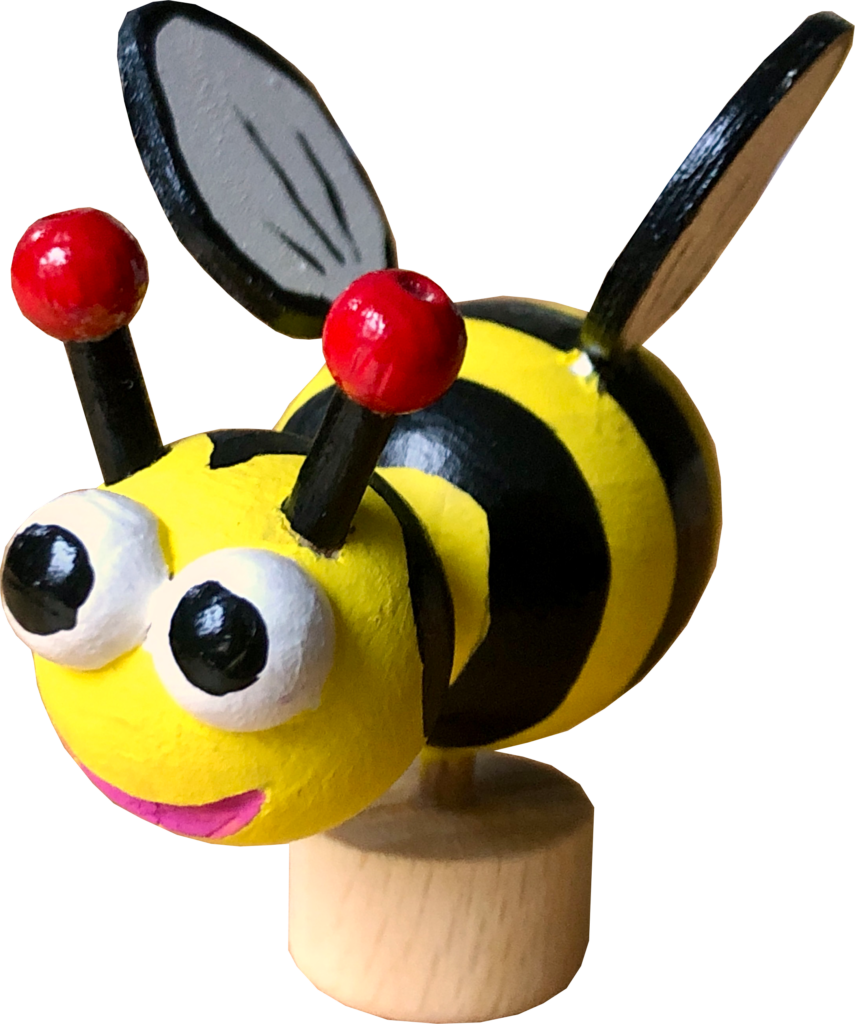
I have a collection of plug-in figures from previous projects, all with a standardised base to plug in to a 17.5 mm diameter hole, thus fitting nicely into the teacups. It’s quite handy being able to reuse “characters” like this. You can then mix and match as you like.
Changes
I had originally planned to use a small music mechanism.
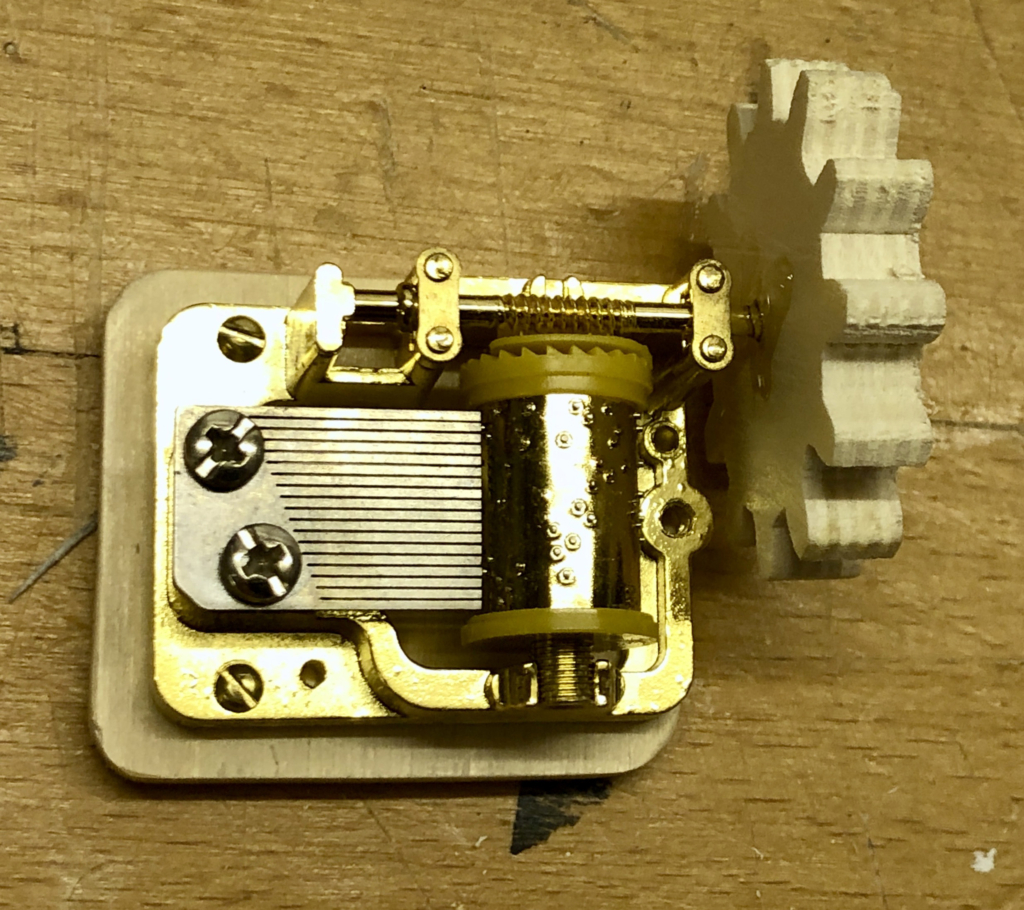
When I tried it, I didn’t like the music and it seemed a bit superfluous. So I simply left it off, leaving a small, now unused, cog behind the small pinwheel gear. That’s life isn’t it? You start off with a certain idea and in the end, less is more.
Reflections
The finished item looks quite simple and clean. Placing teacups and plugging in a collection of animals gives it more character. If you turn the crank handle very quickly a teacup can be thrown out of its magnetic connection and cause a traffic pile-up. That is a plus point to me as it makes it more interesting to use. Also, getting the speed just right can cause some teacups to resonate and spin at an amazing speed which is fun too. Sometimes figures just stare straight ahead, waiting for some impulse to start spinning. It’s nice and chaotic.
It works surprisingly well and I can think of loads of other ideas which could use a similar mechanism. For a lark, I turned the entire thing up on end and I could successfully transport teacups vertically up and down. There is an old English nursery rhyme called Hickory Dickory Dock and from that I can imagine making a mouse run up and down a clock. Processions of figures often appear in old public clocks, coming out of one door and disappearing through another. And so on.
Instead of using polyester cord, I could have used tape instead. Tape as wide as the dowel pieces’ height might resist twisting more and be better for other projects.
If spin is not needed then turning the magnets in the chain through 90° to be parallel to their counterpieces in the cups would stop the rotation.
Download
https://www.wordwise.de/Flying_Teacups_Archive.zip