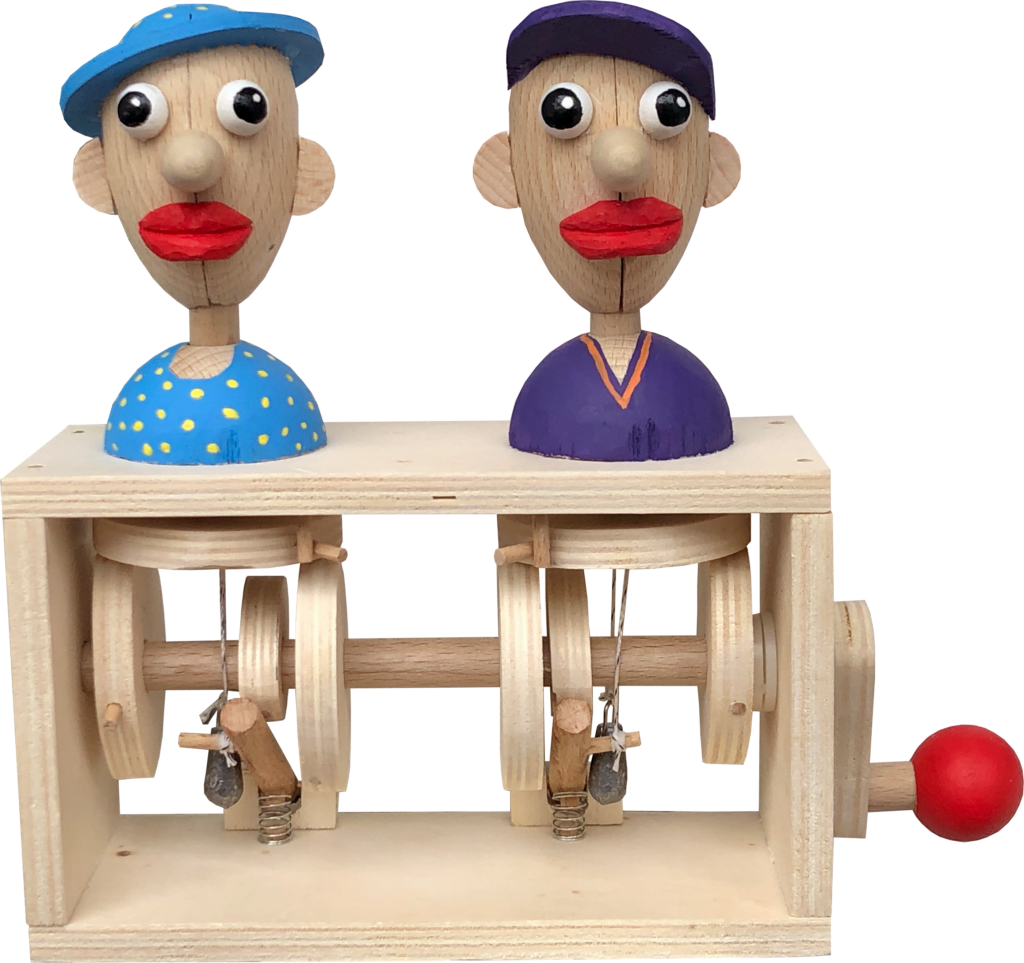
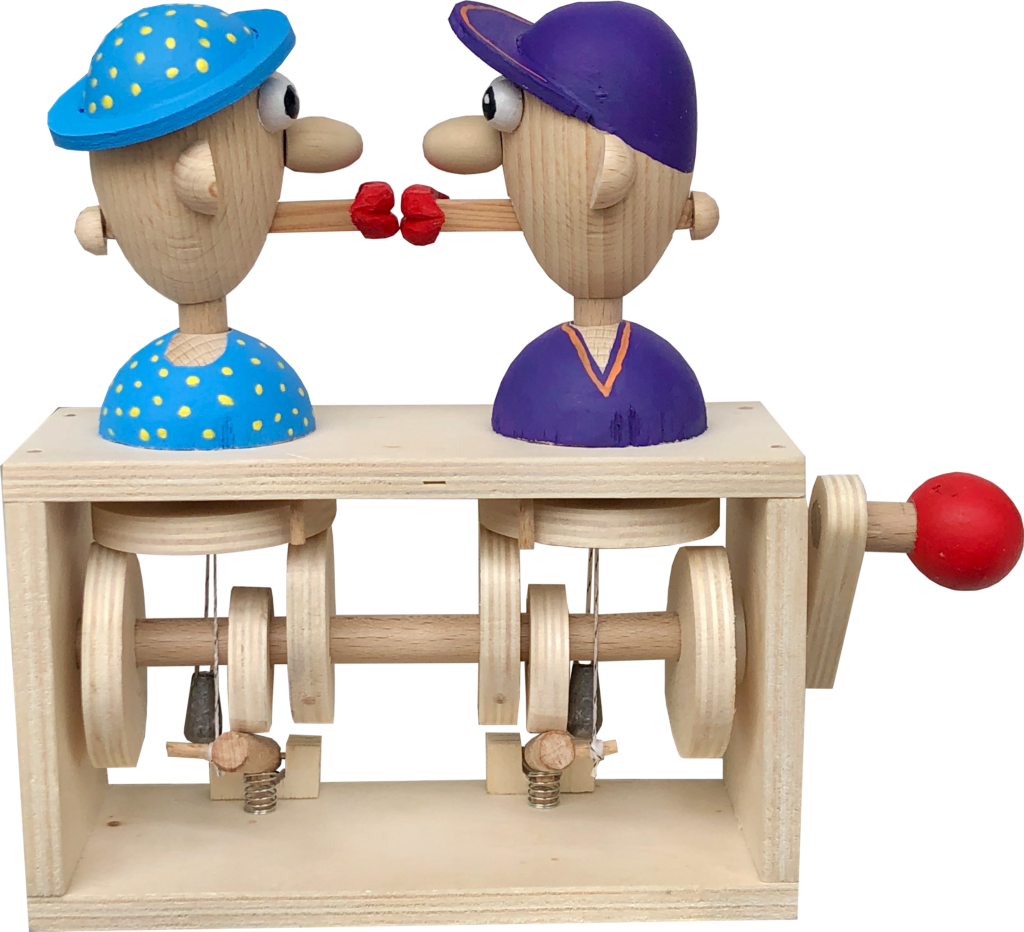
Some while ago, a small automata scrolled up into my Instagram feed where three figures in a circle are kissed in turn by a promiscuous character turning in an endless circle. Magnetised lips ensured a lingering encounter every time. This reminded me that I had a plan to make a kissing automaton, perhaps along the lines of Peter Markey (e.g. https://youtu.be/H0x1TSSM1DY), or maybe as offered in kit form by Timberkits (e.g. https://youtu.be/a-8P4vfAaBY). They each have their charms, but in the end I decided to go for bust and borrow all of the best ideas and roll them all up into one. The resulting couple are demonstrably keen kissers and what a pleasant hobby to have!
So What was the Plan?
I decided that it was only fair on the equality front to have both heads rotating to face one another and to have both sets of lips extending, to meet in the middle in a tender peck. With heads turning through 90 degrees, it seemed easiest to pass the instruction to kiss up inside the neck. Maybe brass rods would have been better, but I chose to risk using some cord to move the lips in and out. The risk is abrasion. If the cord rubs on a rough corner, it may well break after a period of time. Time will tell.
Making the heads
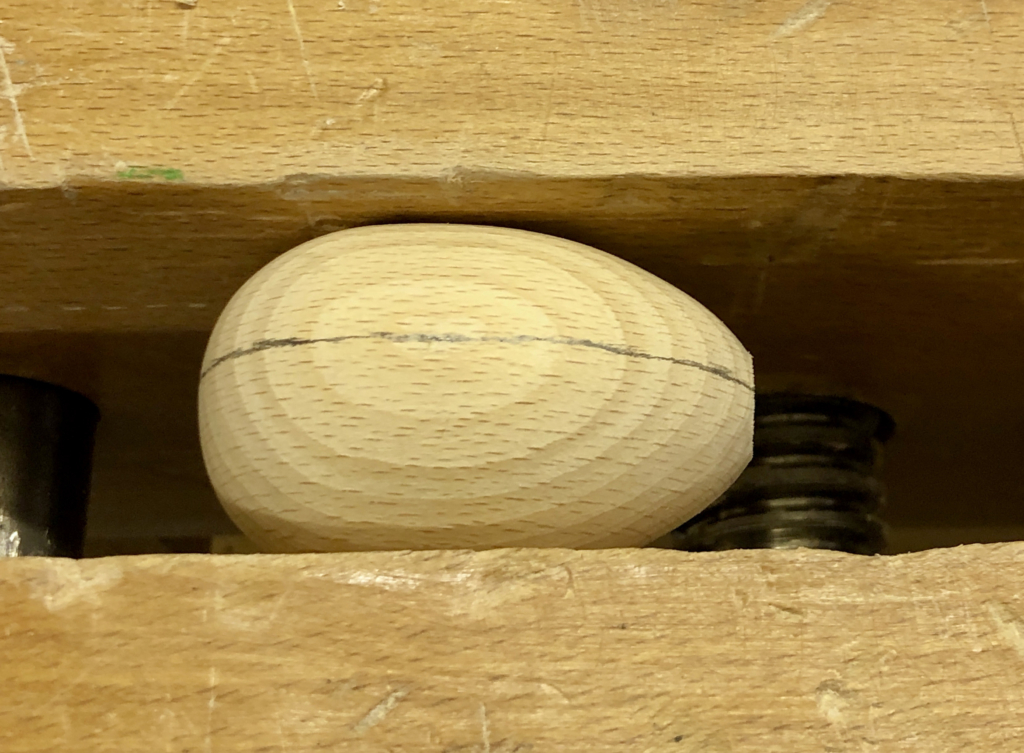
A couple of 60 mm long wooden eggs from my local craft store were nicely head-shaped. First I drilled an 11 mm hole to take the 10 mm dowel serving as the neck. Cutting the egg in half, reduces the hole down to provide a snug fit for the dowel.
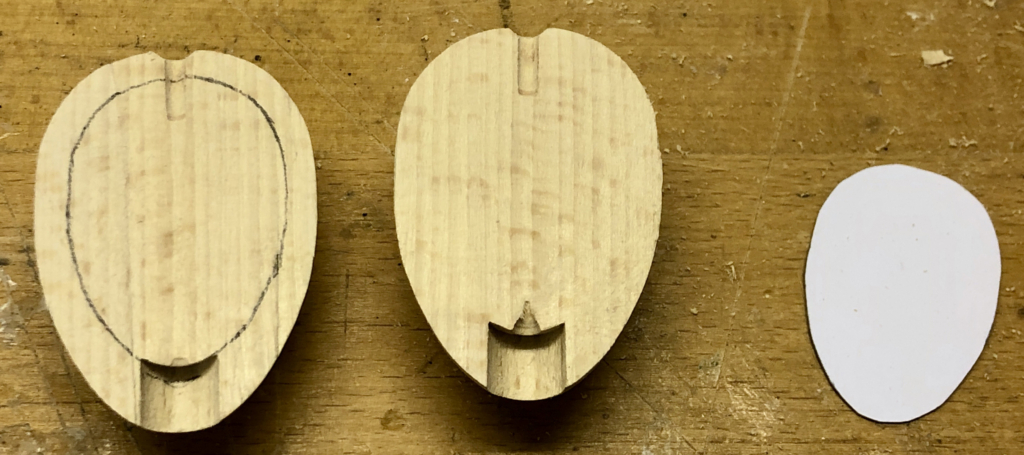
The halves have to be hollowed out, so I first marked them and then used a drill to do most of the work.
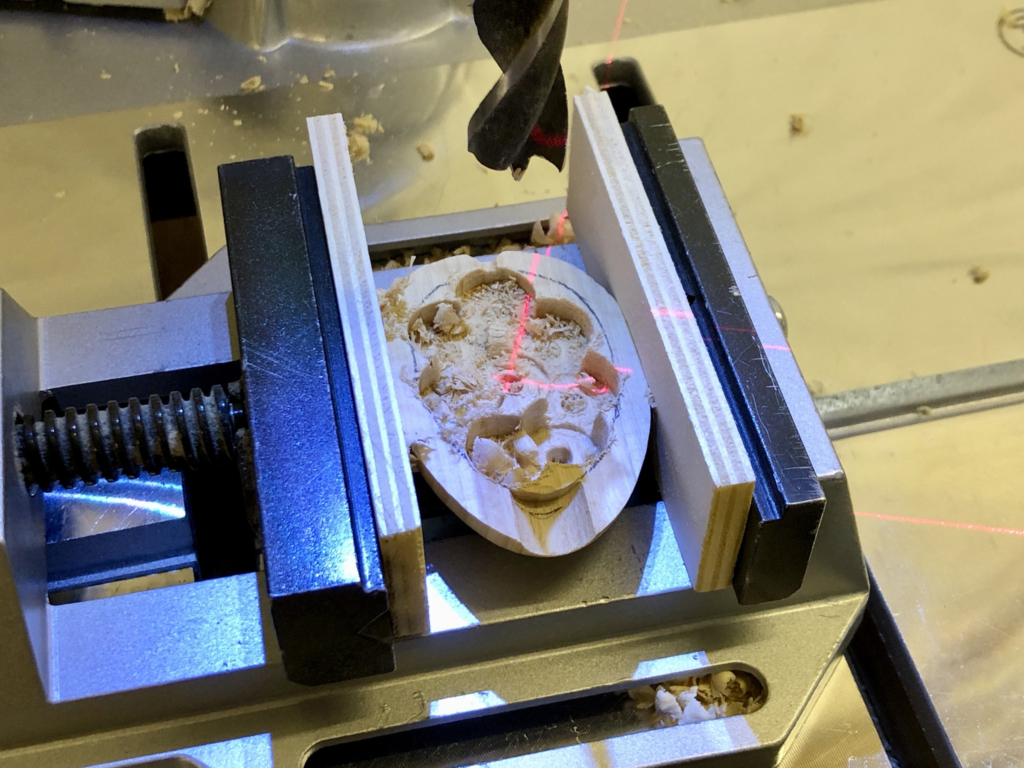
Beechwood eggs are pretty hard, so it is worthwhile using a drill to remove most of the material, leaving just a bit of cleaning up to be done manually.
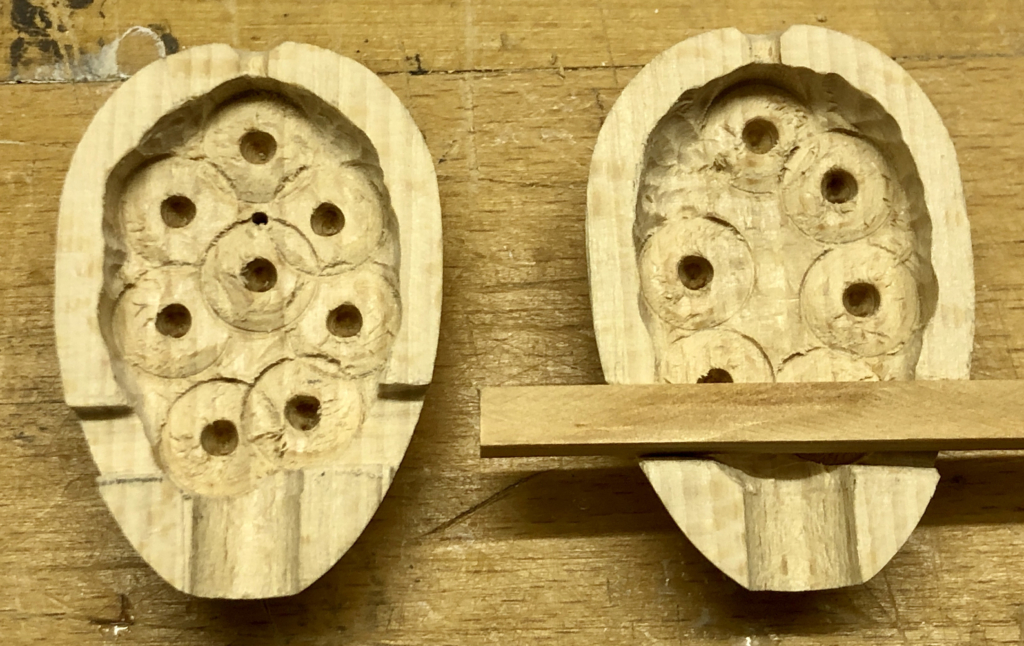
A 10 mm square section stick serves to hold the lips, sliding in a slot cut in the sides of the egg. The odd pattern left by the brad point drill bit which I used is not visible from the outside so it is of no consequence.
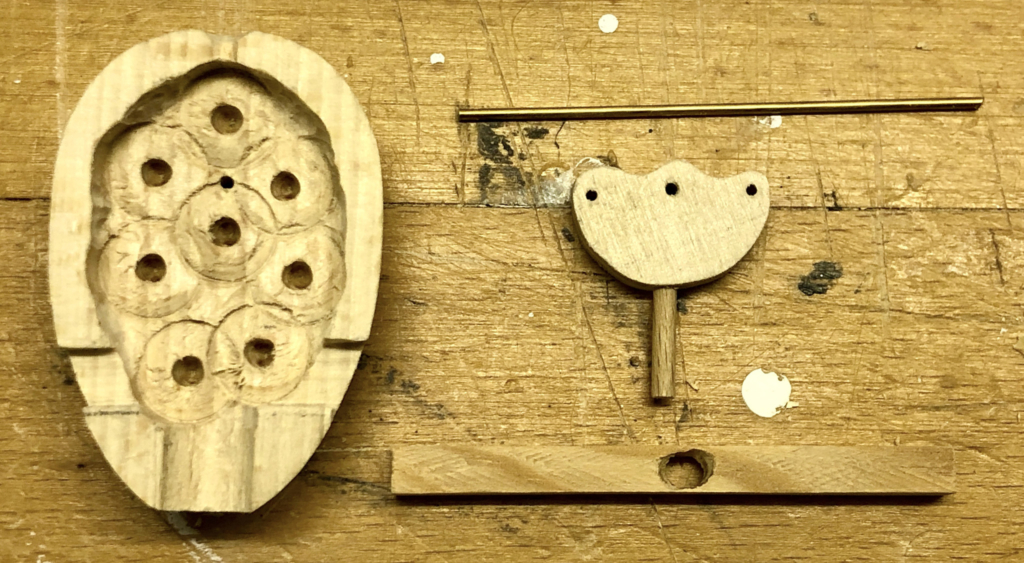
A brass rod serves as a pivot for the actuator shown below it. Two pieces of cord are attached to the left and right side of the actuator. Pulling on them moves the actuator clockwise or counter-clockwise which results in the “lip-stick” being moved to the left or to the right.
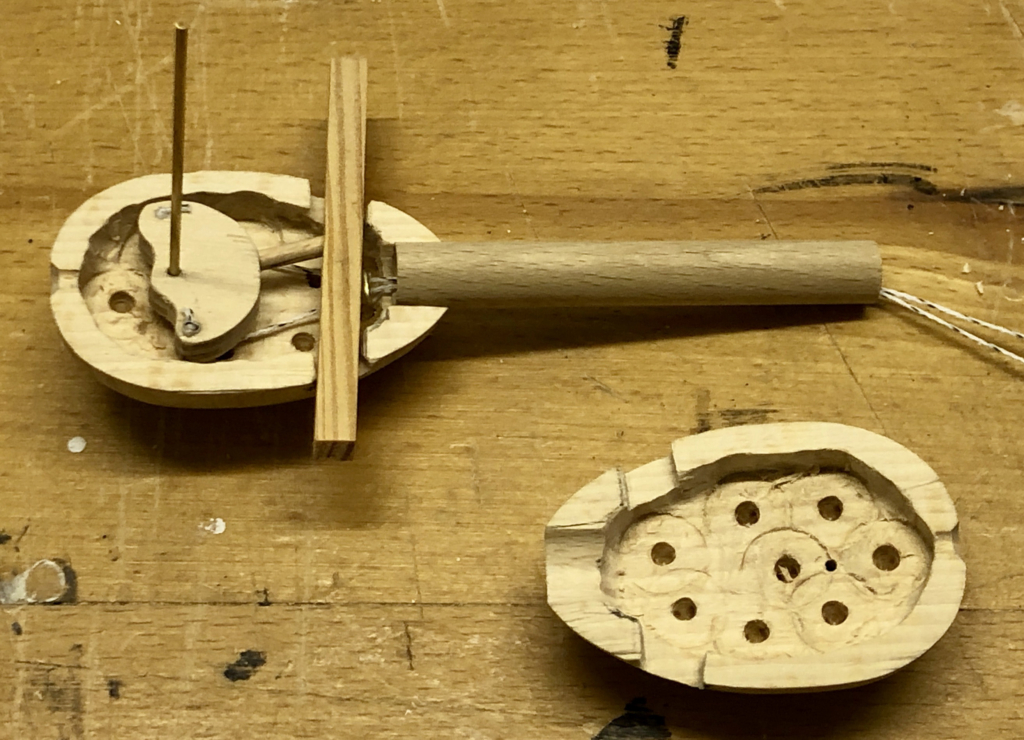
The 10 mm dowel used for the neck has a hole drilled down the middle and has been carefully smoothed to avoid the cord catching or wearing too quickly.
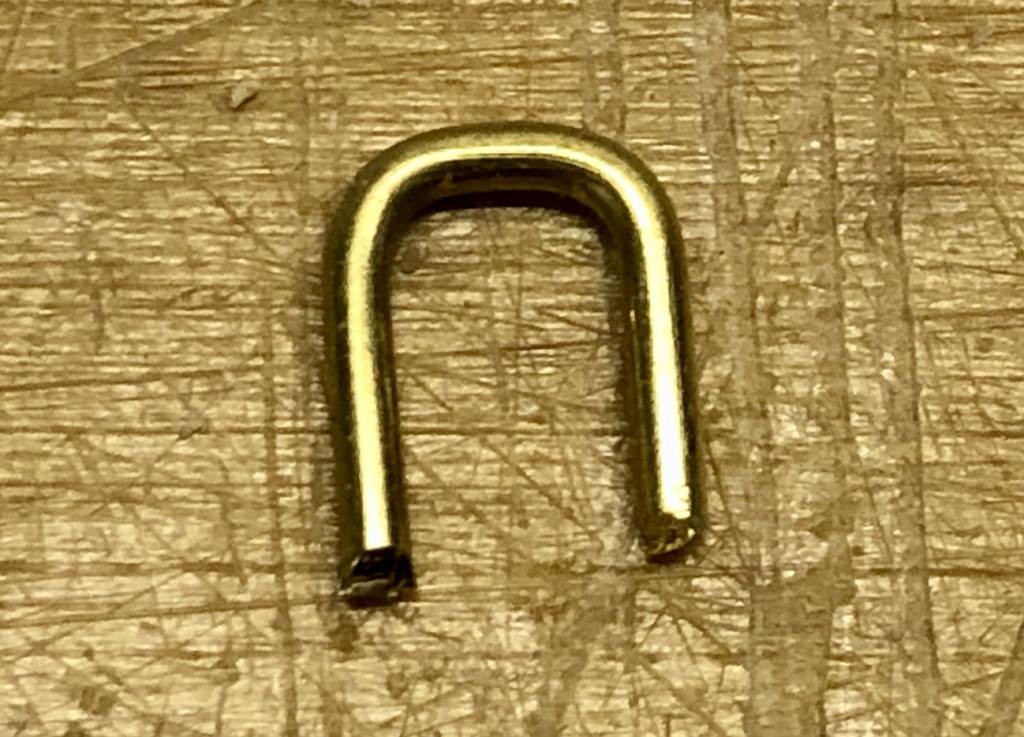
A small piece of brass rod helps to prevent the cords from rubbing on the lip-stick.
The base
The base is open to show off the mechanism. At each end there are 10.5 mm holes to take the 10 mm crankshaft. Drilling a 10.5 mm hole through a 50 mm diameter ball and then cutting it in half produces two nice, minimalistic bodies. These allow the necks to turn freely while keeping them pretty straight.
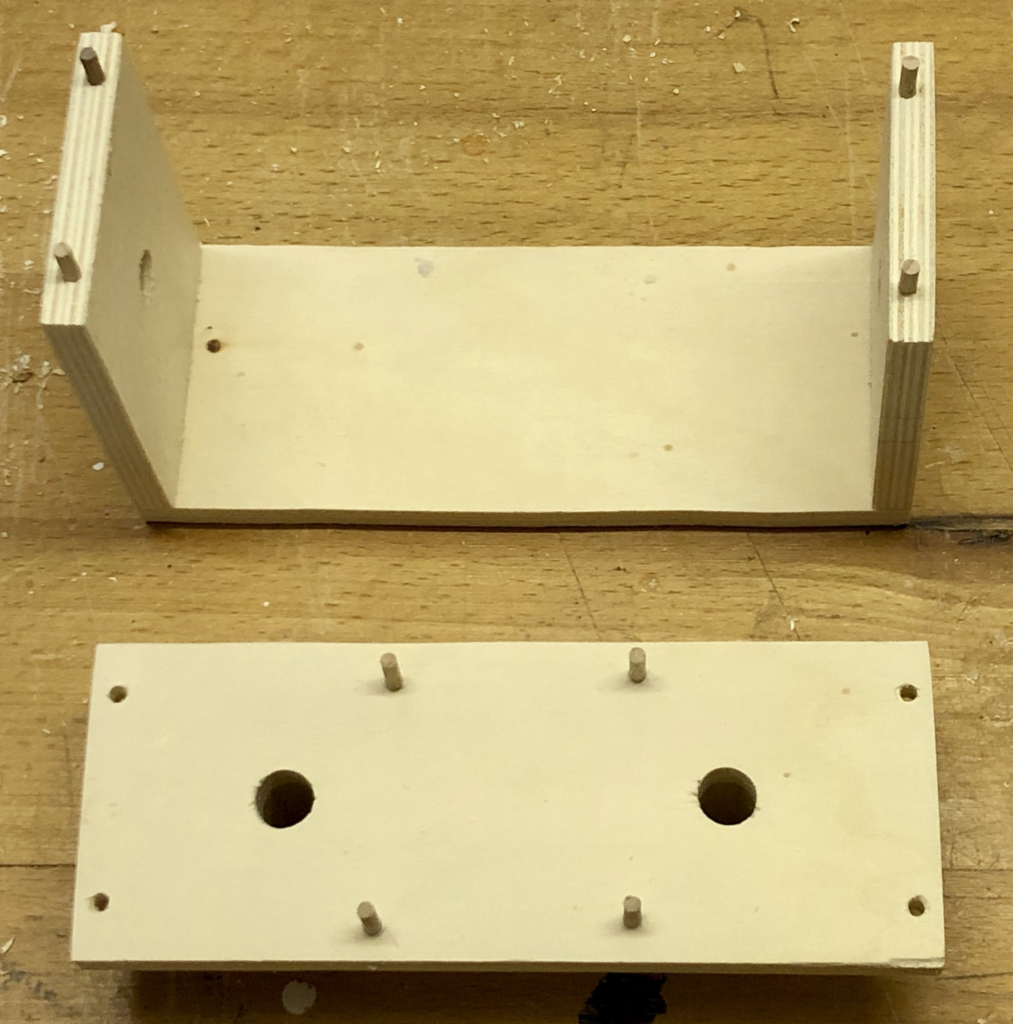
3 mm dowel pins hold the base together, allowing me to frequently take it to pieces whilst experimenting and adjusting the cams. Only when I was sure that everything worked OK did I fetch the glue bottle. The four pins in the middle are stops to limit the rotation of the heads to 90 degrees.
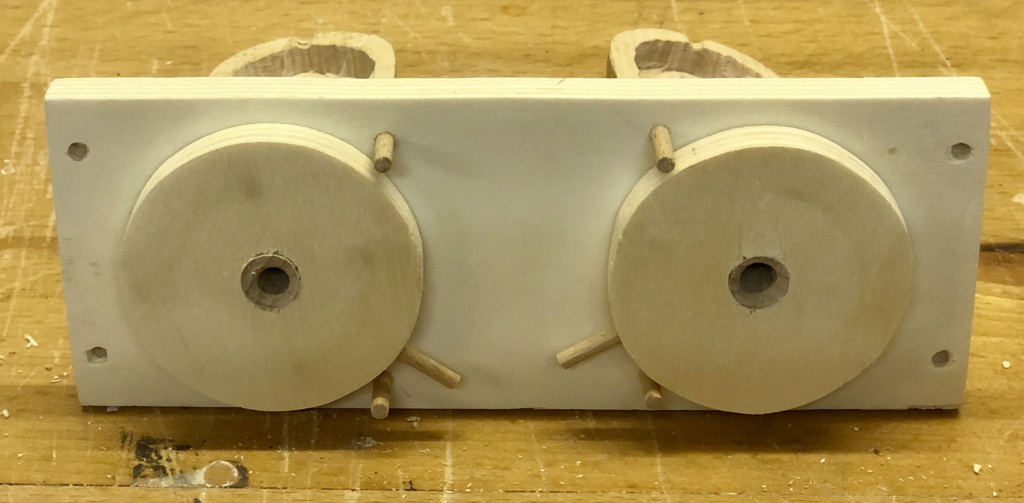
Each 50 mm diameter wheel, which turns its neck and thus its head, has a protruding 3 mm pin which bumps up against the stops, preventing further rotation. After drilling the hole up inside the 10 mm diameter dowel used for the neck, I used a countersink to chamfer the edges where the cord comes out to try and reduce the abrasion.
Cams
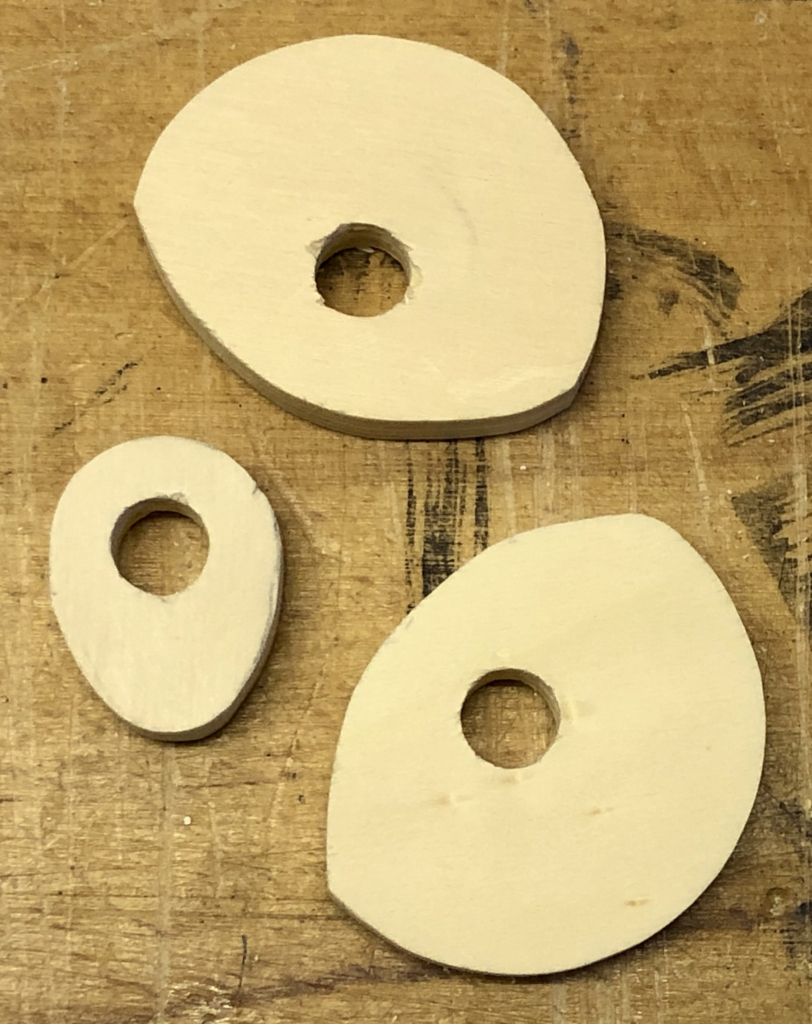
Each head needs three cams: one to turn the head clockwise, one to turn the head counter-clockwise and a small one to move the lips. The large cams were originally 50 mm diameter discs with half of the circumference cut back in each case. When fixed on the camshaft, these take turns to move the wheel connected to the head. I had to experiment to work out the right shape for the small cam.
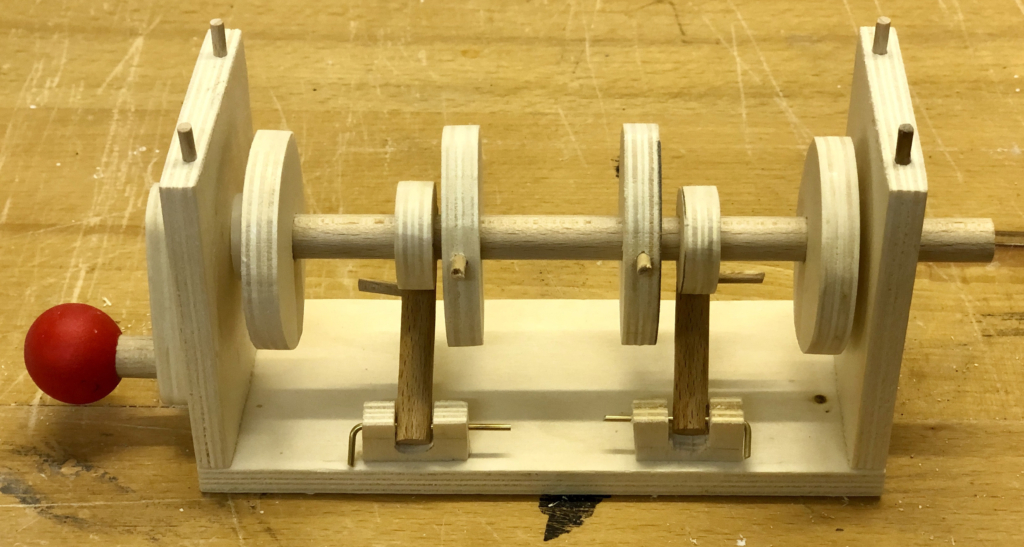
To be able to adjust the cams and then fix them in just the right position, I drilled a 3 mm hole from the outside of each cam down into the 10 mm hole in its centre. After sliding it onto the camshaft, when I was happy with the position, I then drilled along that hole and into the camshaft. Inserting a piece of 3 mm dowel locks the cam onto the shaft. Any excess dowel is easily cut off and sanded smooth.
Camshaft

The camshaft is a piece of 10 mm dowel with a crank on the end allowing the user to turn it.
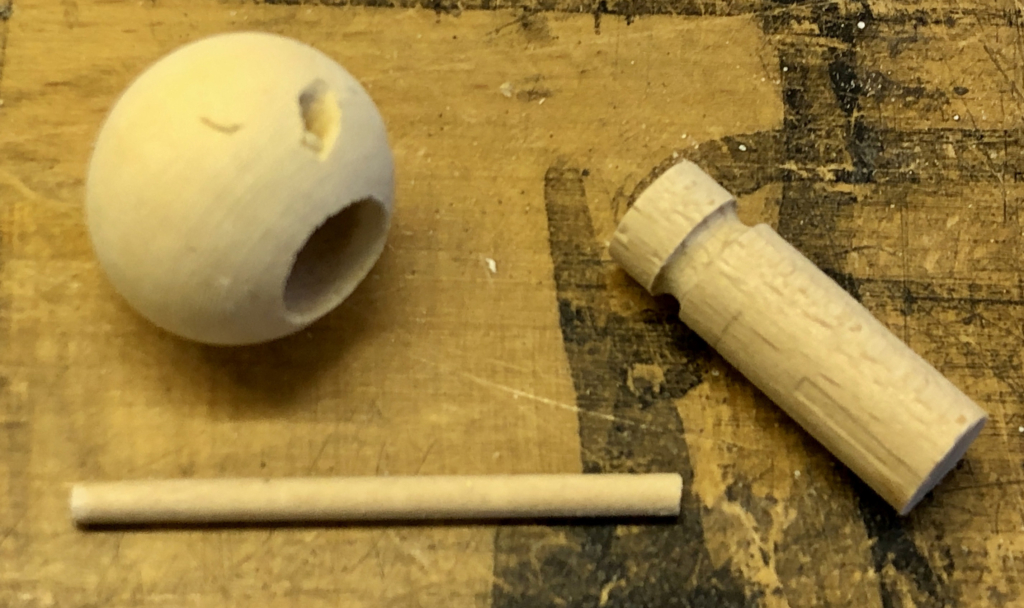
The ball used for the knob has two holes drilled in it. A 10.5 mm hole to take the spindle and a 3 mm hole to take a piece of dowel. The spindle has a groove towards one end, added with a file. With the spindle inserted into the large hole, pushing the dowel in locks the spindle in place while allowing it to turn freely. This means that you can turn the crank to your heart’s content without having to release the ball or let it slip though your fingers. It may take a couple of goes to get this right.
The Yanker
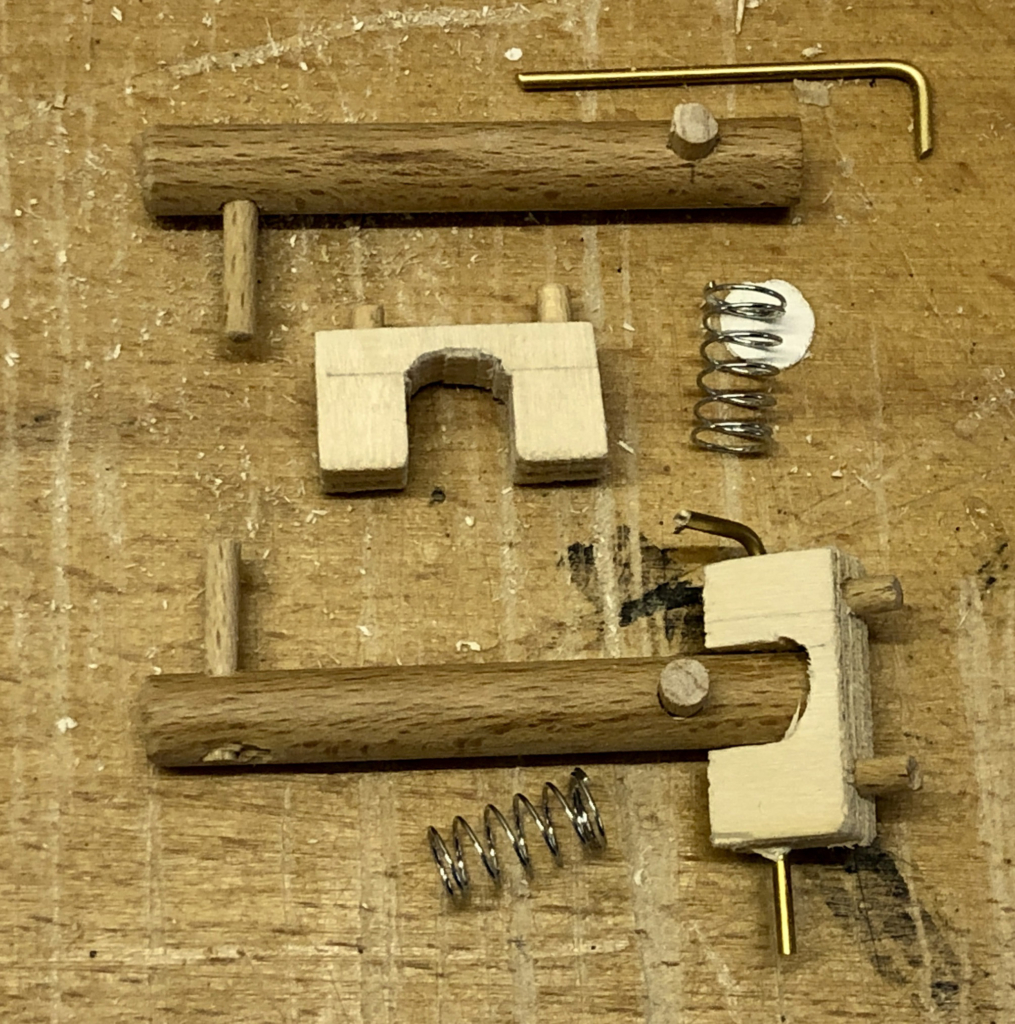
To move the lip-stick a “yanker” is required. This is a lever which is mounted onto the base. A spring pushes the lever upwards and the small cam on the camshaft pushes it downwards. I used a bit of brass rod for the bearing, bent at one end to make it easier to remove and insert whilst adjusting things. When the adjustments were done, I just cut the ends off flush with the wood.
One cord from the lip-stick is attached to it so that when the cam pushes the lever down, it yanks the cord which moves the lip-stick into its kissing position. A lead fishing weight is attached to the other cord which pulls the lip-stick back to its starting position. I tried a spring but didn’t like the feel. Gravity is a very predictable and steady pull. What would we do without it?
Decoration
I carved some over-large lips to glue to the end of the lip-stick. They are painted bright red to attract the viewer’s attention. This makes the man in my little scenario seem a touch androgynous so I tried to give him a male looking T-shirt and cap. I adorned the woman with a stylishly angled hat and matching blouse. As I made the heads & bodies in the same way, it was entertaining to think about what sort of clothing and colours signal maleness and femaleness in 2023.
Reflections
This was a fun project to make, even if adjusting it to work smoothly took quite a while.
The mechanism to move the lips could be used to move a nose too. How about a Pinocchio automaton? Or how about an Eskimo kiss automaton, where two Eskimos turn and rub rub noses? Or how about …?
I left the skin areas unpainted as the beechwood eggs had an attractive appearance and vaguely match my winter skin colour.
I was surprised to discover that turning the crank counter-clockwise (CCW) does not quite reverse the order of the movements. In optimising the cams for clockwise (CW) cranking, I have obviously de-optimised it for CCW. Children seem to have no preference for CW or CCW. Fortunately adults generally go for CW and as this will be a present for two adults it ought to be OK.
Video
Images
Download from https://www.wordwise.de/Keen_Kissers_Archive.zip