Why a Nice Bear?
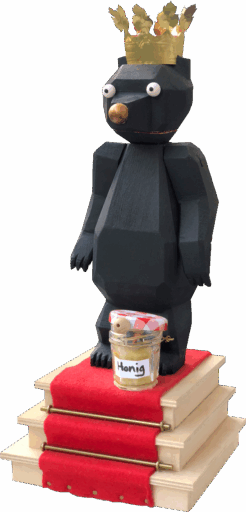
A few years back I made a bear modelled on the Berlin coat of arms, including a recorded sound of a rear bear roaring. To my surprise, this quite frightened children who triggered the bear’s sequence of movements by opening the lid of the honey pot. Nature has obviously preprogrammed us to stay clear of bears when they are roaring.
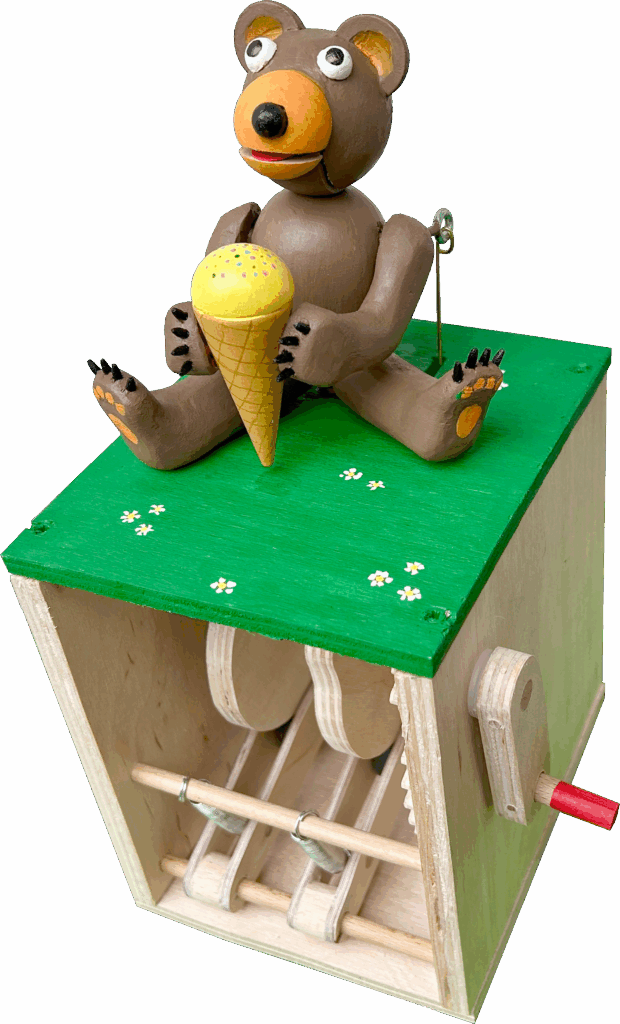
When that bear’s Arduino controller went berserk and the movements uncontrollable, it thus wasn’t too painful to consign this first bear to the back of a shelf in the cellar, rescuing the controller for some future project. With that in mind, I decided that it was time to make a nice bear instead. Moving one space in the name, this becomes an ice bear. Perfect! Off to the workshop to make a bear enjoying some ice cream!
Making the Figure
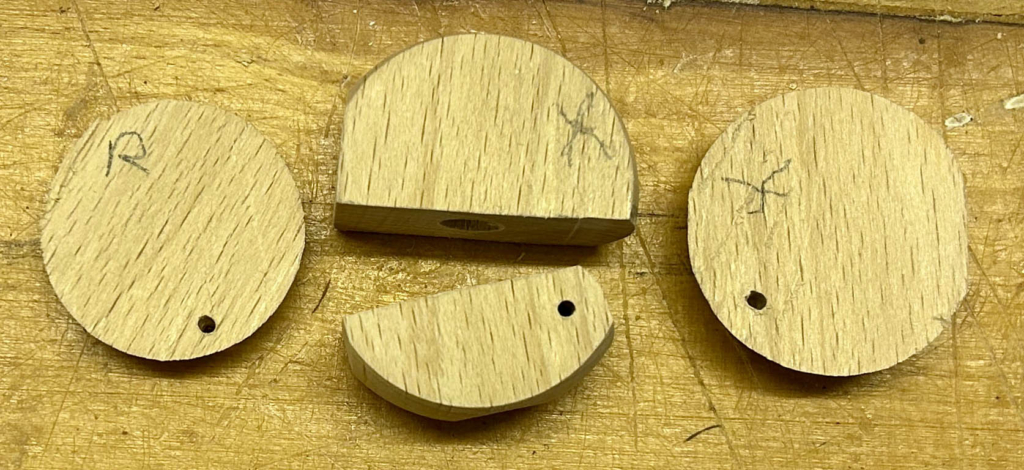
The bear’s head had to include a moving jaw, so that she can have a good lick at the ice cream. I took a new approach to this, starting by cutting a wooden sphere into three slices. The two outer slices become the bear’s cheeks. I cut the thicker central piece into two parts – the jaw and the top of the head. To exaggerate the movement, the jaw does not move, but everything else does, pivoting around a 2 mm piece of brass rod.
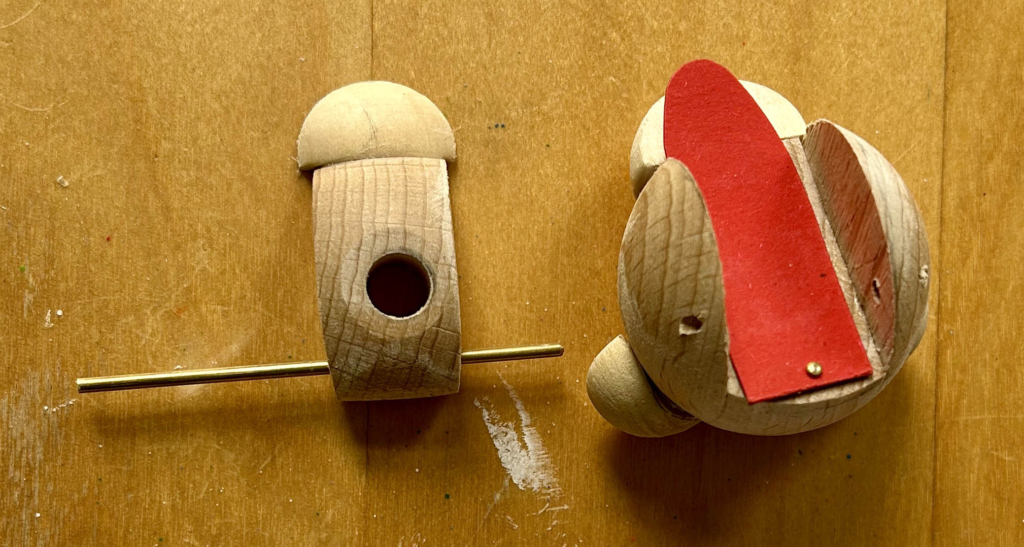
I added a wooden hemisphere to the face, to make the bear’s snout and a piece of red card for a tongue.
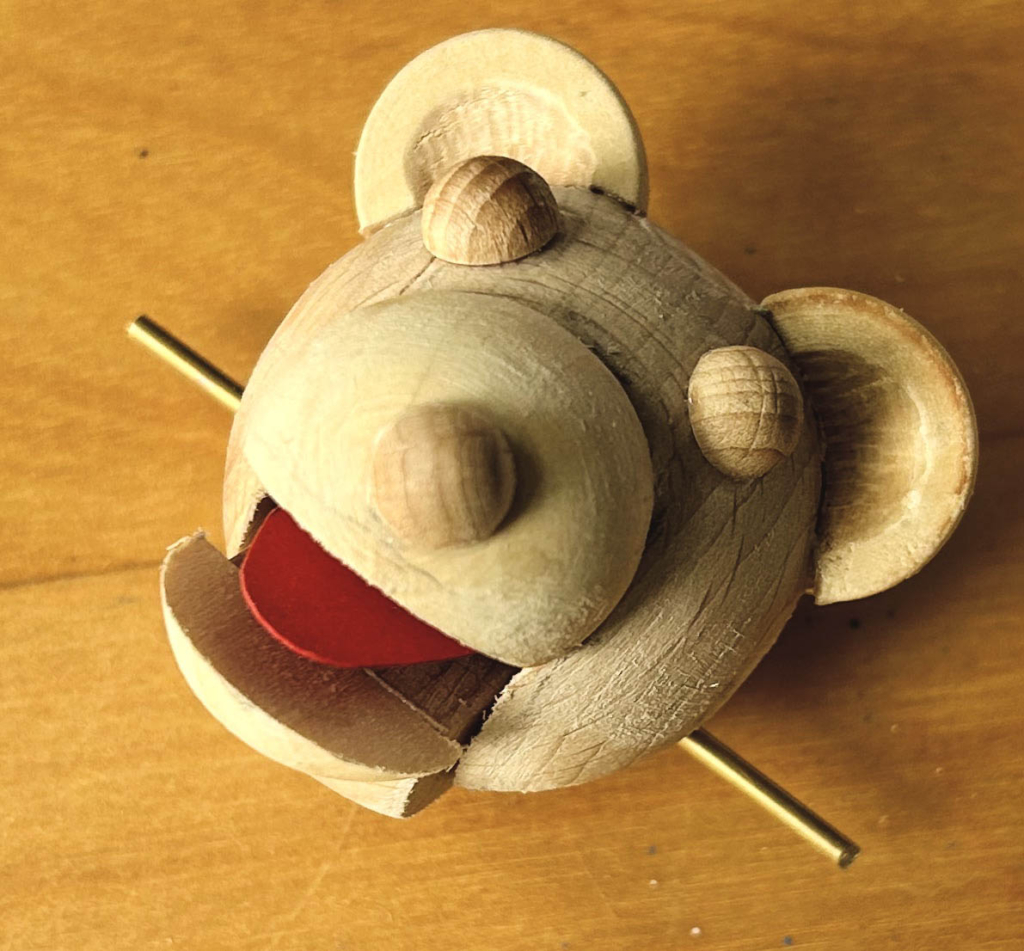
Three smaller hemispheres provide a nose and two eyes. The ears are from two medium-sized hemispheres, carved into an ear-like shape. At this point, the head looks quite like a teddy bear.
A wooden egg serves as the bear’s body and a wooden cone from the hobby shop is perfect as an ice cream cone. The arms will be attached to a piece of dowel fitting loosely in the body.
Some plastercine is handy to model the bear’s legs. They show what size to cut and carve lime wood to be glued to the bottom of the body.
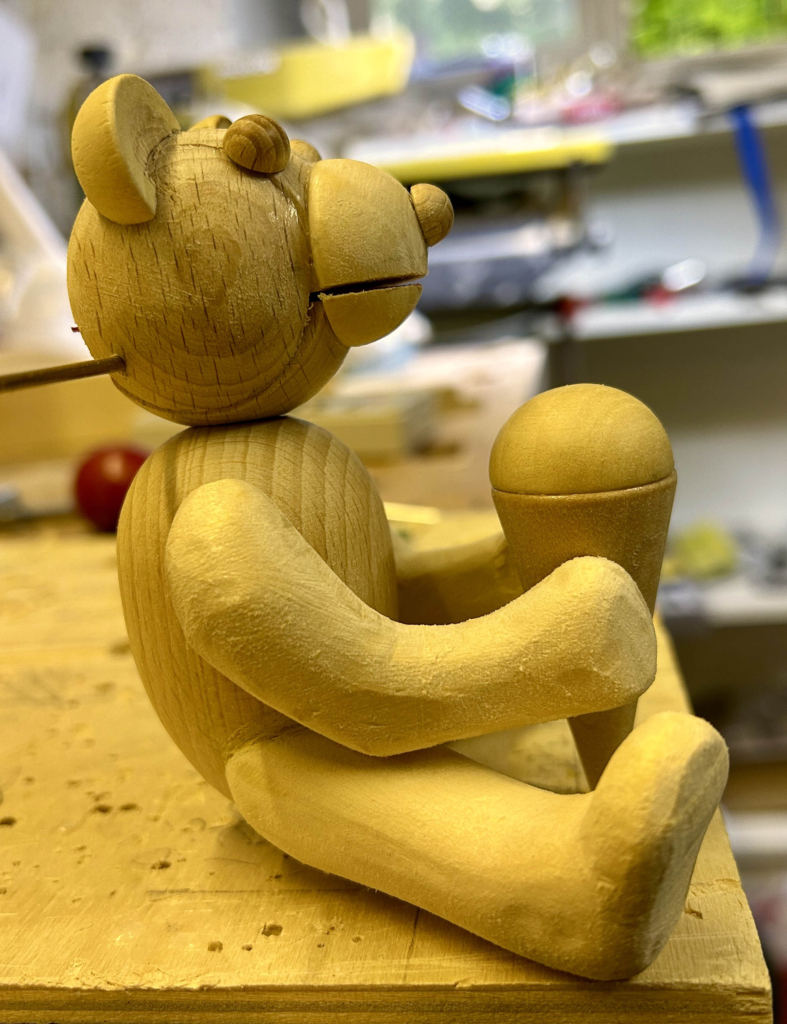
A plastercine model is even more helpful to shape the arms correctly so that they can hold the ice cream cornet. The final touch is provided by some 2 mm dowel sanded and cut to make some claws. However nice our bear is, she has to be able to defend her ice cream!
Making the Base
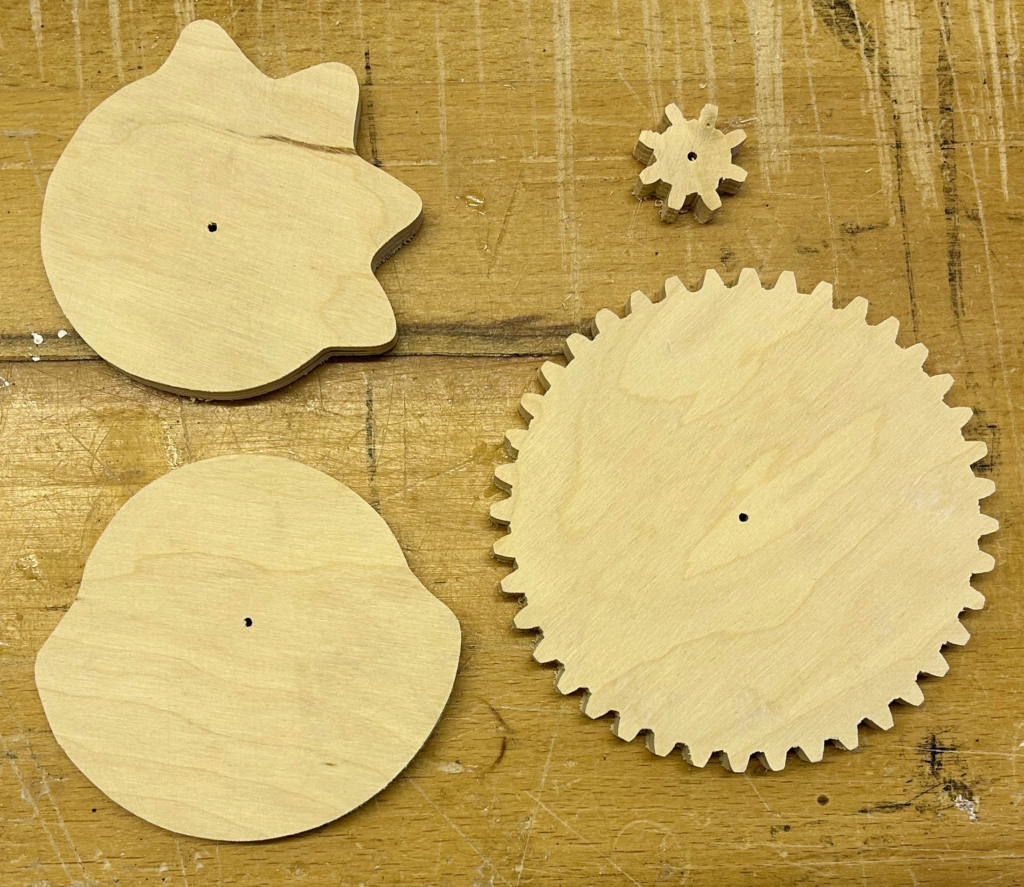
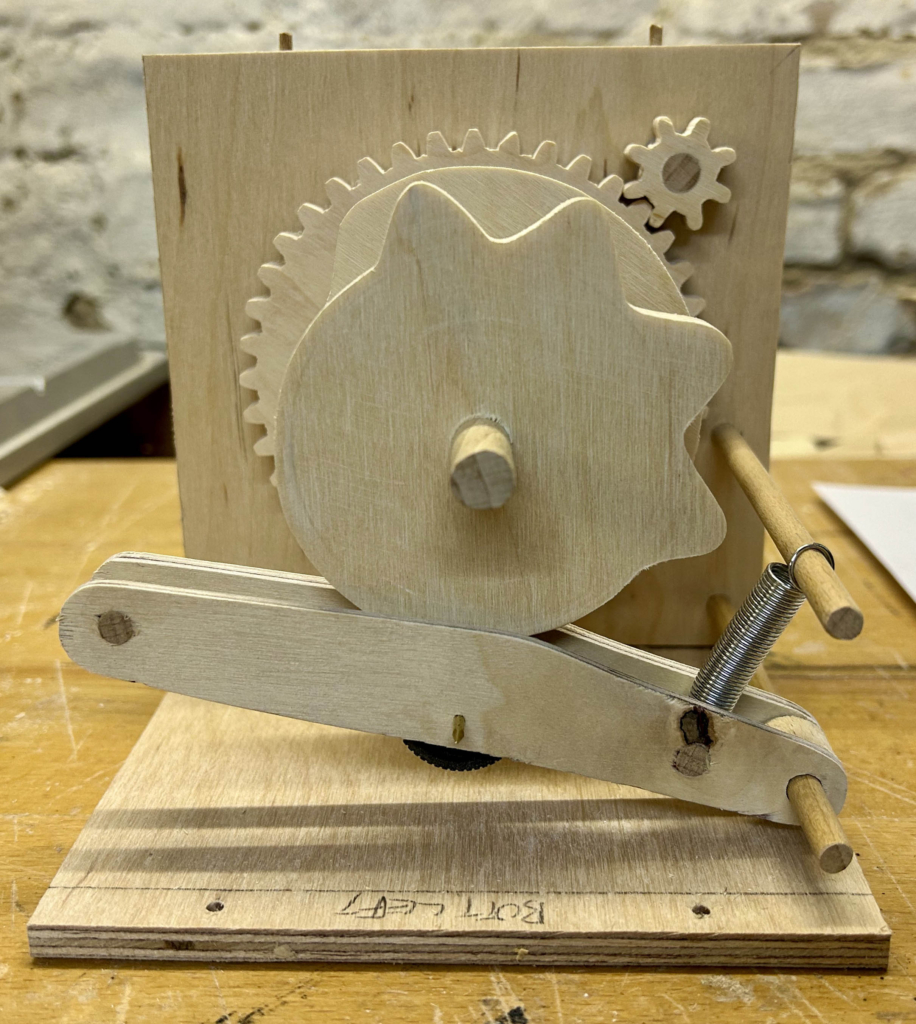
I used some software (Graphic for Mac) to draw two cams. One cam to lift the arms once per cycle, and one cam to open the jaw four times per cycle. The movement was about 1 cm per cam. I glued paper printouts to some 8 mm plywood and cut out the shapes with my scroll saw.
For the cogs, I used the marvellous Woodgears page https://woodgears.ca/gear_cutting/template.html with 8 mm tooth spacing to make one 40 tooth cog and one 8 tooth cog. This means that you have to crank 5 times to go through a whole cycle, rotating the cams by 360 degrees.
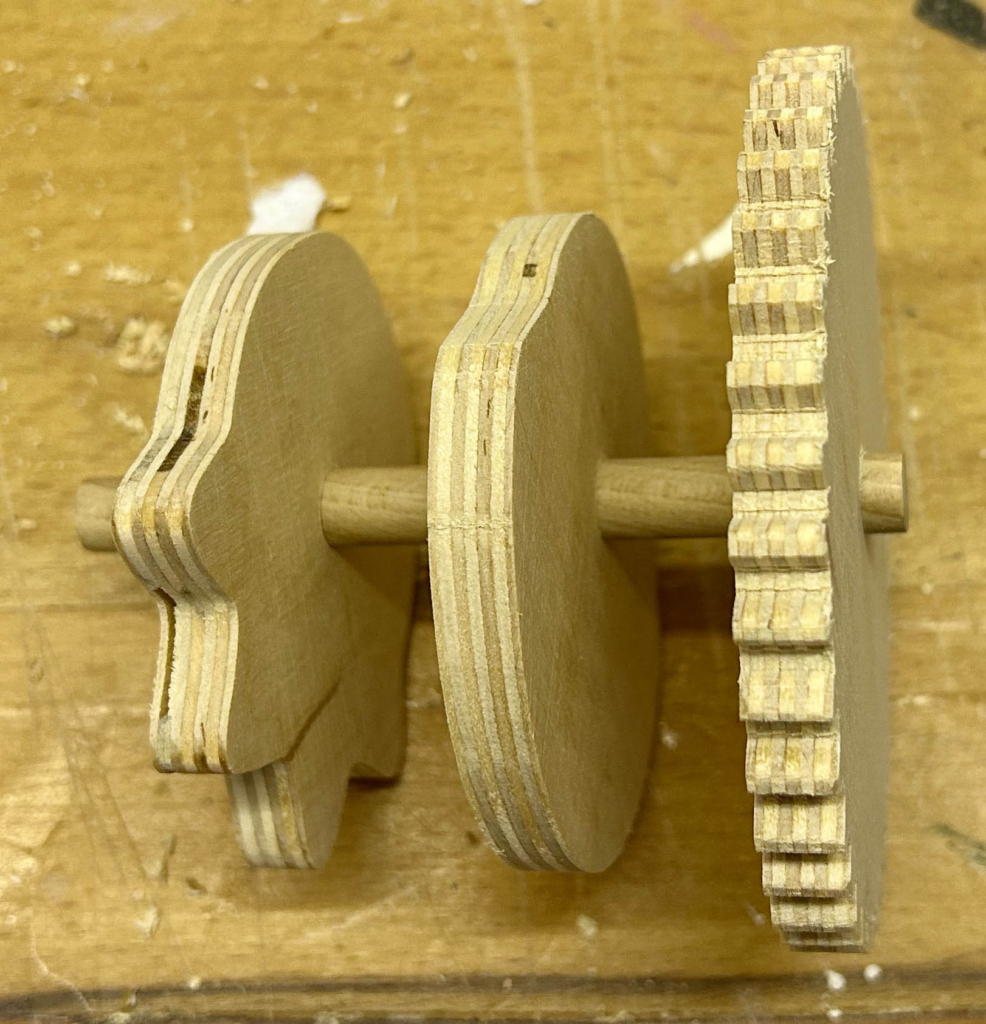
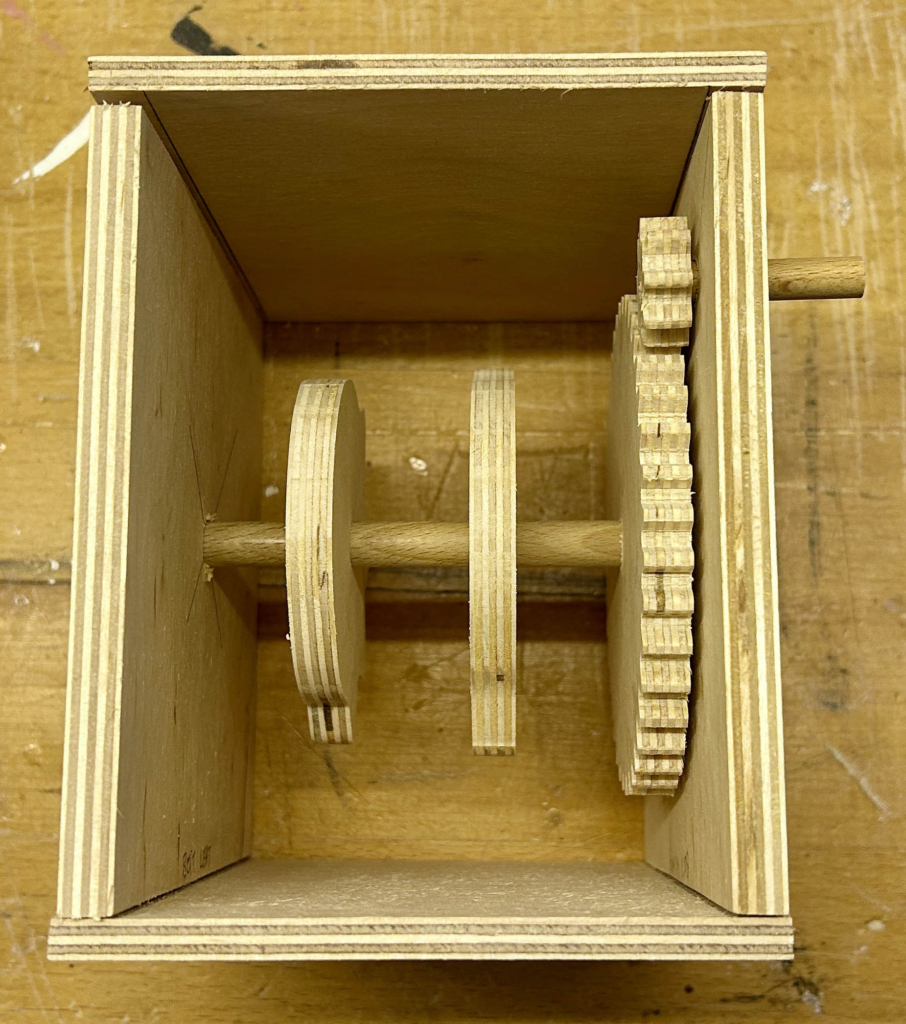
Some 8 mm dowel serves as the shaft to link the cams to the largest cog.

Once I knew how big the bear was and the side of the cams & cogs, I could size the box accordingly. To permit frequent assembly and disassembly, these parts are not glued but pinned together with 3 mm dowel.
Things can now turn quite nicely. Now we just need the levers which are actuated by the cams.
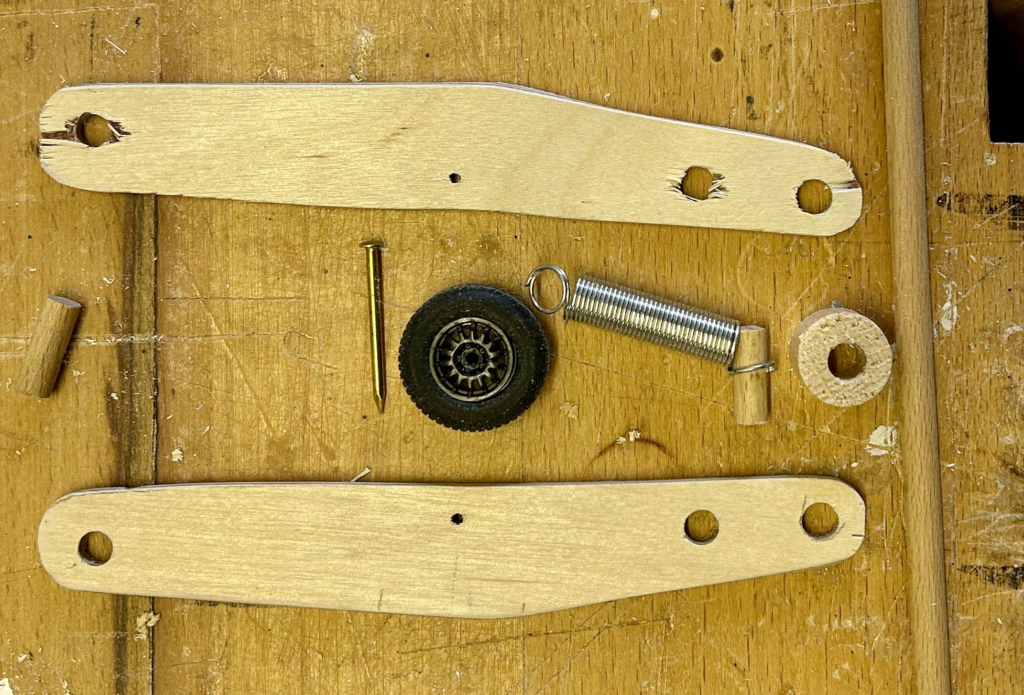
I found some black wheels at the back of a drawer and I thought, they will do very well to run around the curves on the cams. A spring will hold the lever against the cam as it turns.

Two more dowels have appeared in the box; one as a pivot for the levers and one to attach the springs.
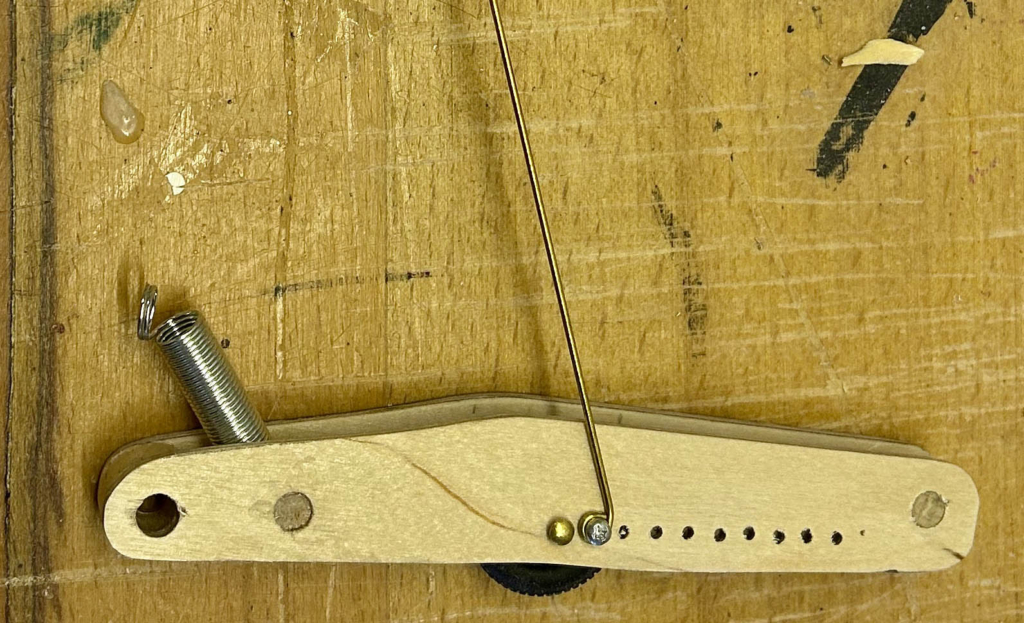
I had guessed that the movement would be about 1 cm, where the wheel touches the cam. To adjust the actual movement, I drilled a series of holes in the lever and used trial and error to select the hole which provides the best movement. The further along each lever, the more the brass actuator rod moves.

So, as the crank is turned the cogs turn and the cams turn. The cams press the levers down which tug the brass actuator rods down. These open the bear’s mouth and lift her arms, which hold the ice cream. When the fixed sequence becomes boring, you can reach around the back and press the levers down yourself, perhaps to make the bear talk and explain what she is doing there. Red paint shows where to press.
The last act was to screw the top and bottom of the box to the sides. Should a repair become necessary this means that dismantling should be fairly simple.
Reflections
I am quite pleased with how the mechanism works. The wheels which I discovered have rubber tyres, which ensure a very smooth and quiet cam action. The bear’s jaws also work well. Cutting the wooden sphere into four pieces was definitely an improvement over my previous method of using a coping saw to directly cut out the jaw. The base is however quite large in comparison to the bear. This is due to the size of the large wooden cog. I could shrink that by using smaller teeth, but smaller teeth would be more fragile. As the mechanism is intended to be part of the show, I guess that it is actually Ok for it to be that size.
Video
Video URL https://www.youtube.com/watch?v=RuqlEUFUb7Q
Images
Images
Download here https://www.wordwise.de/Nice_Bear_Archive.zip