Background to the Class
The Czech Republic and Prague are well known for puppetry. In the days of the Austro-Hungarian empire, conventional theatres were obliged to perform in German, so small travelling companies of puppeteers who were allowed to perform in Czech could offer more than just entertainment for the children and even now, one hundred years after the end of that empire, puppet shows for adults are still to be found and seem to be much appreciated from the couple that I saw. Modern Prague also has a well-regarded film animation scene, resulting in a good supply of experts in puppet, armature & model making. Master craftsman Miroslav Trejtnar and his team have also taught hundreds of students how to make puppets at his Puppets in Prague workshops and when he announced a brand new “Mechanical Object Workshop”, I thought it’s time to pay Prague a visit.
Some of the Team

The Preparations
To apply for a place, I sent a few details of things that I had made in the cellar. Once accepted, Mirek asked for an idea of what sort of mechanical model I would like to build, so I sent him a drawing, with a rough outline of what movements I’d like. We exchanged a couple of emails and he said, yes we can make that.
Mirek’s American wife, Leah Gaffen dealt with all of the organisation, booked accommodation, a puppet show just before the course started as well as an evening at the circus, sent a pocket map of Prague and even some tickets for Prague’s public transport system, which is great when you first arrive, confused by the unfamiliar surroundings. Add a schedule for the course and loads of tips about Prague and we were all set.
Via the social media page set up for the course I was pleased to see that three of the five students were repeat offenders, which is a very concrete statement about the previous workshops.
The course
The six-day course, 8 hours a day, with a day off in the middle, was basically in 4 parts:
- workshop fundamentals about machines, tools and materials
- various mechanisms to make things move
- maquettes to test out the movements for your own project
- building your own project
Fundamentals – photoessay
One tidy workbench per student ready to get started.
Types of material and their quality.
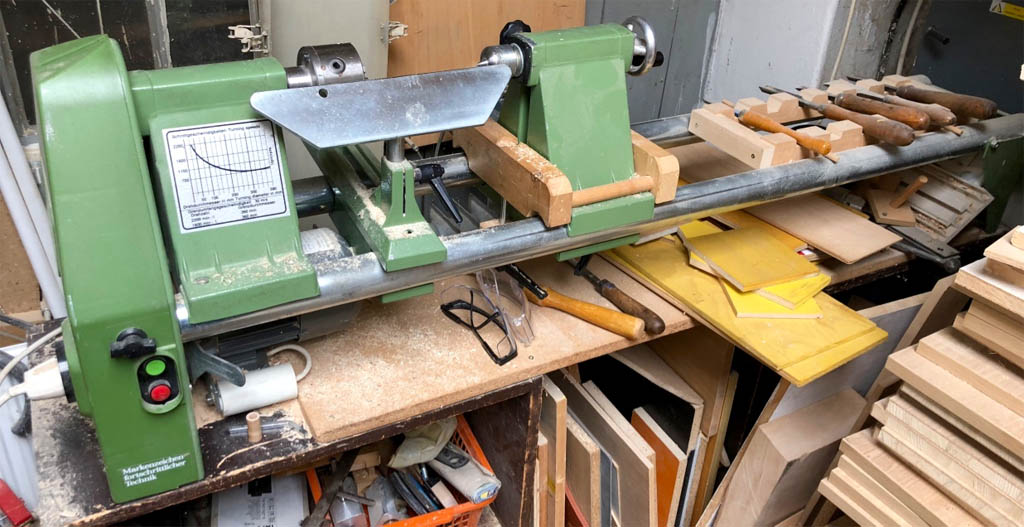
The lathe ready to turn some wooden wheels.
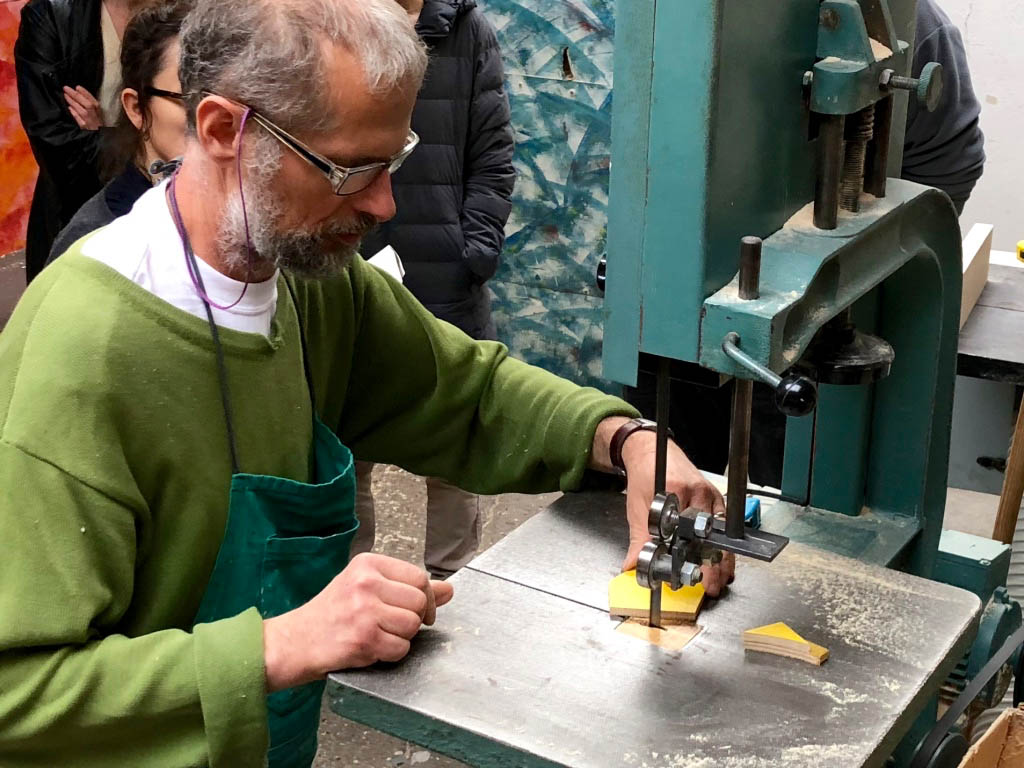
How to use a bandsaw properly.
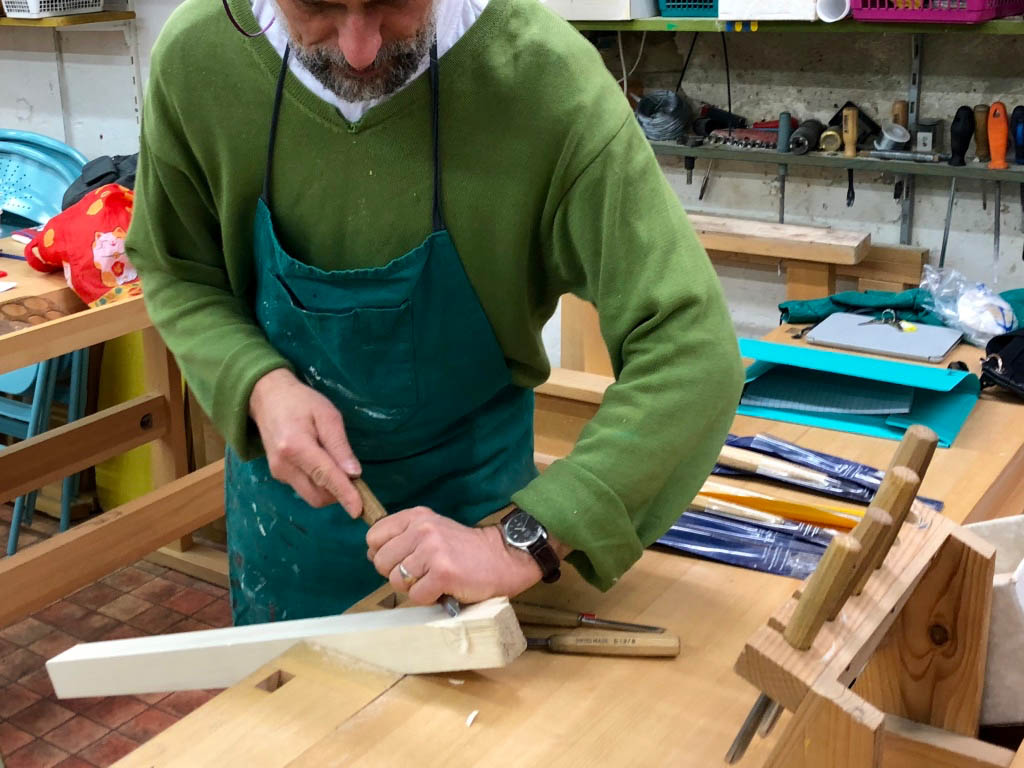
Chisels, sizes, shapes and their care.
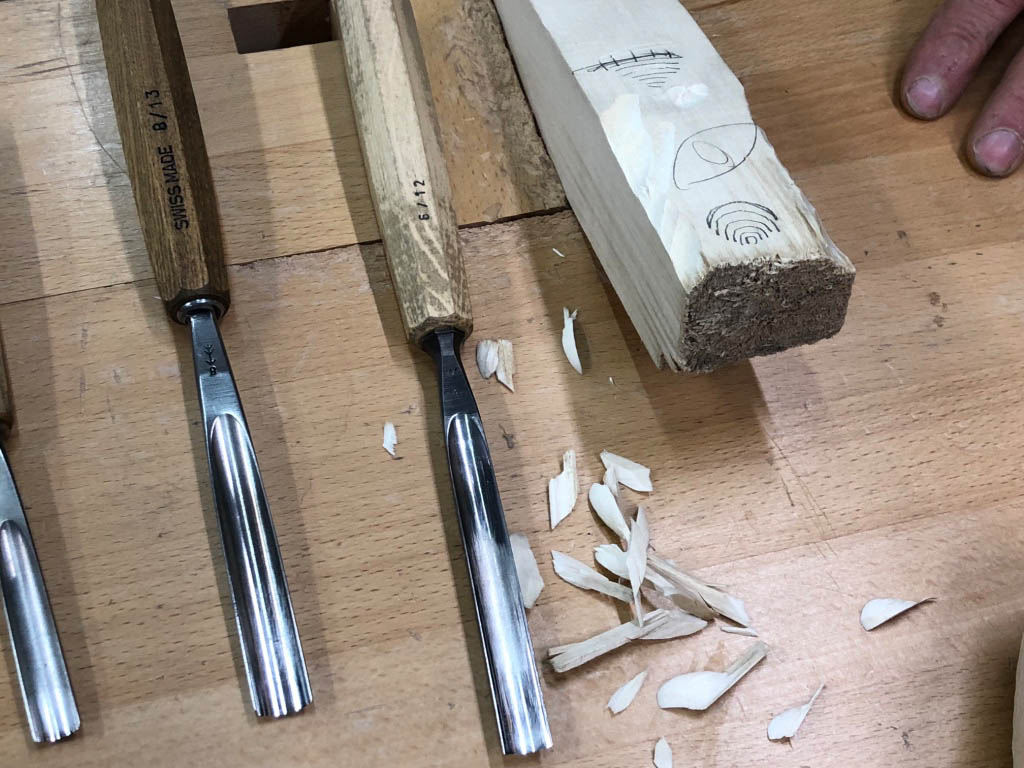
Using a chisel.
Basics of brazing.

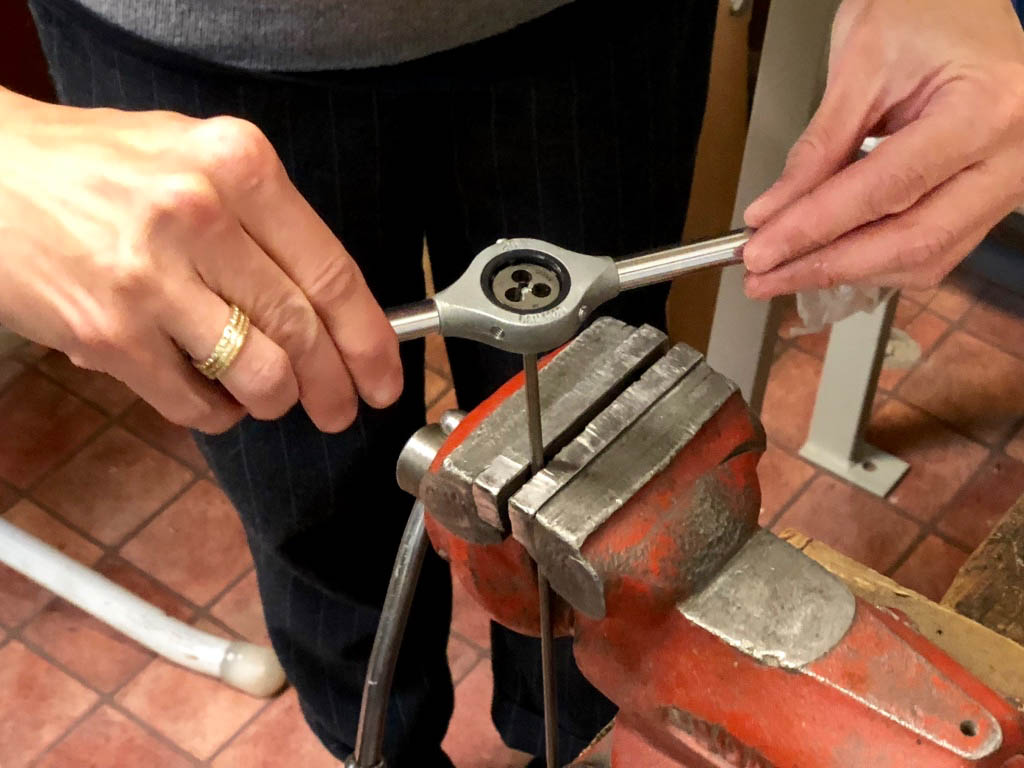
Tapping holes.

Cutting threads.
Mechanisms
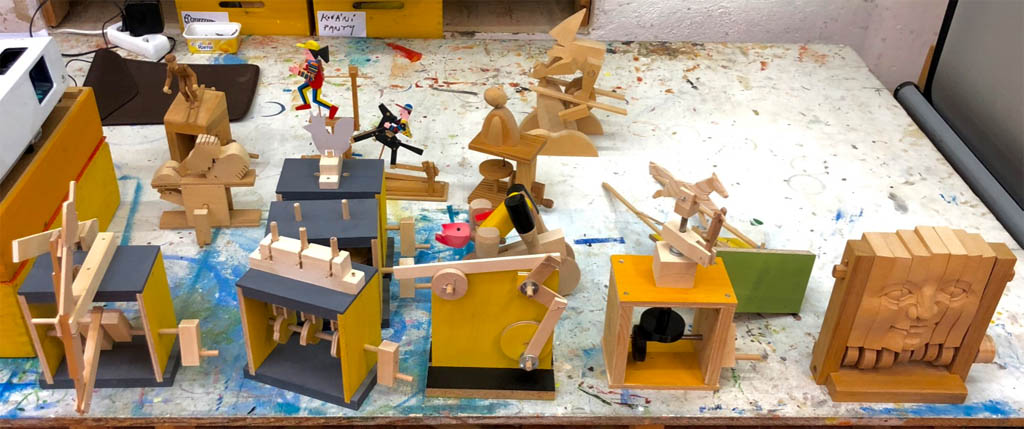
There is nothing better to understand a mechanism than to pick it up, make it work and inspect it from all angles. Mirek has a collection of mechanisms, some complete models from other artists and some basic mechanism, which he produced himself to illustrate how cams and levers can be used. This included Mirek’s own push along cyclist which is now included in the collection of the prestigious Victoria & Albert Museum in London.
The “horse” and the “runner made by Peter Markey use fascinating mechanisms, I spent quite a while handling them to see exactly how the movement is produced.”Man and fly” by Robert Race uses a very simple mechanism but is very entertaining and shows that it doesn’t have to be complicated to be a success. Mirek’s own animated, carved face produce a really striking effect, just from a set of cams.
Mechanisms – photoessay
Examples, for inspiration and to understand the basic mechanisms.
Mechanisms, theory and practice.

Mirek with some of his small friends hanging around behind him and some online inspiration.
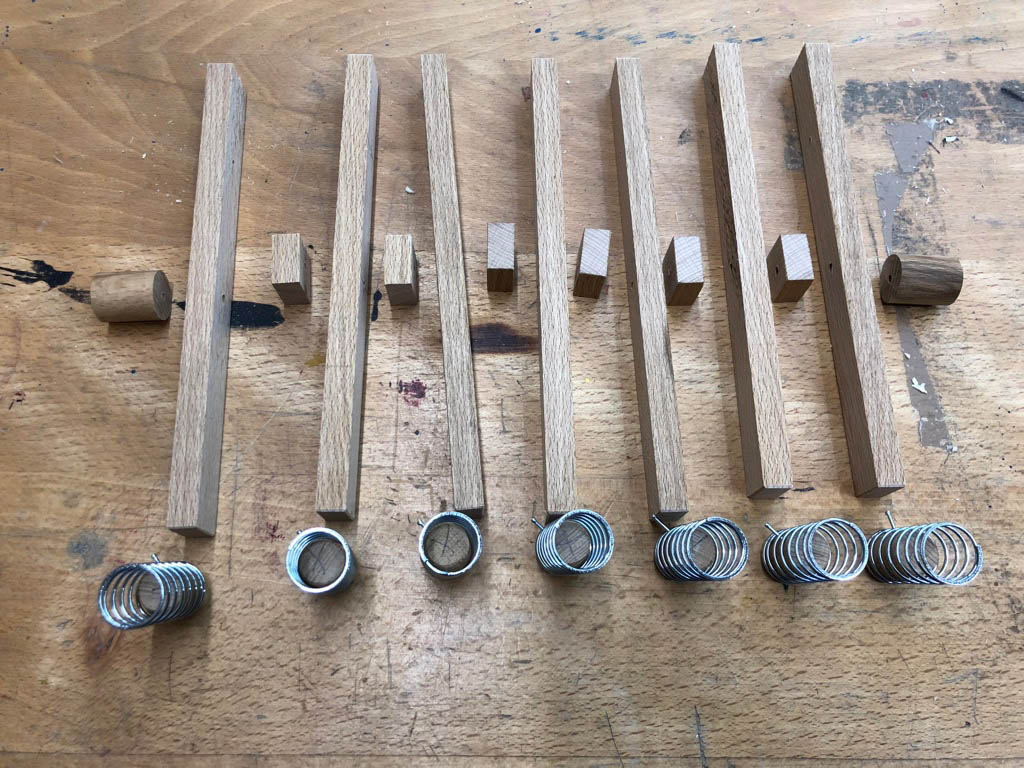
Mirek has made plenty of base kits so that we can try out the mechanisms ourselves.

Templates for three cams.

Three cams in action.
Making a maquette
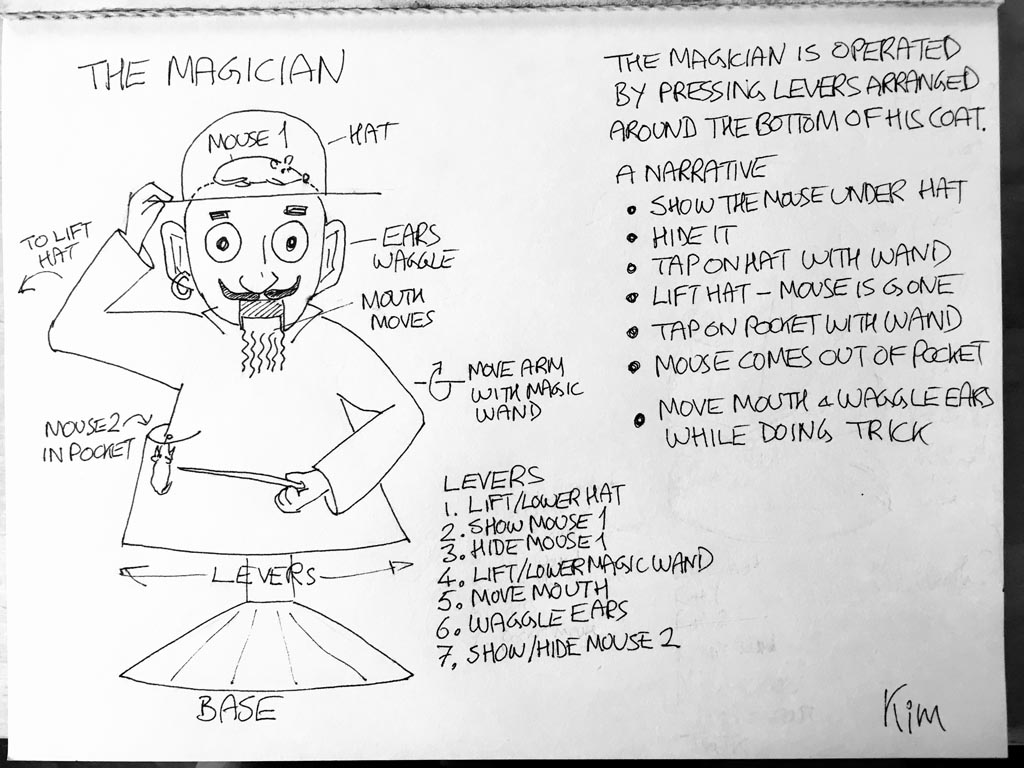
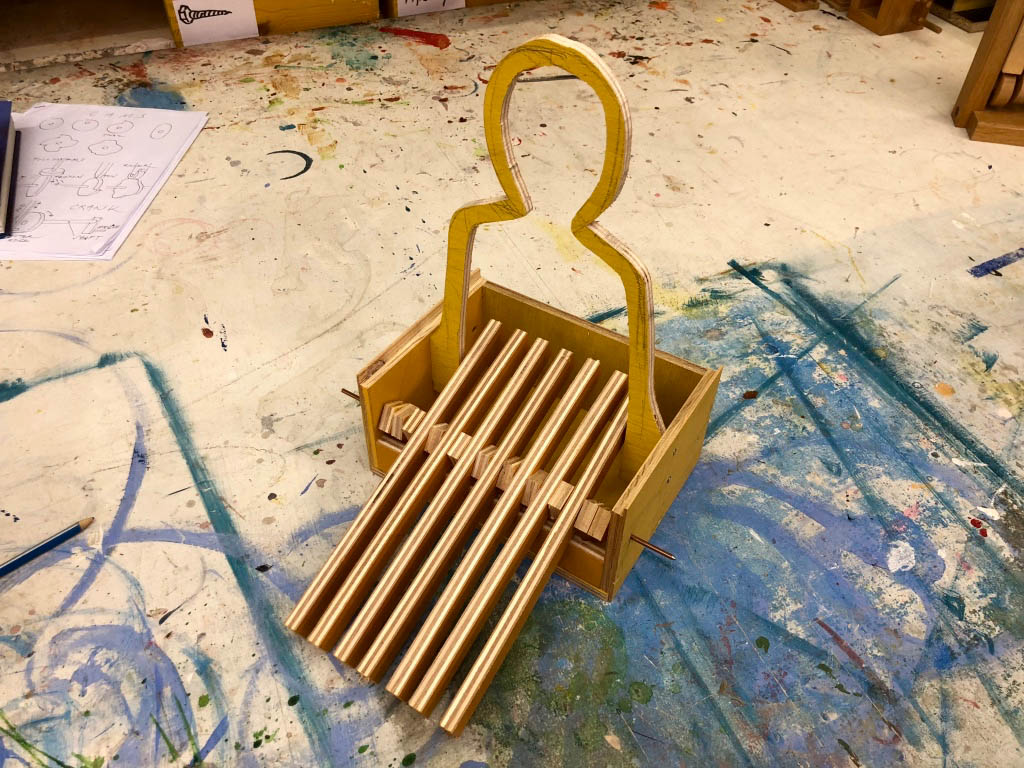
Having understood what mechanisms we could use in our own projects, we then moved on to trying our ideas out on a sort of working model or maquette. This means drawing your idea with enough detail that you can see how the moving parts move, which bits are hinged or which parts sit on an axle, or rest on a cam. This is a fascinating intermediate stage which shows whether your great idea can work or not. From this point on there was a flurry of activity as Mirek and Zdar and the team took our more detailed drawings and conjured up just enough of a starting point for us to work on the movements. In my case this meant a strange centimetre wide outline of my magician figure, standing on a box with seven levers, ready to do whatever I planned for the finished object.
Once I had screwed together the parts which Zdar made for me, I could start the process of adding movement. This first means a real-size pencil drawing of something that moves like one of my magician’s arms. When you are satisfied, cut it out and try it on the maquette to see if it works. Is it the right size? Does it hinge in the right place? With a sharp pair of scissors this takes no time at all and a second or third attempt allows you to get it just right. When you are happy with the paper version, trace it onto a piece of plywood and cut it out on the bandsaw.
Making a maquette – photoessay
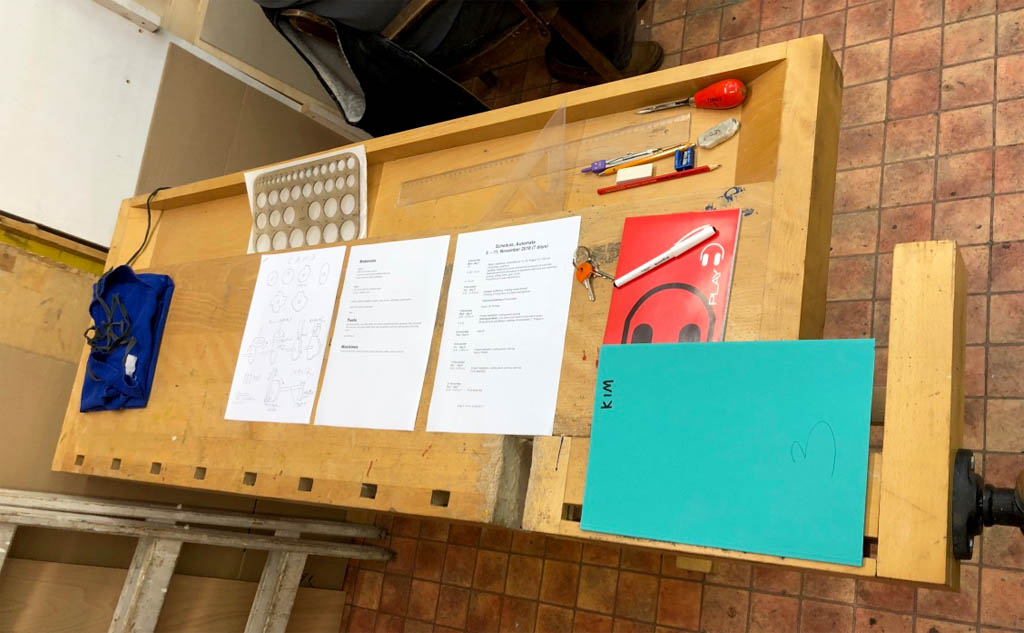
A “technical” drawing of your project.
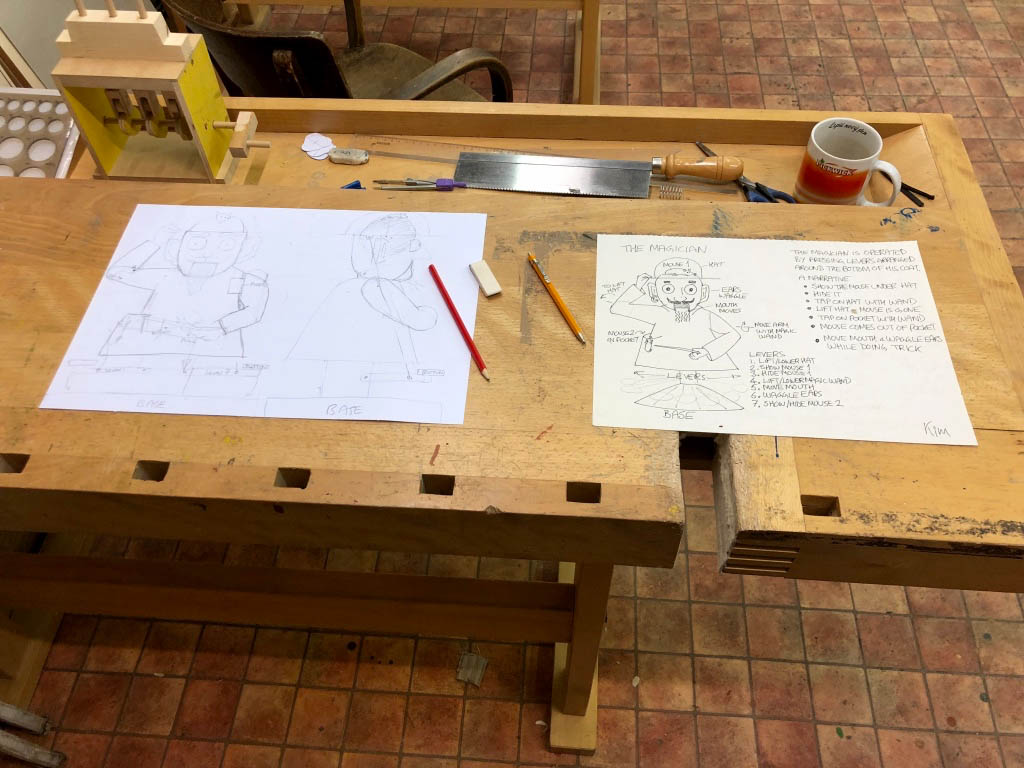
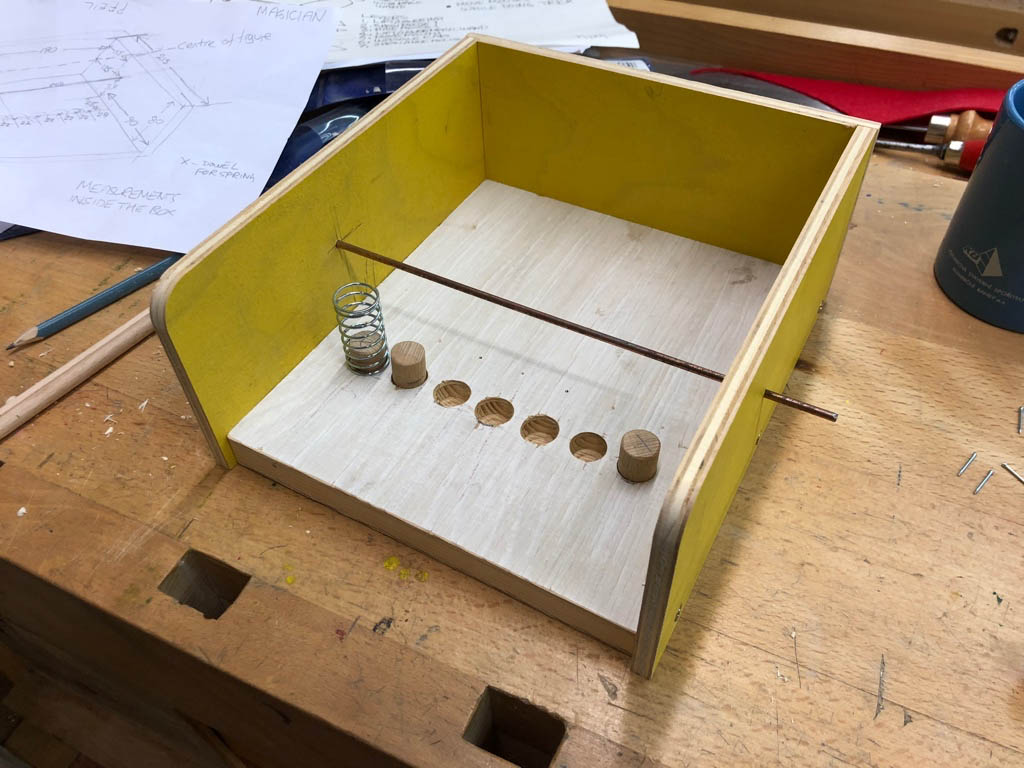
The basic magician maquette, with seven levers and a simple outline of the figure.
Cut out parts in card, if they are OK, cut them in plywood.
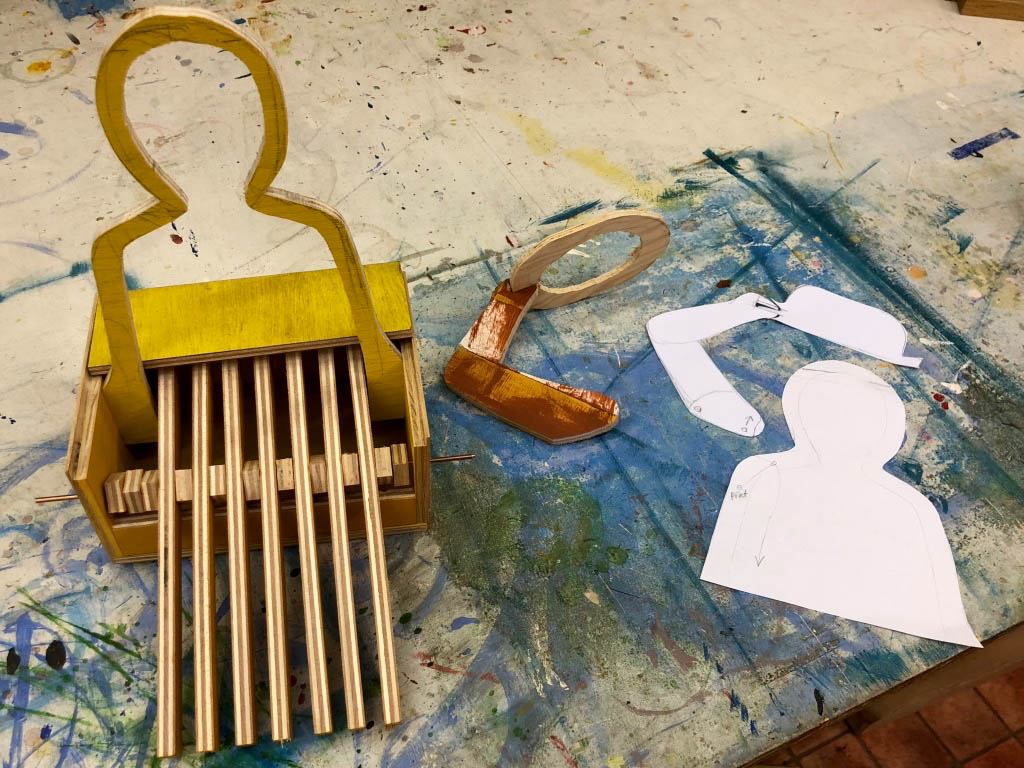
Two mechanisms already proven on the maquette, he can politely raise his hat and wave his magic wand..
After a day off to see the marvellous sights away from Prague, today we return to the workshop, eerily quiet at the start of the day.
![]()
The maquette is finished enough with its 7 movements to get ready for the real thing.

There’s always a magically replenished supply of nibbles to go with your tea.

Making the real thing
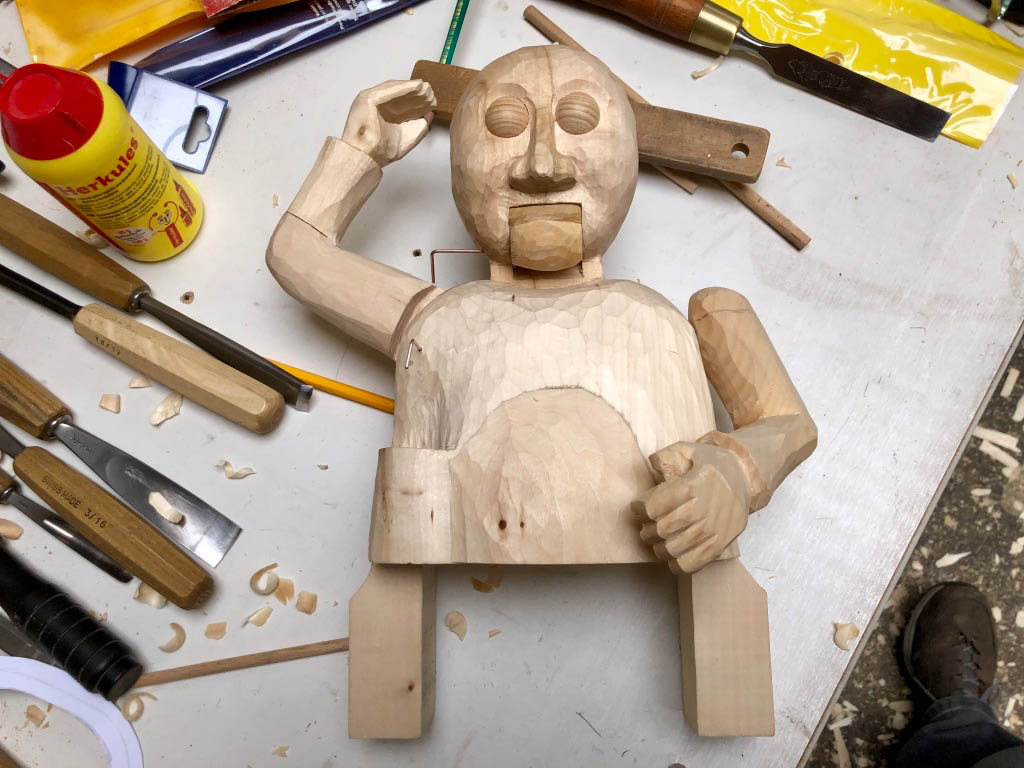
Having proved the principles on the maquette, it was now time to start on the real thing. To make the most of the time available I dismantled the maquette so that we could use the pieces as rough templates. For the real craftsmen it didn’t take too long to cut lime wood pieces roughly into shape, which I could then carve and prepare for assembly.
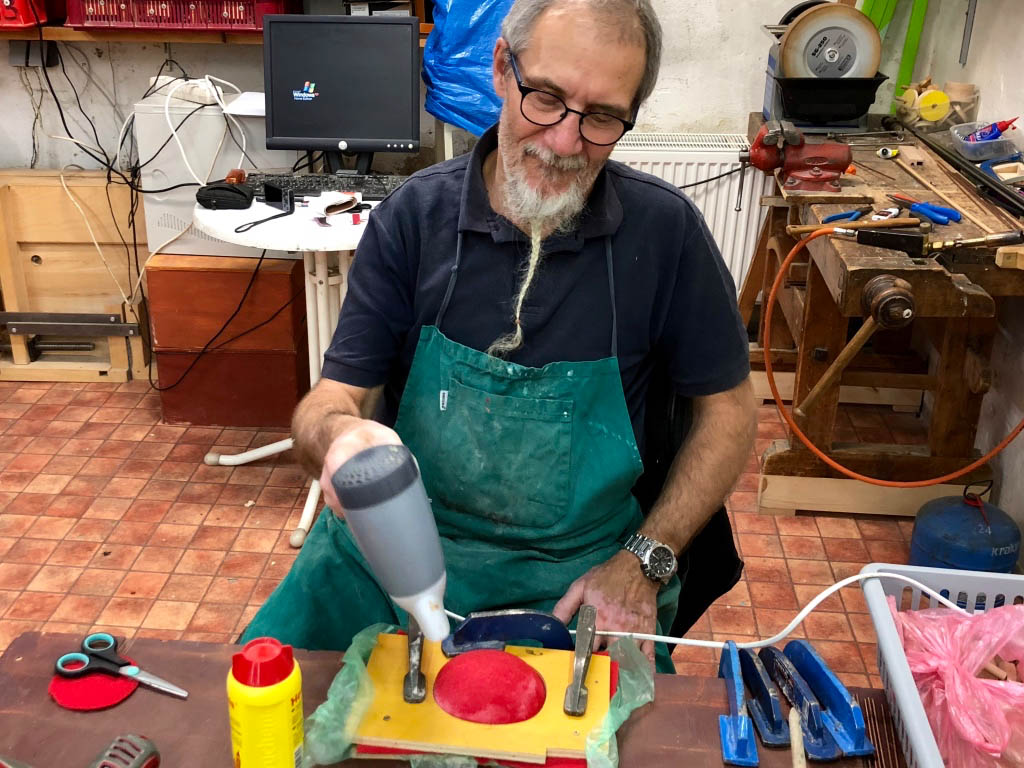
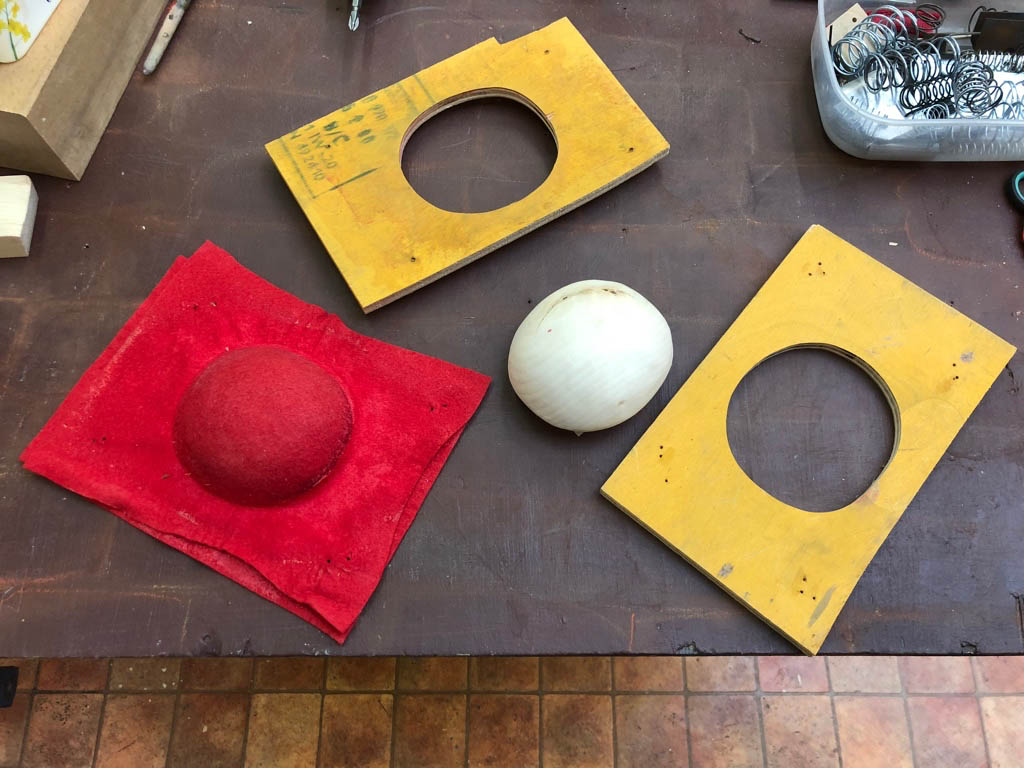
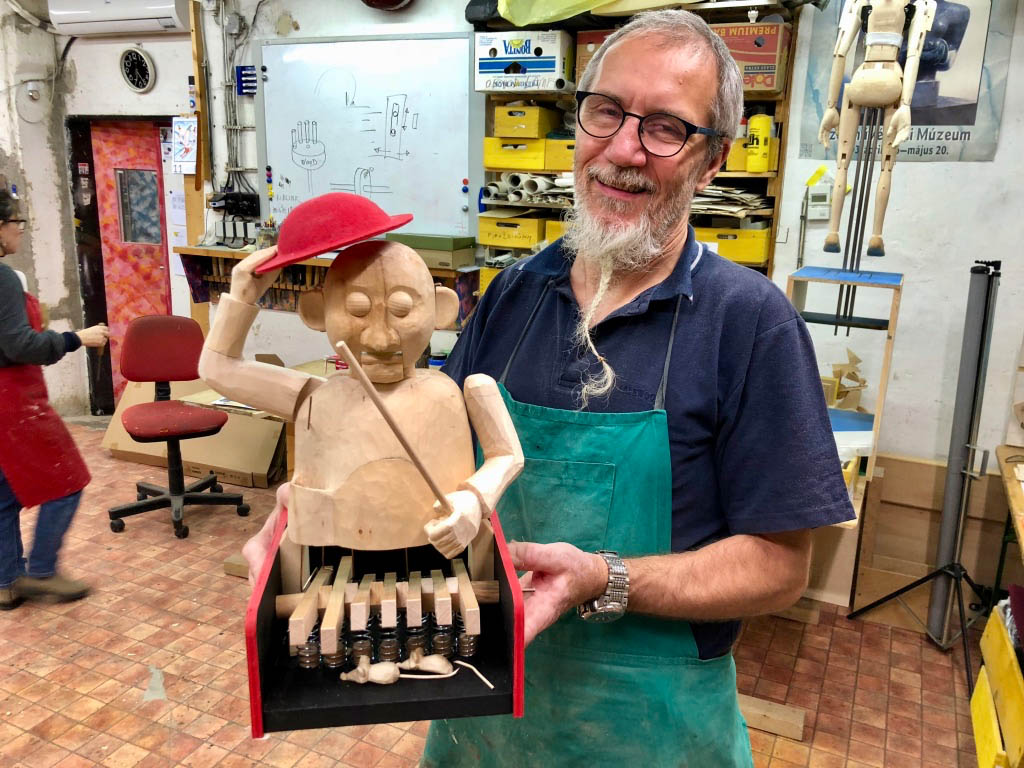
My magician also needed a hat and it was again wonderful to see how the experienced model makers go about that. Once we had decided that it didn’t need to be made of wood (I mean, who wears a wooden hat!), two layers of felt were soaked in diluted wood glue and clamped into an improvised hat mould. After drying out over night, I used a flat iron to smooth the rim and trimmed it to shape with a pair of scissors. Add a bit of wire reinforcement where the hand holds it and taraaa! A hat!
Making the real thing – photoessay
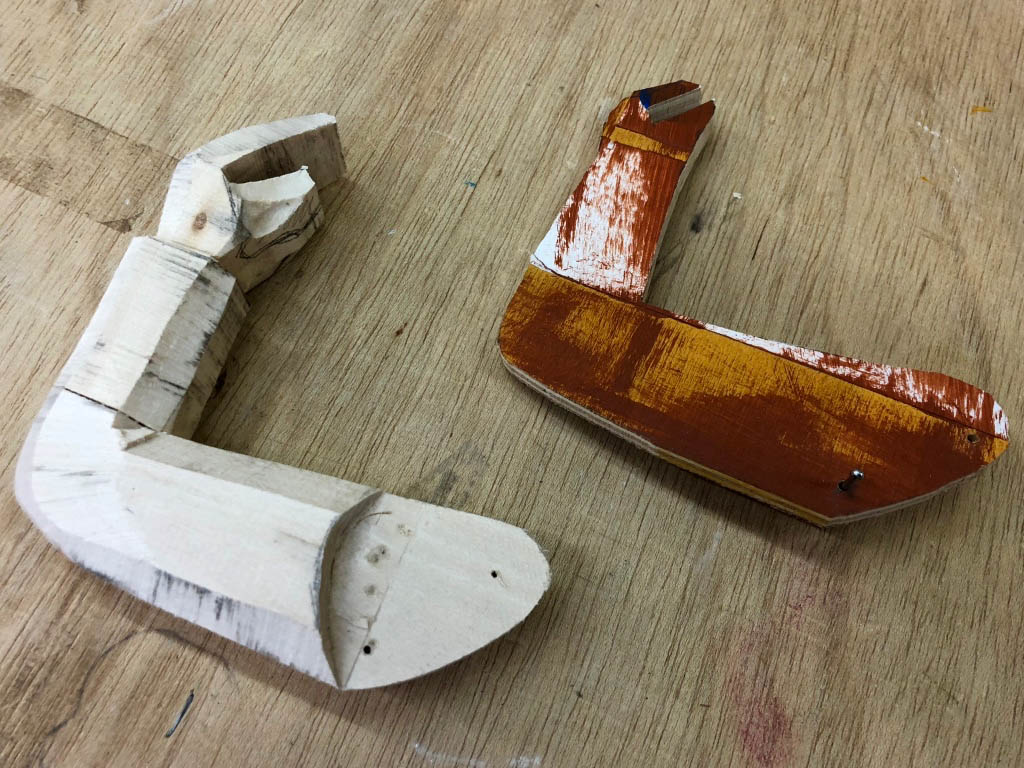
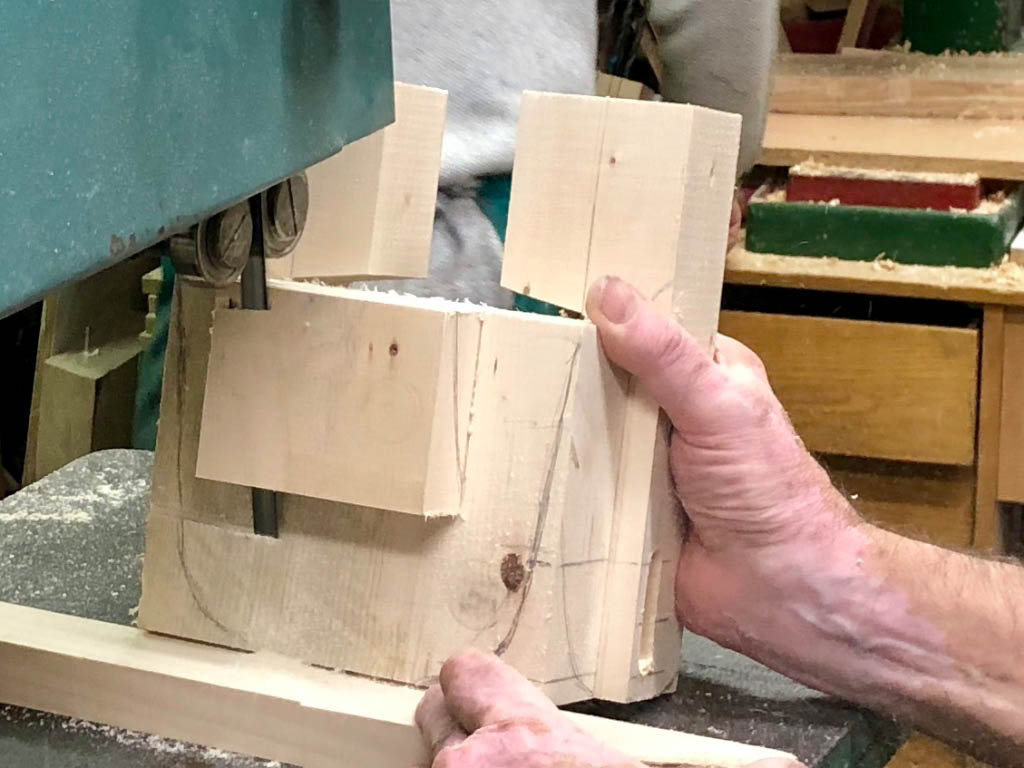
Cutting the left arm on the bandsaw from the marquette.
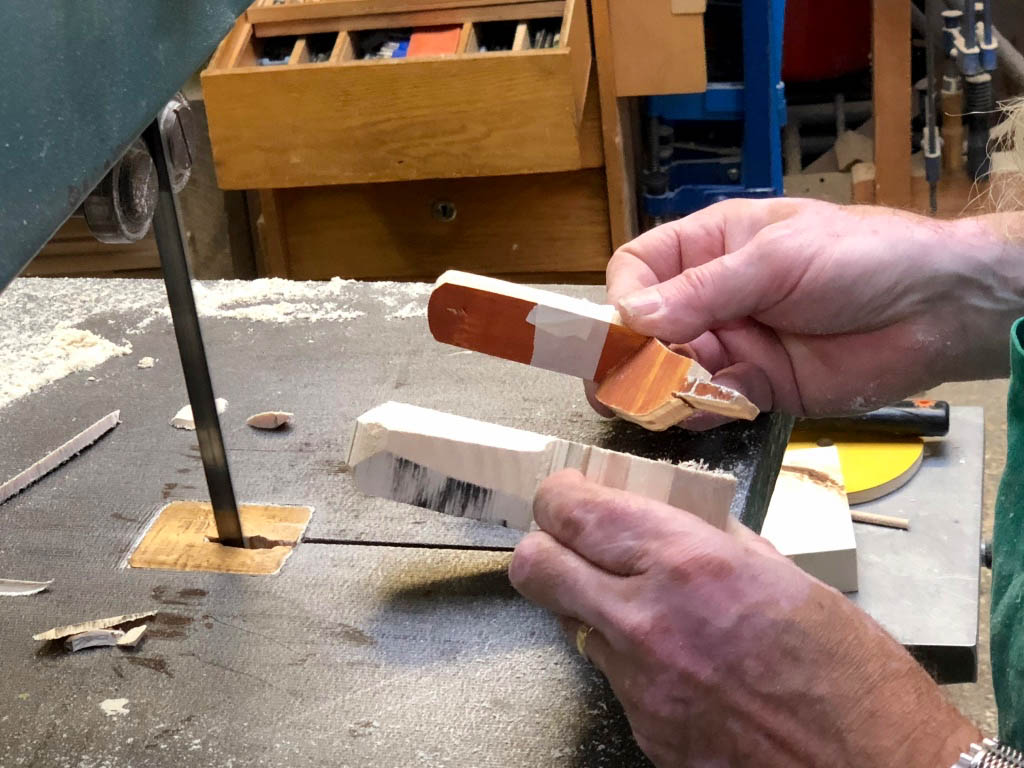
As finished from the bandsaw.
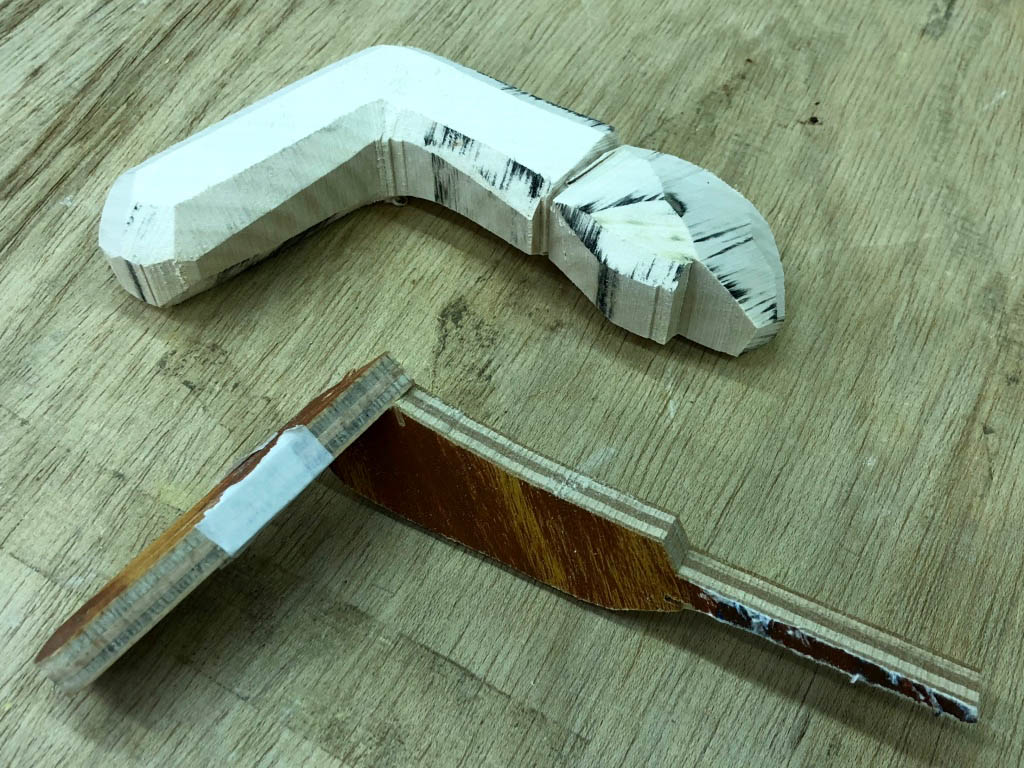
Same for the right arm.
The head’s a bit more complicated…
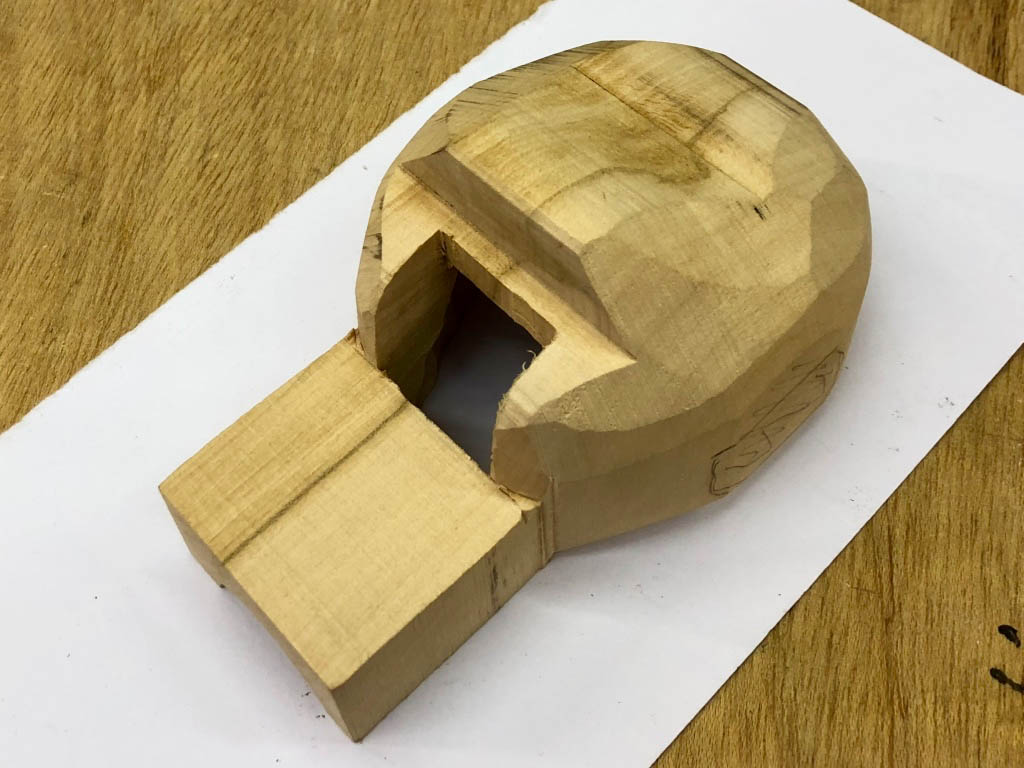
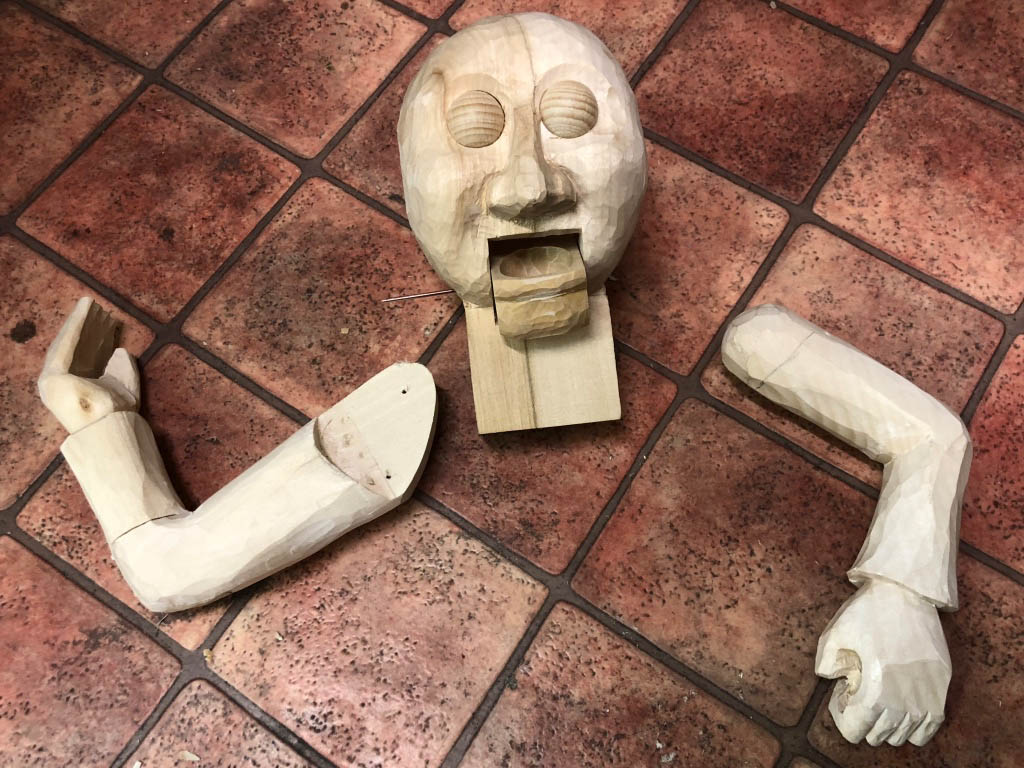
After carving.
Zdar making a hat from two layers of felt soaked in glue.
A new base in the right size, with holes in the right place.
New levers in nice wood.
Take the hat out of its mould and iron the rim flat.
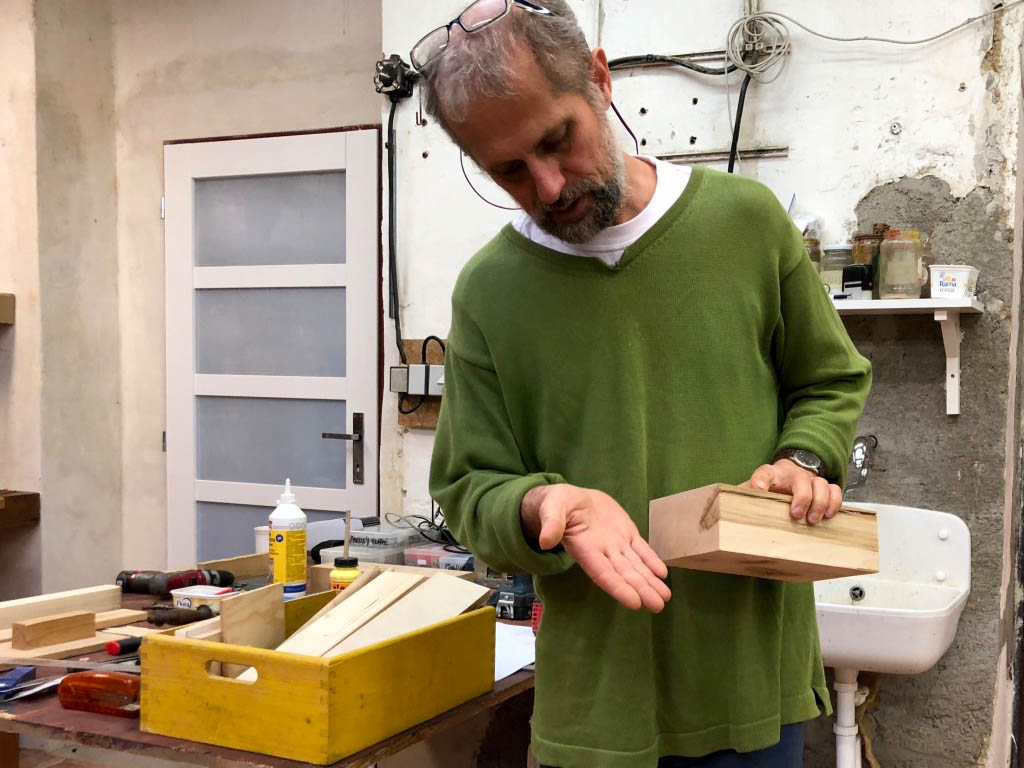
Take the glued together blocked up body which dried overnight and trim it roughly to shape.
Try the head and body together.
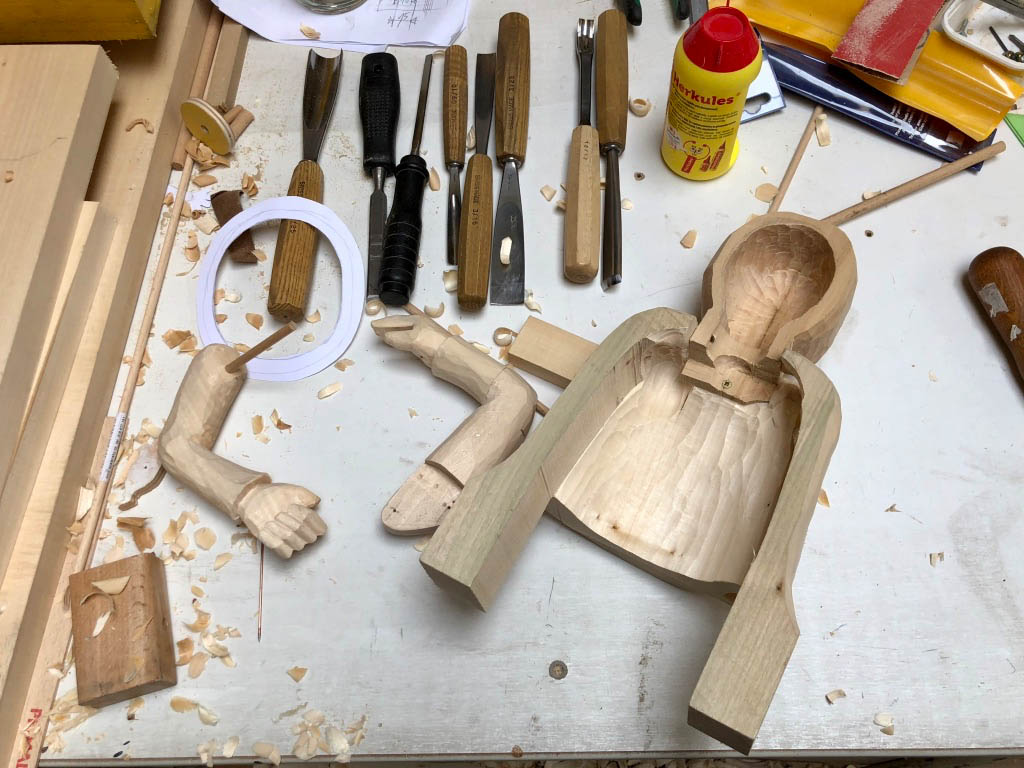
Add the jaw.
Paint the assembled base.

Glue the head to the body and screw it into the base and start fitting the mechanisms as used in the maquette.
How did I like the course?
Although there wasn’t enough time to completely finish him, my magician was finished enough, and I was confident of completing it at home. I snaffled a few pieces of welding rod and some fishing line and set off for home, quite astonished about what we had achieved in one week. Once the magician was set up on my desk at home, I was very proud of him!
The other participants in the course came from a very diverse range of backgrounds and were very supportive. The atmosphere in the workshop was a very happy and positive experience. The course was held in English and sometimes some of the tutors struggled a bit to find just the right words. That didn’t actually matter at all, as actions speak so much louder than words and we all communicated just fine.
I also enjoyed seeing machines and tools in action which I don’t have at home. More or less the first thing that I did on returning home was to order a set of chisels and a few other bits & pieces which I had found particularly useful, to maintain the momentum and enthusiasm. The very deliberate process of making a maquette to quickly test out your ideas also really impressed me. In my days as a working engineer I would have called that “fast prototyping”. Seeing it used for mechanical models was a surprise for me, although it shouldn’t have been. That’s why you go on courses I suppose.
The accommodation was reasonably priced and very close by. The local high street was full of places to grab a bite of lunch. Leah organised an amazing cultural programme which for me included a puppet show, a music show, a modern circus, a trip to see the biggest mechanical Christmas crib on the planet and a very special visit to see one of Mirek’s old tutors. Fortunately I arrived a little early and had a chance to do some conventional sightseeing in advance. All in all I had a great time, learned a lot and now I understand why three out the five students had returned to Puppets in Prague after having attended a previous course.