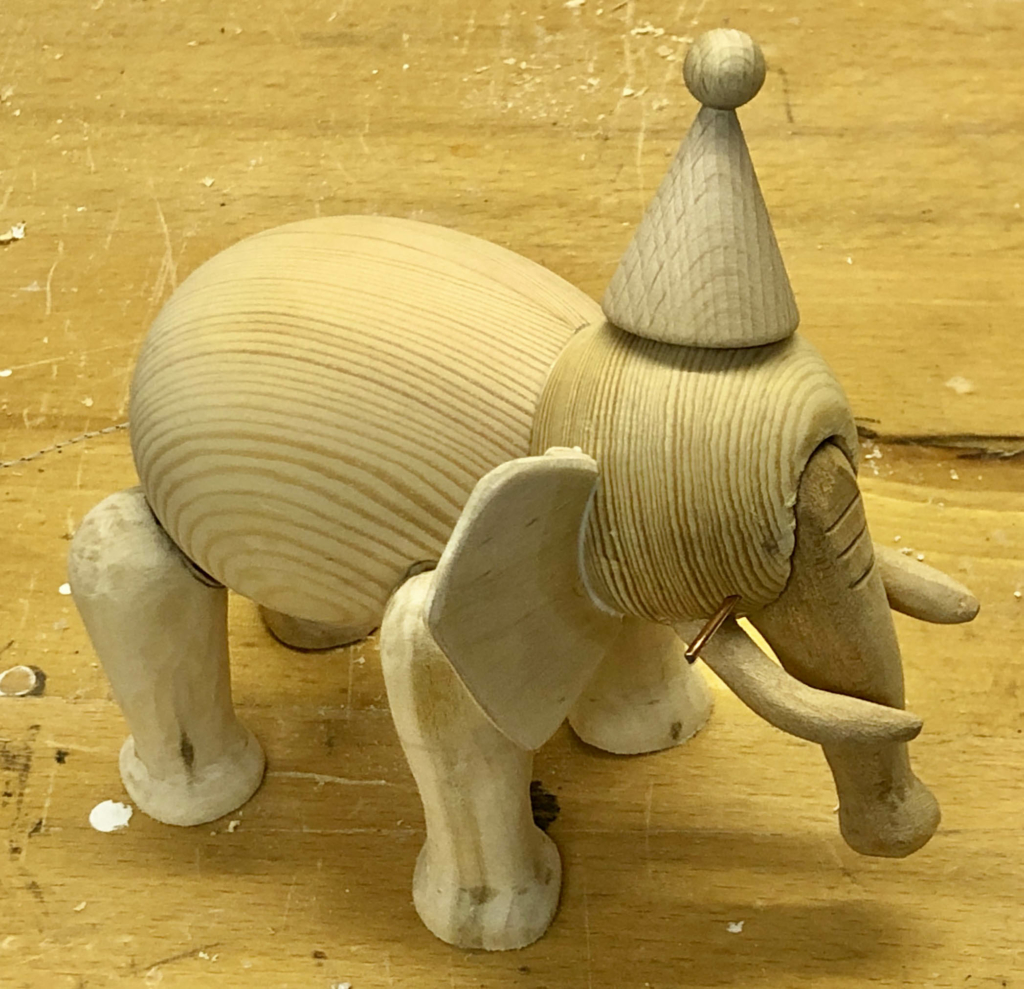
The Idea
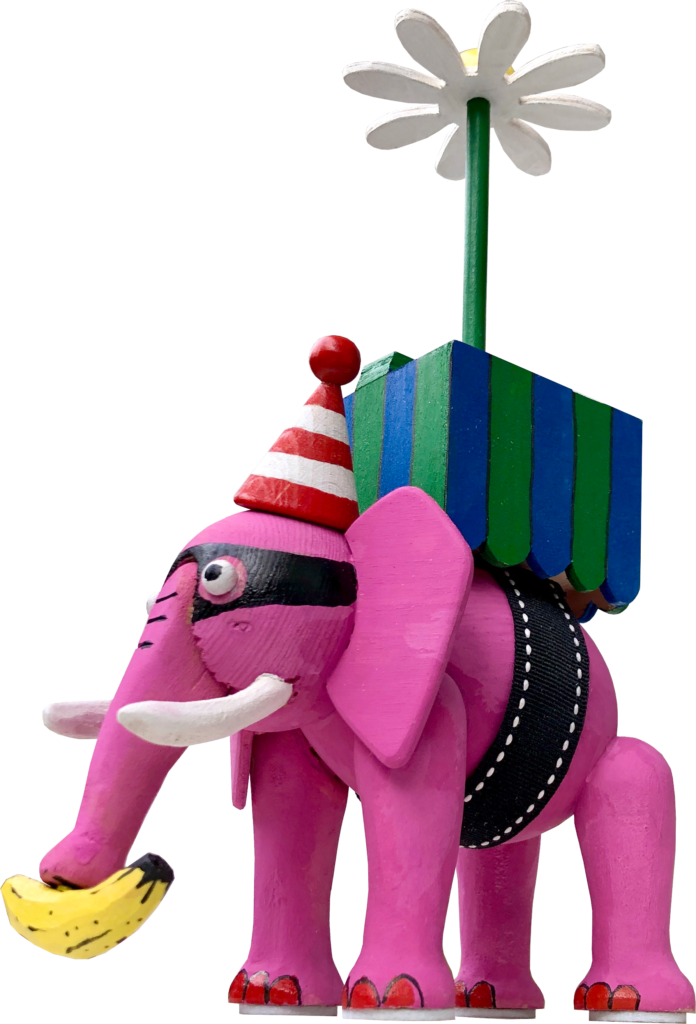
I was poking around a museum shop in Denmark and I came across a splendid elephant designed by Kay Bojesen and made of oak. There are images of this classic product on the Rosendahl web site. I thought that it would be fun to have a go at making my own elephant with some interesting movement. My elephant would have to be able to pick things up with its trunk and of course it would have to be able to fly. I did think about Dumbo-style ears but on consideration I thought that was a bit far fetched. How can an elephant possibly fly by flapping its ears? Instead of that, my elephant has a very modern howdah strapped to its back which contains the mechanism to drive a high efficiency helicopter-like propeller. As usual, there is a crank protruding from the back of the howdah to get things moving.
Technical Requirements
The trunk should be rigid, operated by unkindly pulling our poor elephant’s tail. To help her to pick things up a magnet is required in the end of her trunk. The propellor should be friction driven to make it less likely that over enthusiastic admirers can break parts such as a pin wheel. This friction drive should work even if the elephant is up side down. We don’t want to risk a dangerous power loss during aerobatic manoeuvres.
Making the Elephant
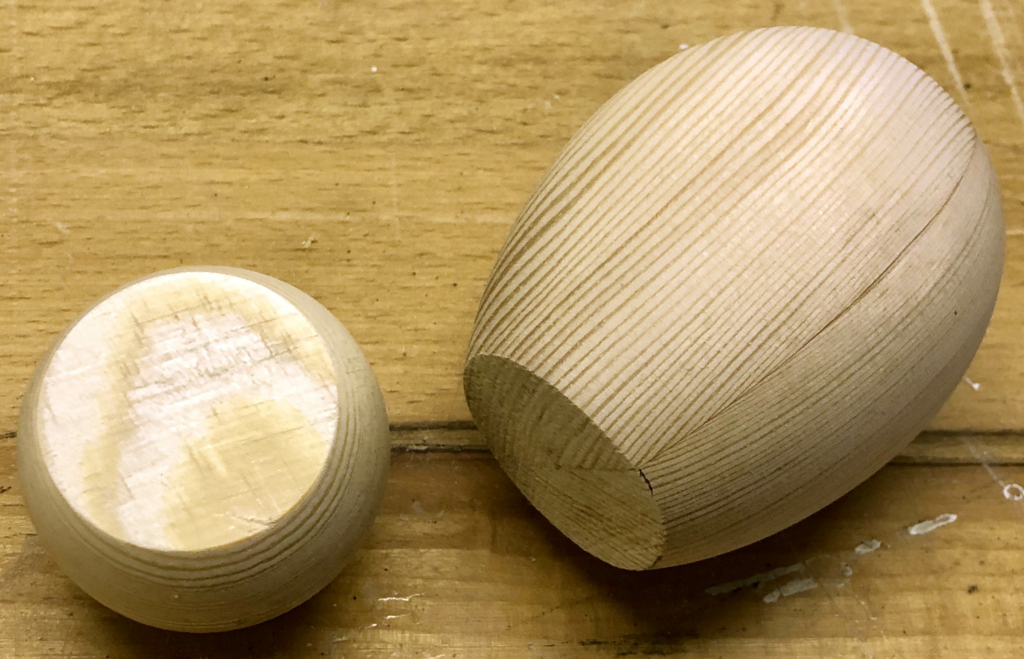
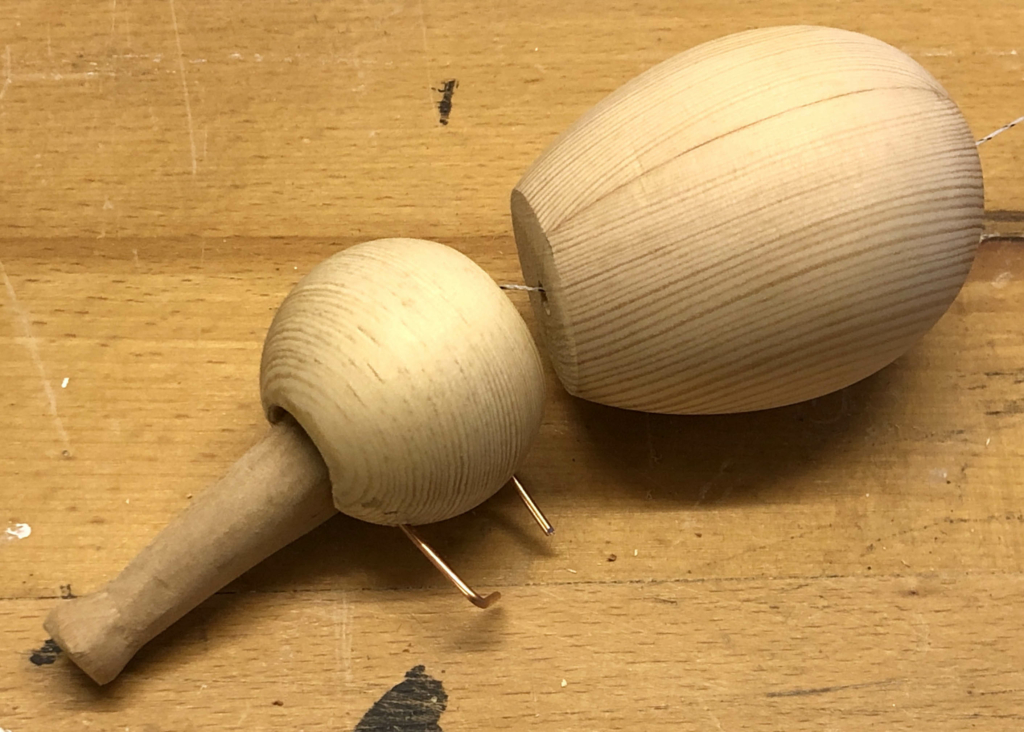
The head is made from a wooden ball and the body from a wooden egg. Cutting a slice off of each part makes them fit nicely together.
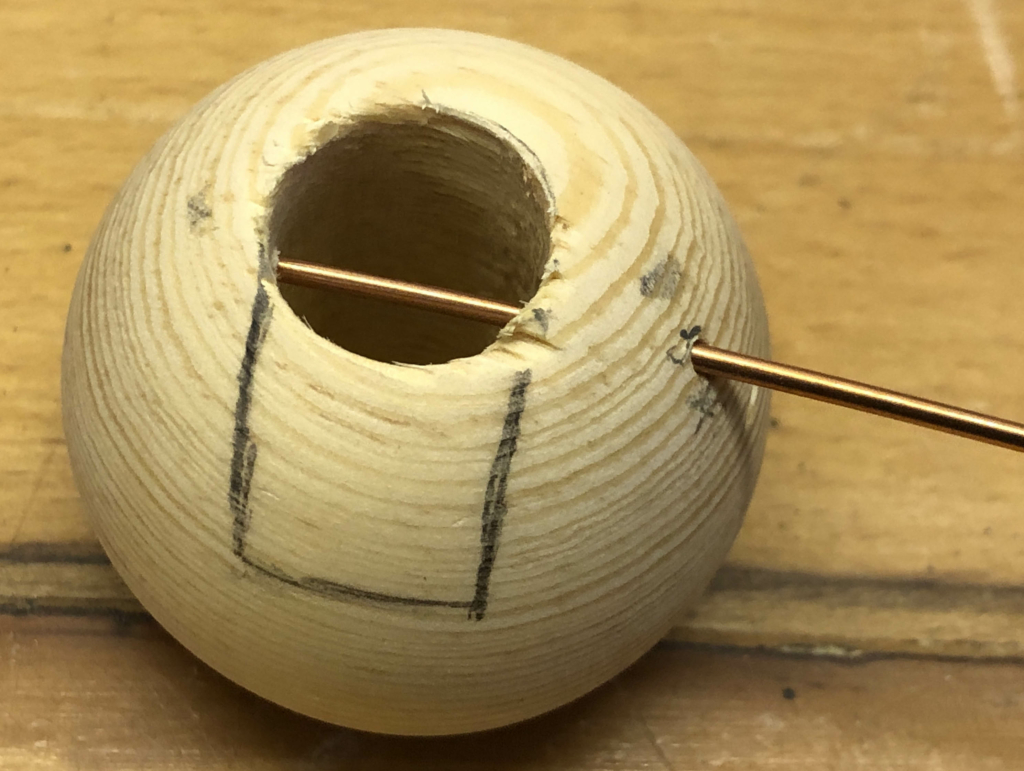
A hole drilled through the head is as wide as the elephant’s trunk allows a string to pass through. A slim brass rod serves as a hinge for the trunk.
The trunk is carved from a piece of lime wood with a suitably drilled hole for the brass hinge rod.
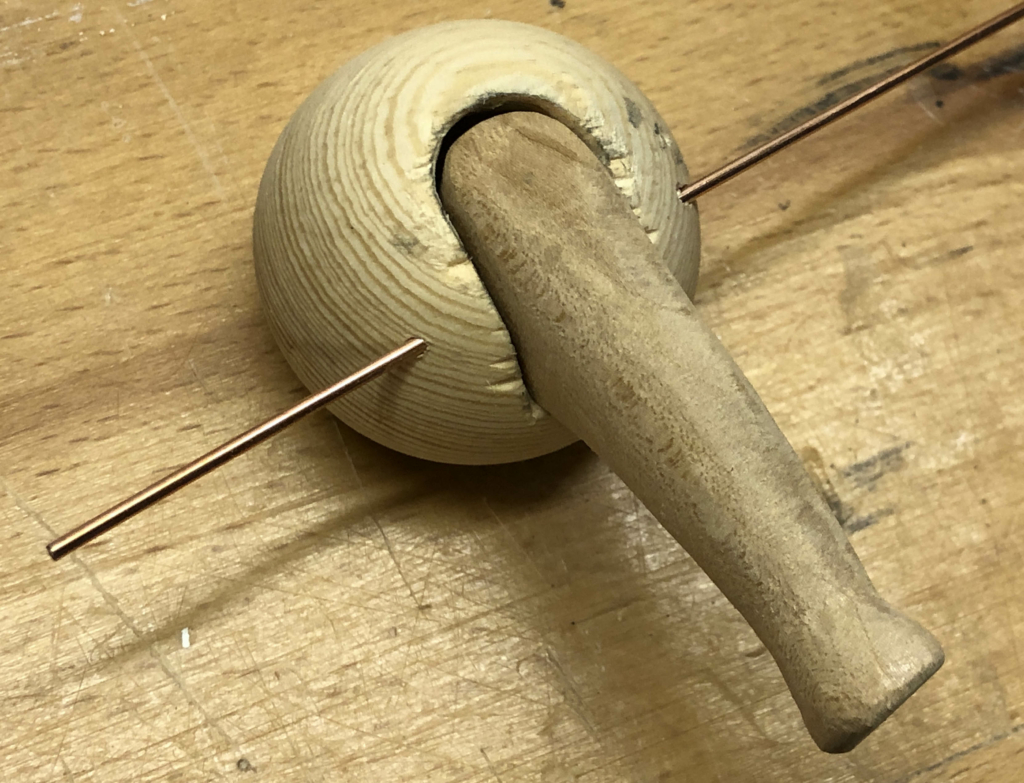
The string emerges from the top of the trunk and another brass rod, near the bottom of the opening, makes sure that tugging the string results in a downward pull to make the trunk lift up.
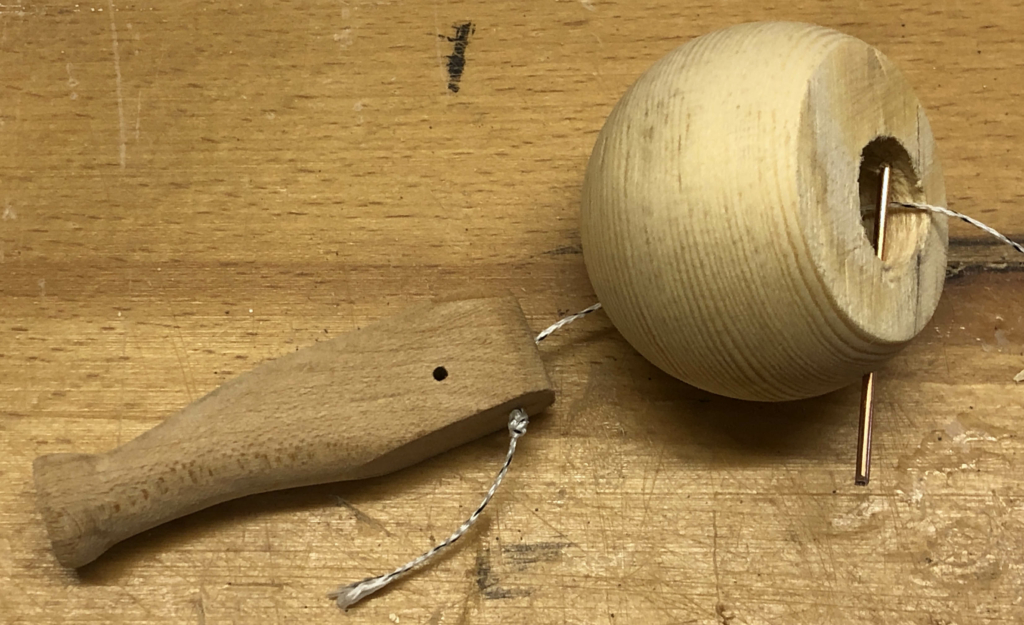
A hole drilled straight through the elephant’s body allows the string to come out where the elephant’s tail will be.
Now we have to carve a pair of tusks and make a hat from a wooden cone which sits at a jaunty angle.
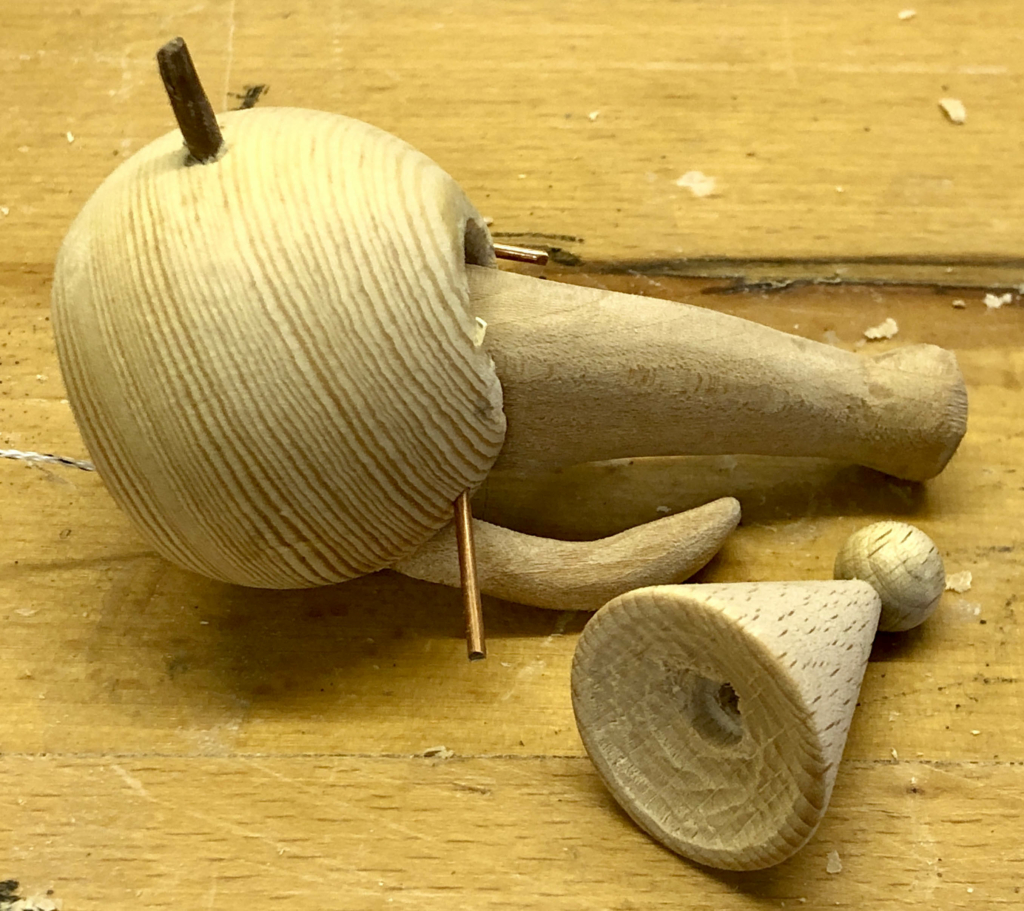
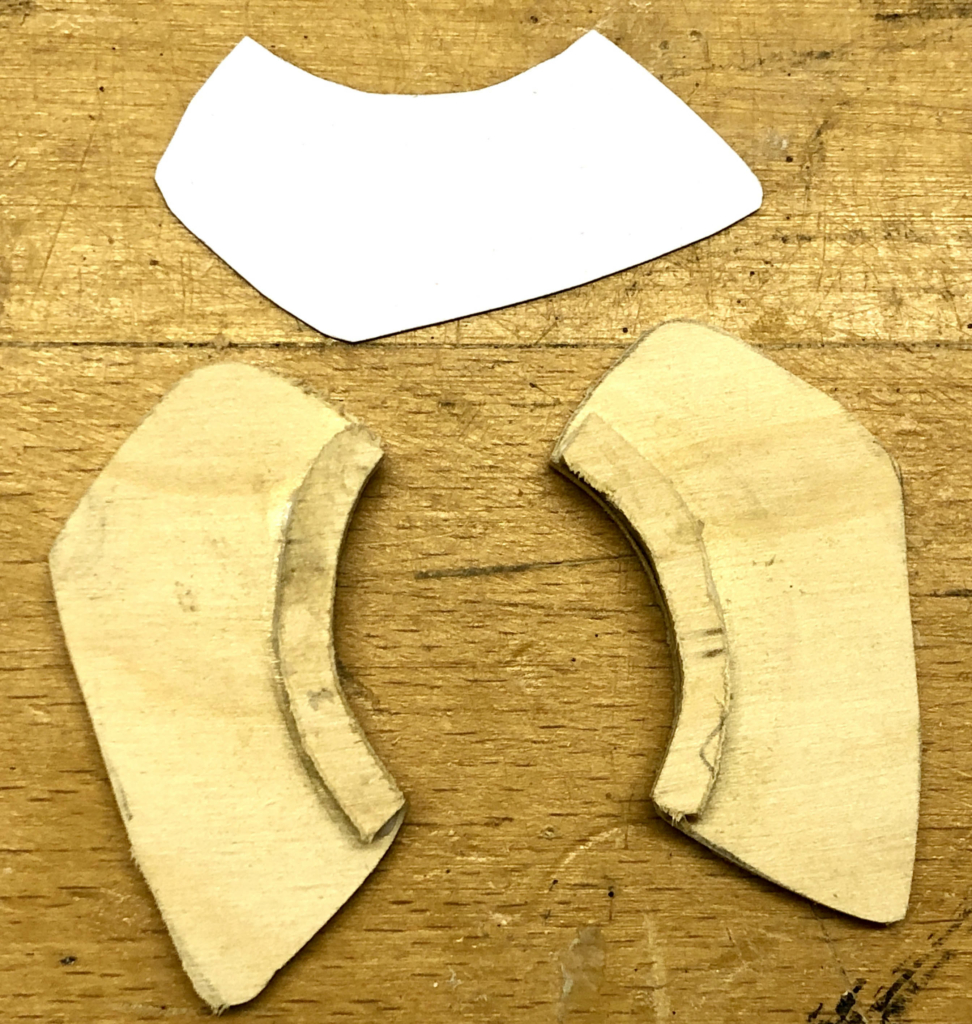
Use a template to cut two ears from 3 mm plywood, adding a slim strip of the same material to strengthen the simple glued bond to the head.
Now we have to carve four legs, two longer ones at the front and the shorter ones at the back.
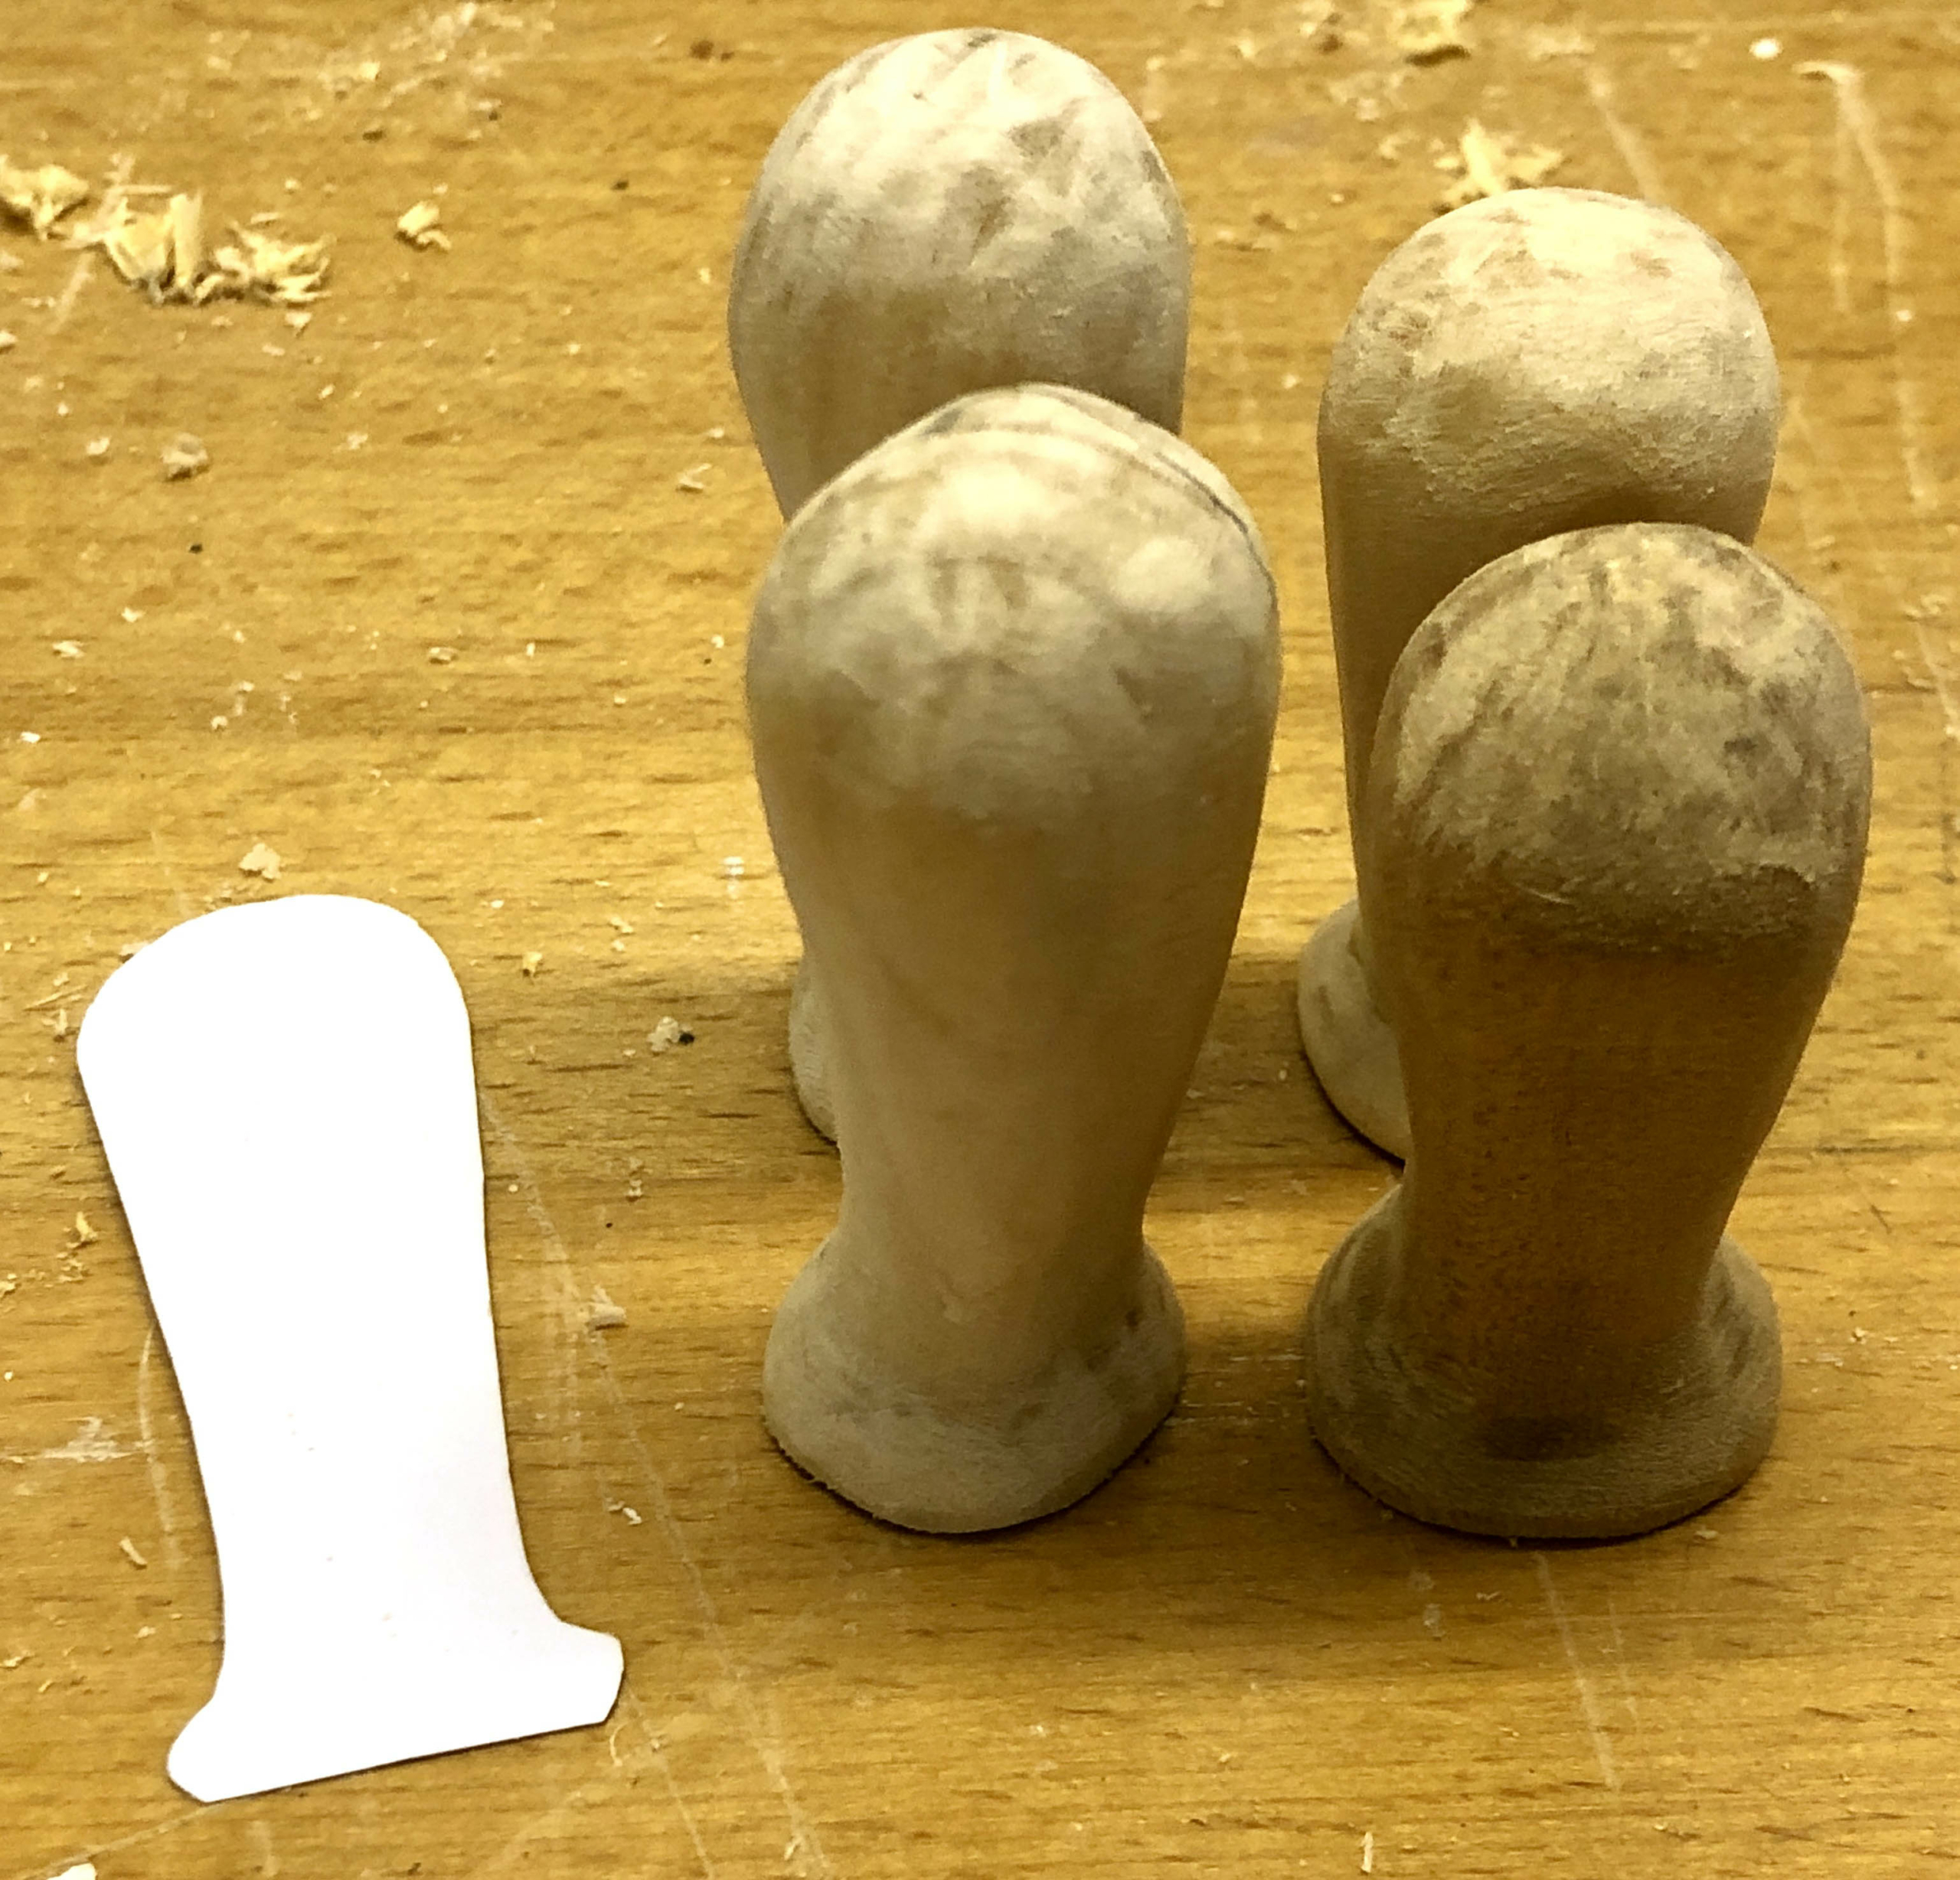
Adjusting the legs to fit against a slightly tilted egg shape was a bit tricky. Trial and error got me there in the end.
Tip
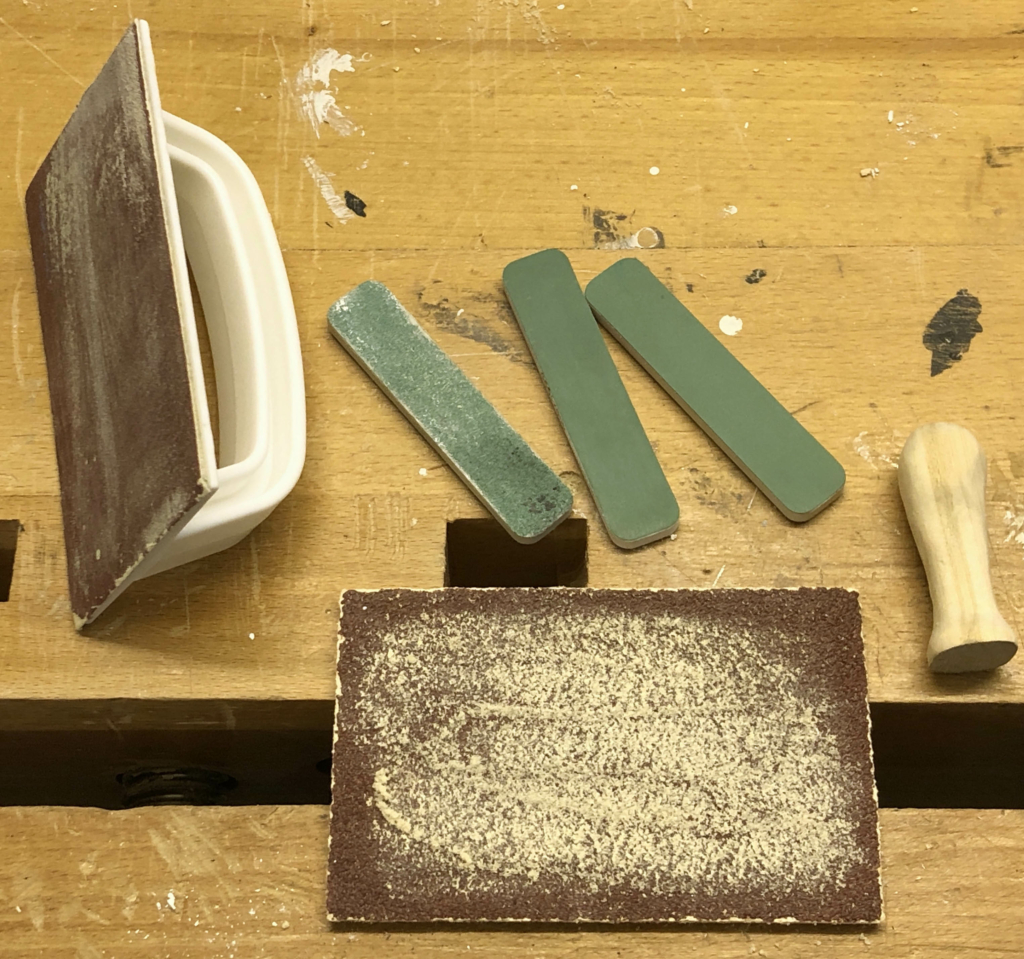
I don’t have a sanding machine as I find the “tools” in the picture do the job for me. The larger tools have a velcro pad to hold suitable sanding papers which you can either use free hand or they can be clamped in a vice. The smaller ones are pieces of fairly rigid foam with pieces of sandpaper glued to the surface. Available in a variety of grades, these are great for smoothing elephant legs.
Making the howdah
Usually howdahs were put on elephants so that wealthy princes could ride around in style or in older, more disreputable, times go tiger hunting from a safe height. My howdah contains the mechanism to allow our pink elephant to fly around.
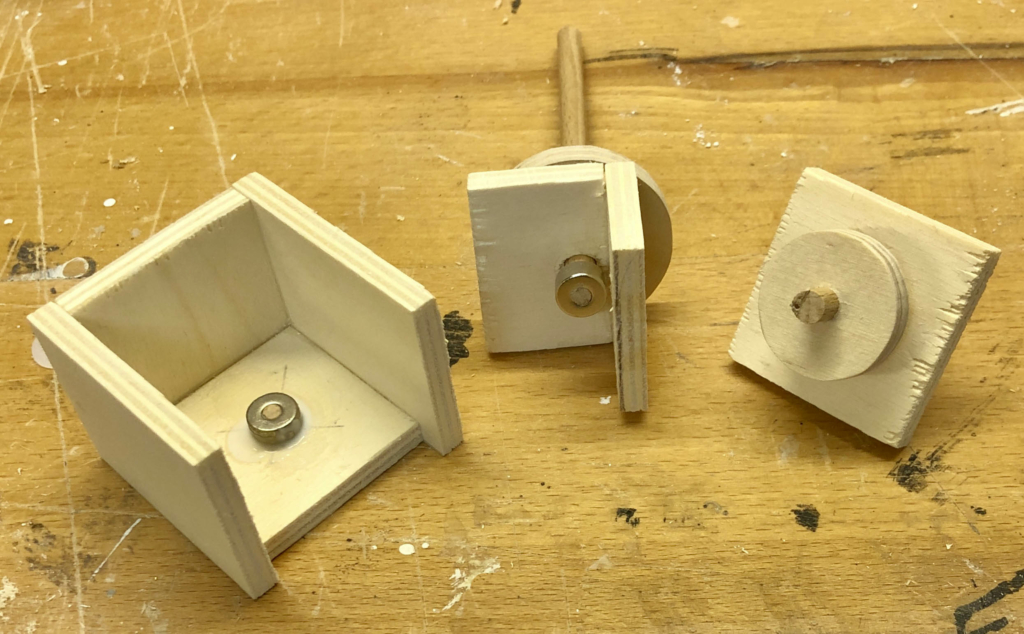
In the picture you can see three parts. The left hand part is the basic box with a small magnet glued in the bottom centre. The right hand part completes the box and carries a plywood wheel which is turned by a crank outside of the box. The centre part drops into the top of the box so that its wheel rests on the edge of the wheel which is turned by the crank.
Note that the vertical dowel which will turn the “helicopter blades” also has a magnet on its lower end. This is attracted to the other magnet and has the effect of pulling the horizontal wheel down onto the vertical wheel which is turned by the crank. Without this gravity would do a similar job, but only when the elephant is standing on a horizontal surface. Turn the elephant upside down and gravity would pull the wheels apart. The magnets also result in a stronger force than gravity provides, so there is a more reliable connection between the two wheels, while still permitting slip if a child try to turn things directly.
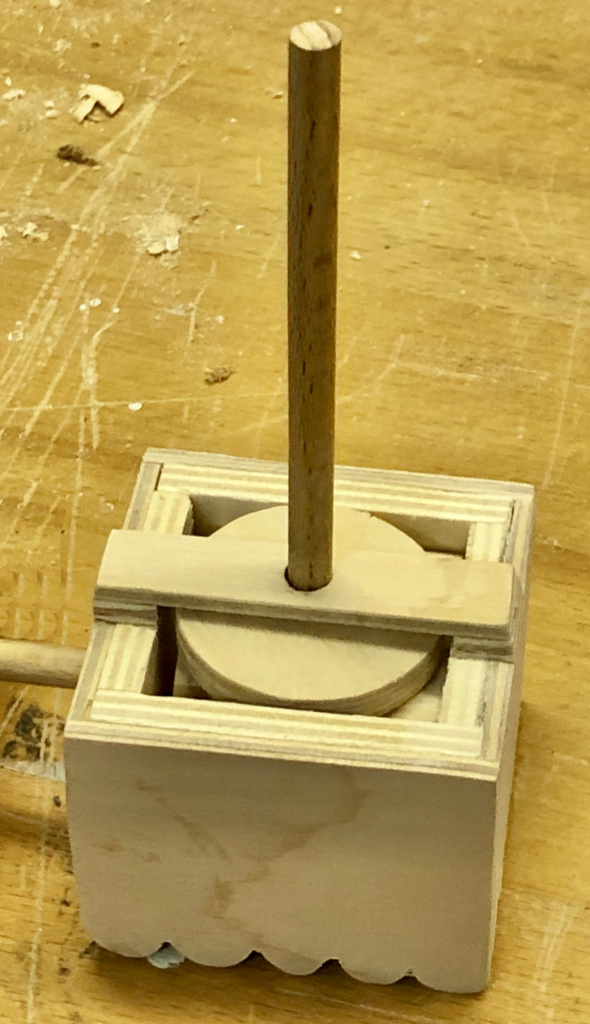
A strip of 3 mm ply above the horizontal wheel keeps the vertical dowel nicely perpendicular to the howdah, which now has some decorative sides added.
Finishing Touches
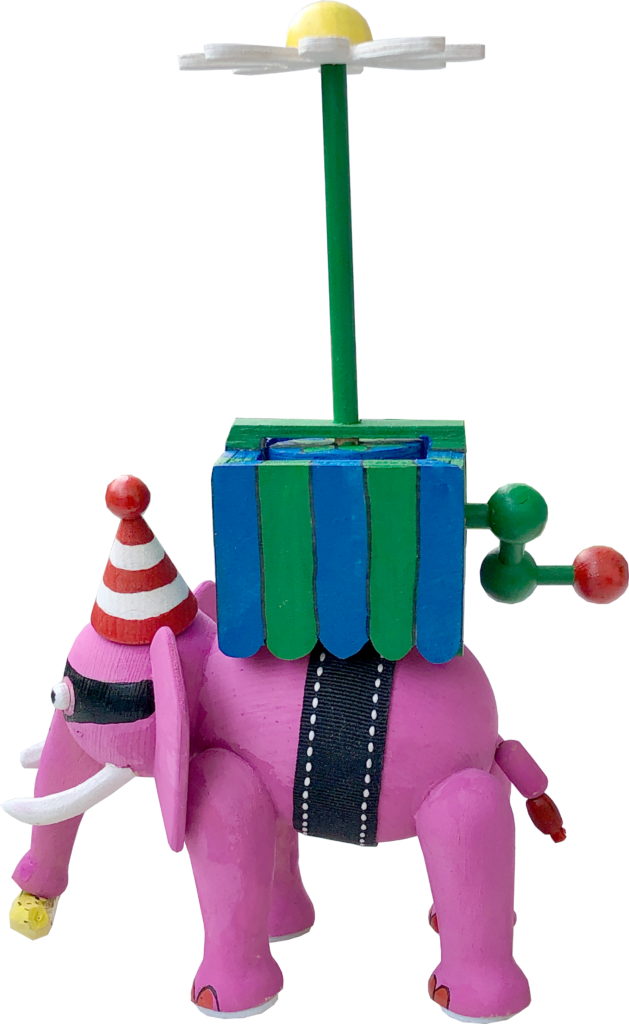
I carved a small banana and added a few steel tacks to it so that the magnet in the elephant’s trunk can pick it up. Some tape from my wife’s sewing box served as the belt to apparently hold the howdah on the elephant’s back. Some 3 mm dowels and a spot of glue do the actual work of holding it in place. The tail is made of a couple of wooden beads. I painted a mask on its face remembering a joke that my father told me a long time ago about an elephant who robbed a jewellery shop and the red toenails must come from a childhood joke about elephants hiding in cherry trees. I was interested to read that elephants have a differing number of toenails on their front and rear feet. My helicopter blades look rather like a flower, so I added a few leaves to the horizontal wheel in the base to make it more realistic.