Why a Dragonfly?
Insects don’t get much of a look-in on the automata front. Most of them have an annoying number of extraordinarily thin legs and aren’t generally as cuddly as cats and dogs, or even Koala bears. I feel this is rather an injustice, so I thought that it’s about time for an automata dedicated to that queen of the insect world, a dragonfly. They are quite showy creatures, glistening in marvellous colours while zooming decoratively around country ponds. I can manage showy, as I have lots of paint in the cupboard, but I decided against zooming about, settling instead for some vigorous flapping of its wings instead. Insects also have quite large eyes but they don’t go in for pupils and irises, preferring complicated compound eyes.
The Initial Design
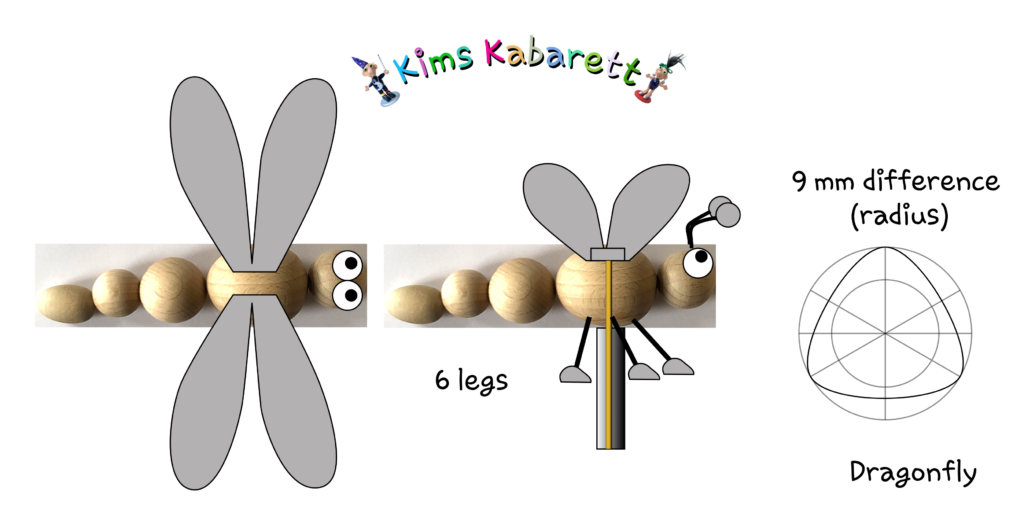
A selection of ready-made wooden balls and eggs served as the body for my dragonfly meaning that there was no need for carving. Some thin plywood could serve as wings and brass rods for legs. The tricky part is the cam to control the flapping of the wings. If I had used a round cam mounted off-centre, for each turn of the crank the wings would go up and down once. After some experimentation, I chose to triple the number of movements by using a cam with three “peaks”. For each turn of the crank, the wings now rise and fall three times, resulting in a satisfactory flapping movement while turning the crank at a reasonable speed. As usual, you will see that the final result doesn’t quite match the initial design.
Making
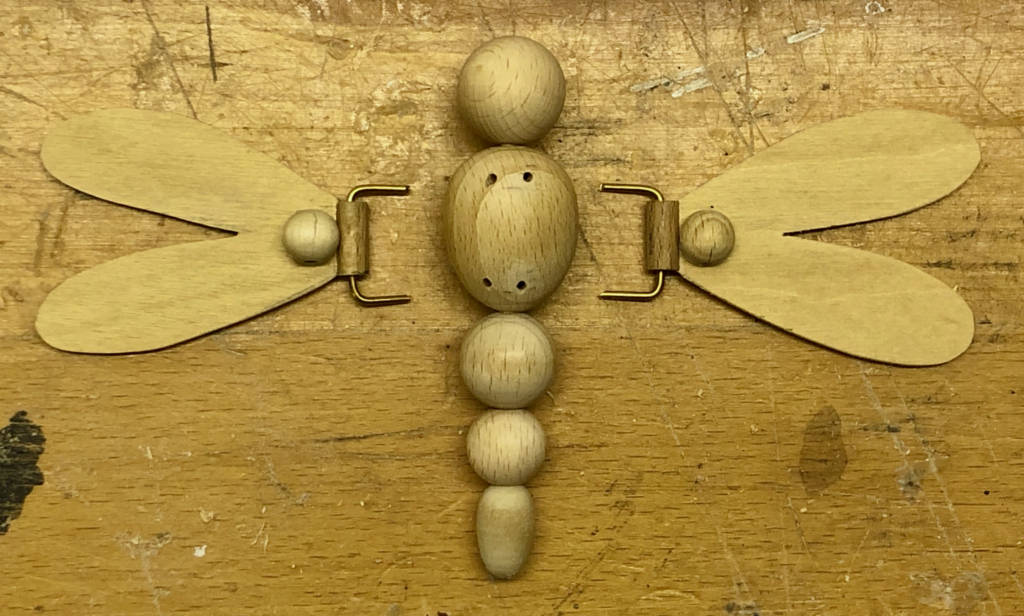
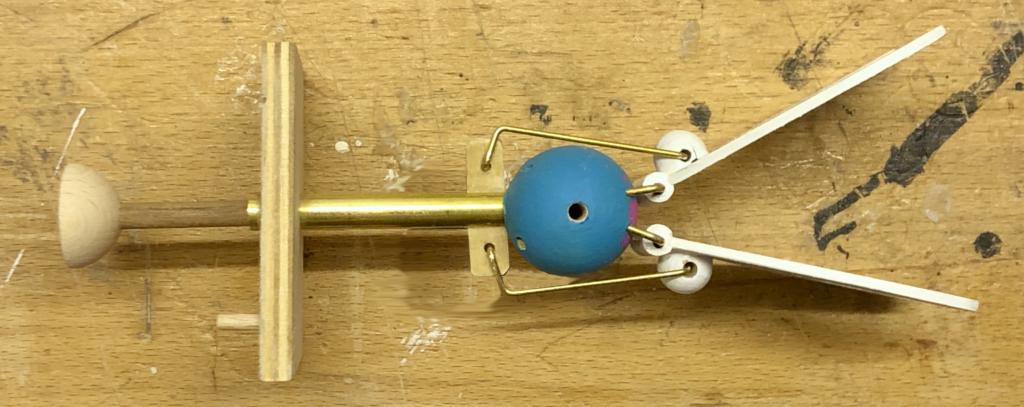
A piece of 3 mm dowel holds the 5 pieces together which make up the dragonfly’s body. In total, t’s about 10 cm long. I cut the wings from 2 mm plywood.
Each wing needs two hinges. The first is to attach the wing to the body and is made of 6 mm dowel with a 2 mm hole drilled along its centre. This allows a piece of 1.5 mm brass rod to turn very easily. The second hinge is needed to attach the rod which pushes the wing up. Here, I used a 10 mm ball which was ready-drilled with a 2 mm hole. After sanding a flat on one side of the ball it can be glued to the underside of the wing. The closer together these two hinges are, the more the upward push from the cam is magnified, increasing the amount of flap.
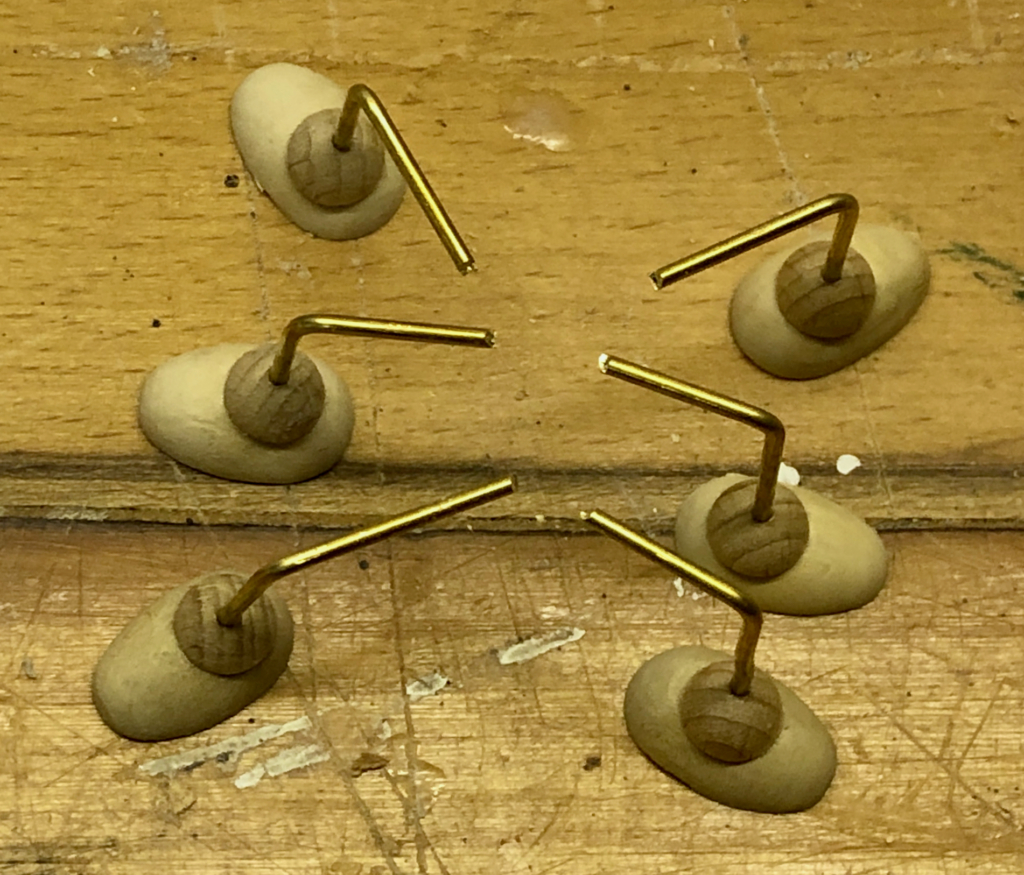
Cutting some small (18 mm) wooden eggs in two with an 8 mm hemisphere on top makes some nice shoes, bent brass rods serving as robust, insecty legs.
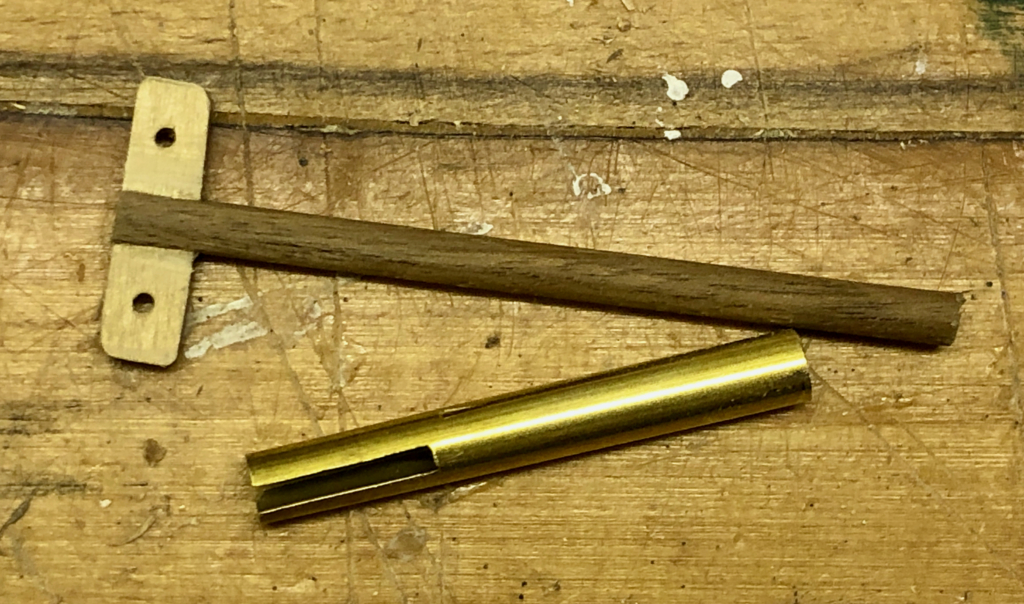
I used a 7 mm brass tube to attach the dragonfly’s body to the base. A 5 mm dowel pusher can easily slide inside this. At the top end 2 mm plywood pieces protrude through carefully cleaned slots cut in both sides of the tube. Friction must be kept to a minimum to make sure that the wings do not stick at the top of their movement. Brass rods then link the wings to the pusher.
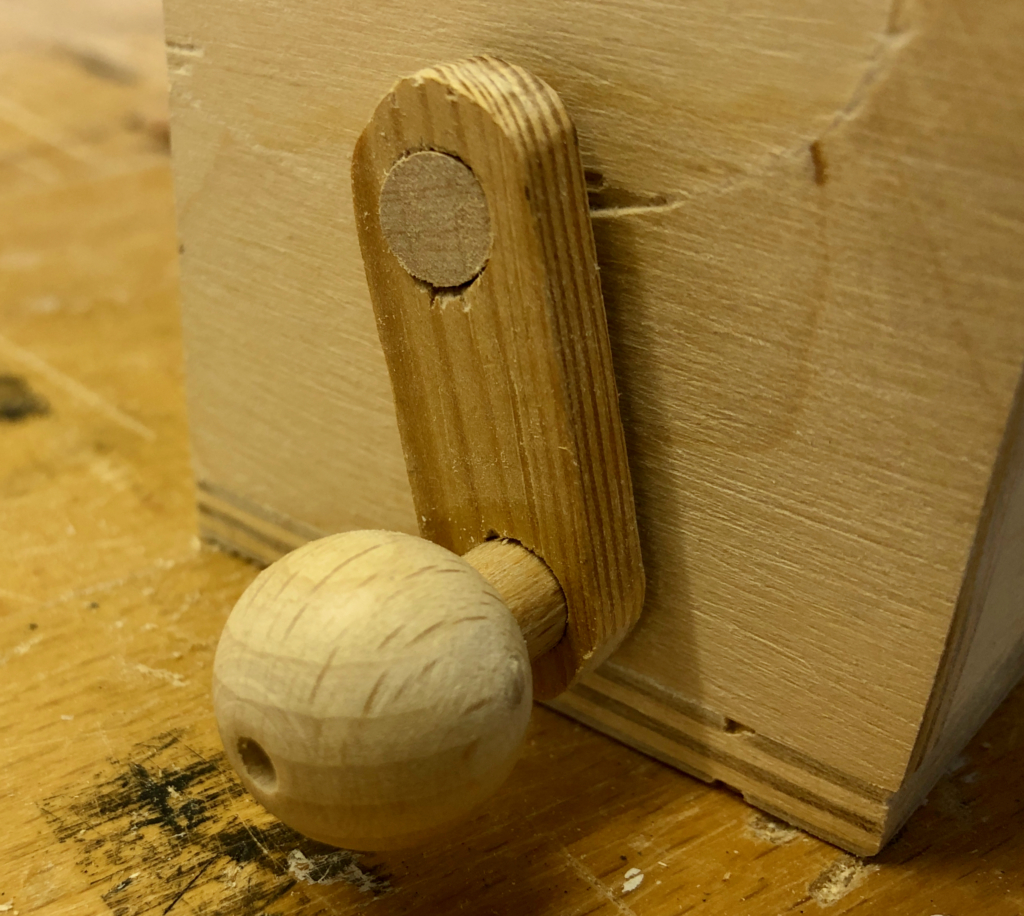
I used a 20 mm hemisphere as the cam follower on the bottom of the pusher rod.

Finishing
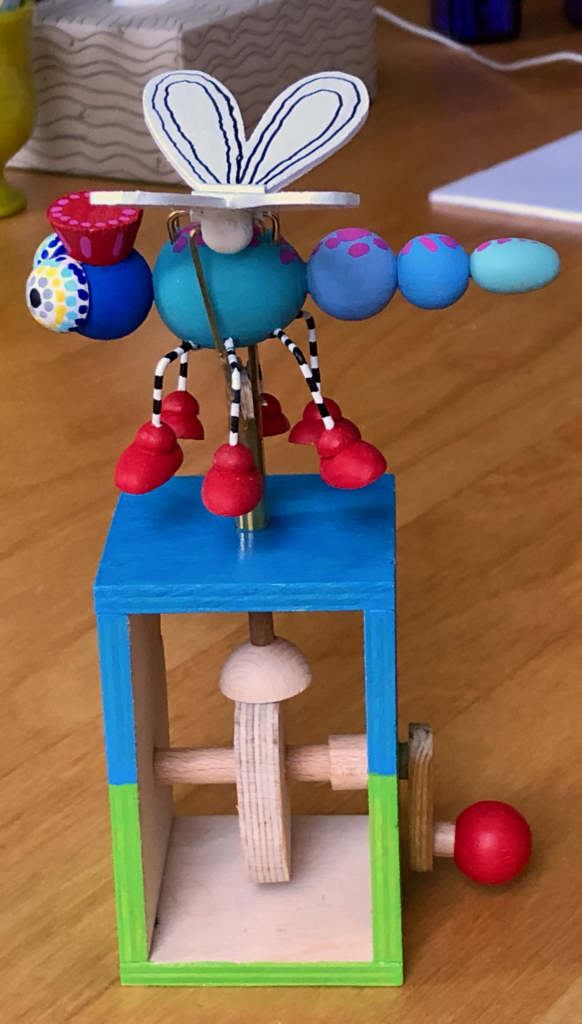
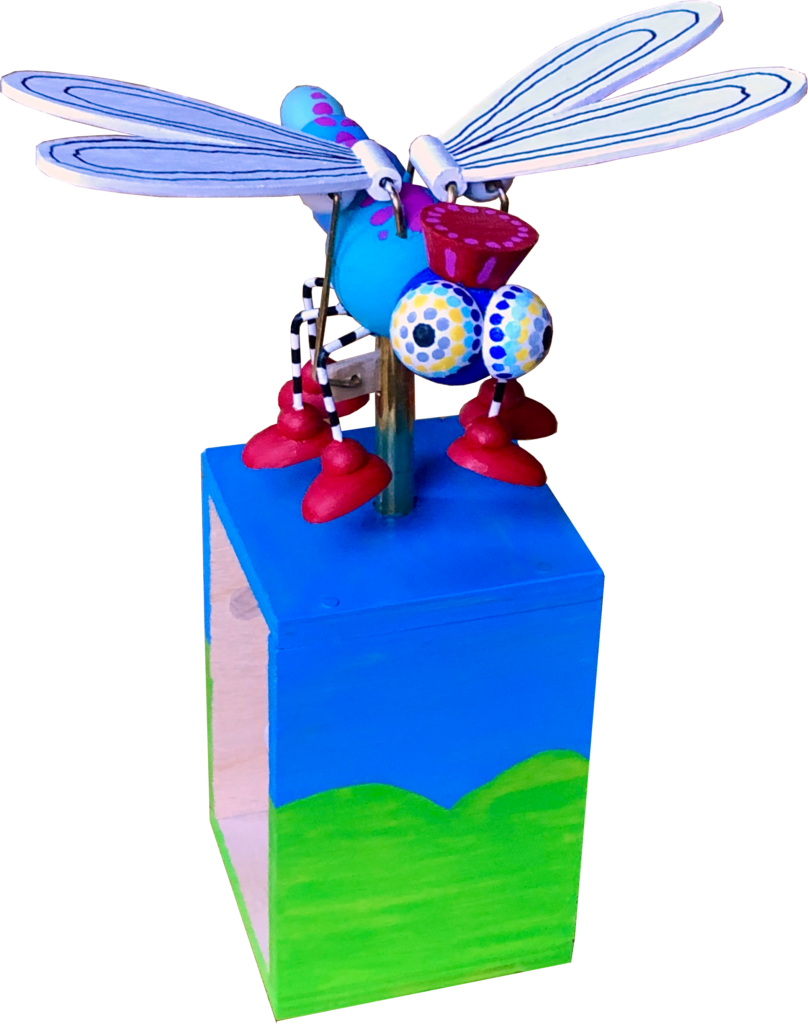
With the follower now resting on the cam our dragonfly is ready to go. A smart hat complements her trendy shoes and huge eyes let her see where she is going. Nature doesn’t equip dragonflies with pupils in their eyes but I sort of hinted at the multi-facetted structure by using a dotty pattern, and if the centre dot is black, well that’s a bit of artistic licence. Everything else could be quite true to nature!
The Video
An unusually warm winter has encouraged a rarely seen species to leave its secret lair next to the pond – the Berlin Dragonfly!
Link https://www.youtube.com/watch?v=9gJACizfDUo
Download
Here are the images compressed for download. https://www.wordwise.de/Dragonfly_Images.zip